
The Airfix kit – there’s a great review of the basic kit by Brett Green on Hyperscale.
Welcome back.
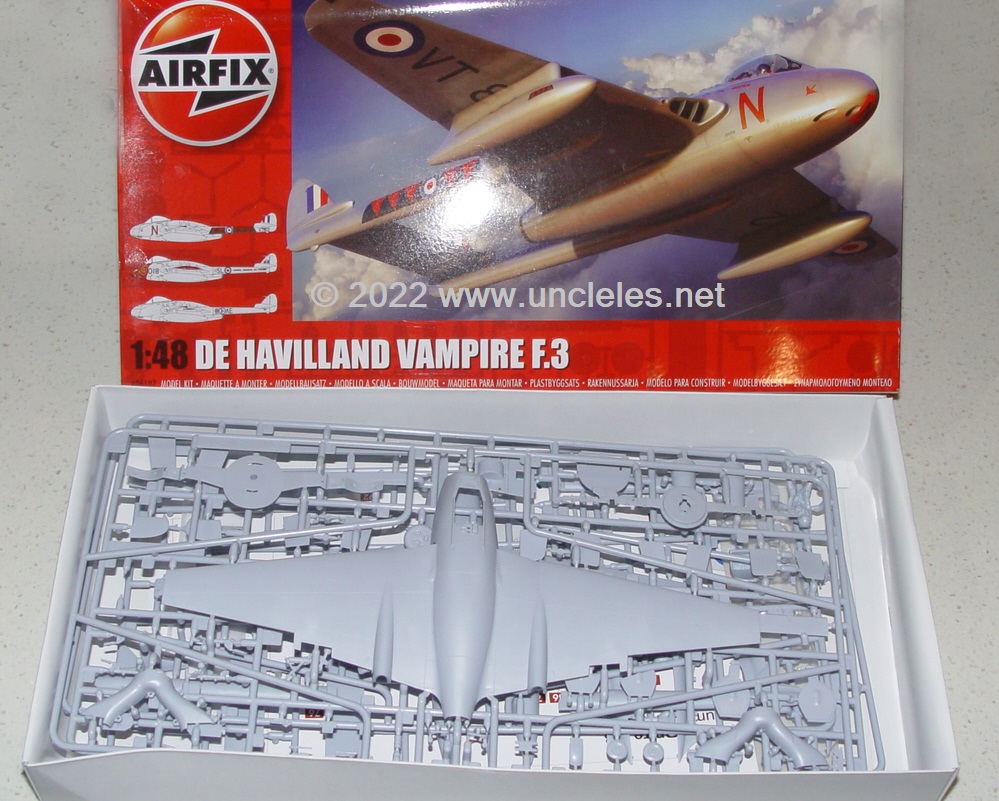
A little while ago I was presented with a new Airfix 1/48 Vampire F.3 kit and asked to facilitate an elephant ears conversion to fashion an Australian icon out of the plastic.
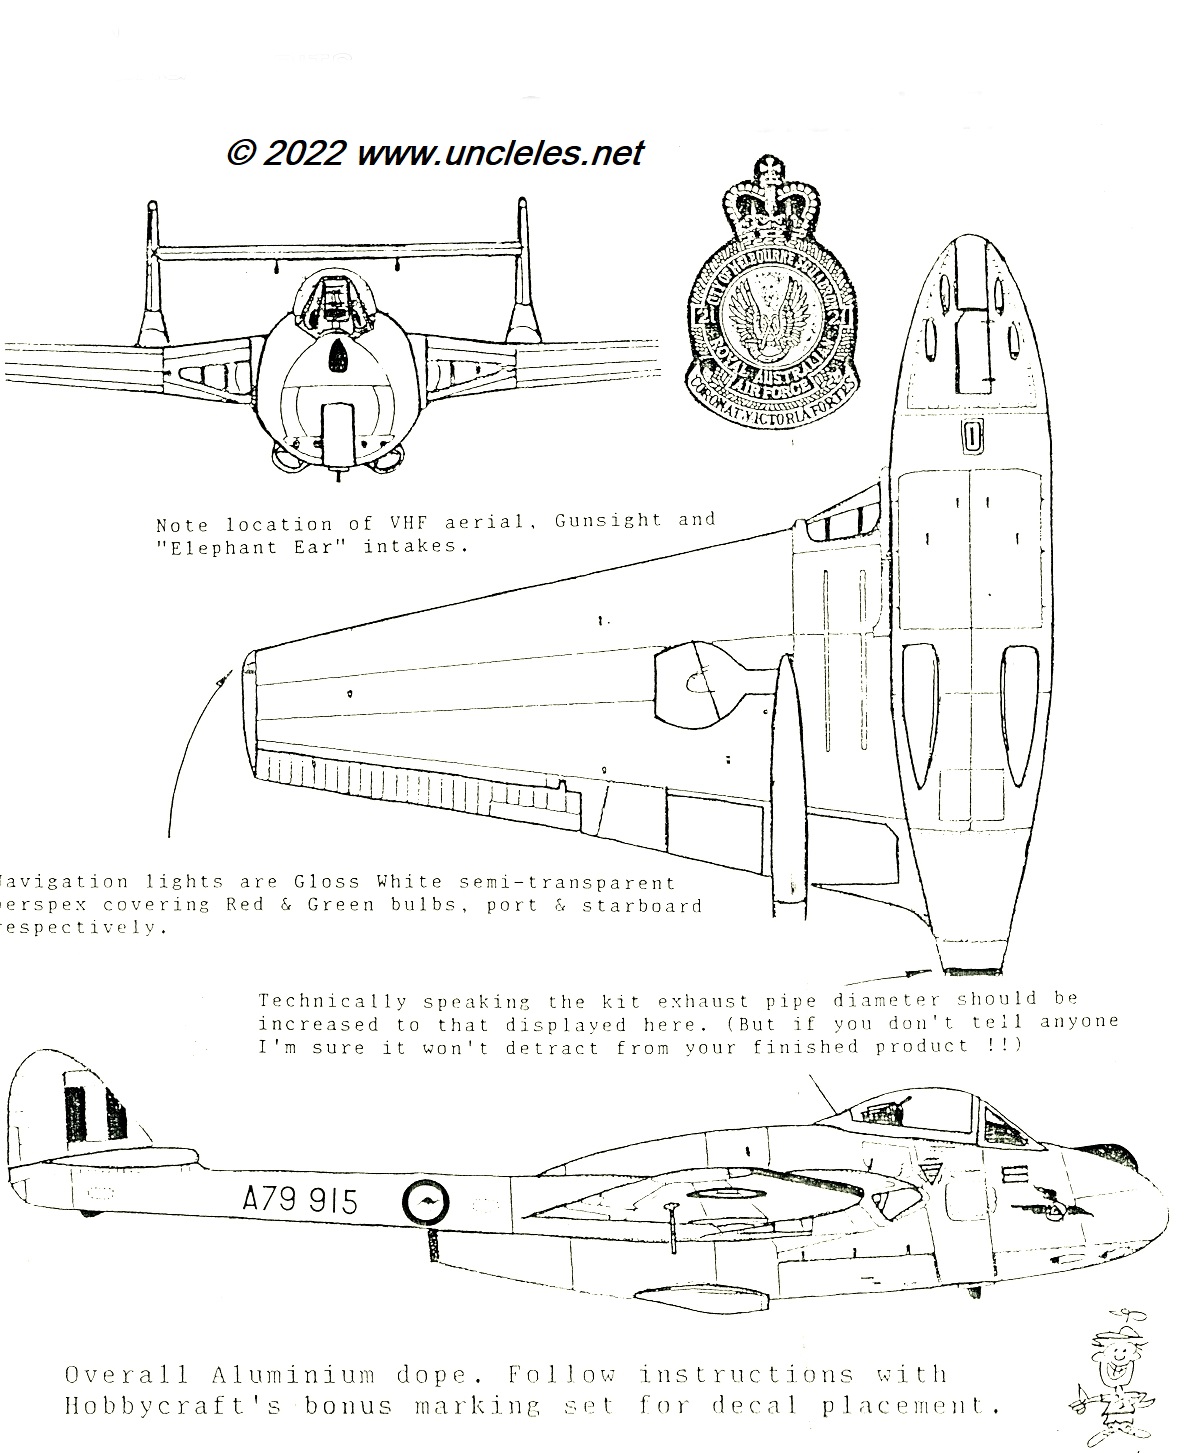
Now if you’re here you probably know all about the Vampire’s history with the RAAF and how Australia received a Mk1 back in the ’40s ( yes I’ve already done the conversion booms for that as well ) and if you want to see what’s in the Airfix kit I can recommend you check out a basic review here: The aircraft enjoyed much attention for the next couple of decades in operational service. My interest was to build one representing an aircraft that served in the same squadron that I did and so I set about to repeat what I’d done back in the ’90s.
Yes, back when Hobbycraft released their dihedrally anaemic 1/48 kit I manufactured a set of intakes and a couple of bumps in polyester resin and they sold well. They were, however, a little bit rough and I reckon this time around I can do better.
Our Vampire.
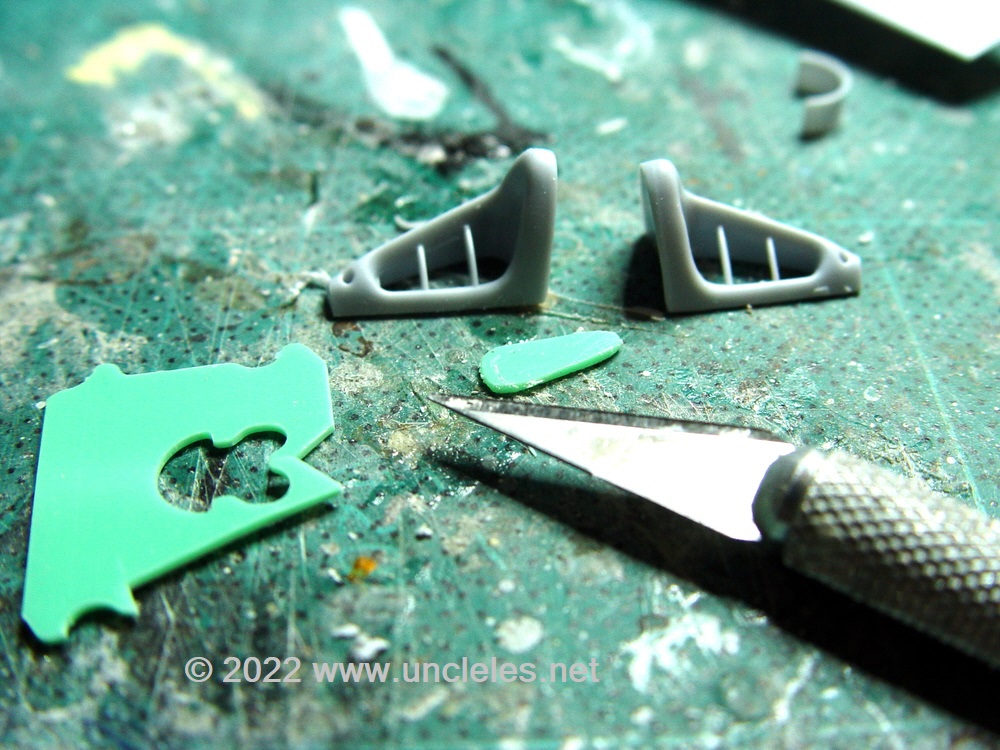
By using the drawings I did back then I proceeded to work some 3D magic. Here’s a quick smattering.
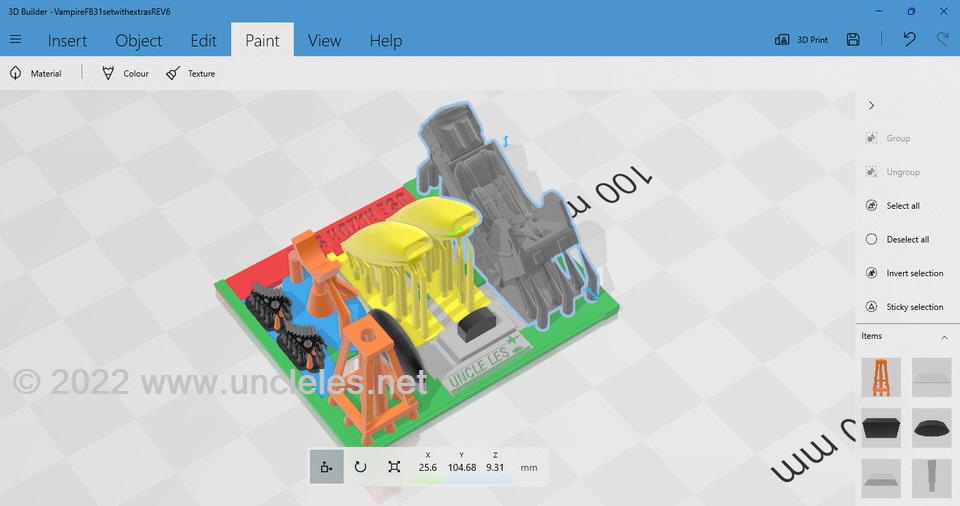
Of course there’s a lot of work that goes on on the background.
…resulting in :


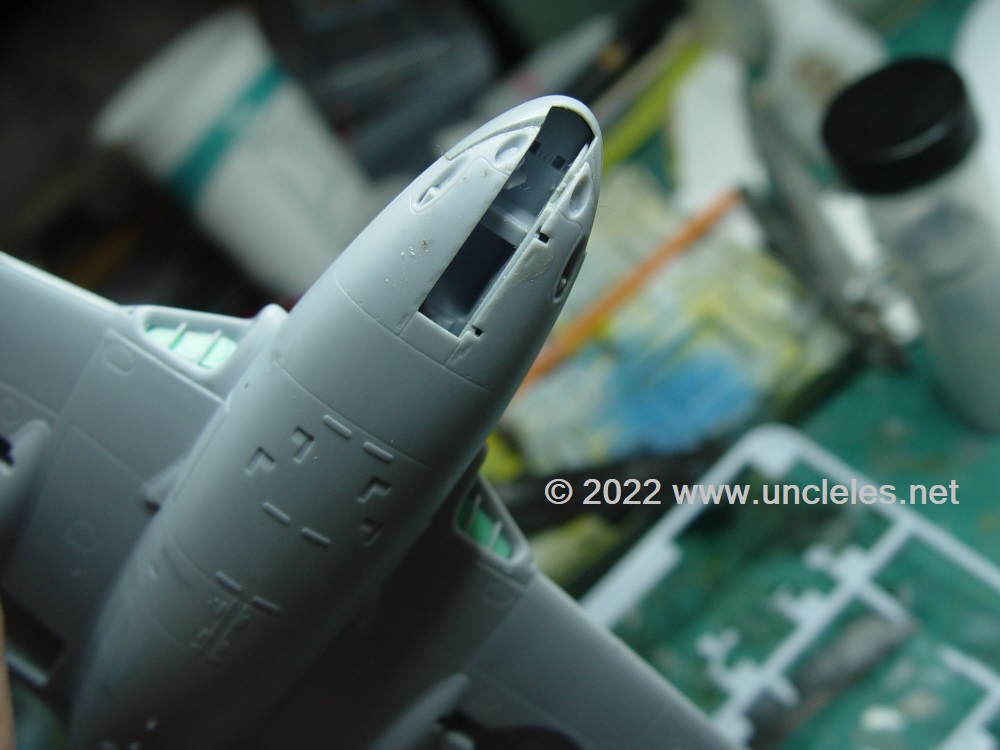
Then came the effort of making it all fit. The Airfix kit is a little gem and it just falls together. There are a couple of minor things to correct or at least be aware of and I’ll cover them here.
The way Airfix has arranged the order of construction is brilliant with the tail booms literally clicking into place making the angles spot on and solid once assembled. Just take care with the internal undercarriage bay walls that you get them the right way around.
There are a couple of sink marks that will need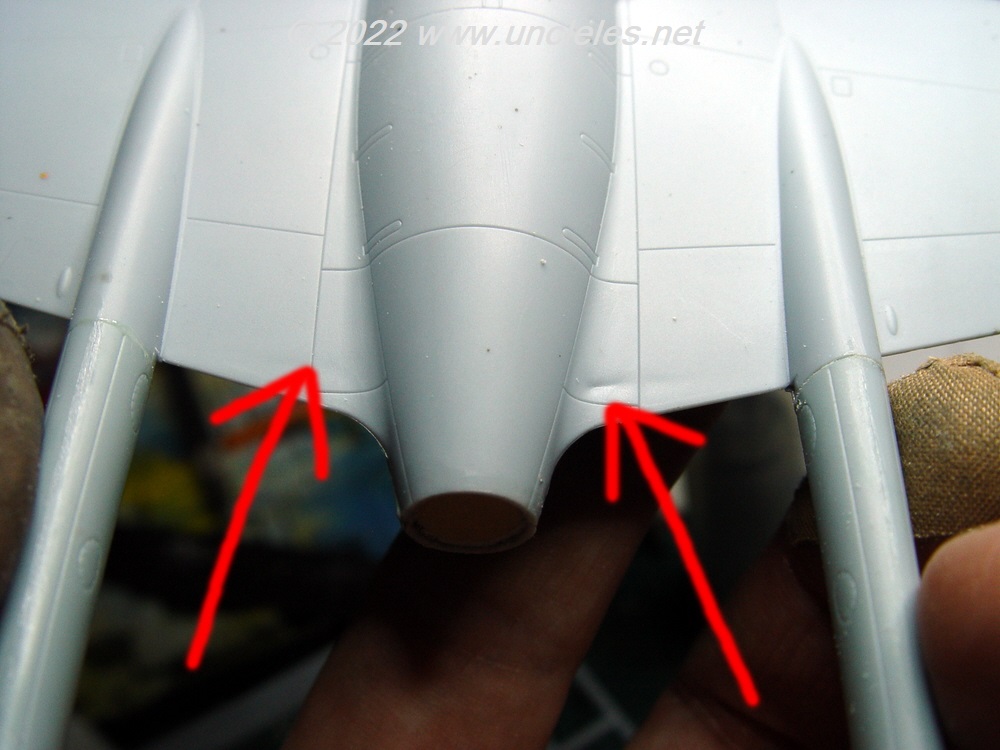 filling near the trailing edge of the inner wings
These were fixed with just a little bit of Tamiya putty in my case bit other brands are available.
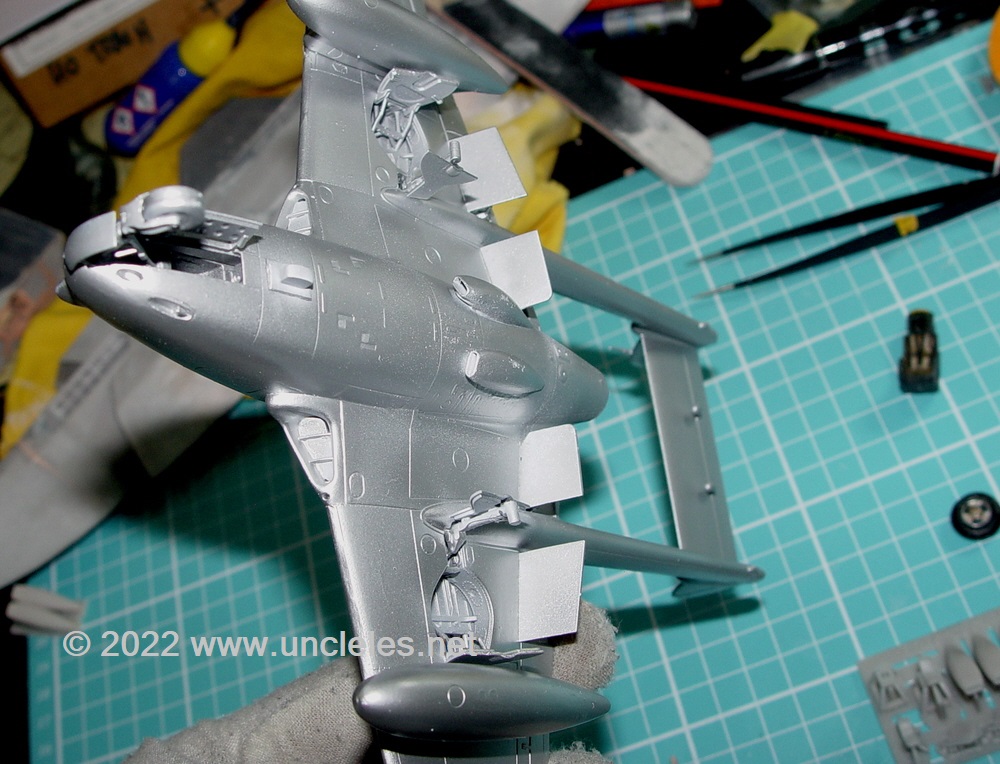
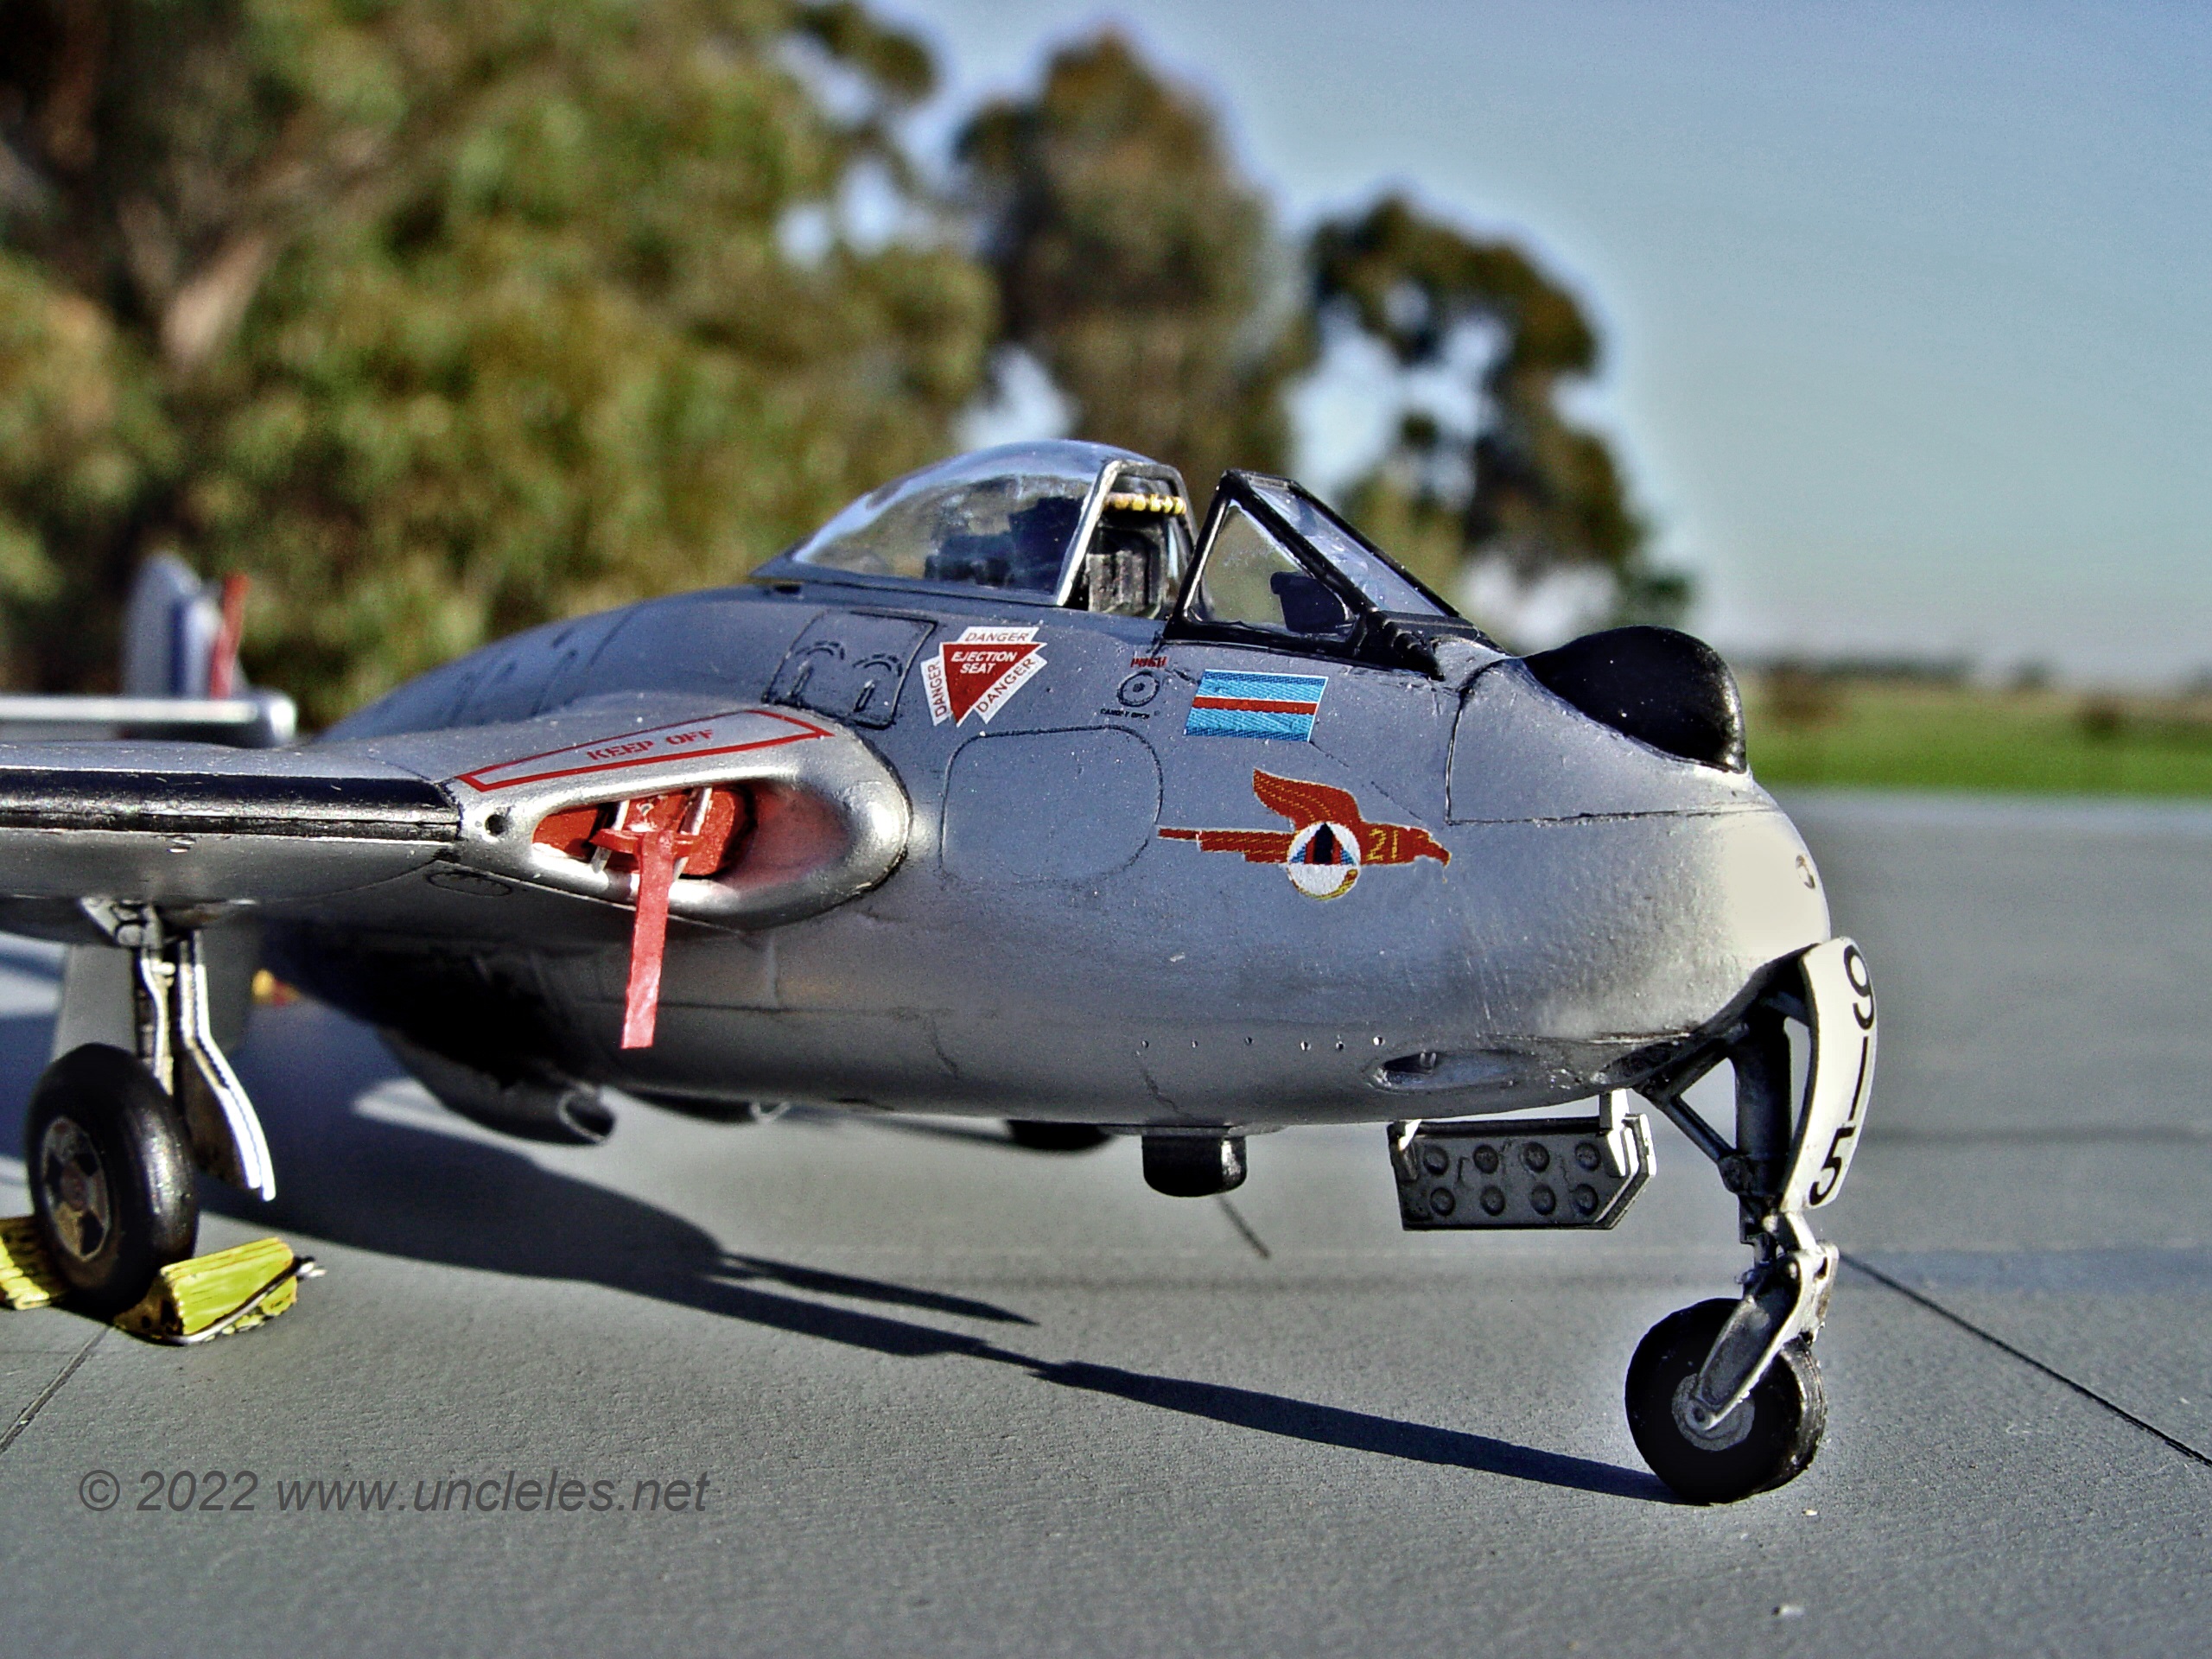
Those who follow my facebook pages will know I just love plastic bread tags – like the NE555 ( computer tech joke there ) there’s nothing they can’t do. I used one here to form the FOD covers for the main intakes just by cutting out he rounded quadrilateral shape and adhering behind the grille BEFORE attaching them to the wings.
The kit makes use of the rounded wing tip for the F.3 but included on the sprues and not mentioned in the instructions are the clipped wingtips so we’re clear to make the FB.31 in its operational guise BUT, the clear components also included in the kit are grossly oversize and will need really careful trimming to make them smooth and aerodynamic ! I then used more bread tags (painted red) to fashion wind locks to cover up some of my gluing transgressions ! ( FOD covers and RBF tags are to aircraft modellers as gobs of mud are to an AFV modeller ! )
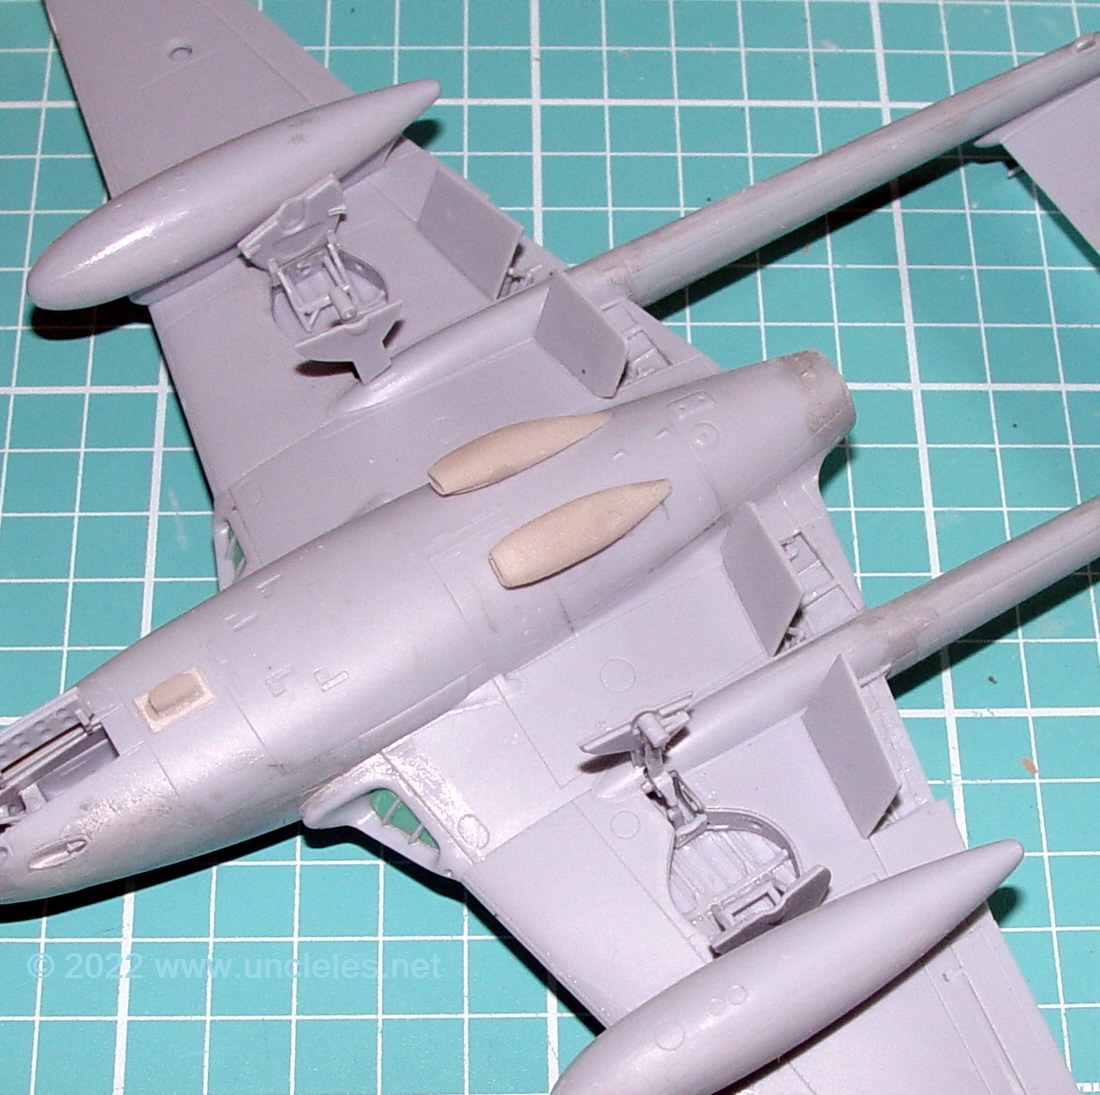
The model seen here was my first one with rounded tips before I changed them. You can also see the location of the elephant ear intakes (when making an FB.31 ) you can of course do an FB.30 if you stick’em on top but I’ll let you Google that one !
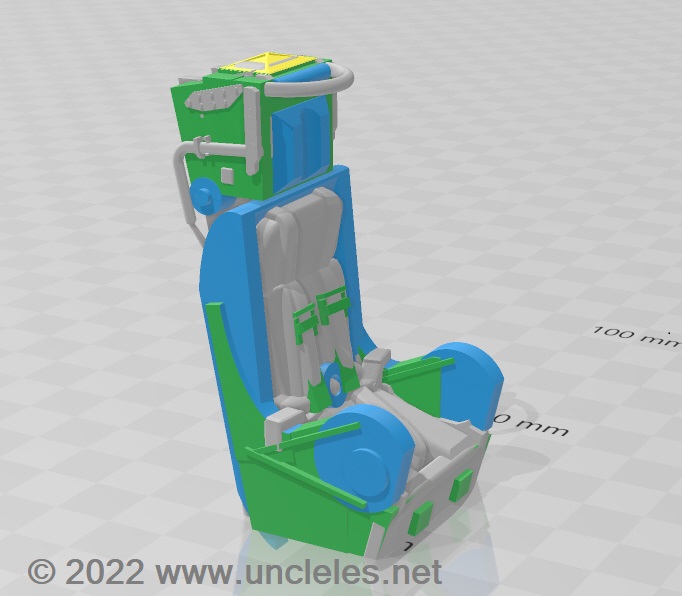
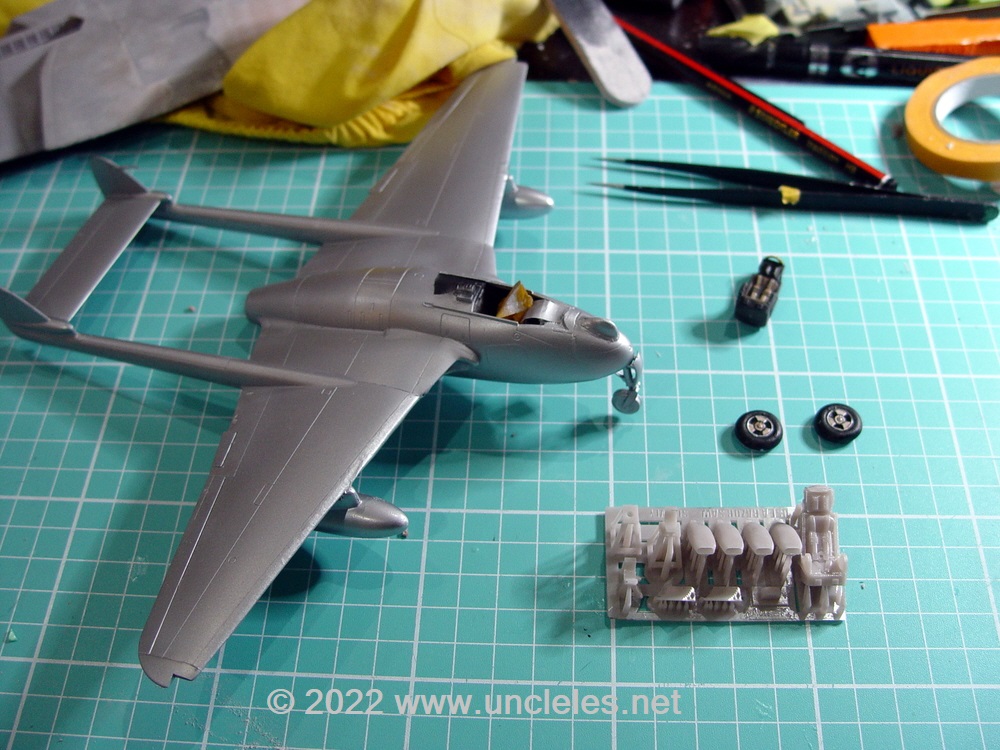
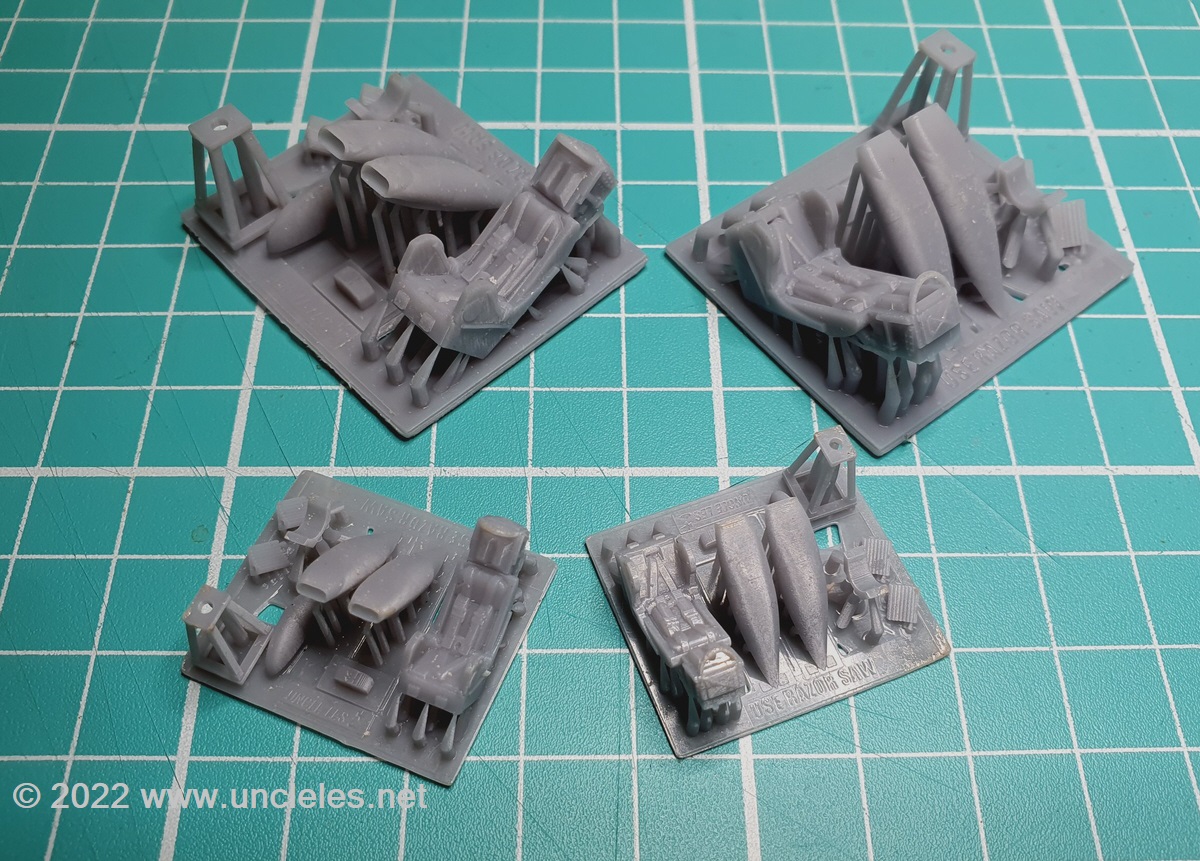
I included a rudimentary bang seat of my own design intended to drop in AFTER you’ve trimmed the rear of the cockpit shelf by a couple of millimetres. The kit comes with a choice of instrument panels, you can work out which one you use – I just used the first one that fell off, painted it black and dry brushed in light grey.
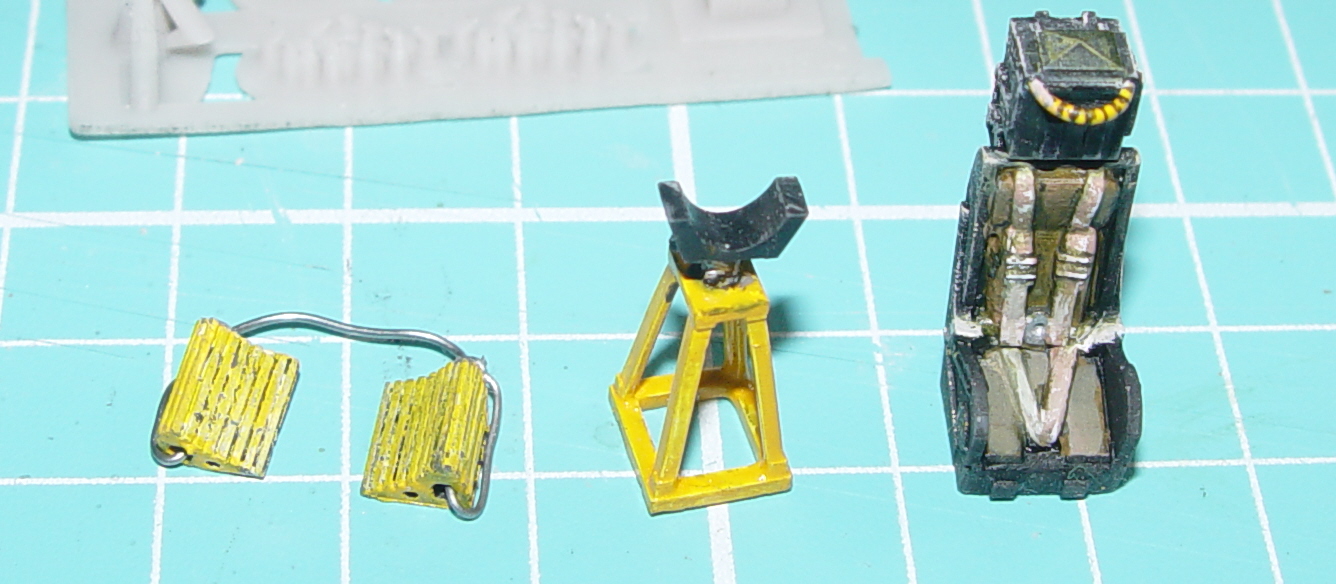
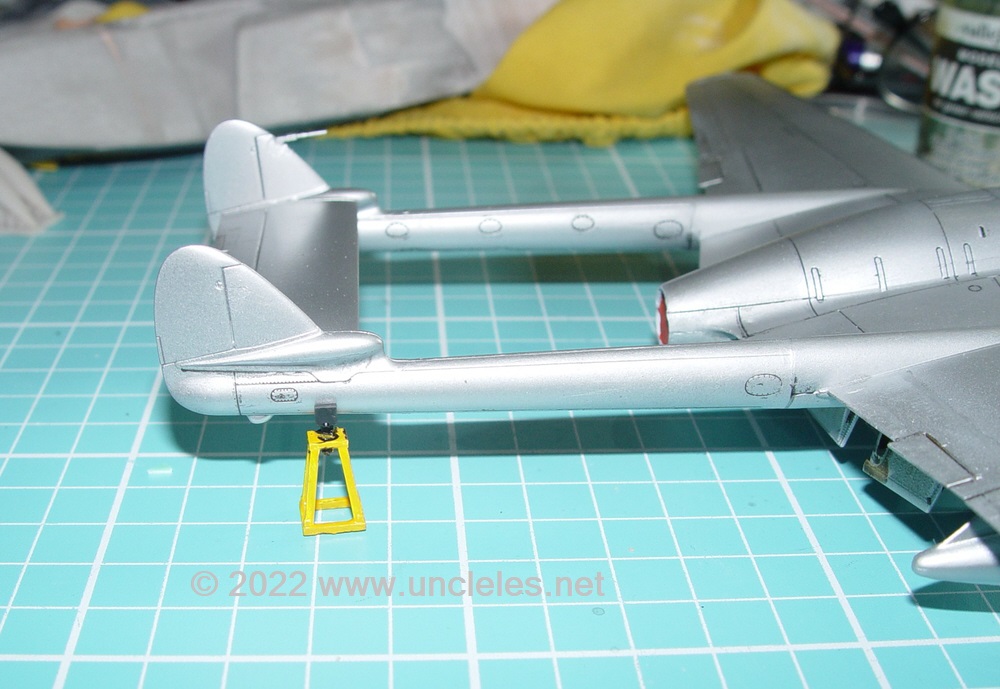
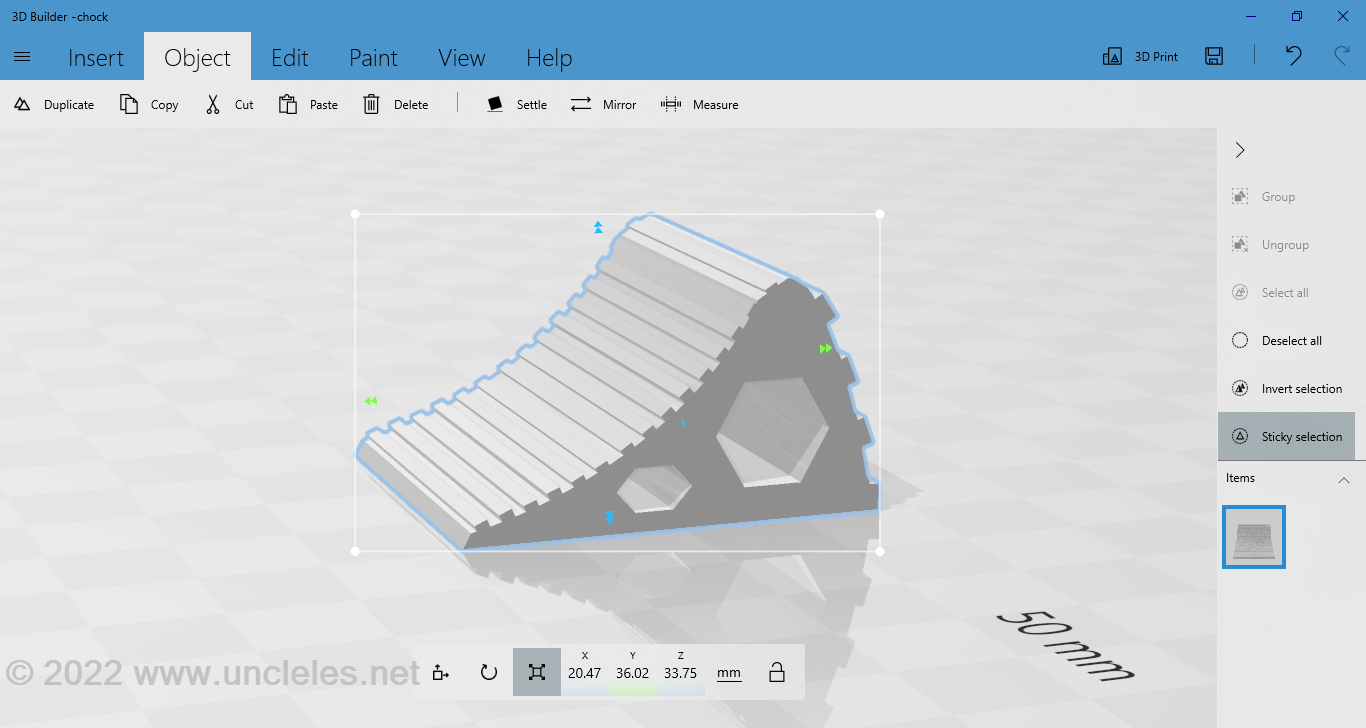
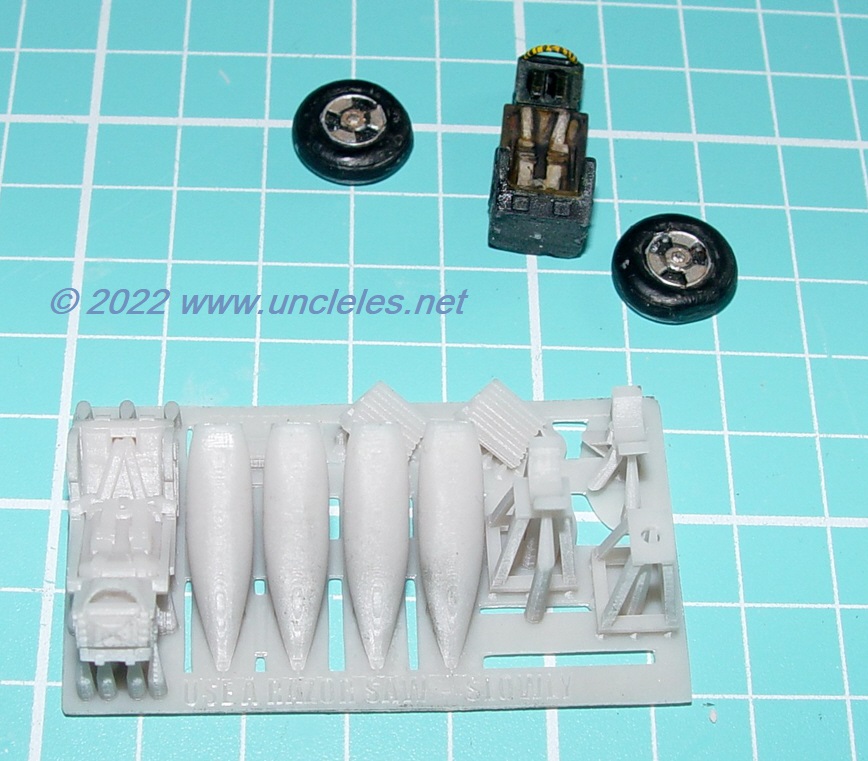
I included a couple of chocks and a trestle stand as a means to achieve a nose-sitting attitude. There is really not much room in the nose for additional weight even with my replacement resin nose piece so I did it this way to overcome that. The ejection seat that’s particular to the FB.31 will sit in the cockpit and if seated correctly it will just fit under the canopy – the real deal was a tight fit !
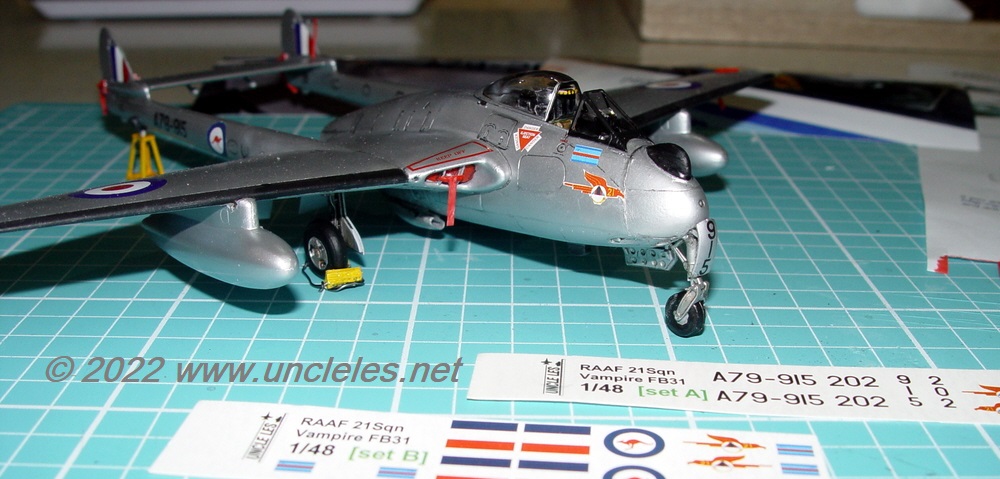
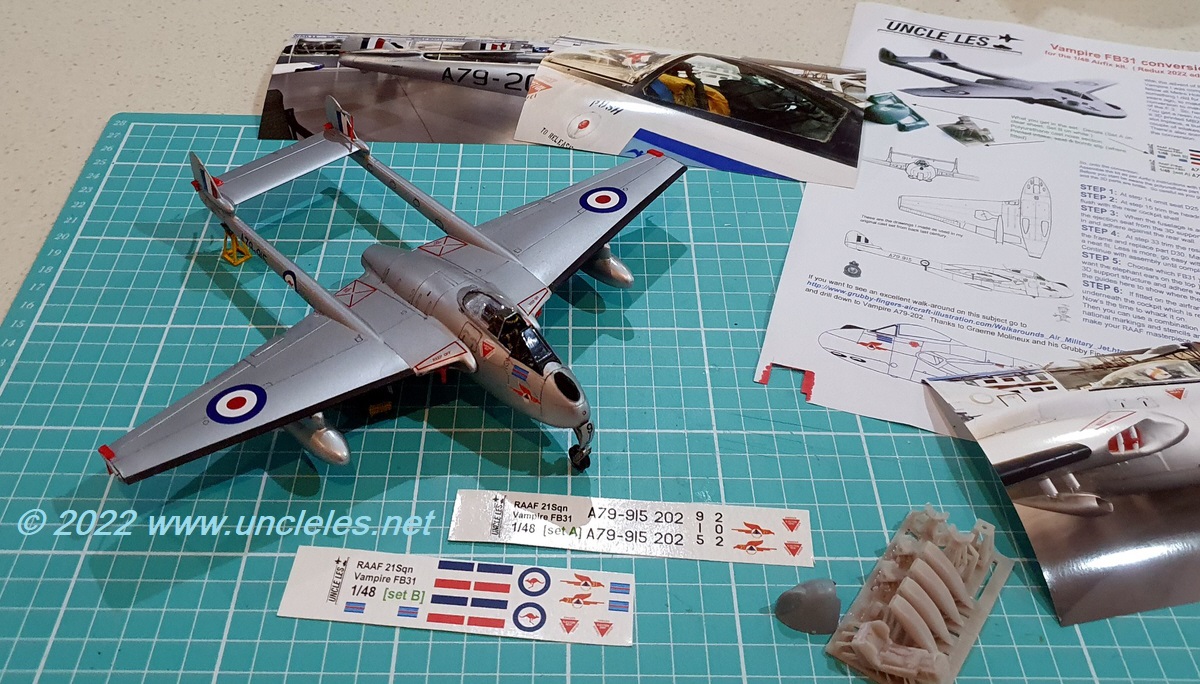
I made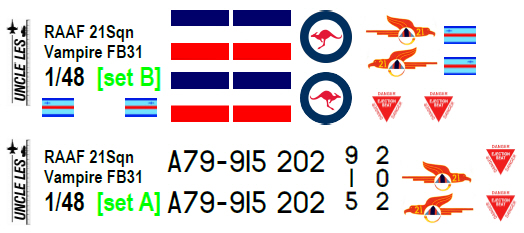 up a set of decals on clear and white sheets using a laser printer and a bevy of intel collected over years. I was going to use a third party decal manufacturer’s FB.31 set which I purchased and found to be simply rubbish so I couldn’t with clear conscience recommend them thus I made my own. As I had done both the parts and the decals as digital entities I was able to rescale – more on that in a moment.
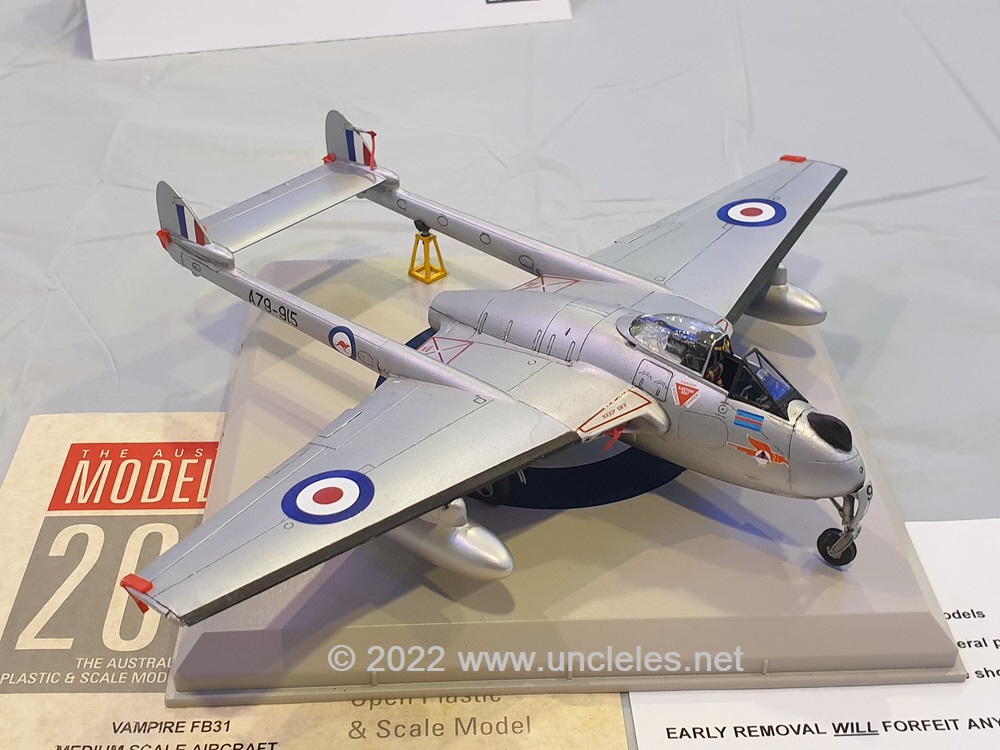

So I finished the model close to ModelExpo time and managed to score a commended in its category.
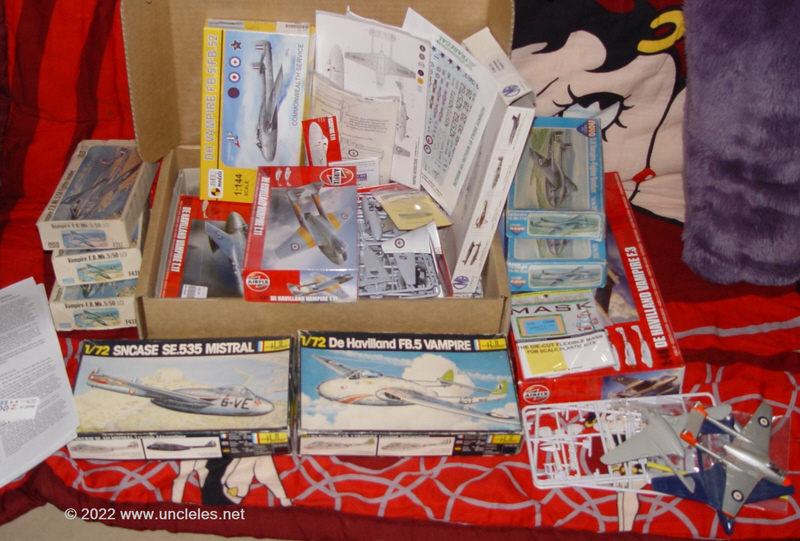
I also bought some reference material as seen on the photo here, and none of it was useful for an RAAF aircraft ! Even that “Vampire” title there had no mention of the FB.31. So – I’ll be flogging that off on eBay sometime. The finished model can be seen at Metro Hobbies in the Melbourne CBD store.
I also get all my Airfix kits from Metro and recommend them highly for these and other popular brands. Just tell Max that Uncle Les sent you ! https://www.metrohobbies.com.au/pages/model-kits
I mentioned rescaling – I’ve already gone through the stash of 1/72 & 1/144 kits and have already sold examples of the conversion set in both of those scales. At the end of this article I’ll talk about a slightly larger version..
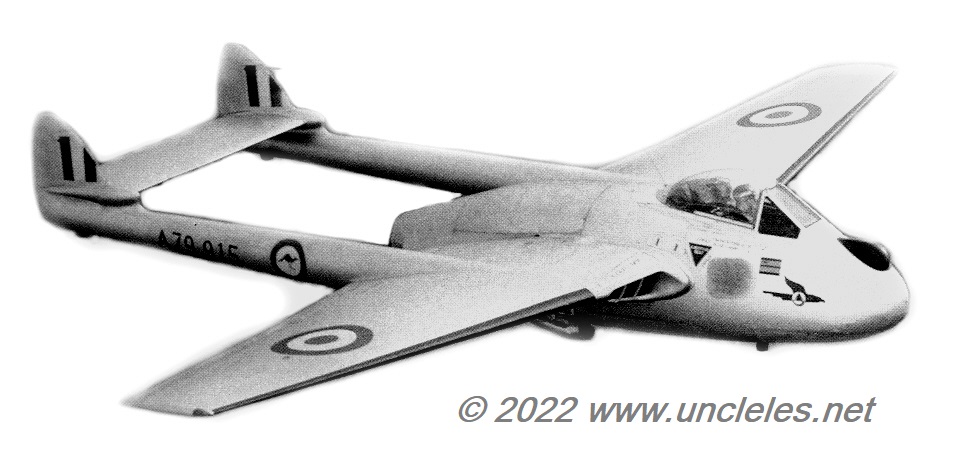
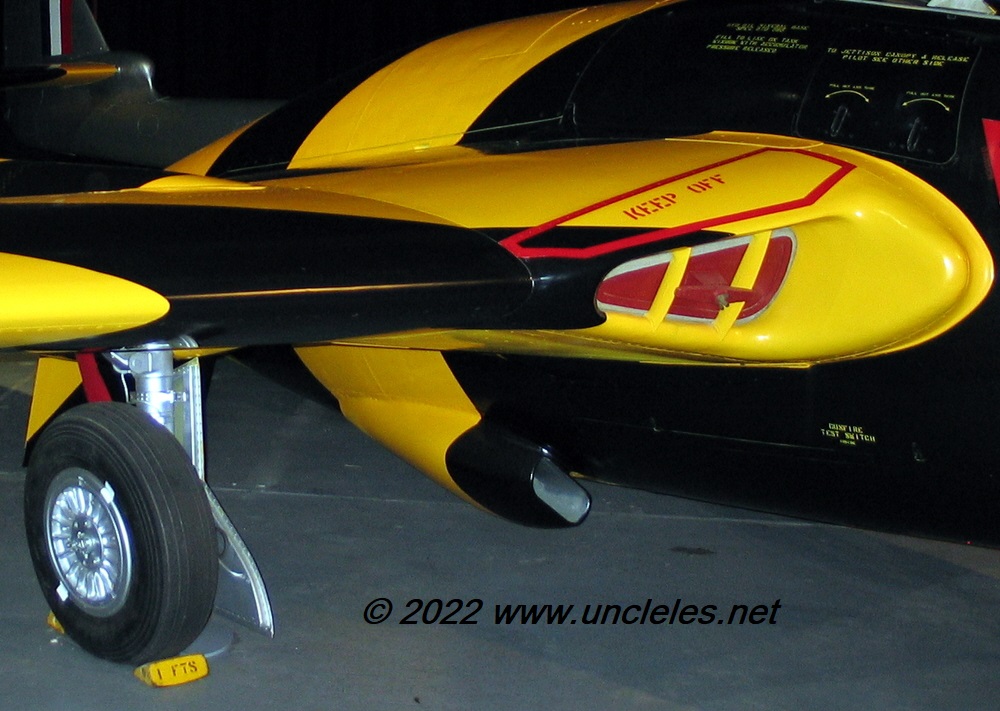
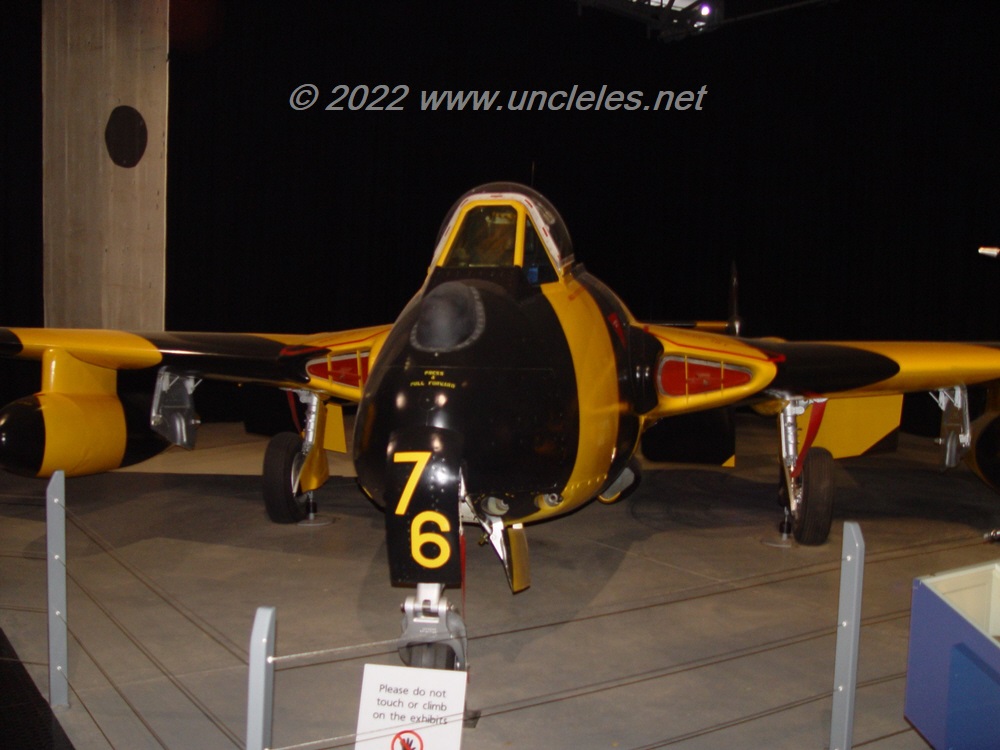
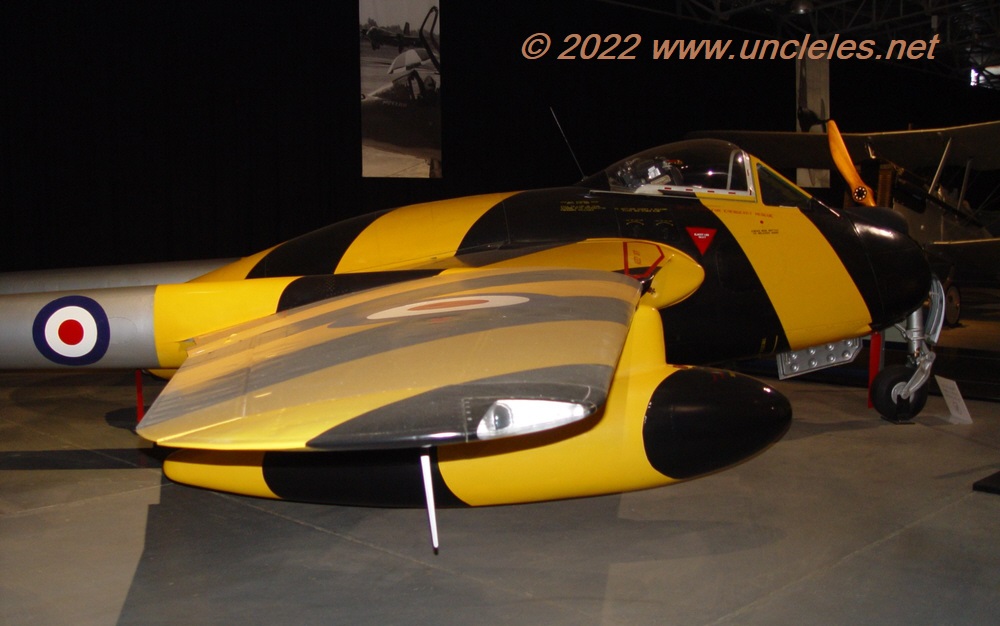
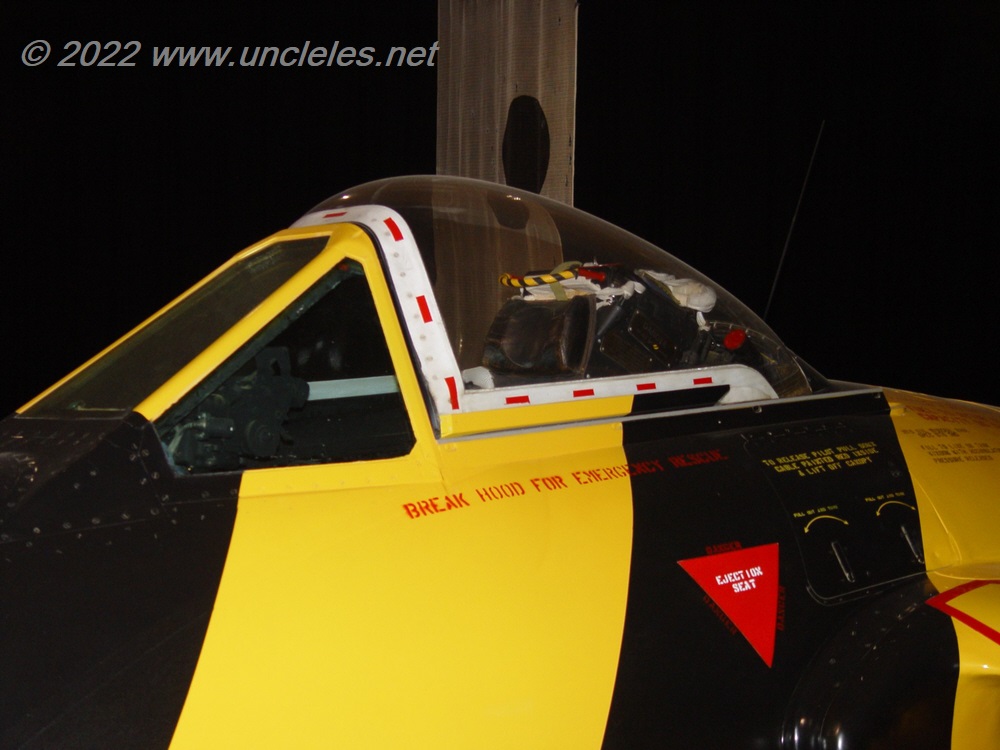
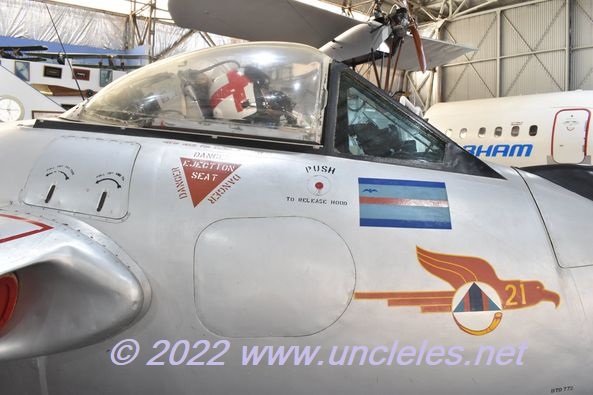
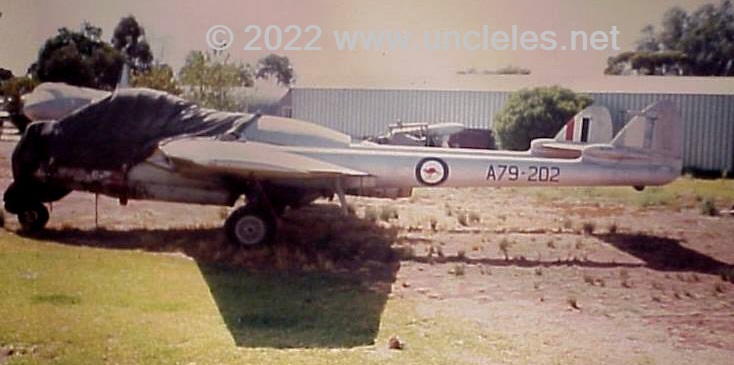
Here’s some pics of the real deal that I found useful as reference
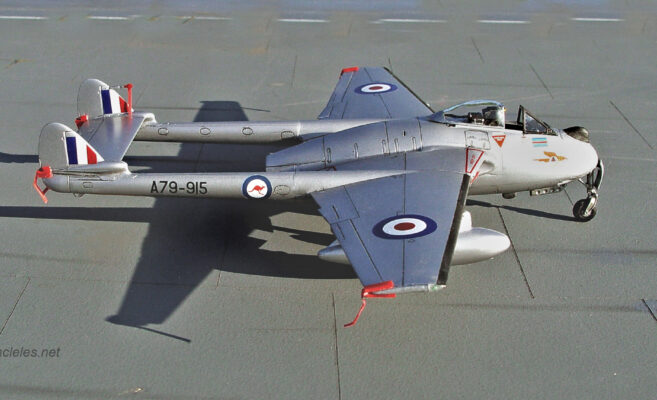
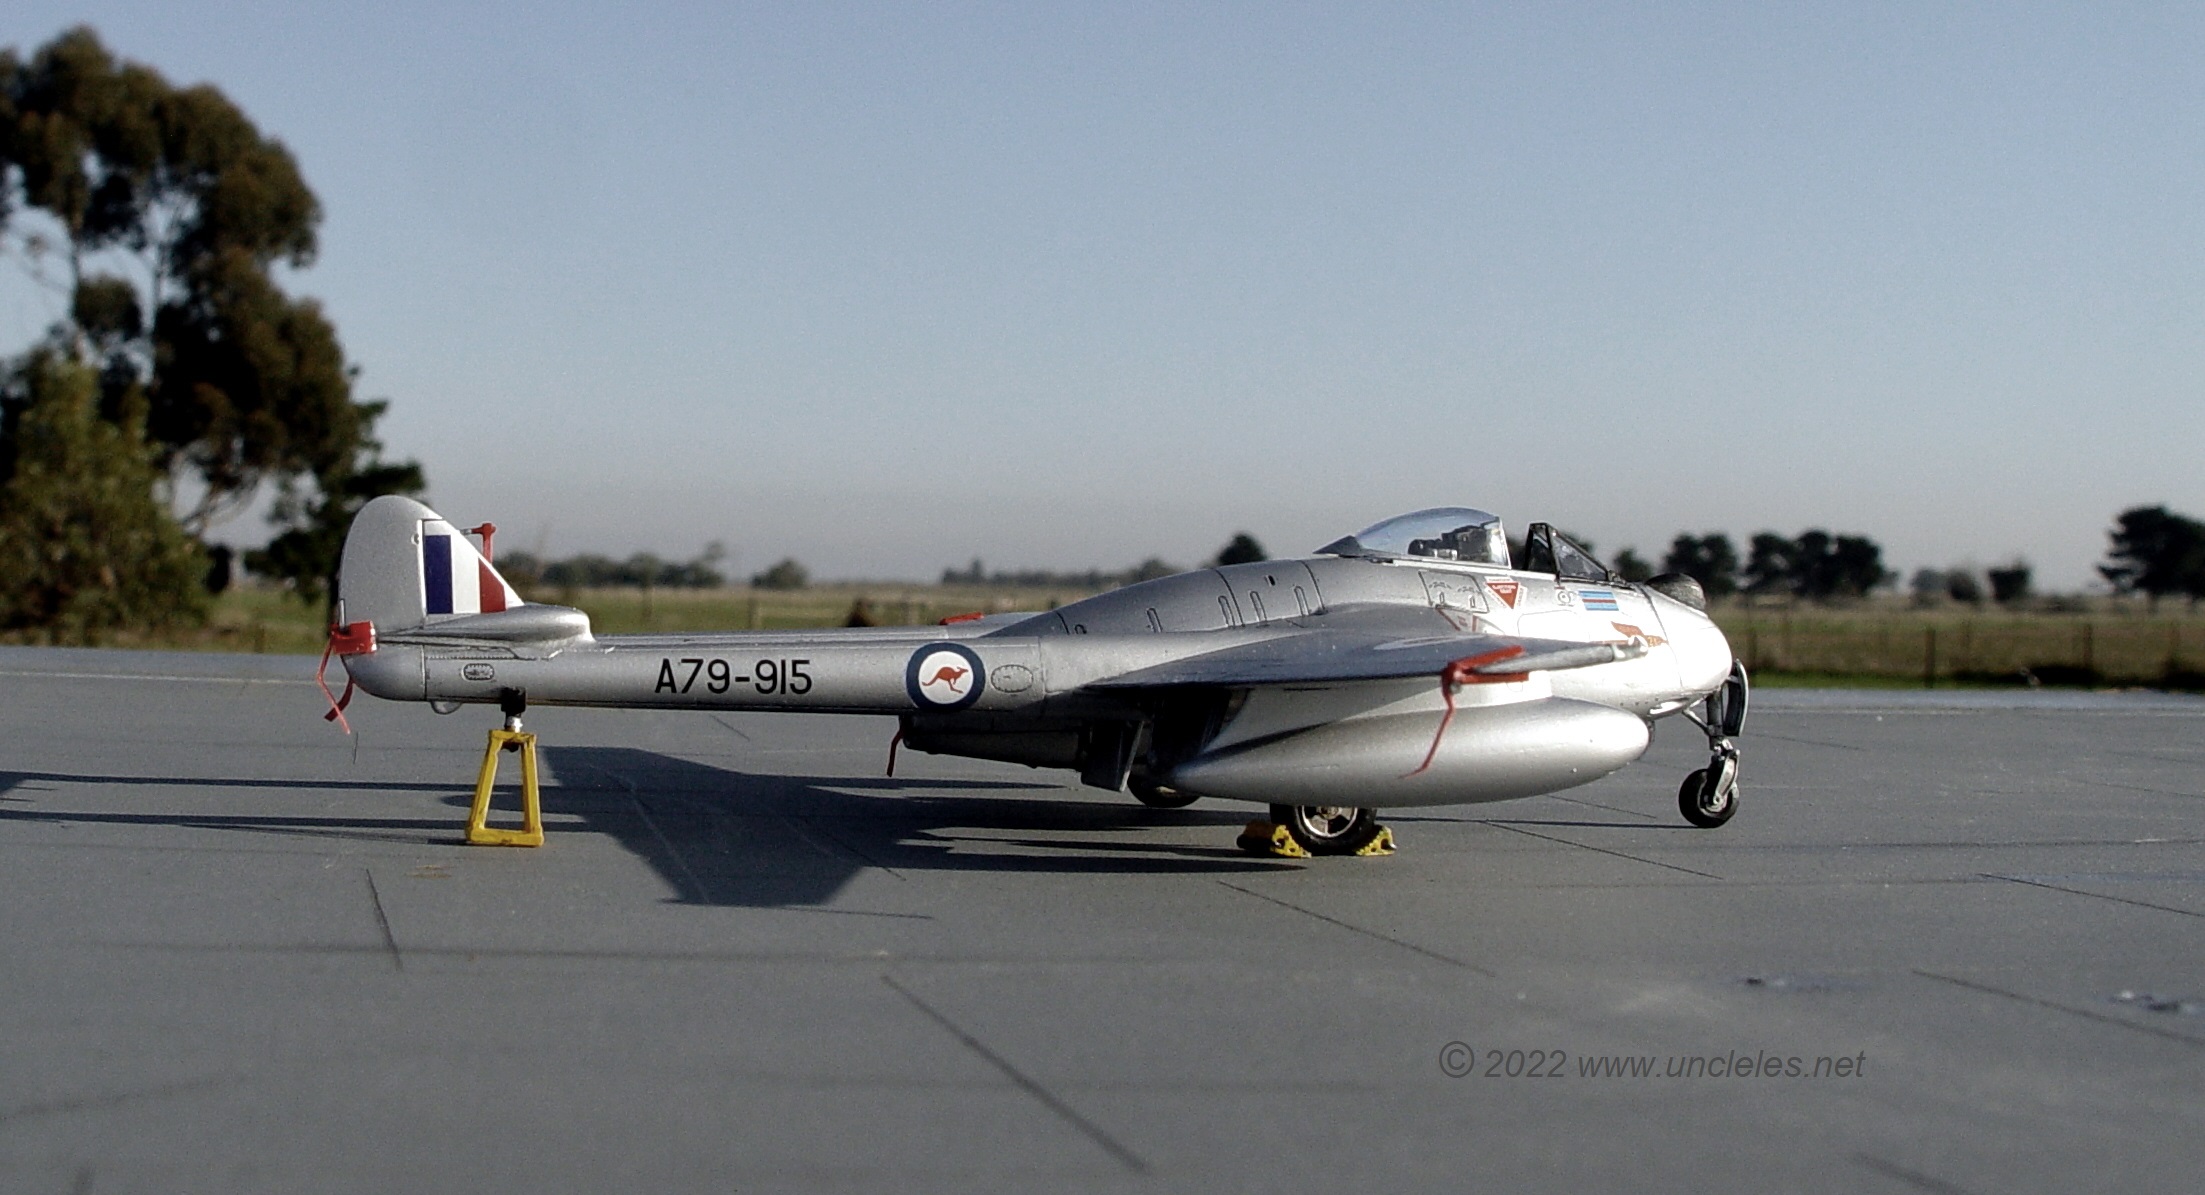
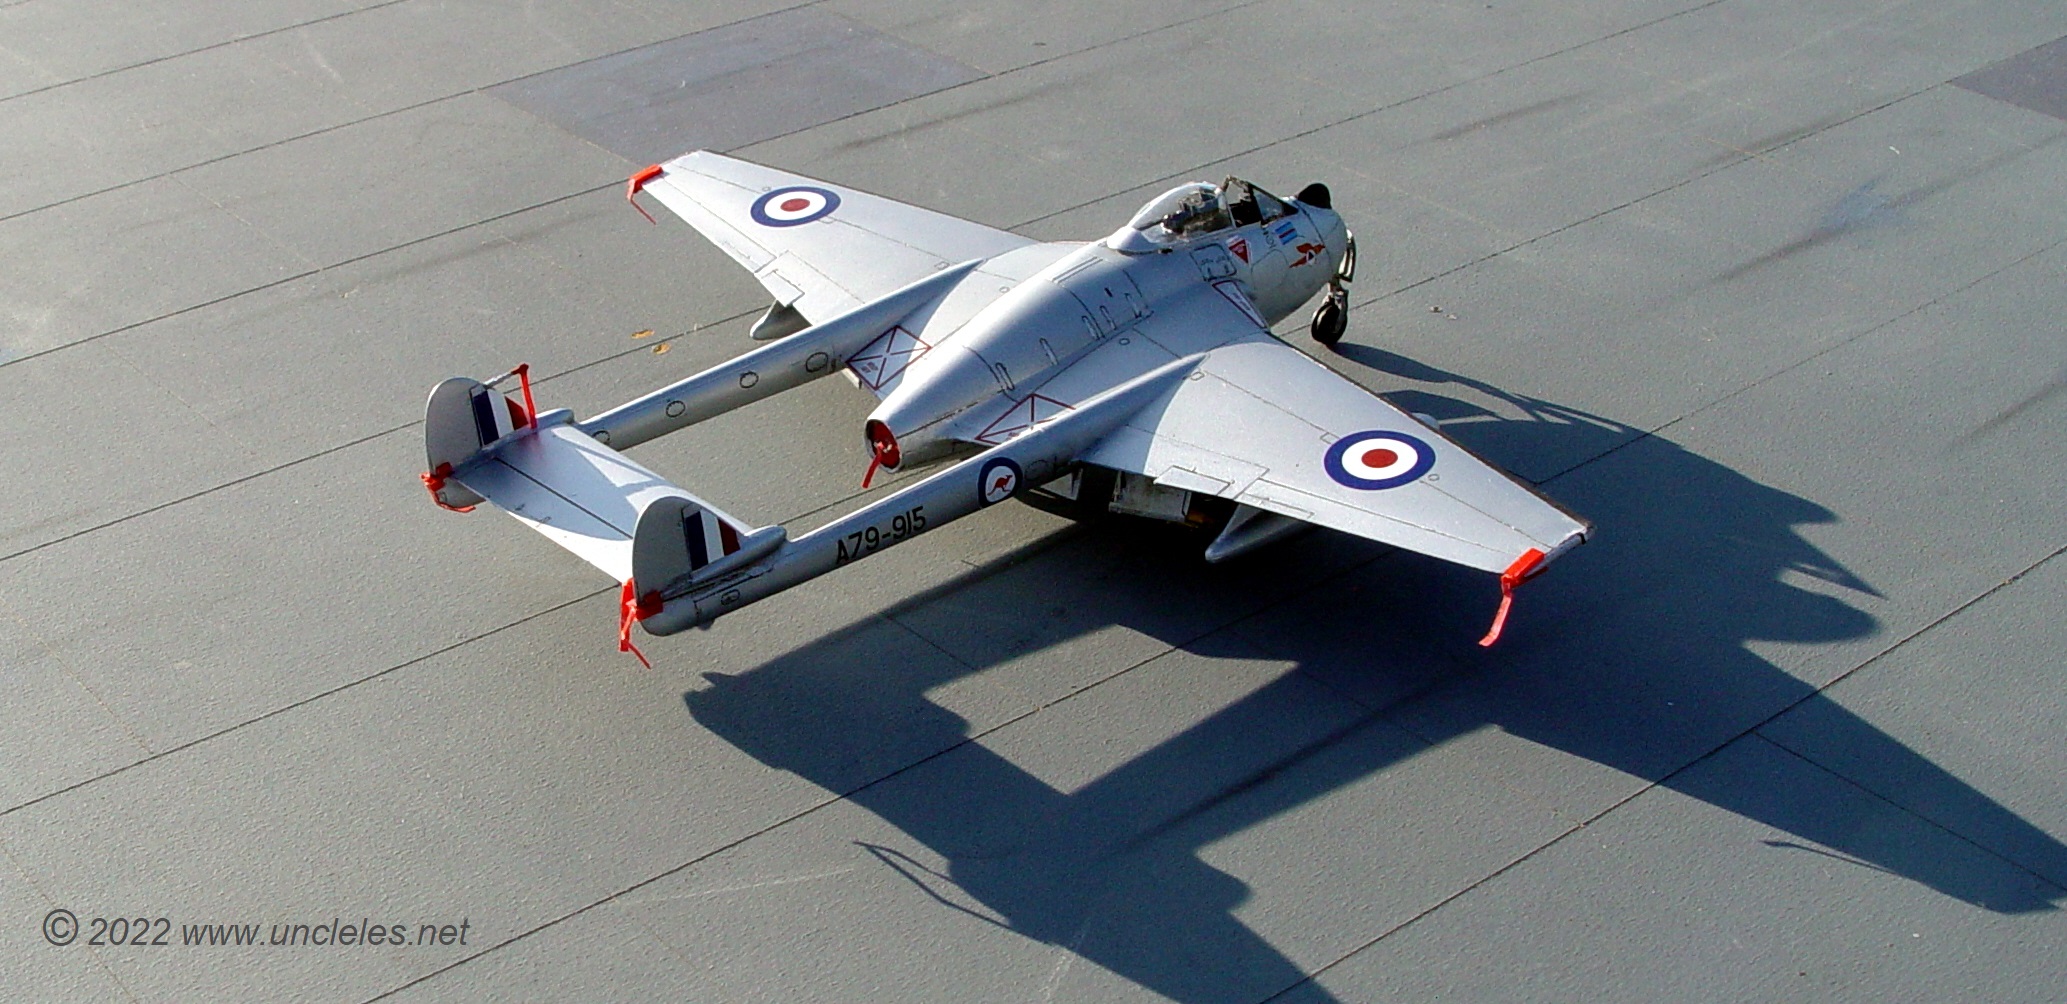
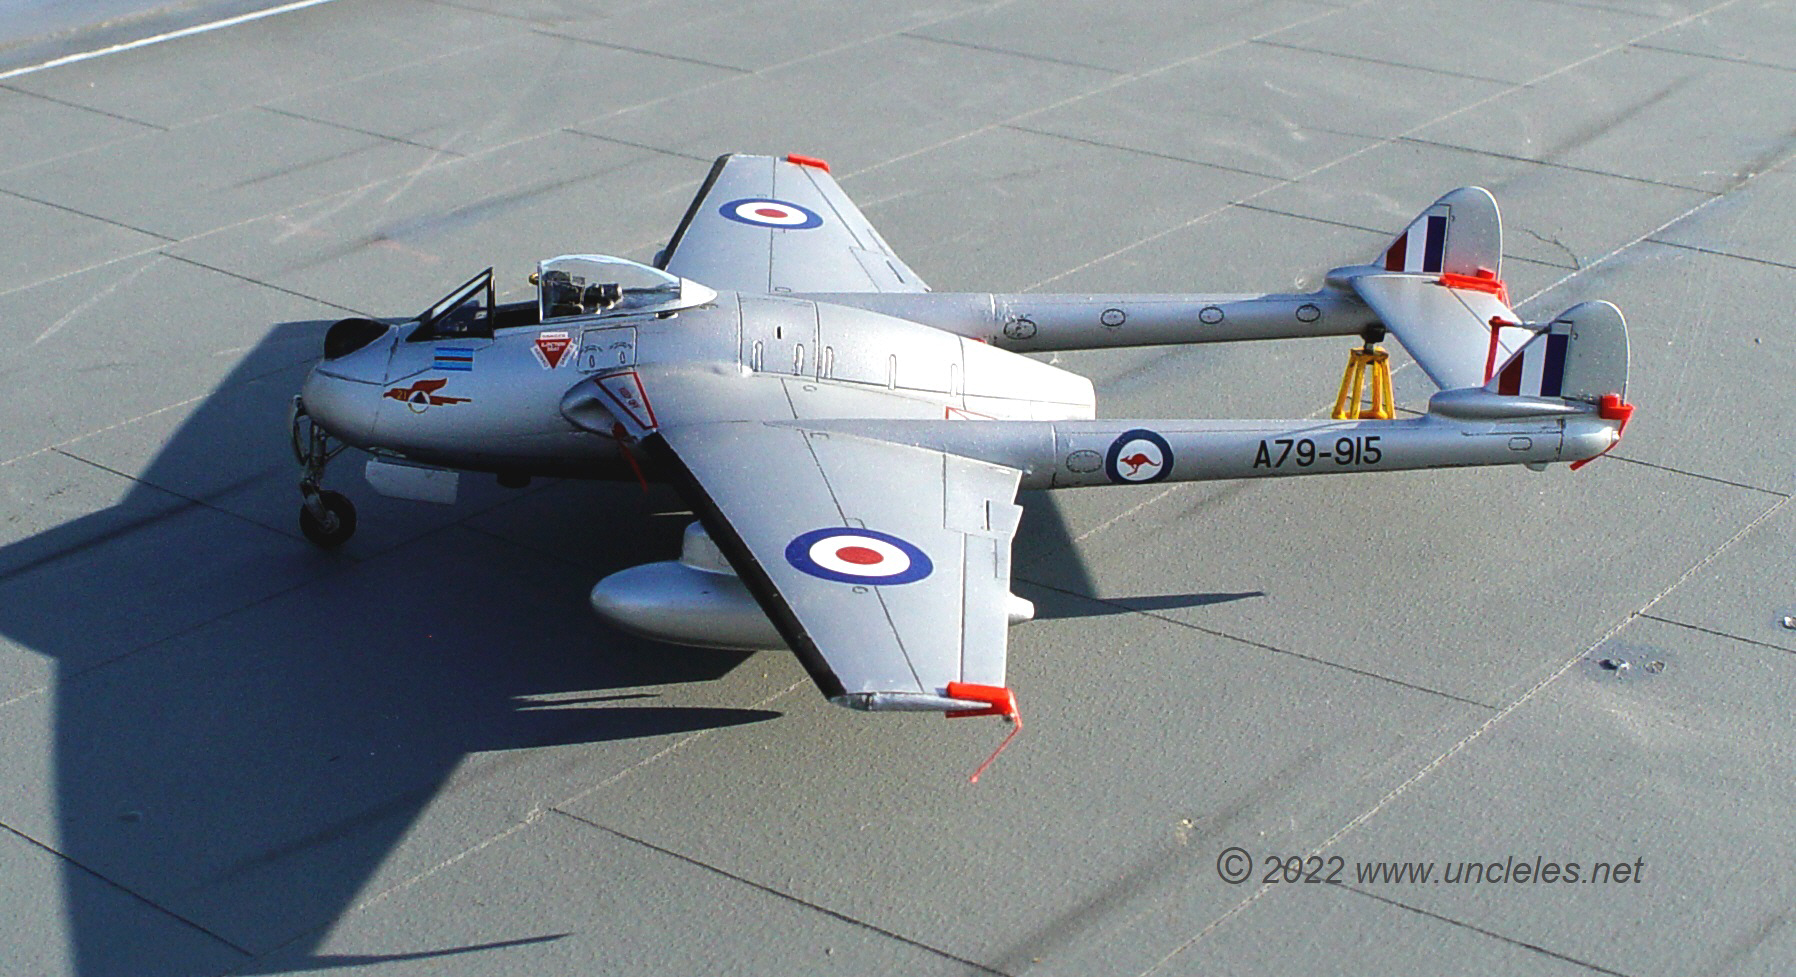
and here’s some pics of my finished model in an outdoor setting:
So that’s about as much effort that’s required to build the model. The canopy sits just right and if the bangseat is positioned correctly it doesn’t so just dry-fit the canopy before the super glue sets ! Have a look at the photo above to see how the conversion seat sits, or at least is suppose to sit.
Now this has been a bit of a brief coverage on building the Airfix F.3 Vampire with the Uncle Les FB.31 conversion set, not an in-depth discussion and not a technical brief, just the ramblings of a modeller.
If you’d like to see the instruction leaflets for both the 1/48 and the 1/72 versions they are
here VampireFB31instructions148Rev2 and here VampireFB31instructions172Rev4
and when they pop up for sale on my facebook sales page they look like this. https://www.facebook.com/groups/493435828689749

I sell the 1/72, 1/48 & 1/32 conversion kits sporadically as I make them at special events such as local swap meets, on eBay or via my facebook sales page. I don’t take orders as such. If you’re really keen then best you find someone who monitors my sales page or eBay.