 Here’s another new addition to the Airfix range. I remember back in the early ’70s Airfix came out with the first large scale Messerschmitt in the form of an Emil and when I finally got my hands on one in my teen years it was huge ! That was about 4 decades ago and the old kit whilst good is dated somewhat when compared with the new offering.
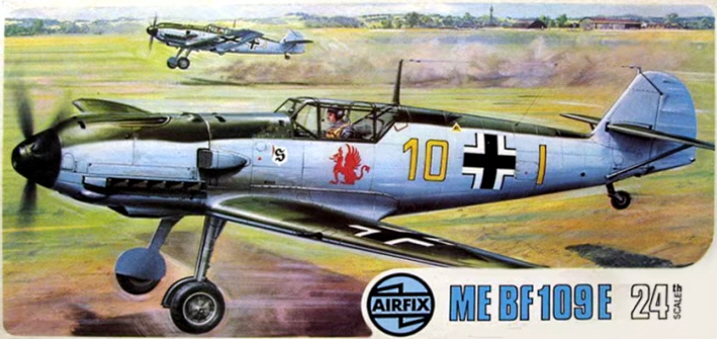
1973 called and said swastikas were verboden.
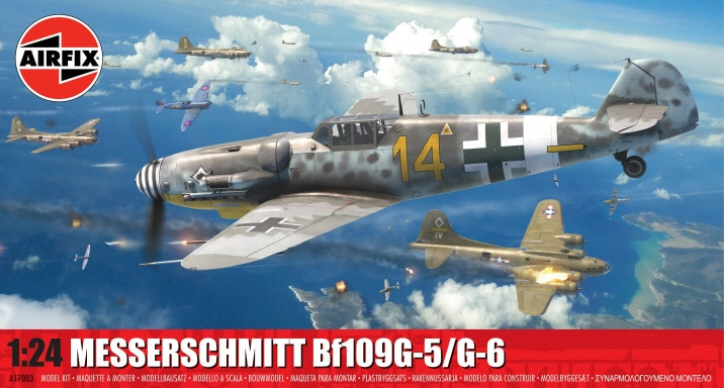
2026 and spicy crosses are still no go.
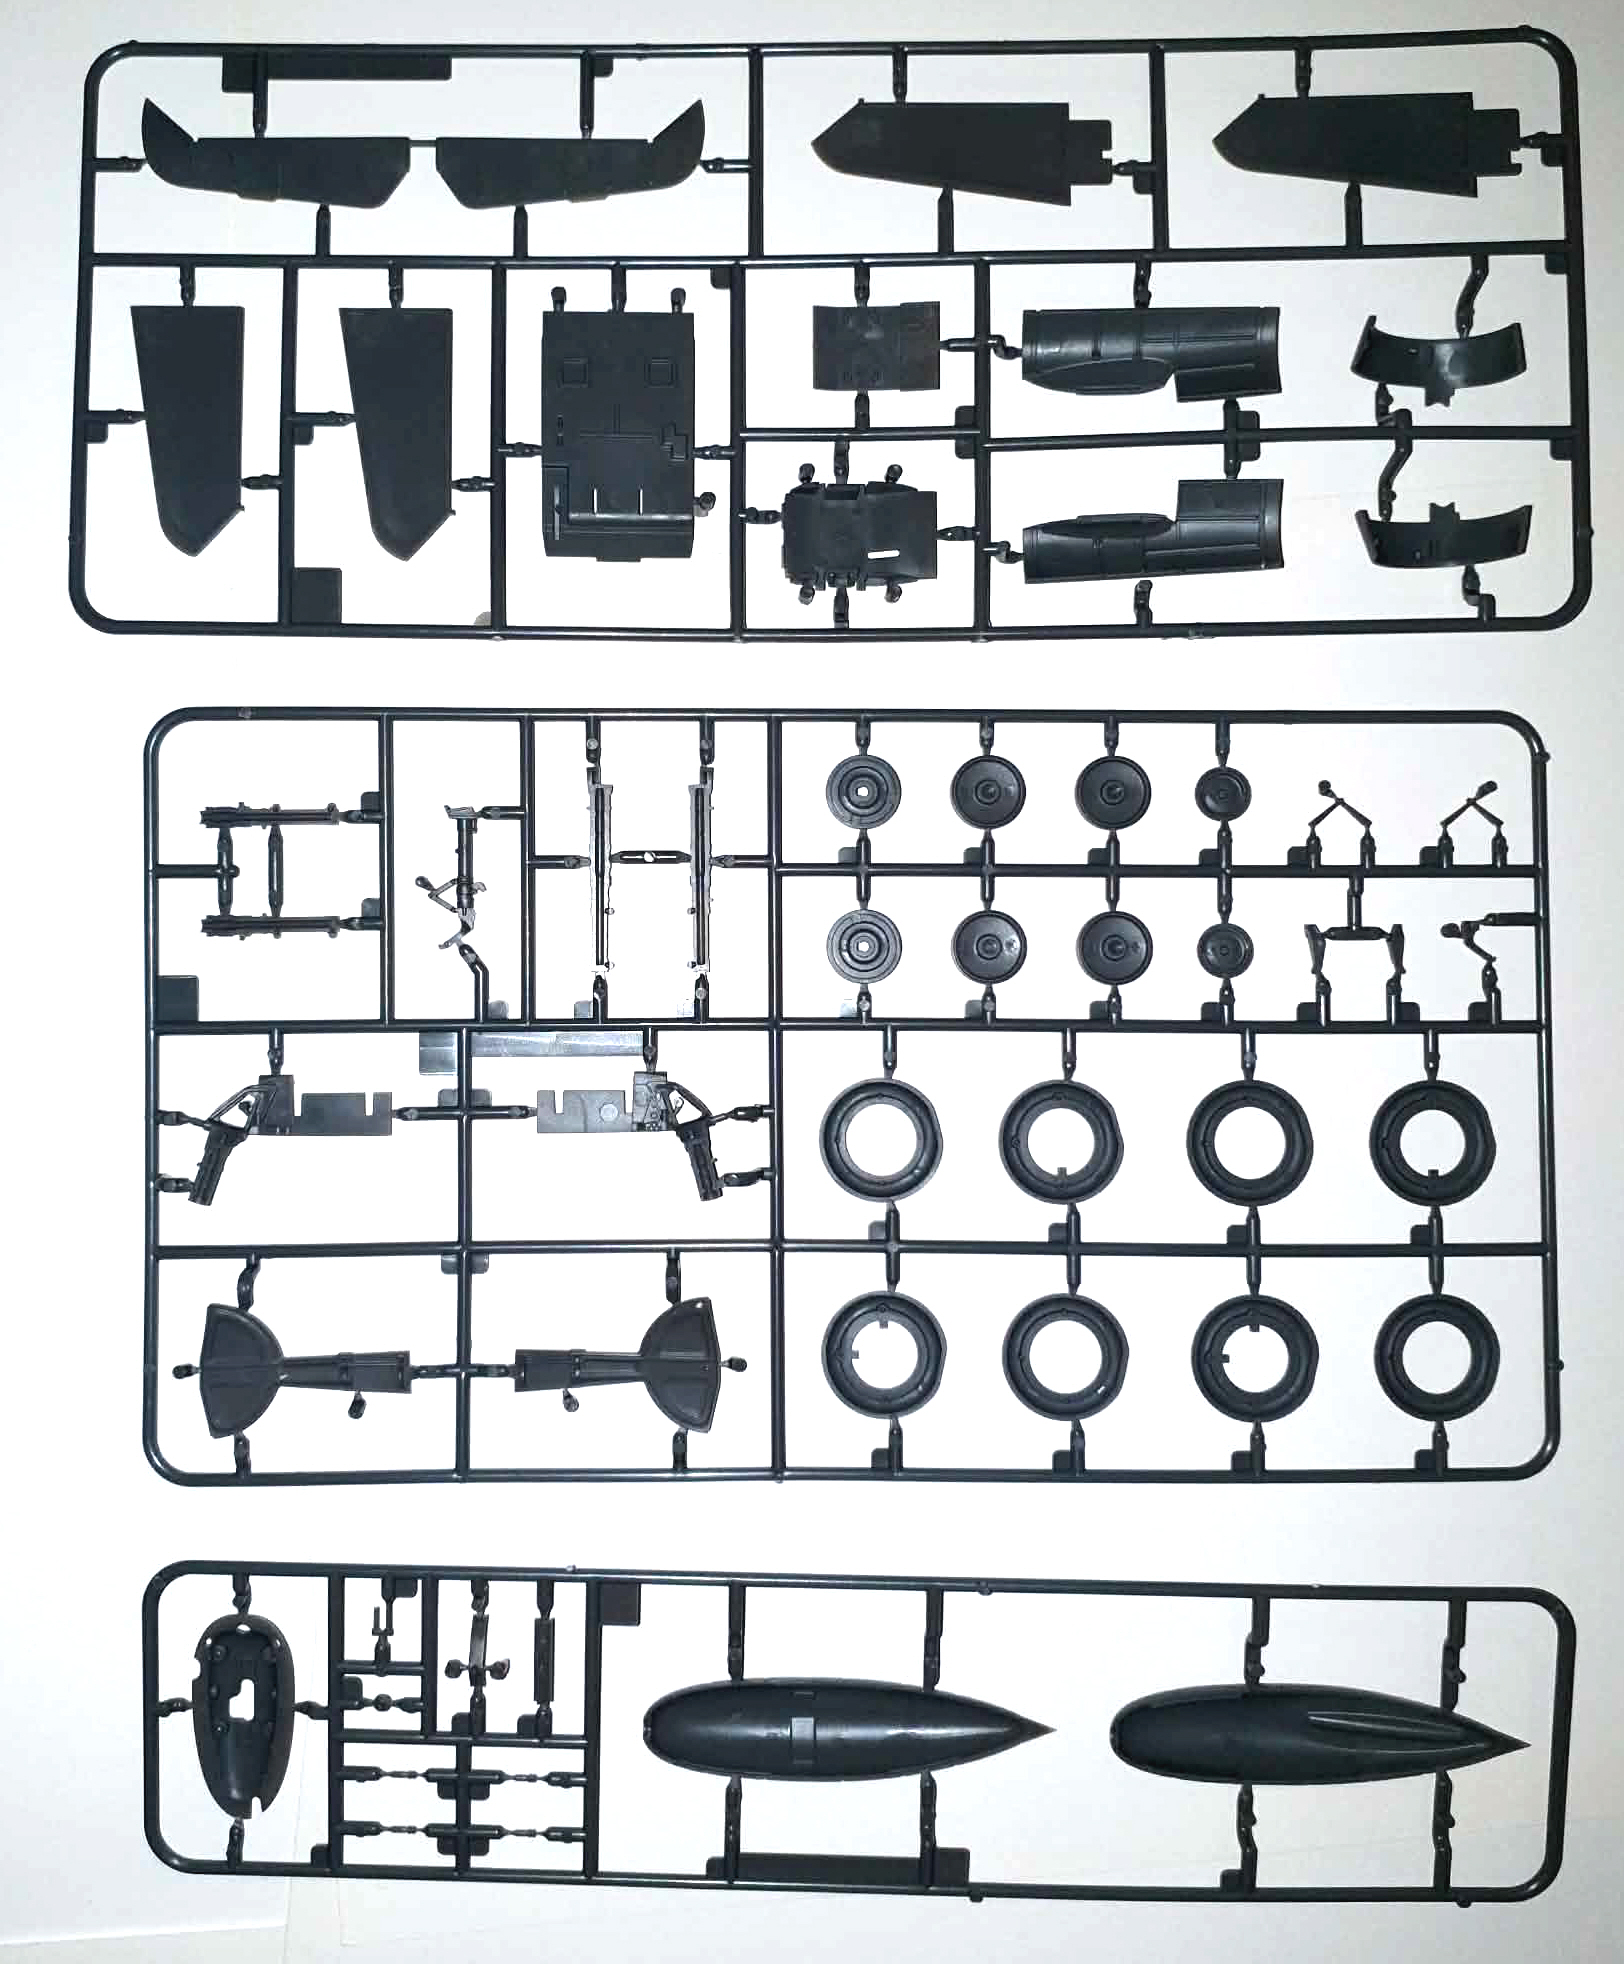
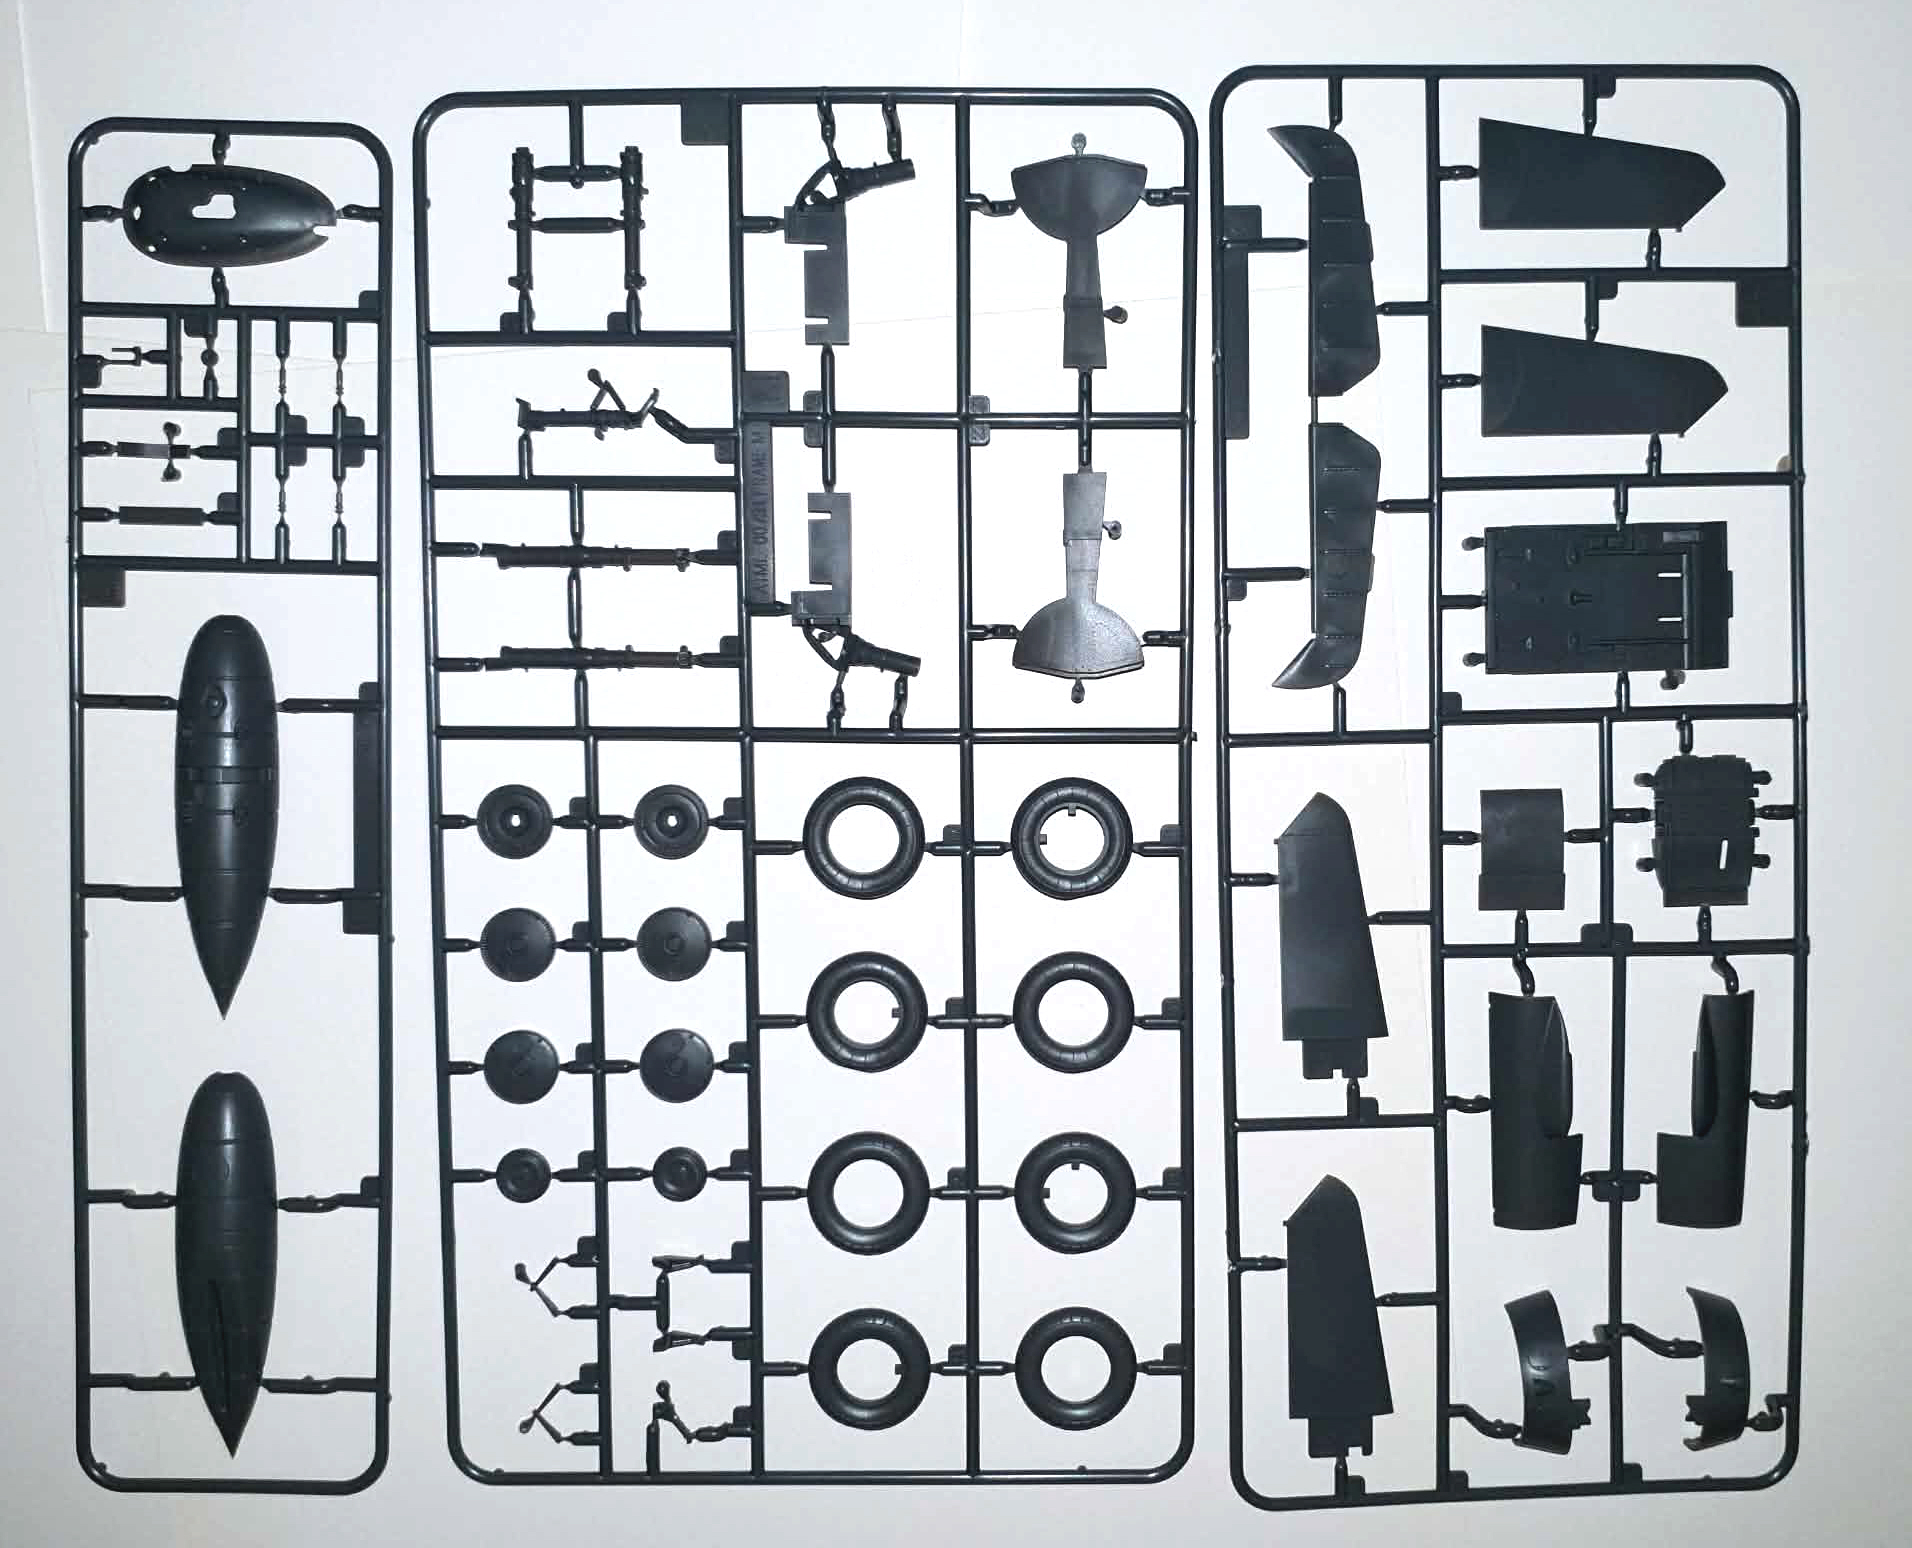
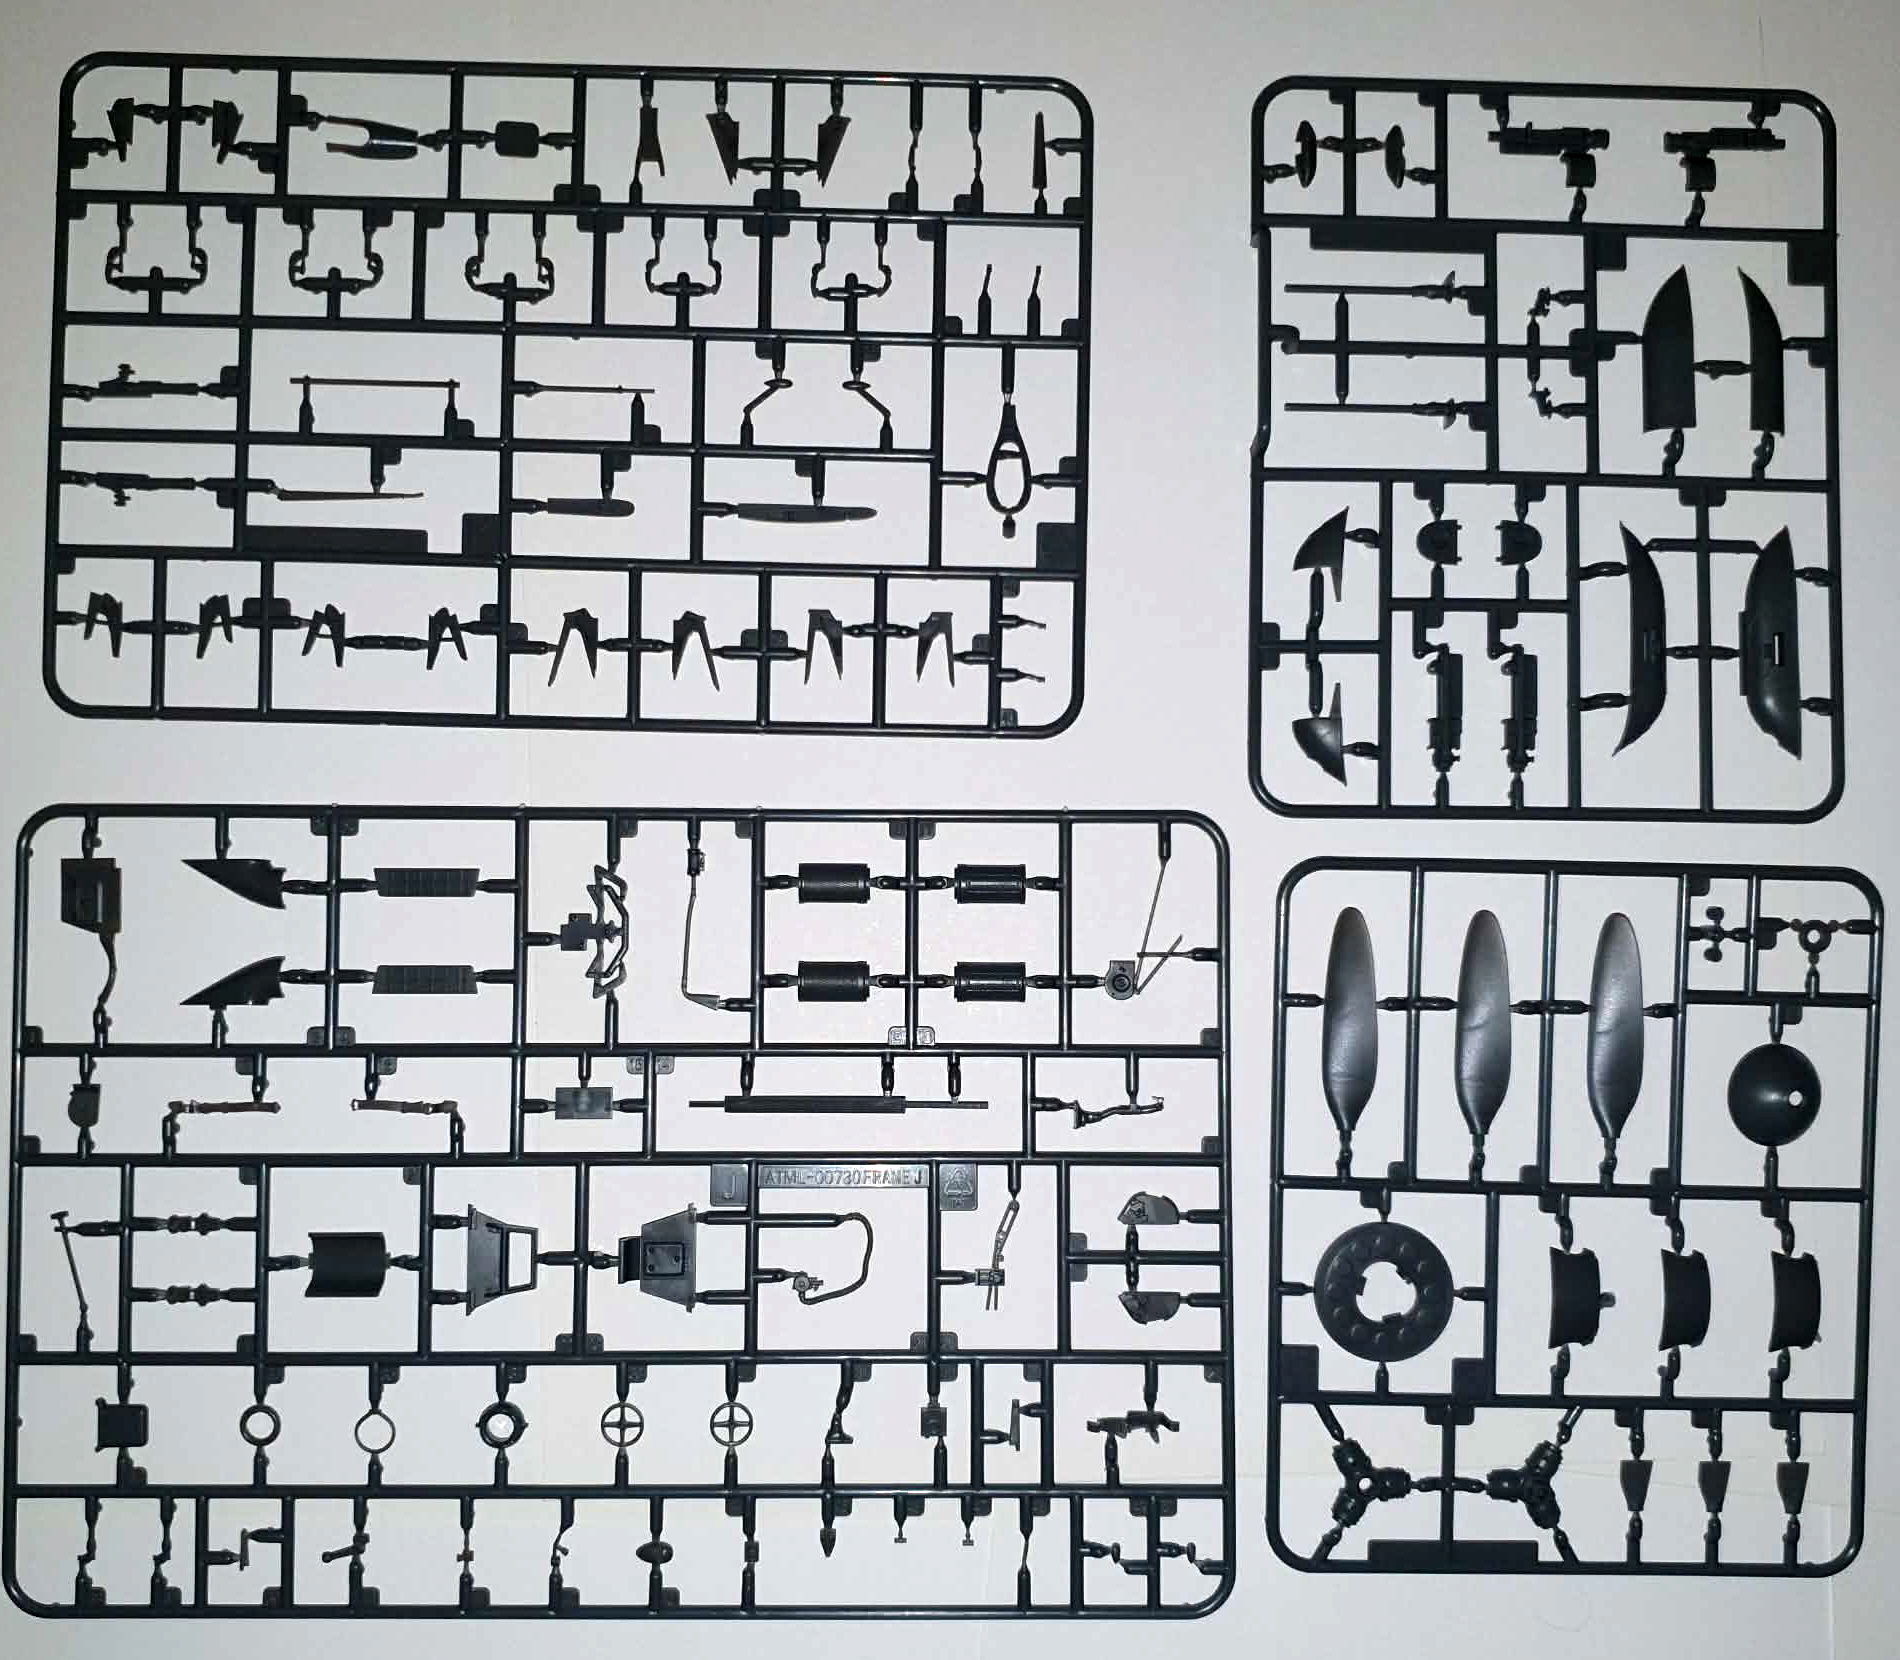
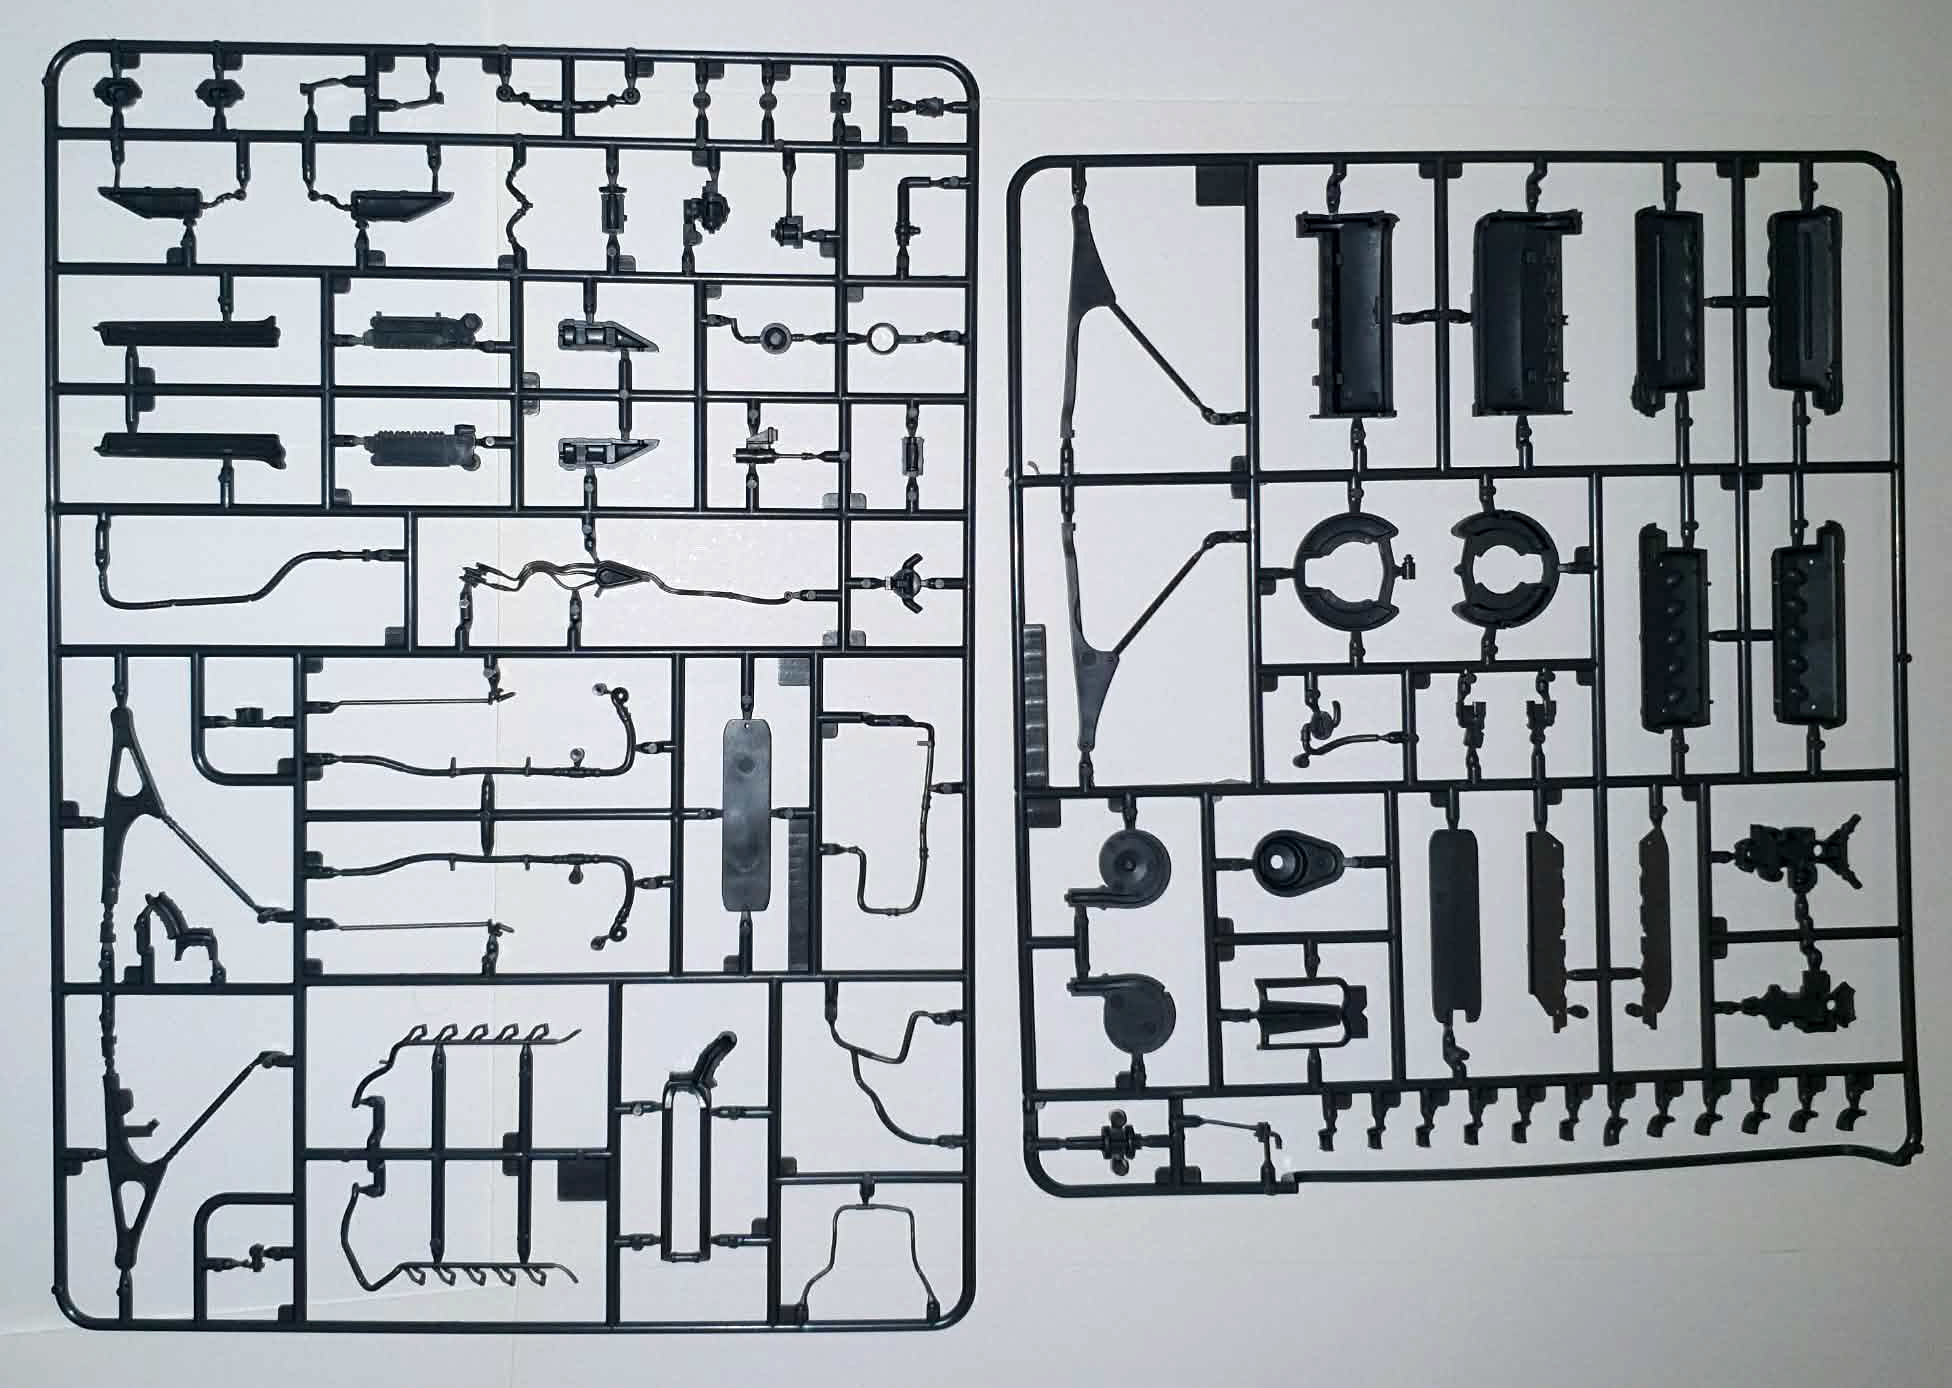
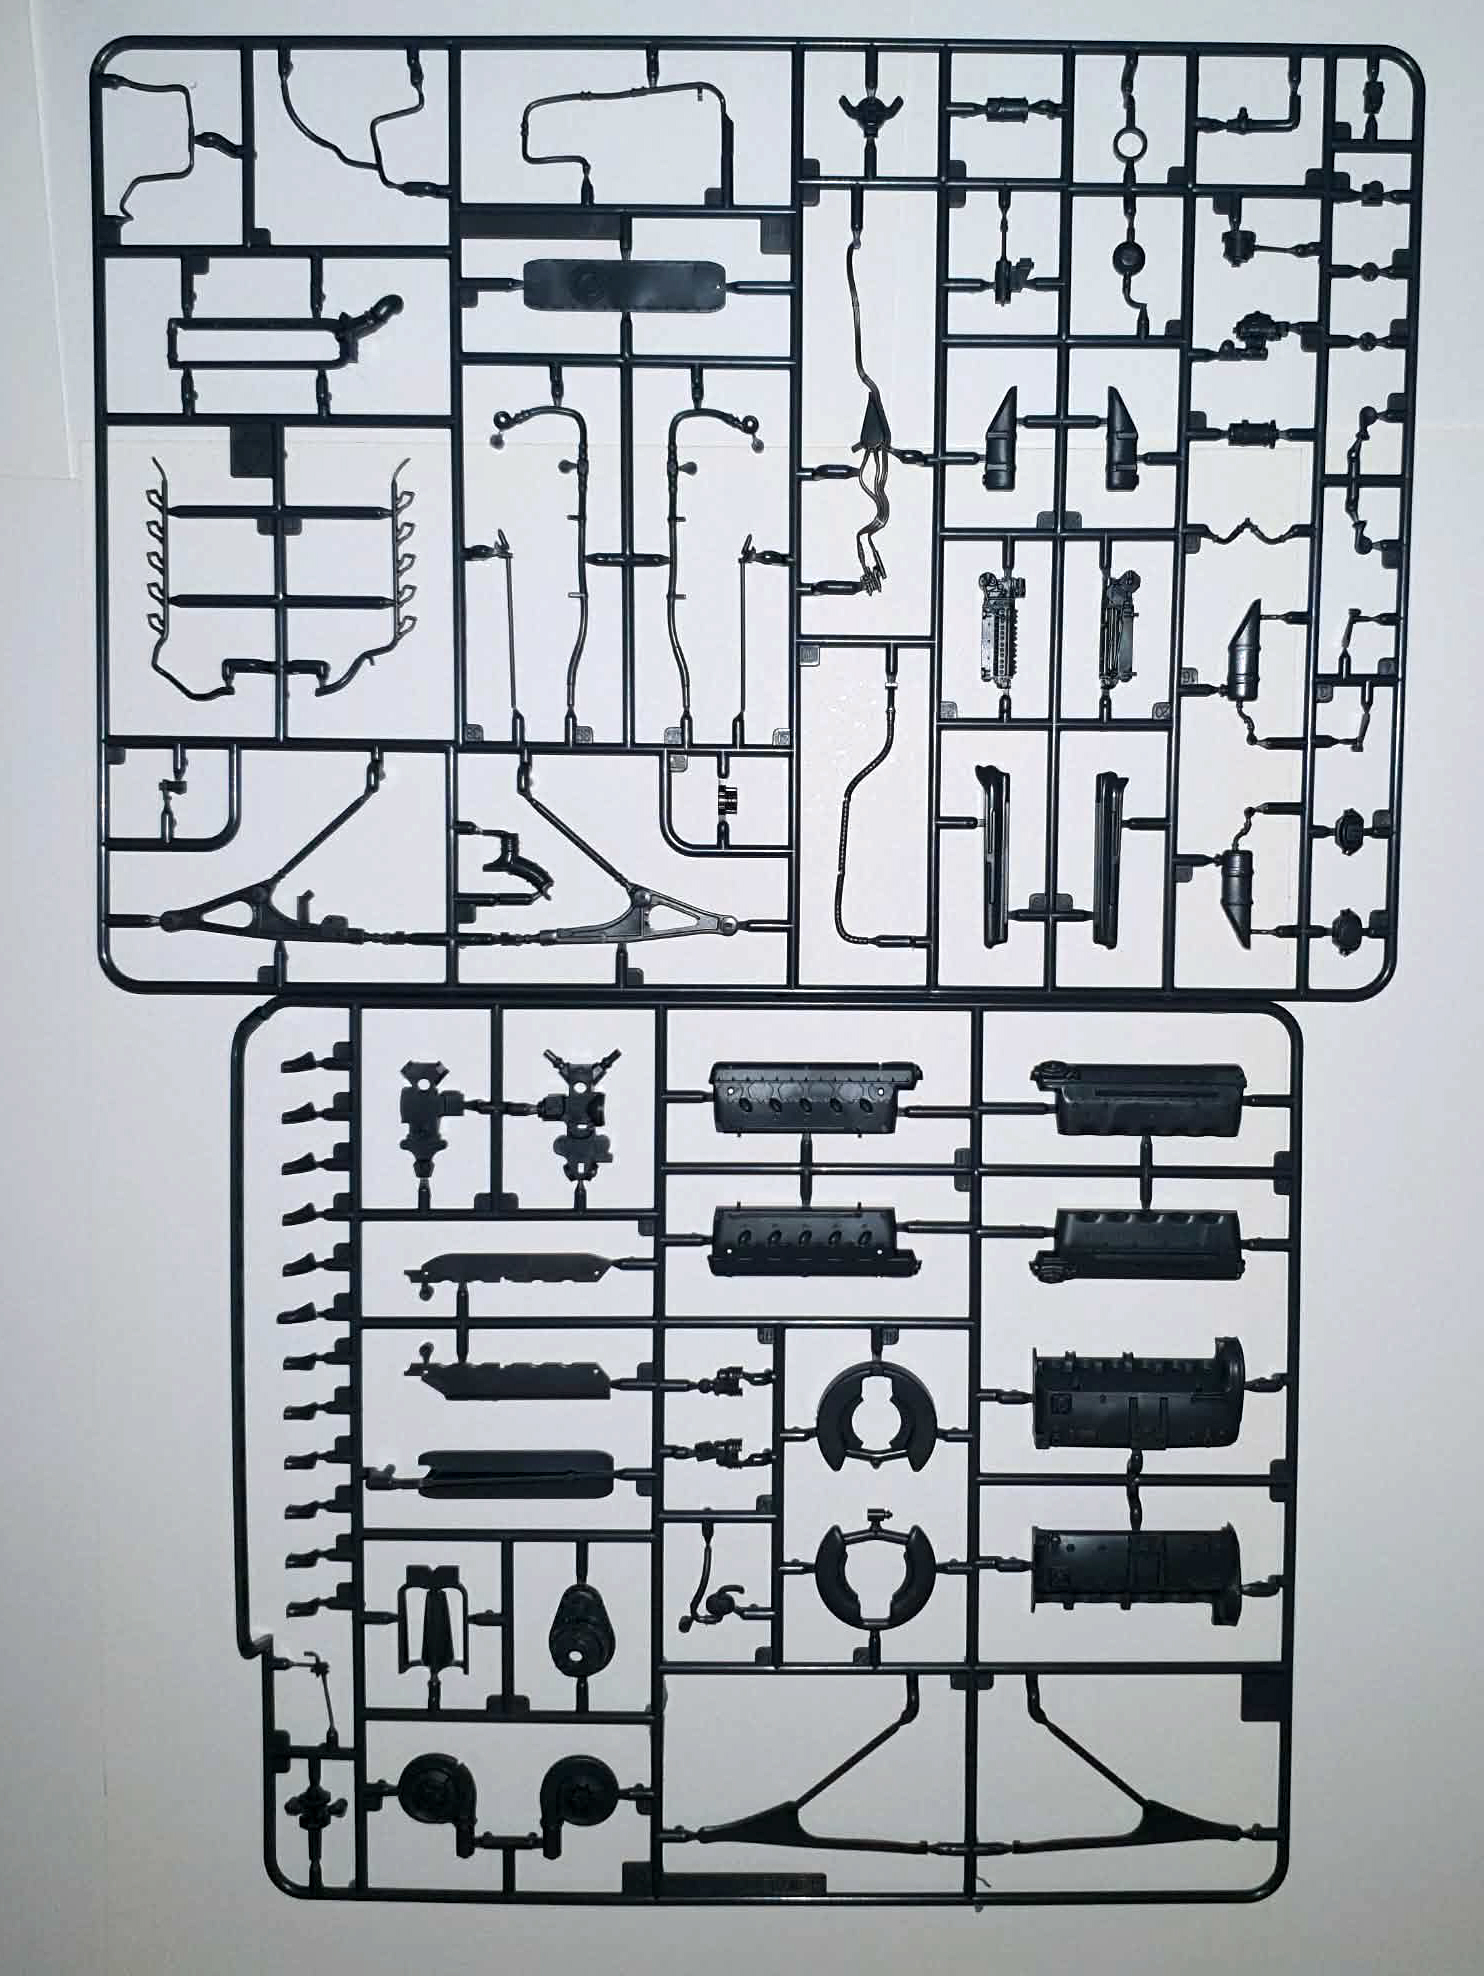
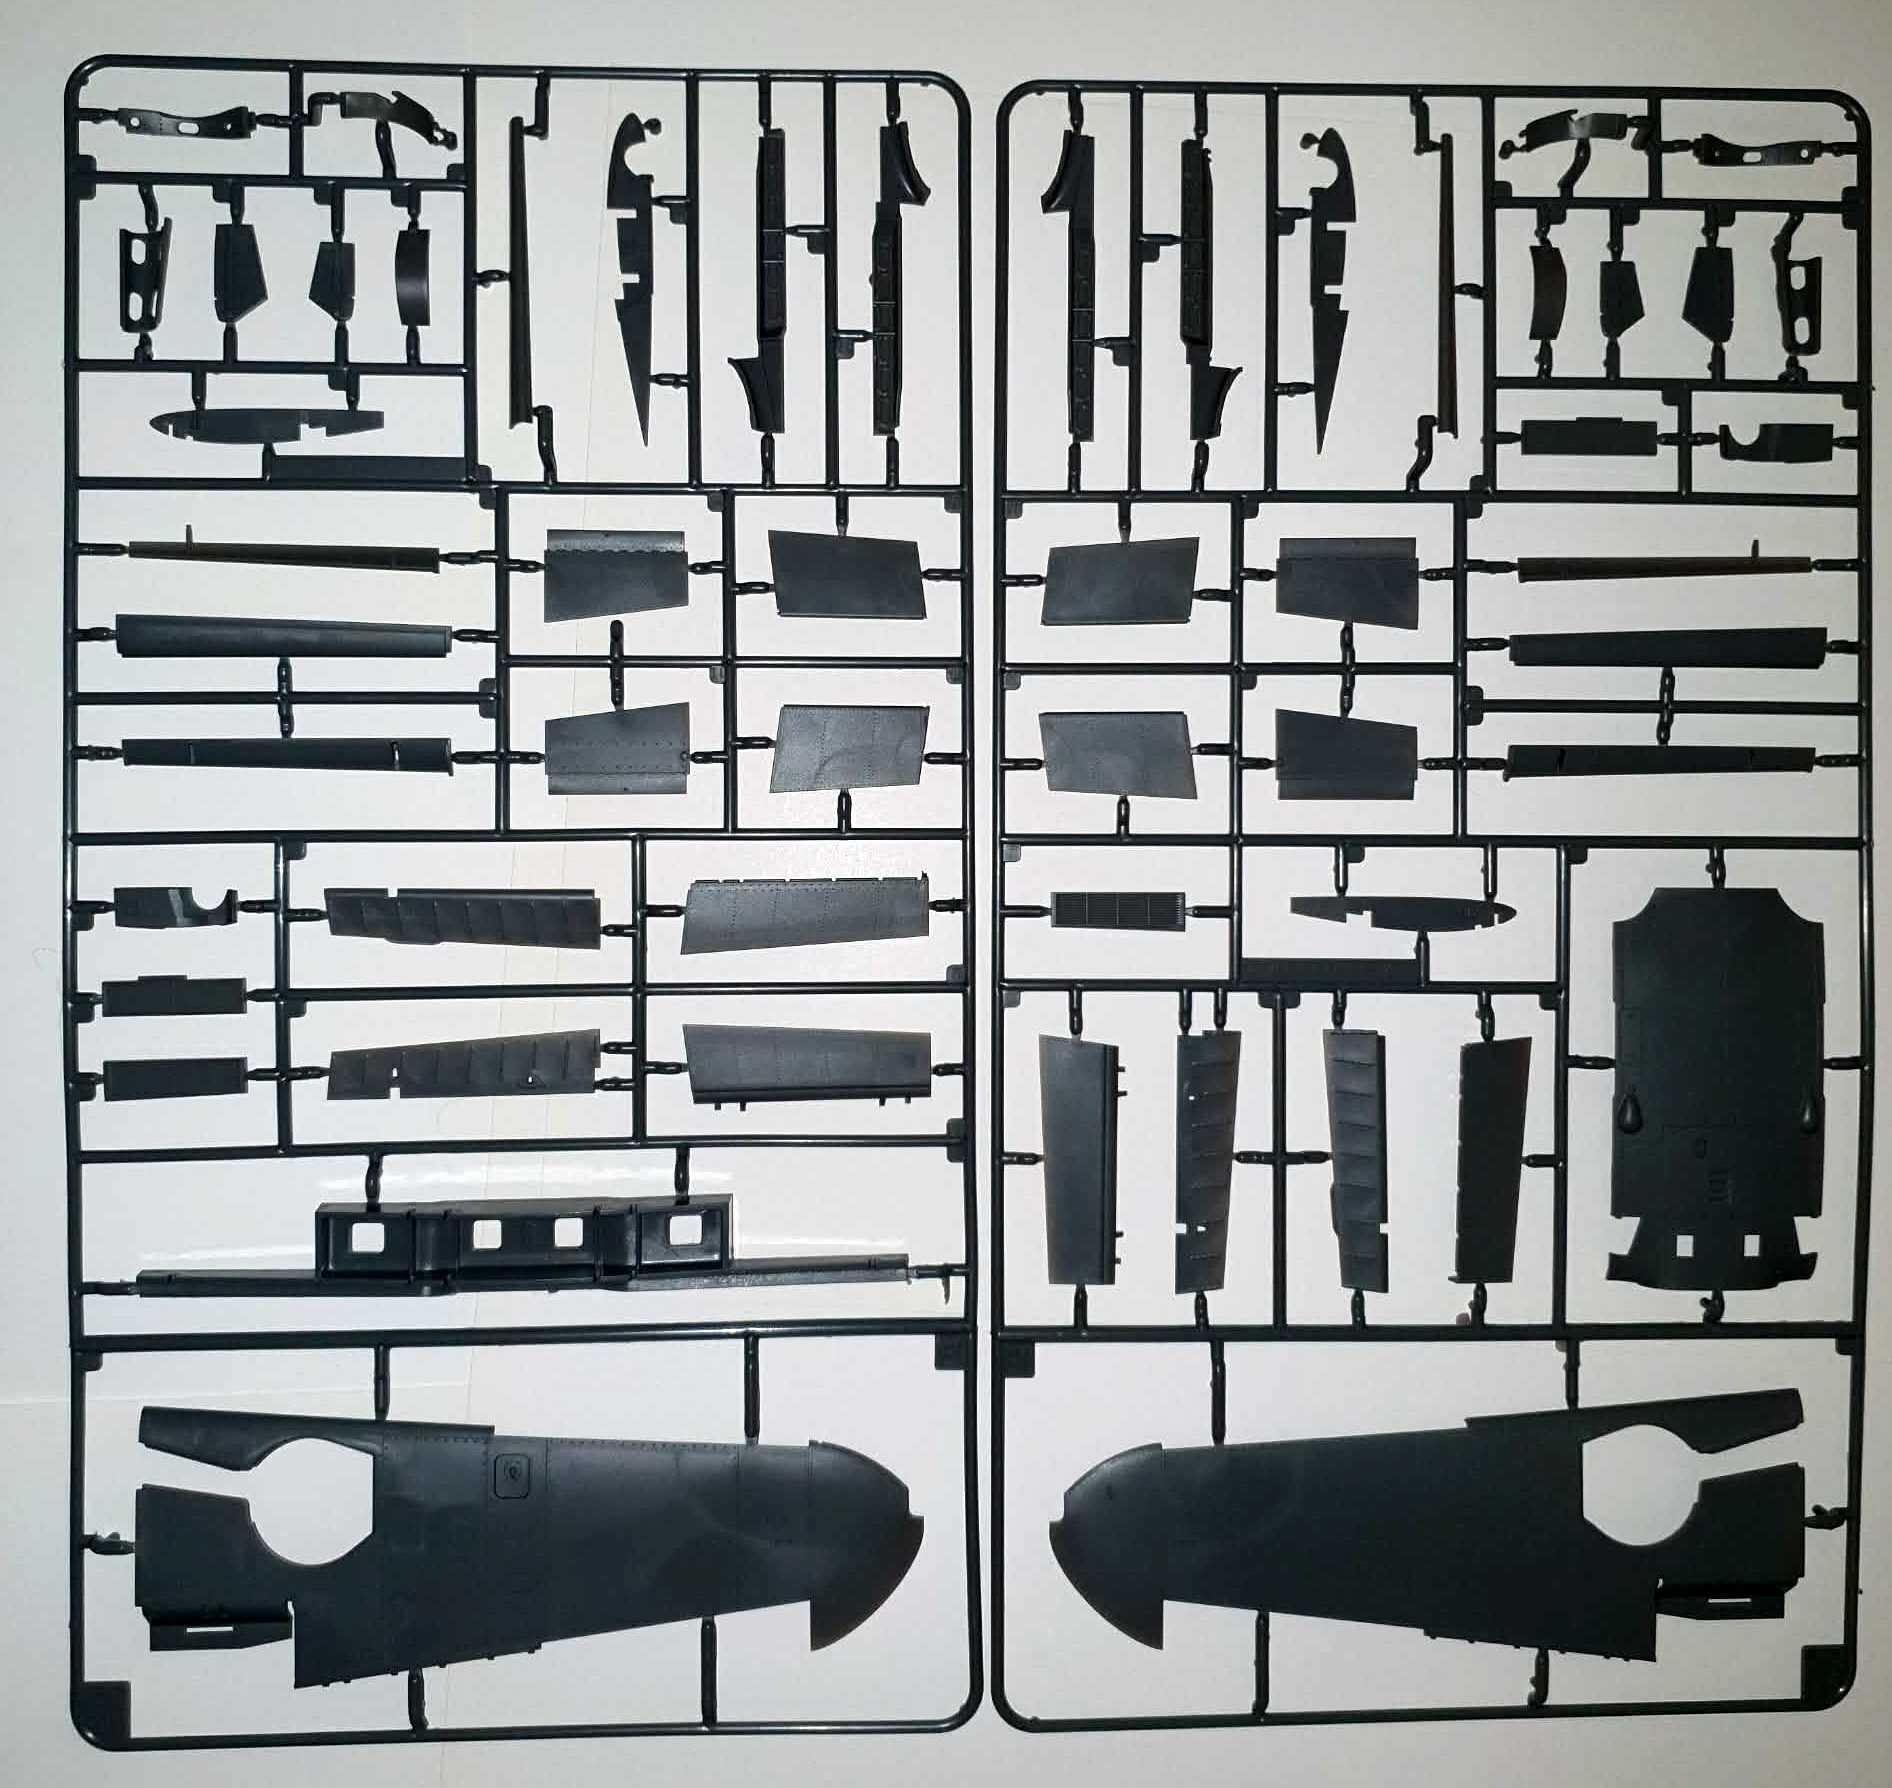
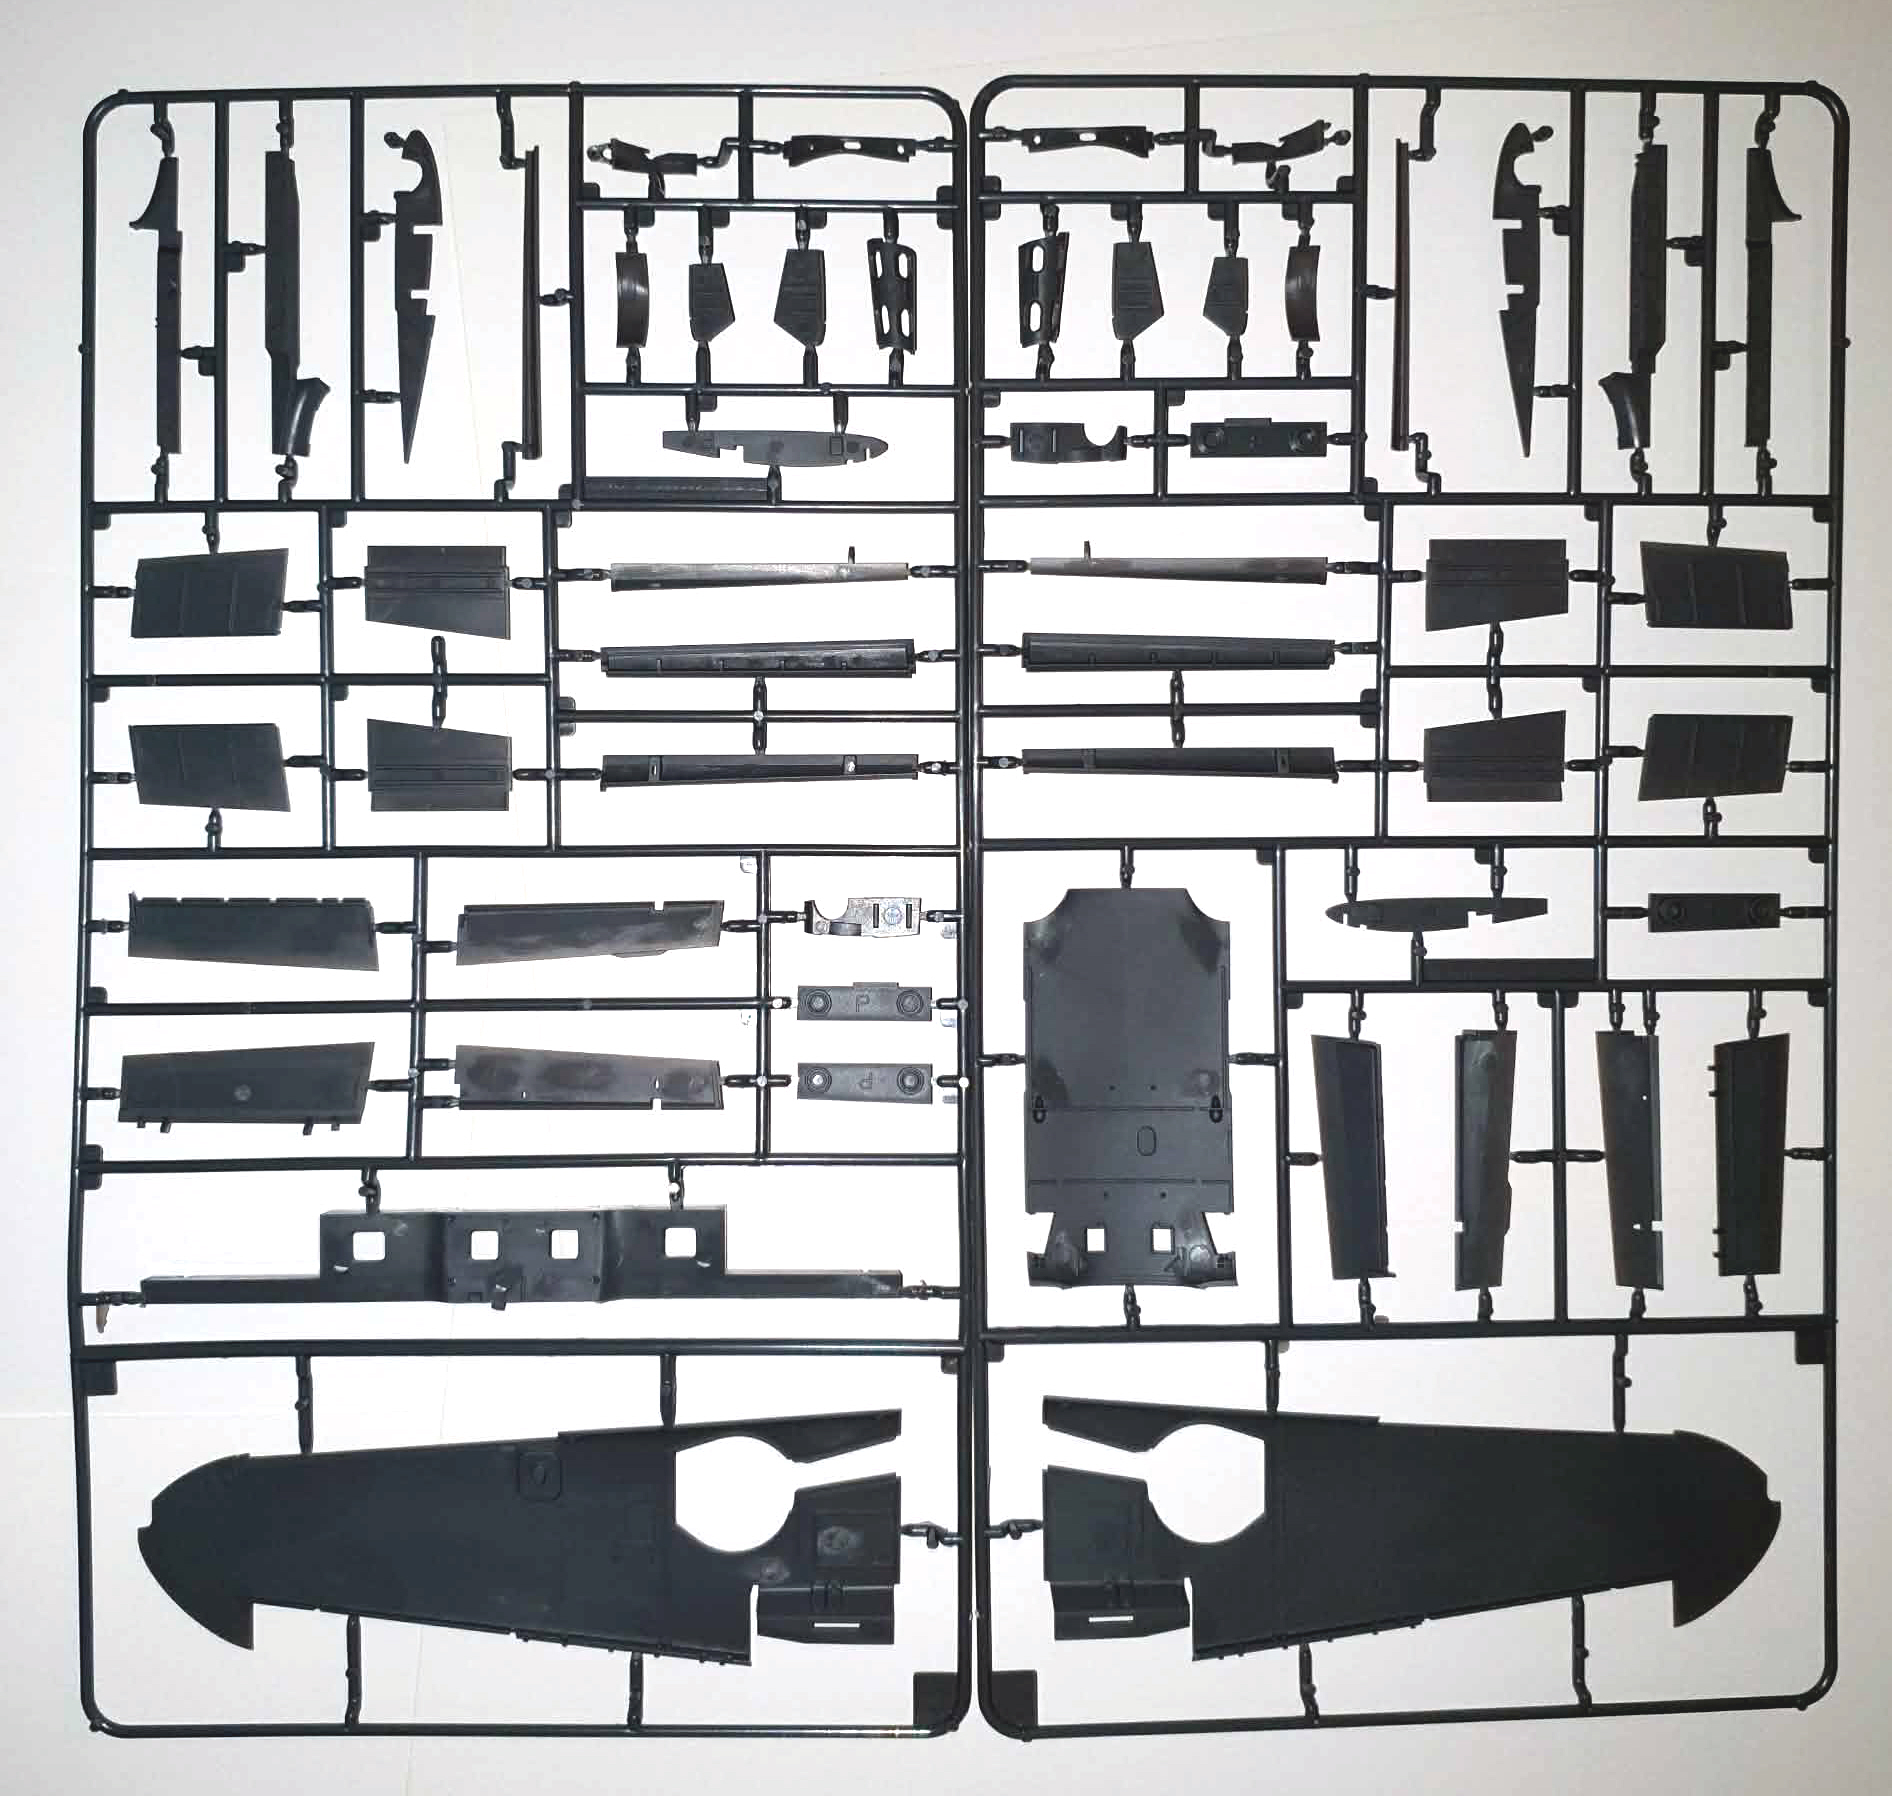
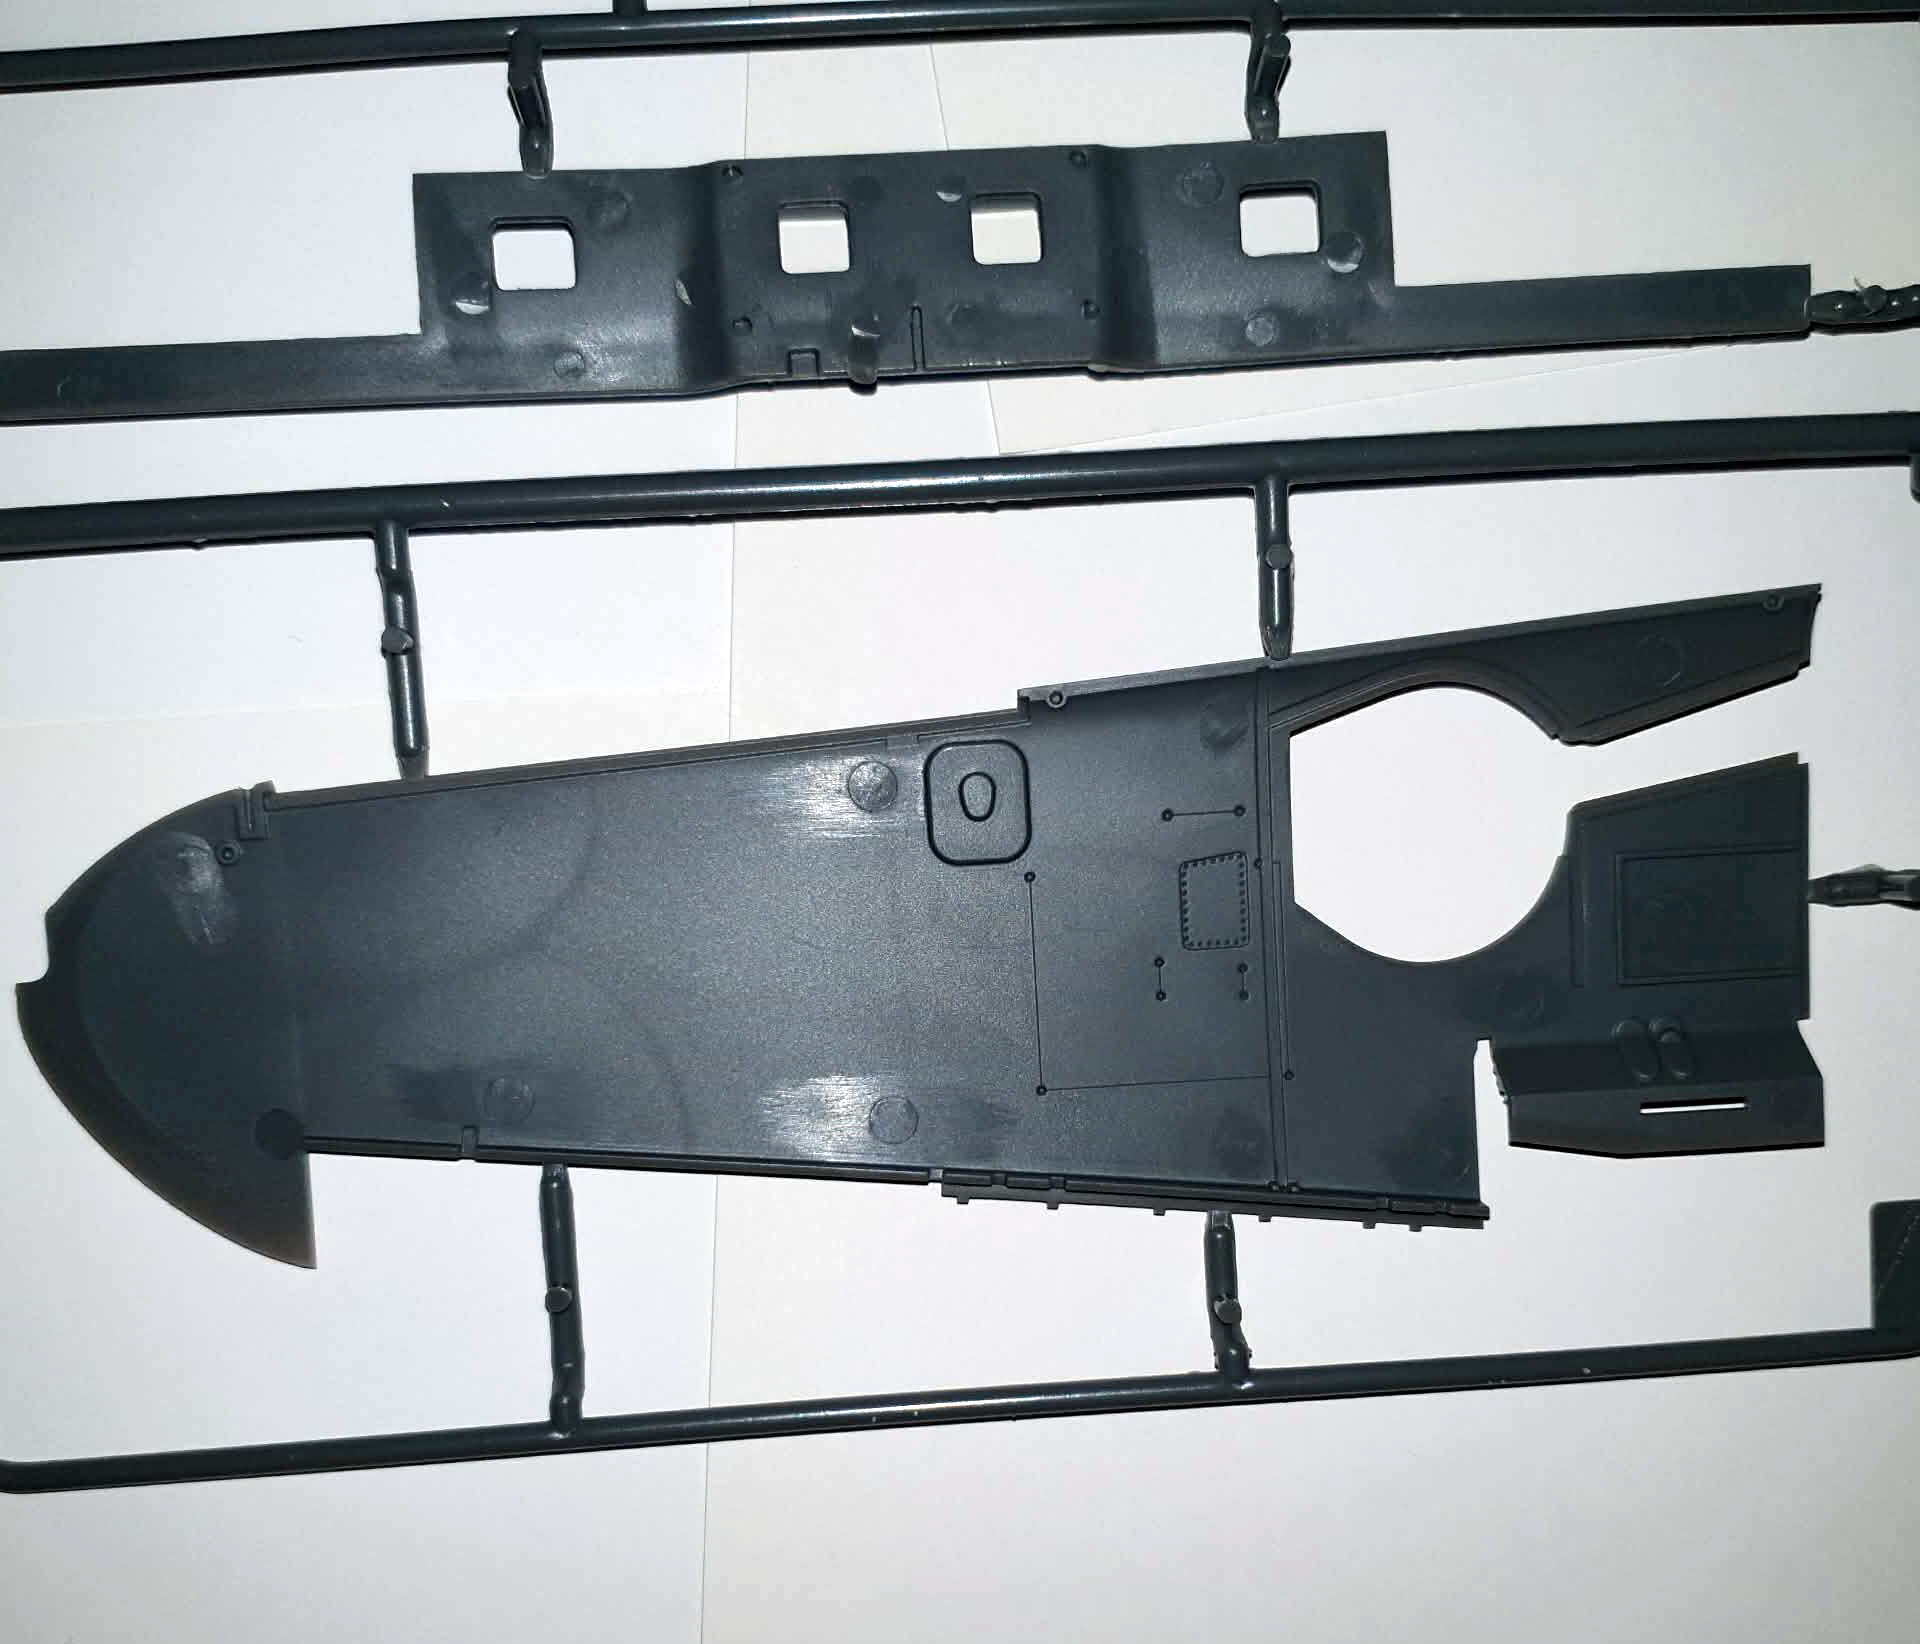
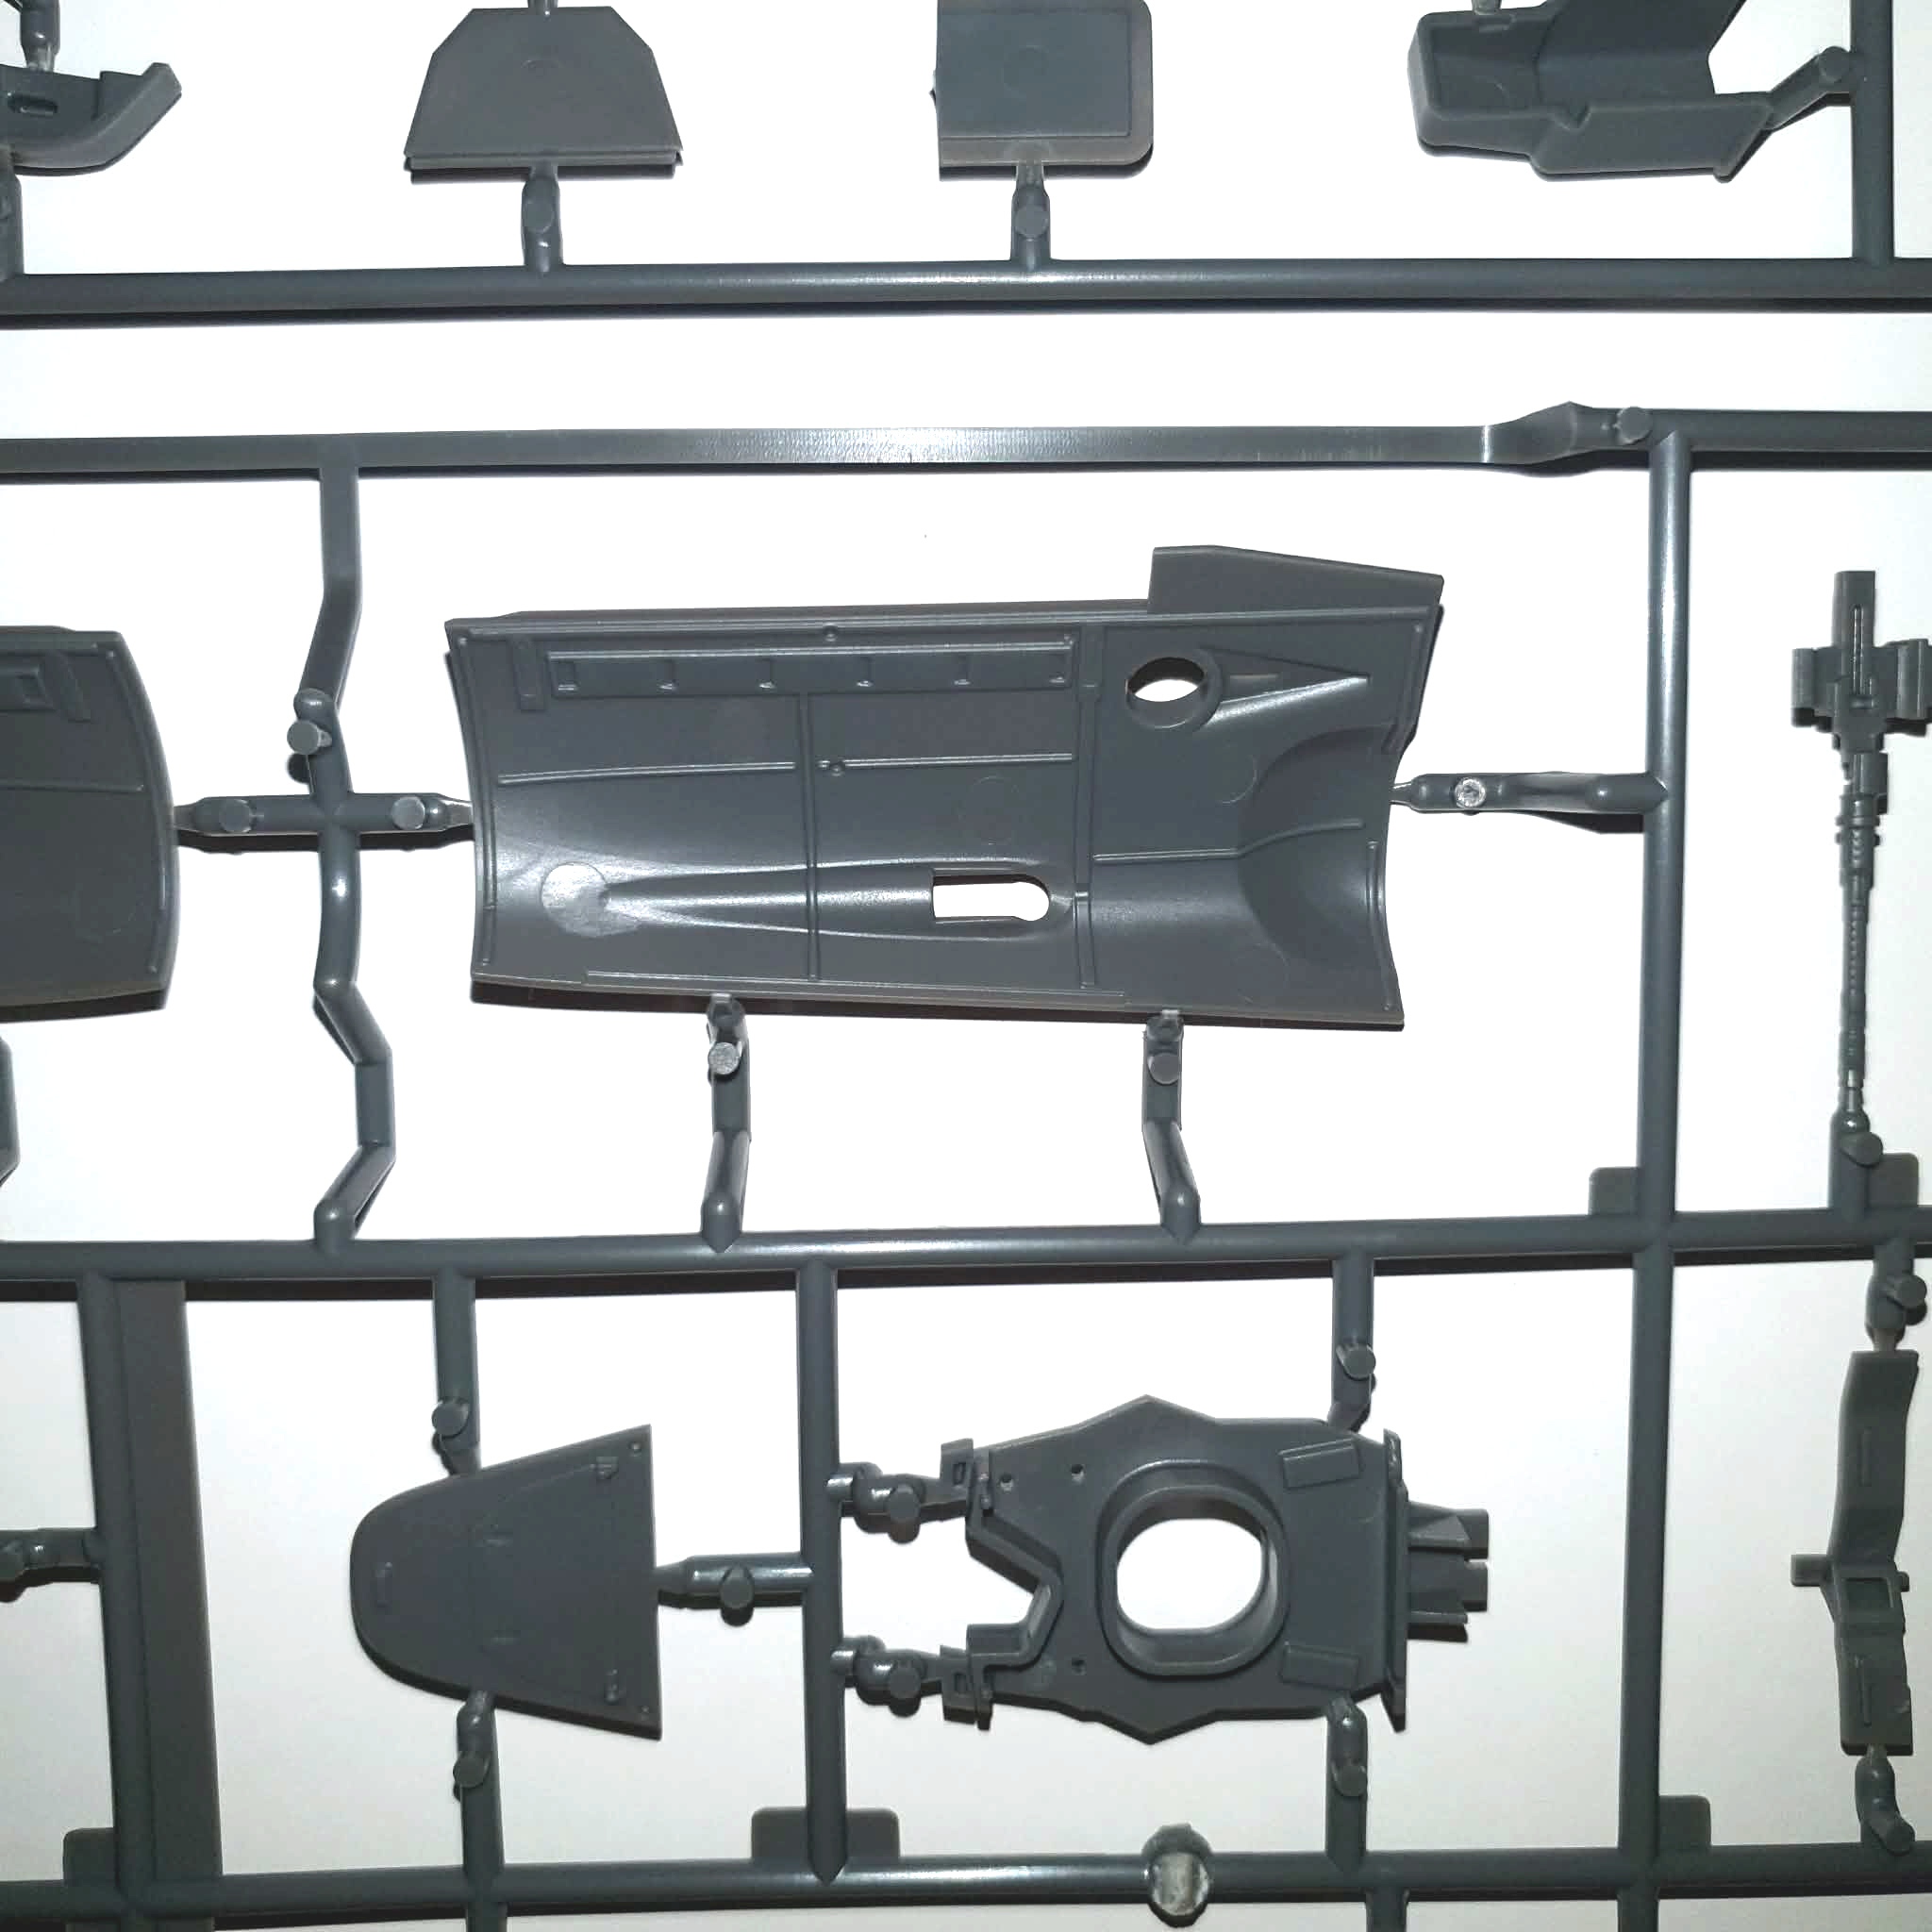
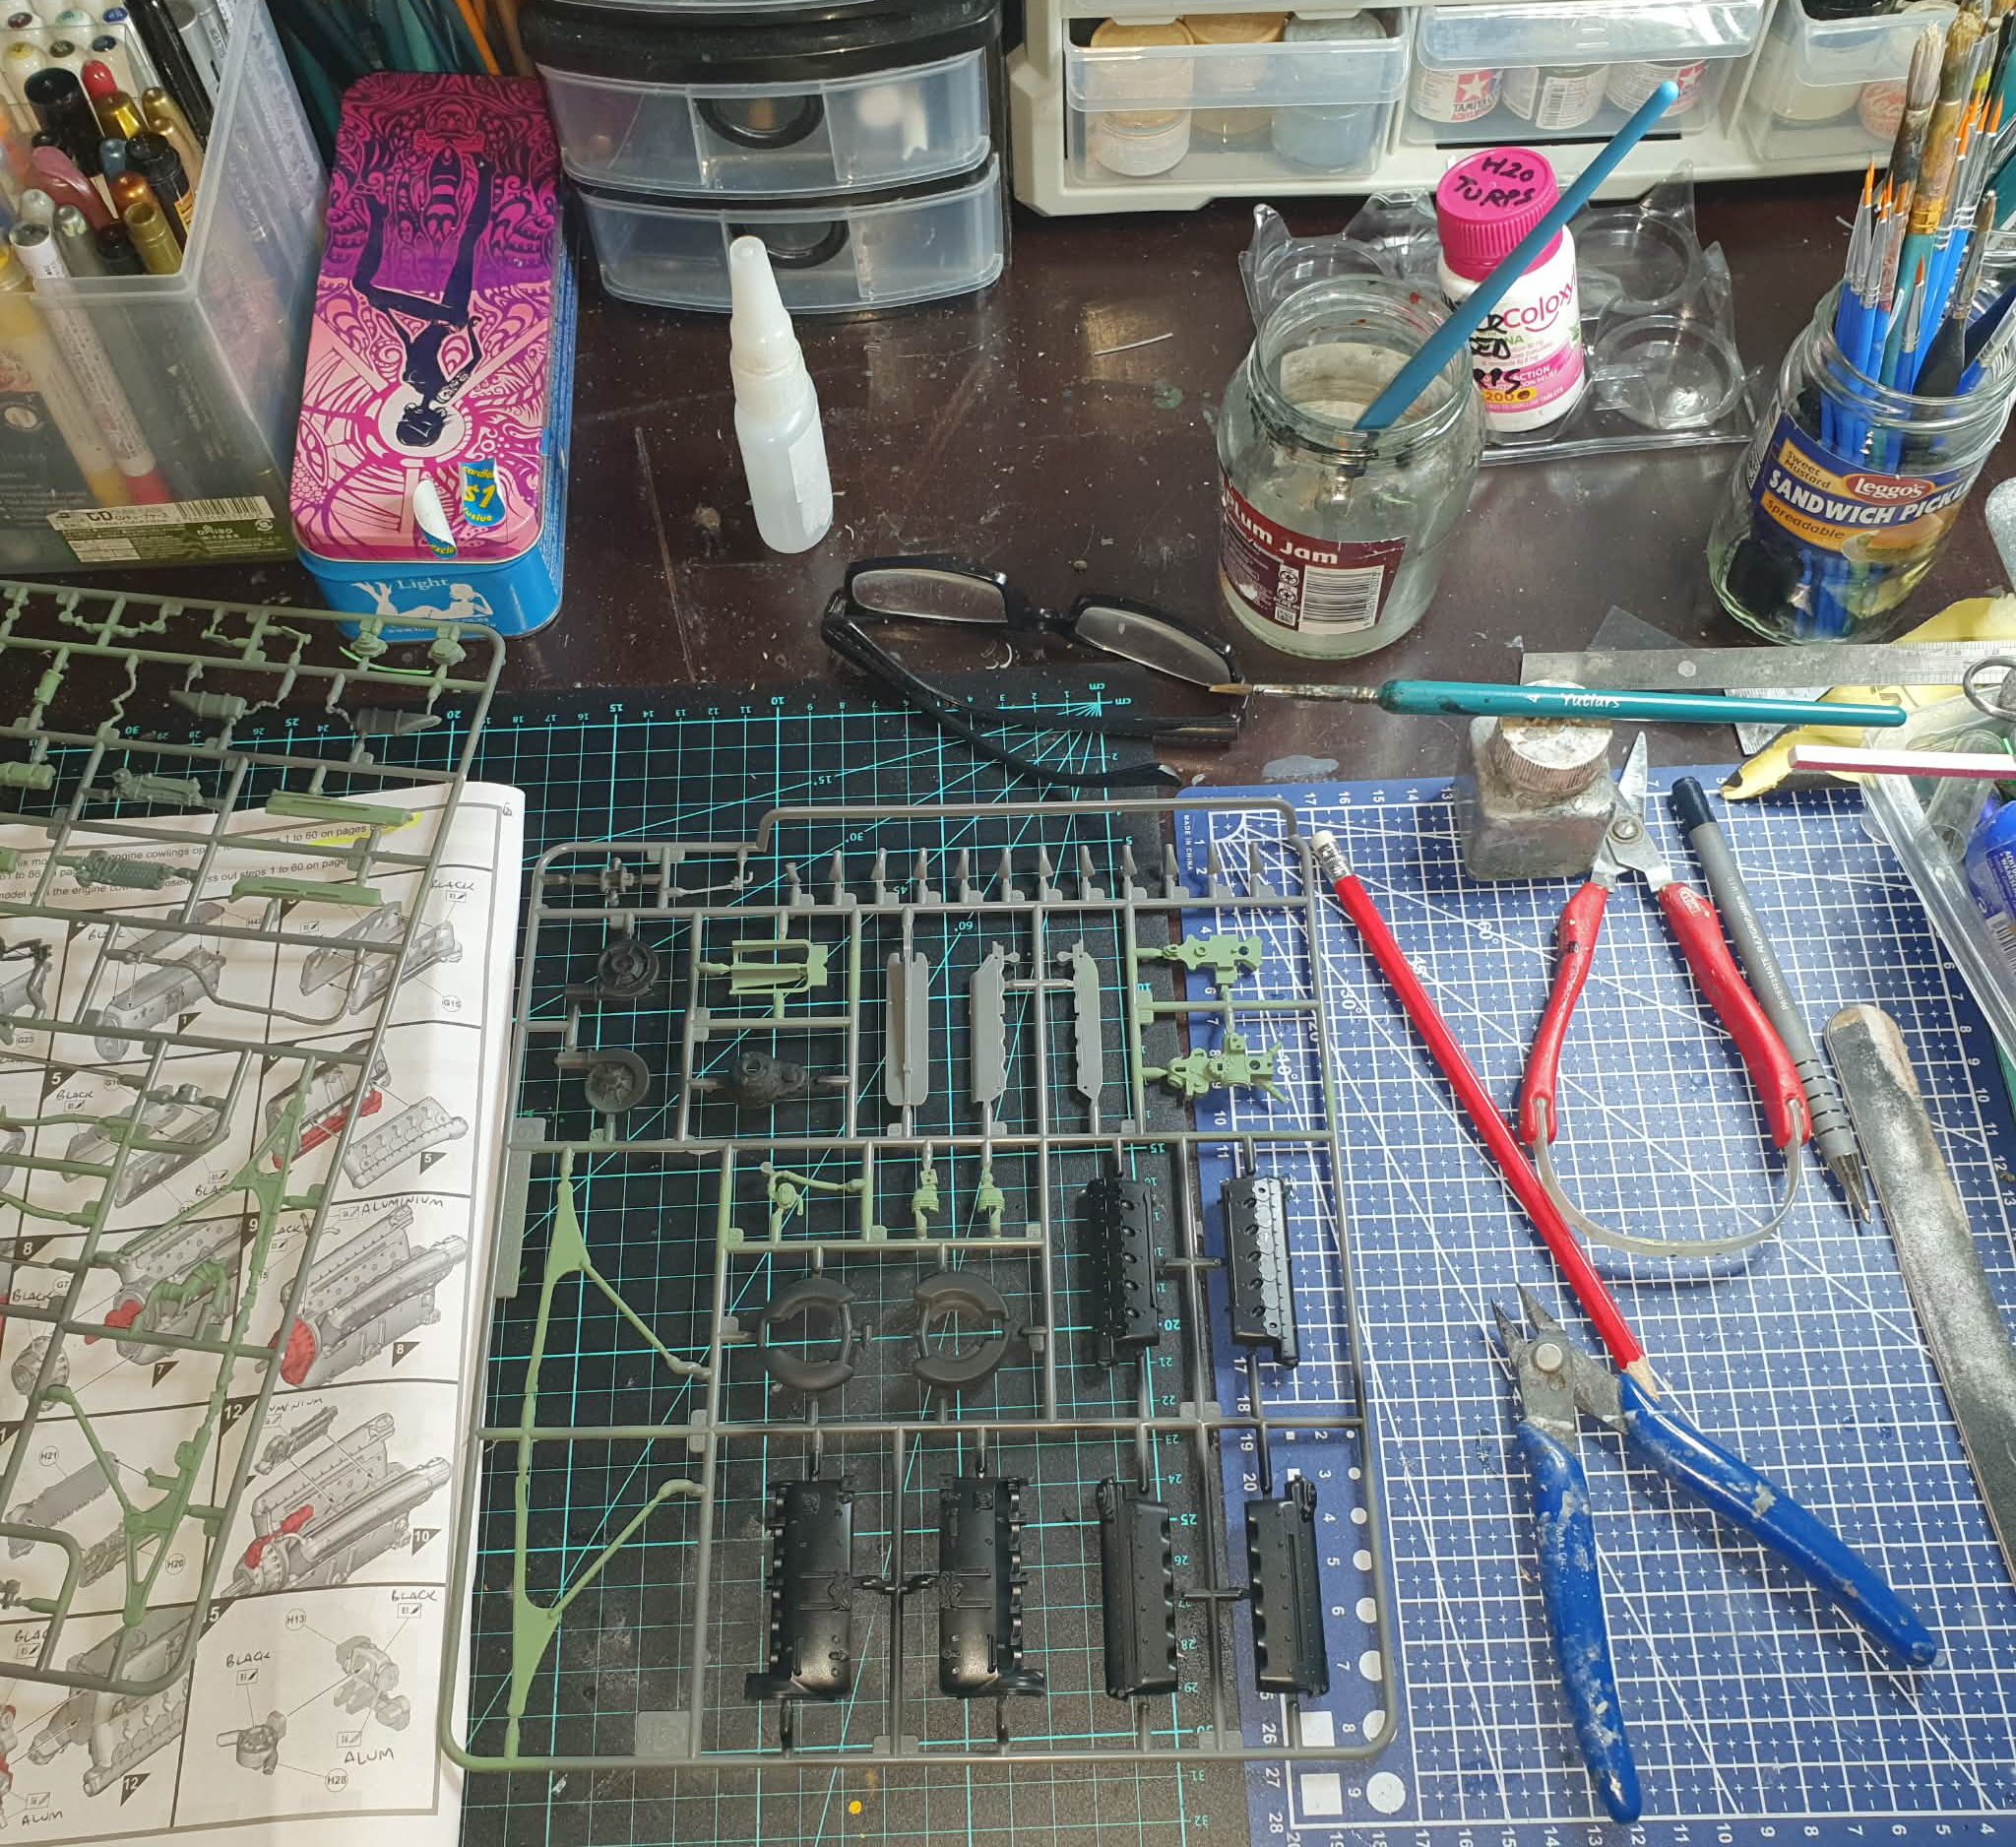
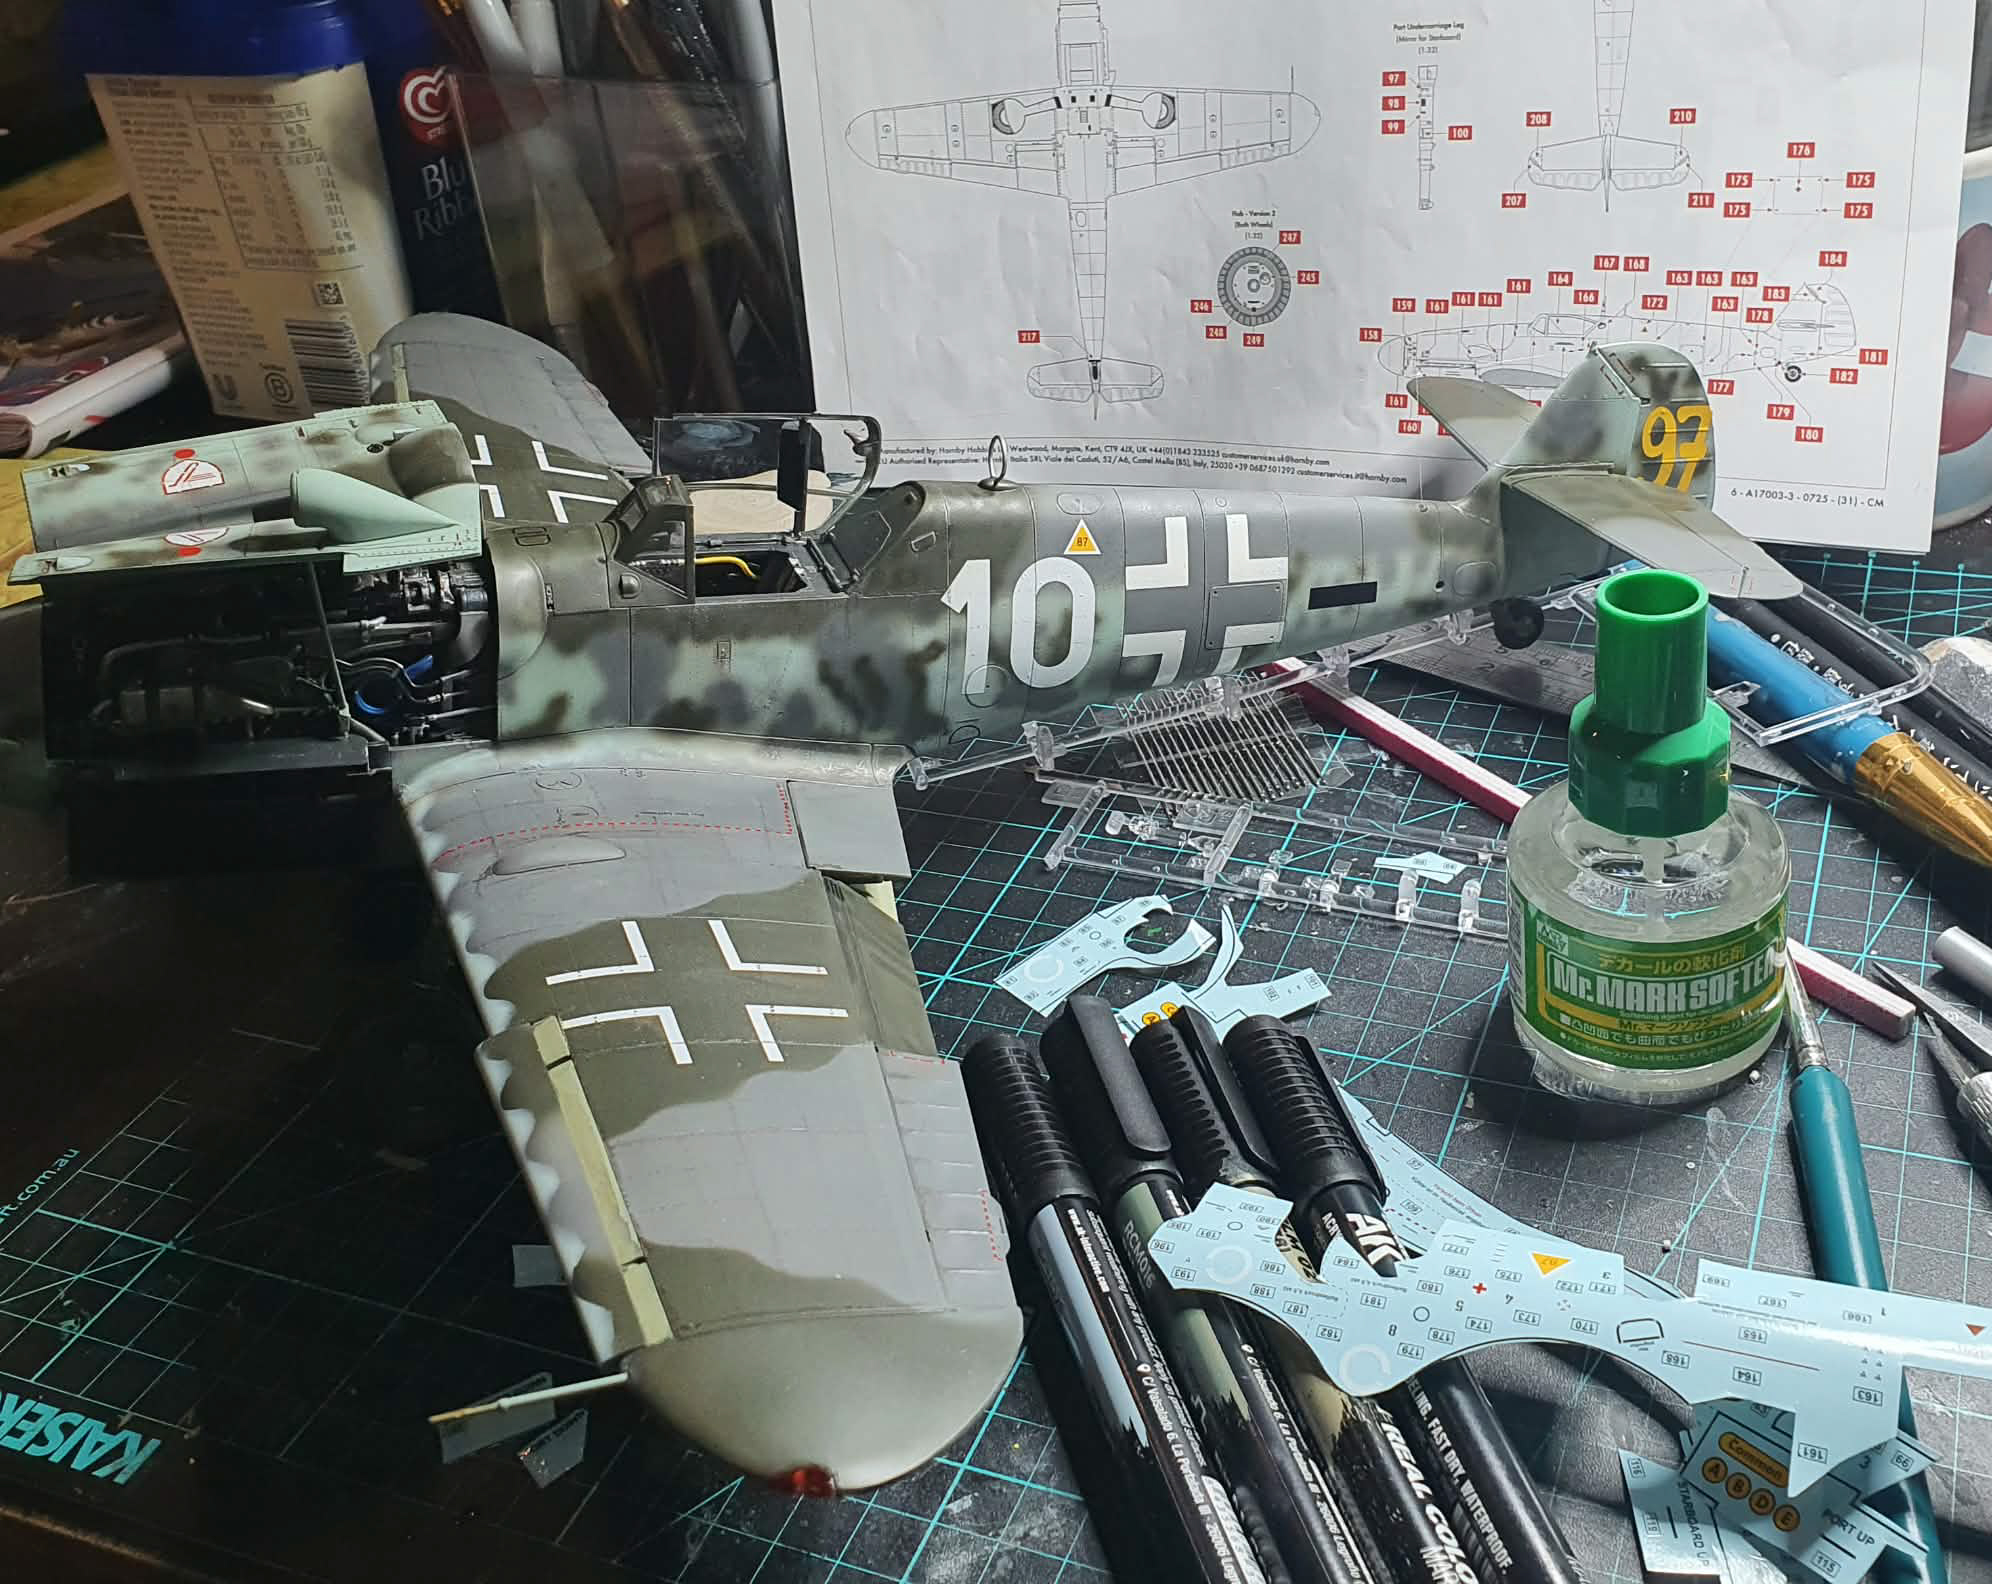
My brief was to build this out of box so here we go, starting with a quick look at the sprues:
There’s a lot here and you can open the photos here to look at moreclosely if you wish.
With a couple of options there’s going to be spares which is good news if you’re harbouring a Trumpeter 1/24 Bf109 as there’ll be bits you can substitute – and I fully intend to do that in a future blog with my stash.
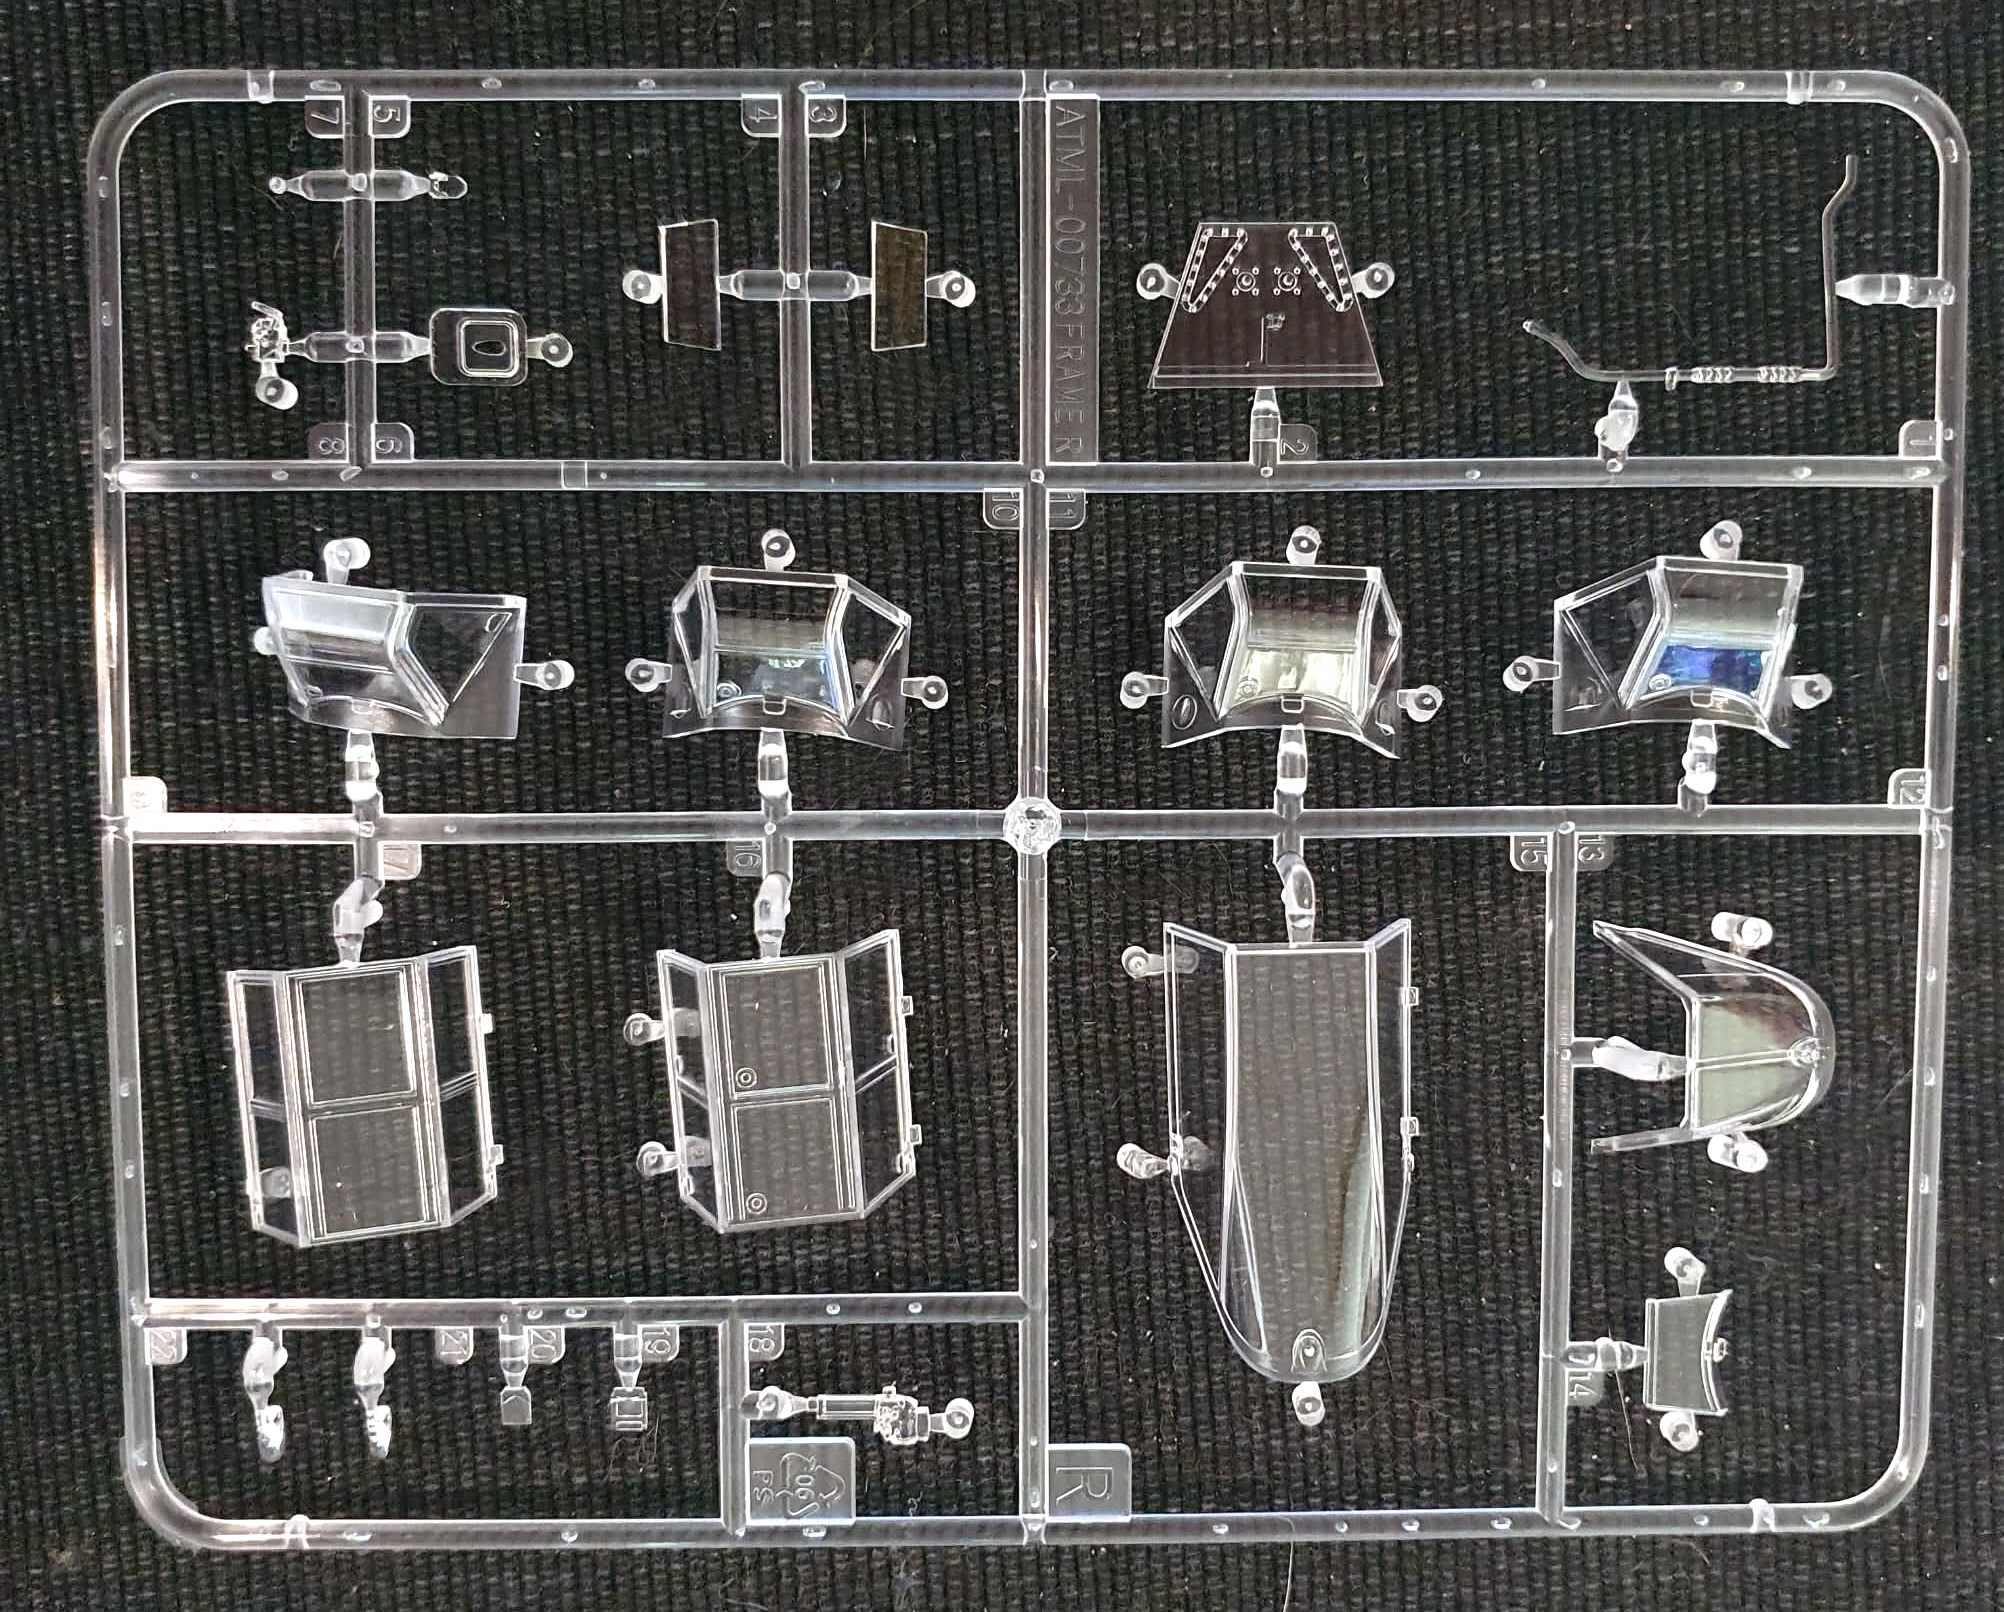

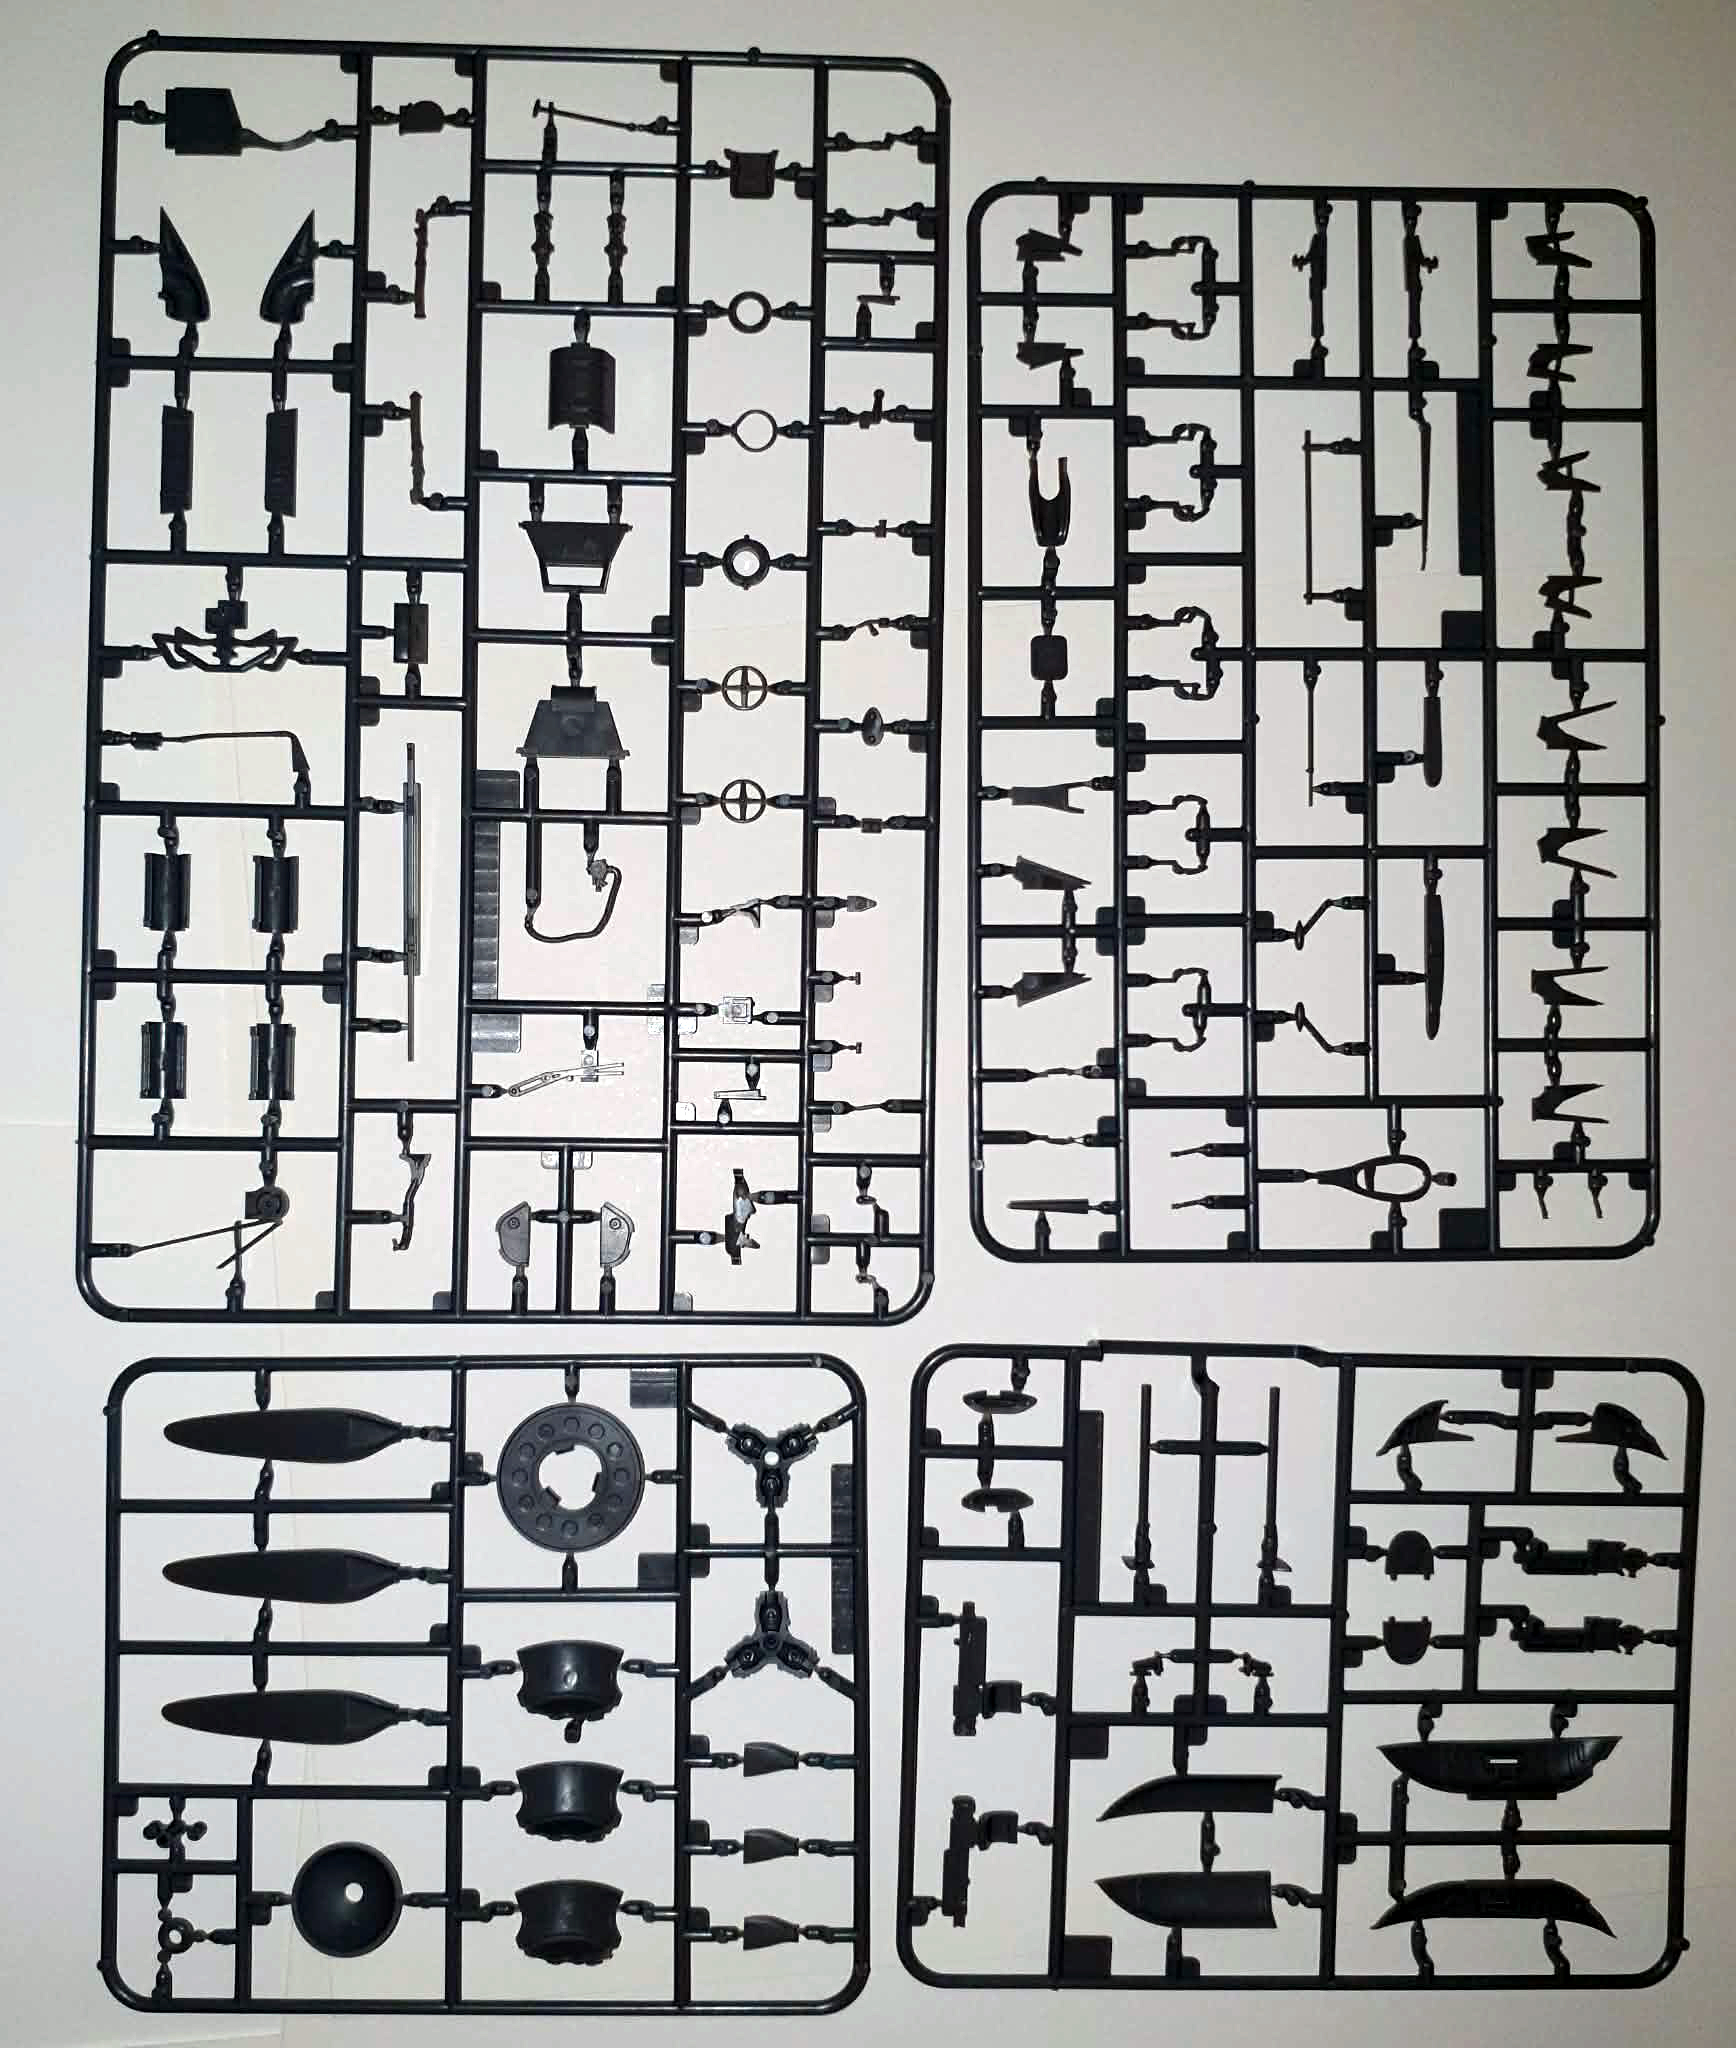
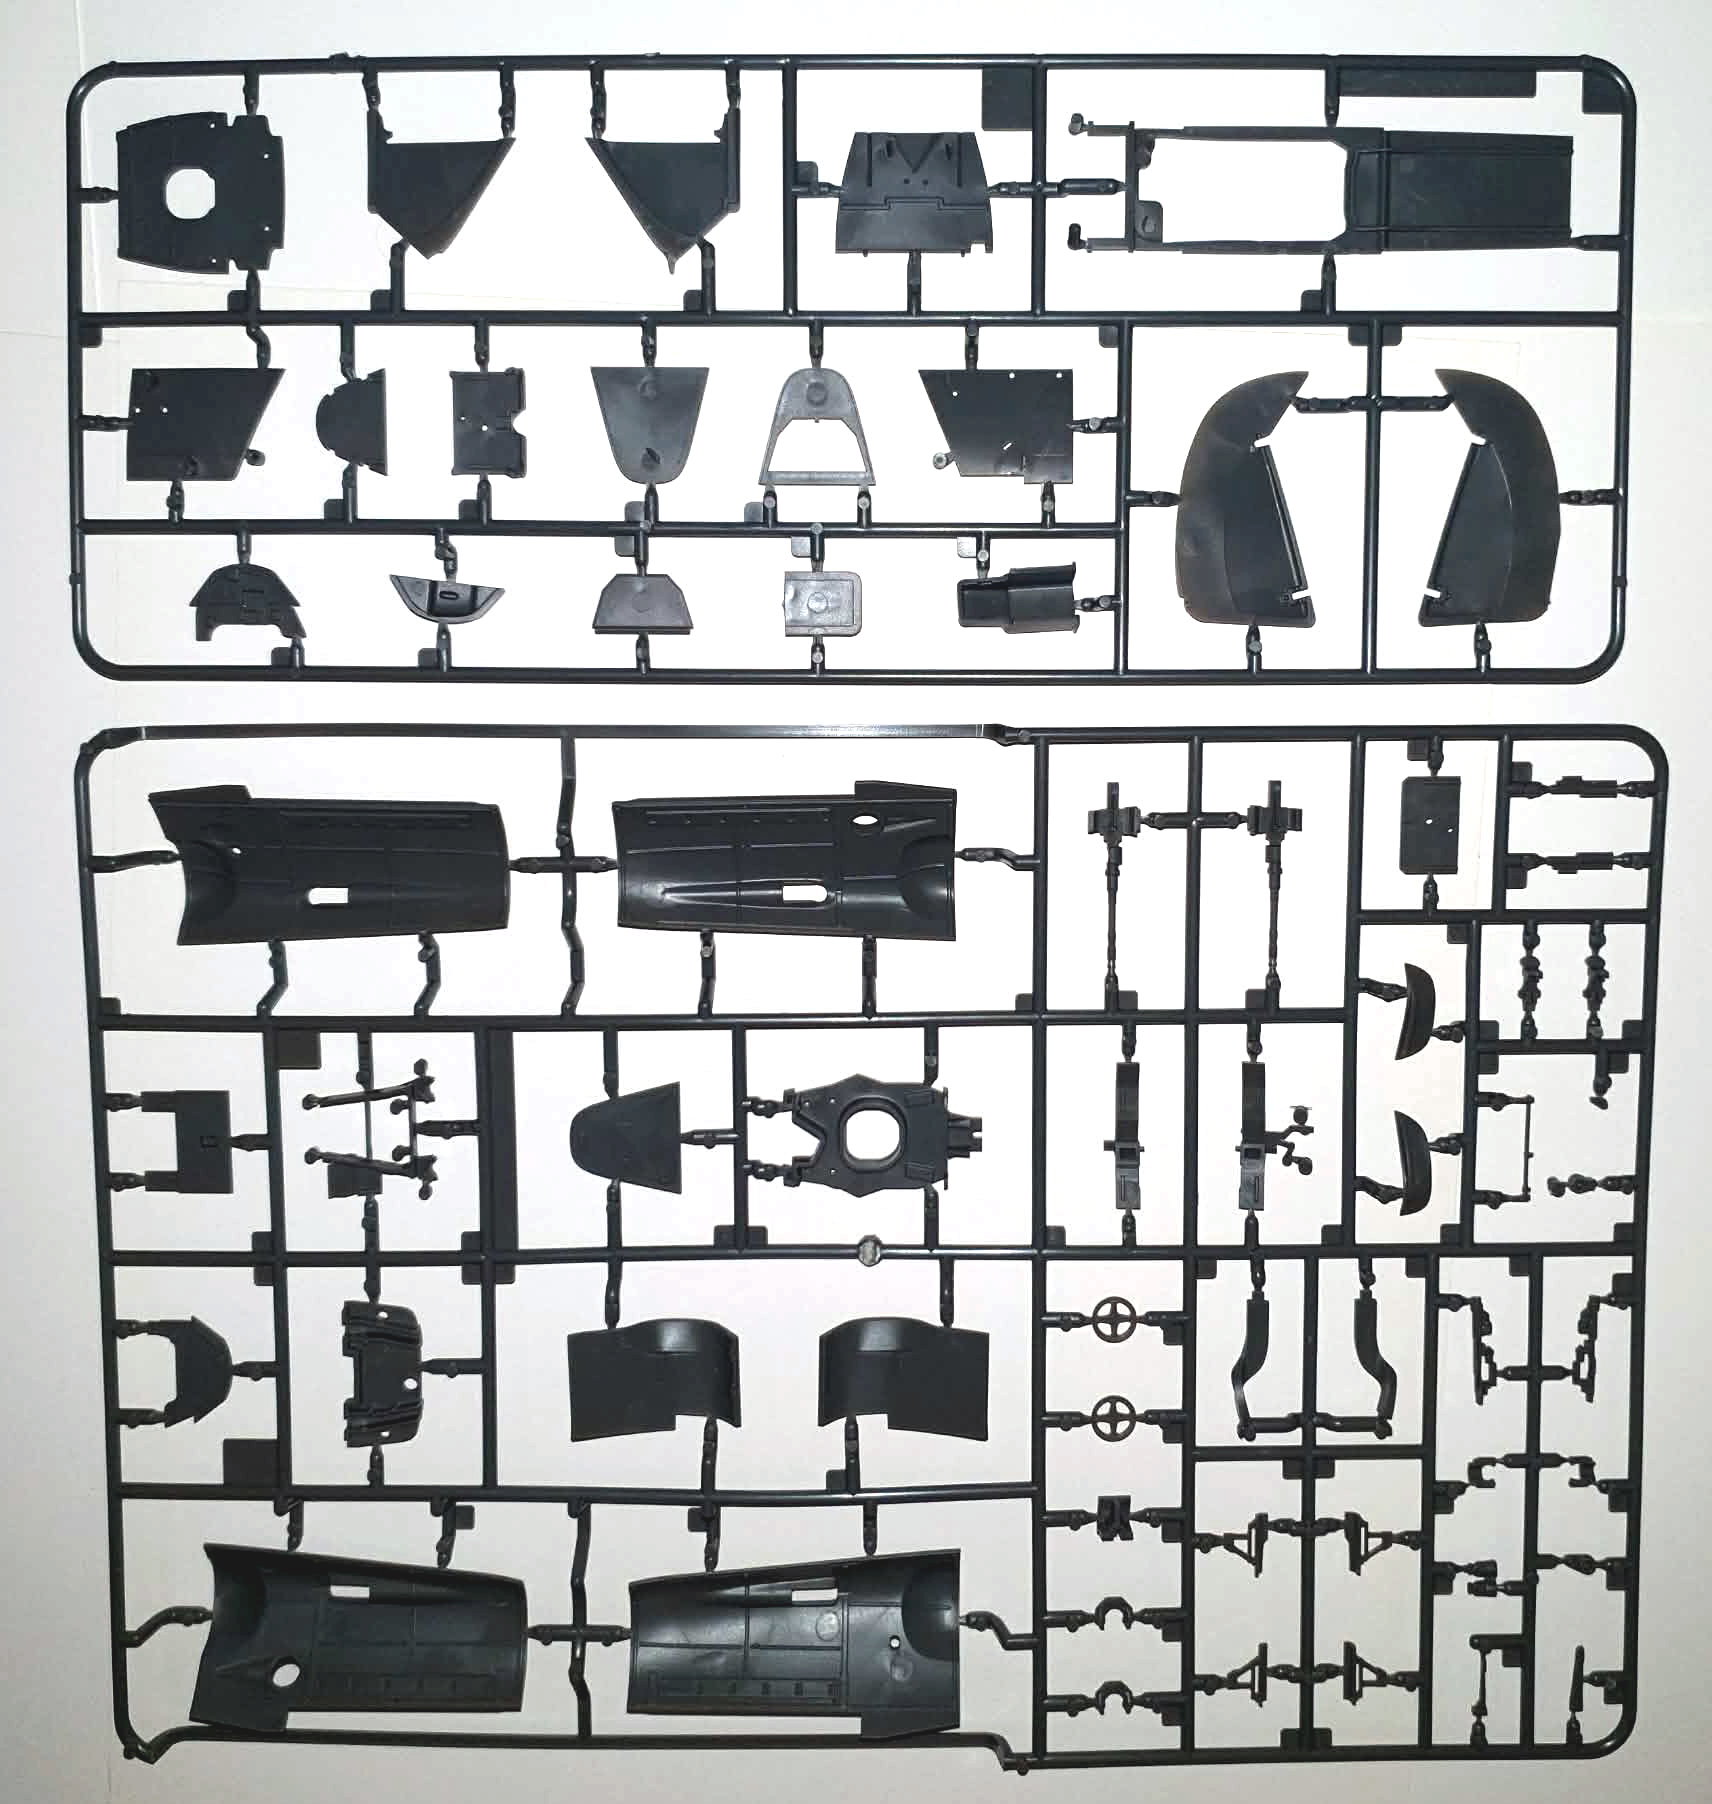
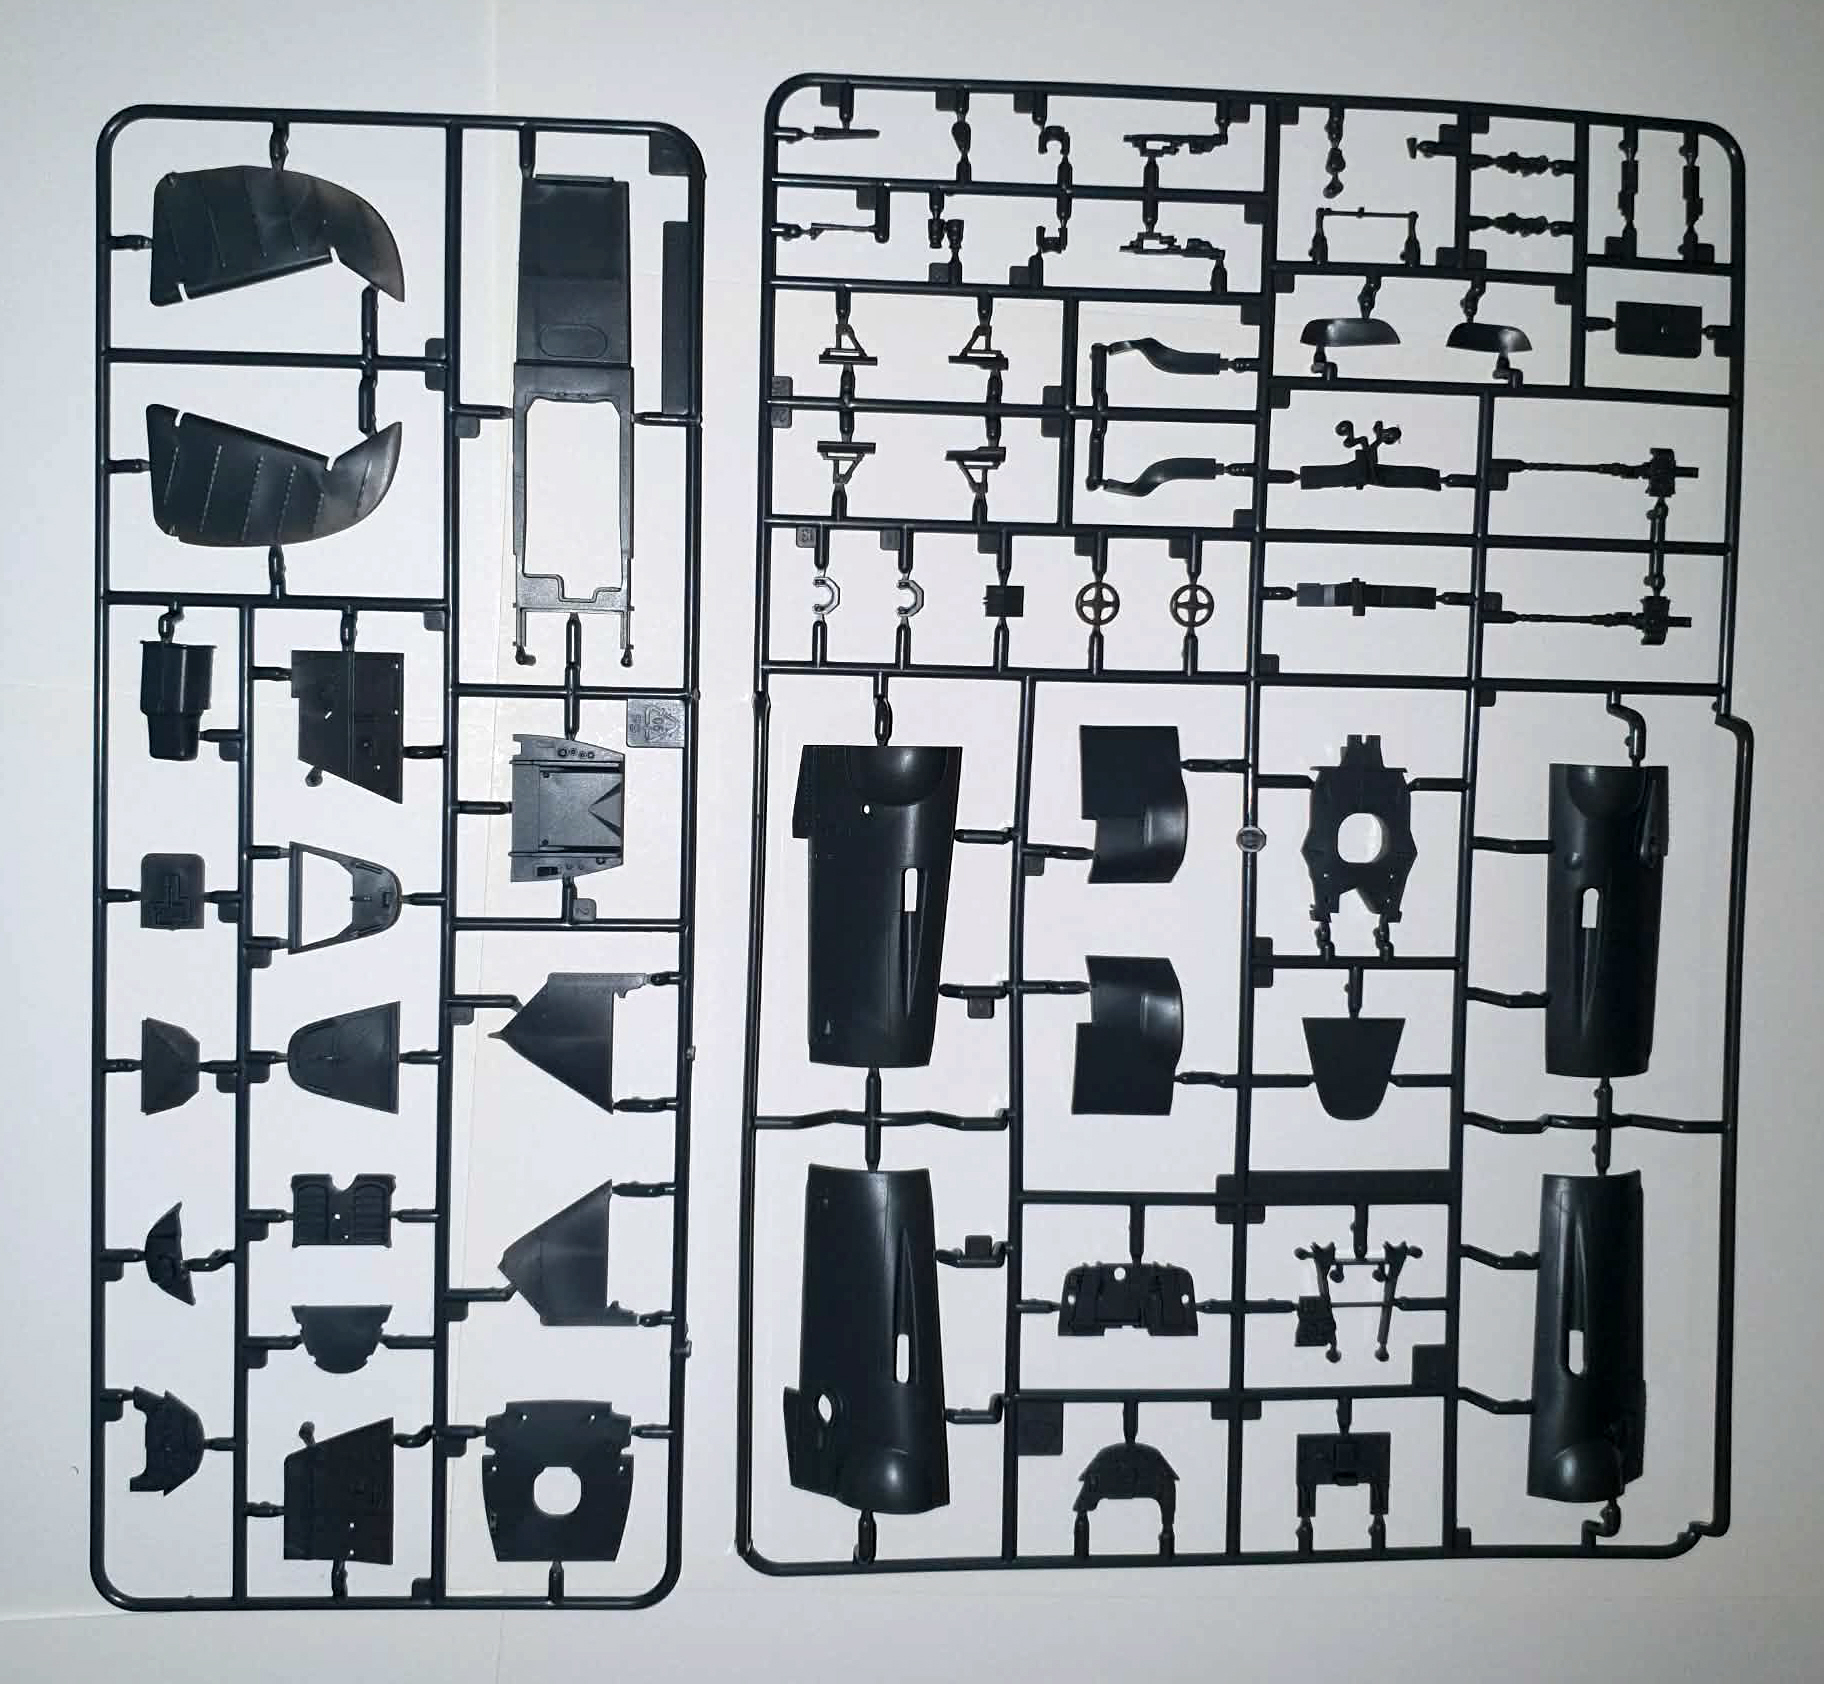
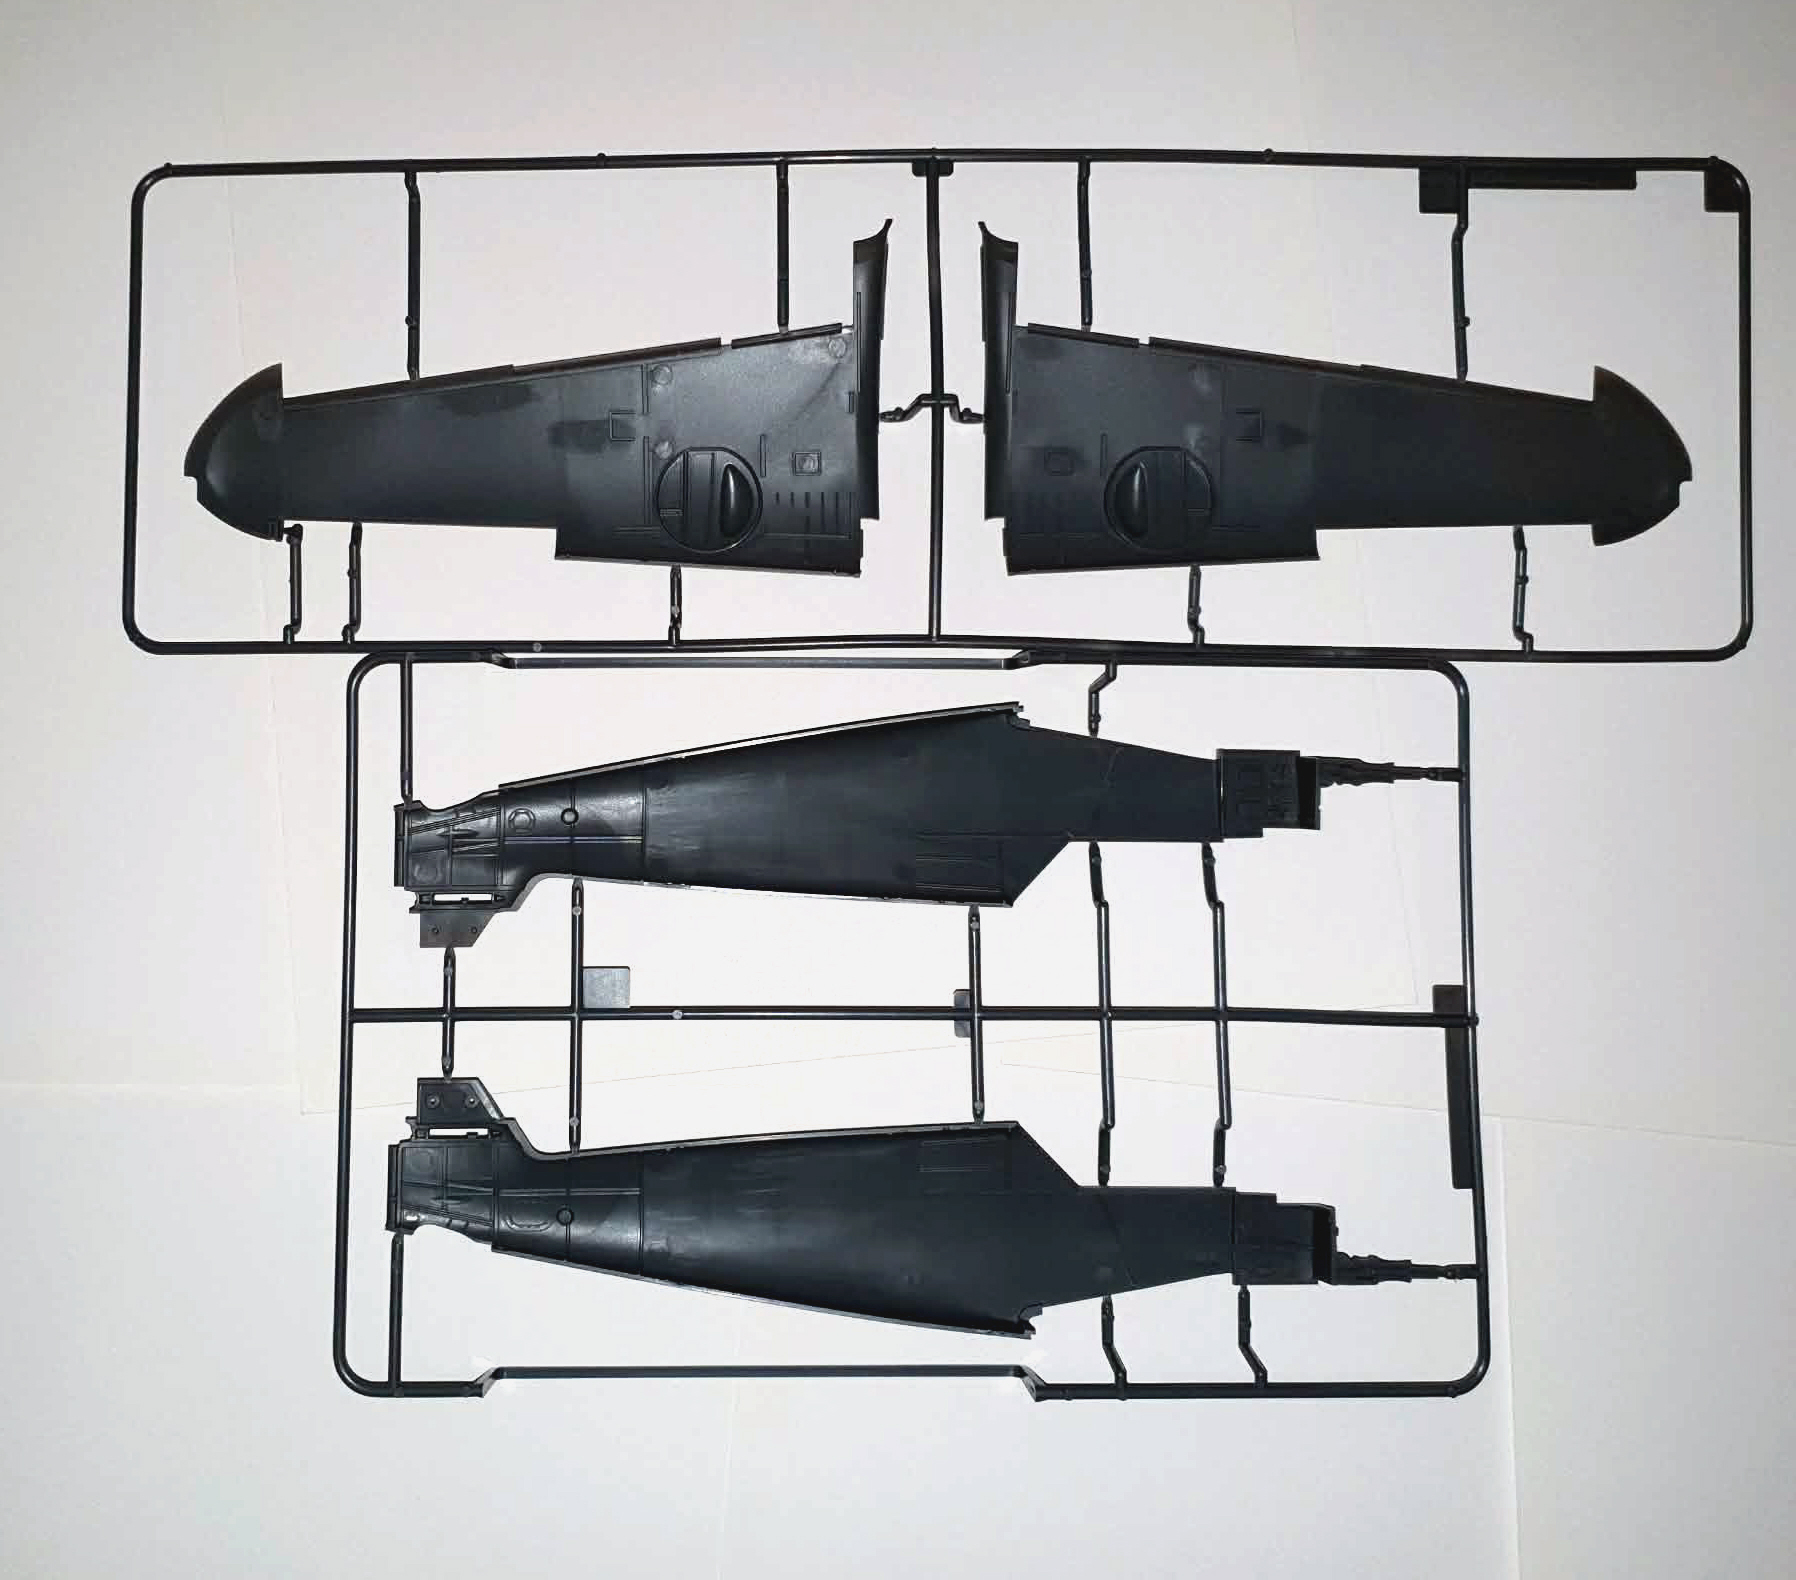

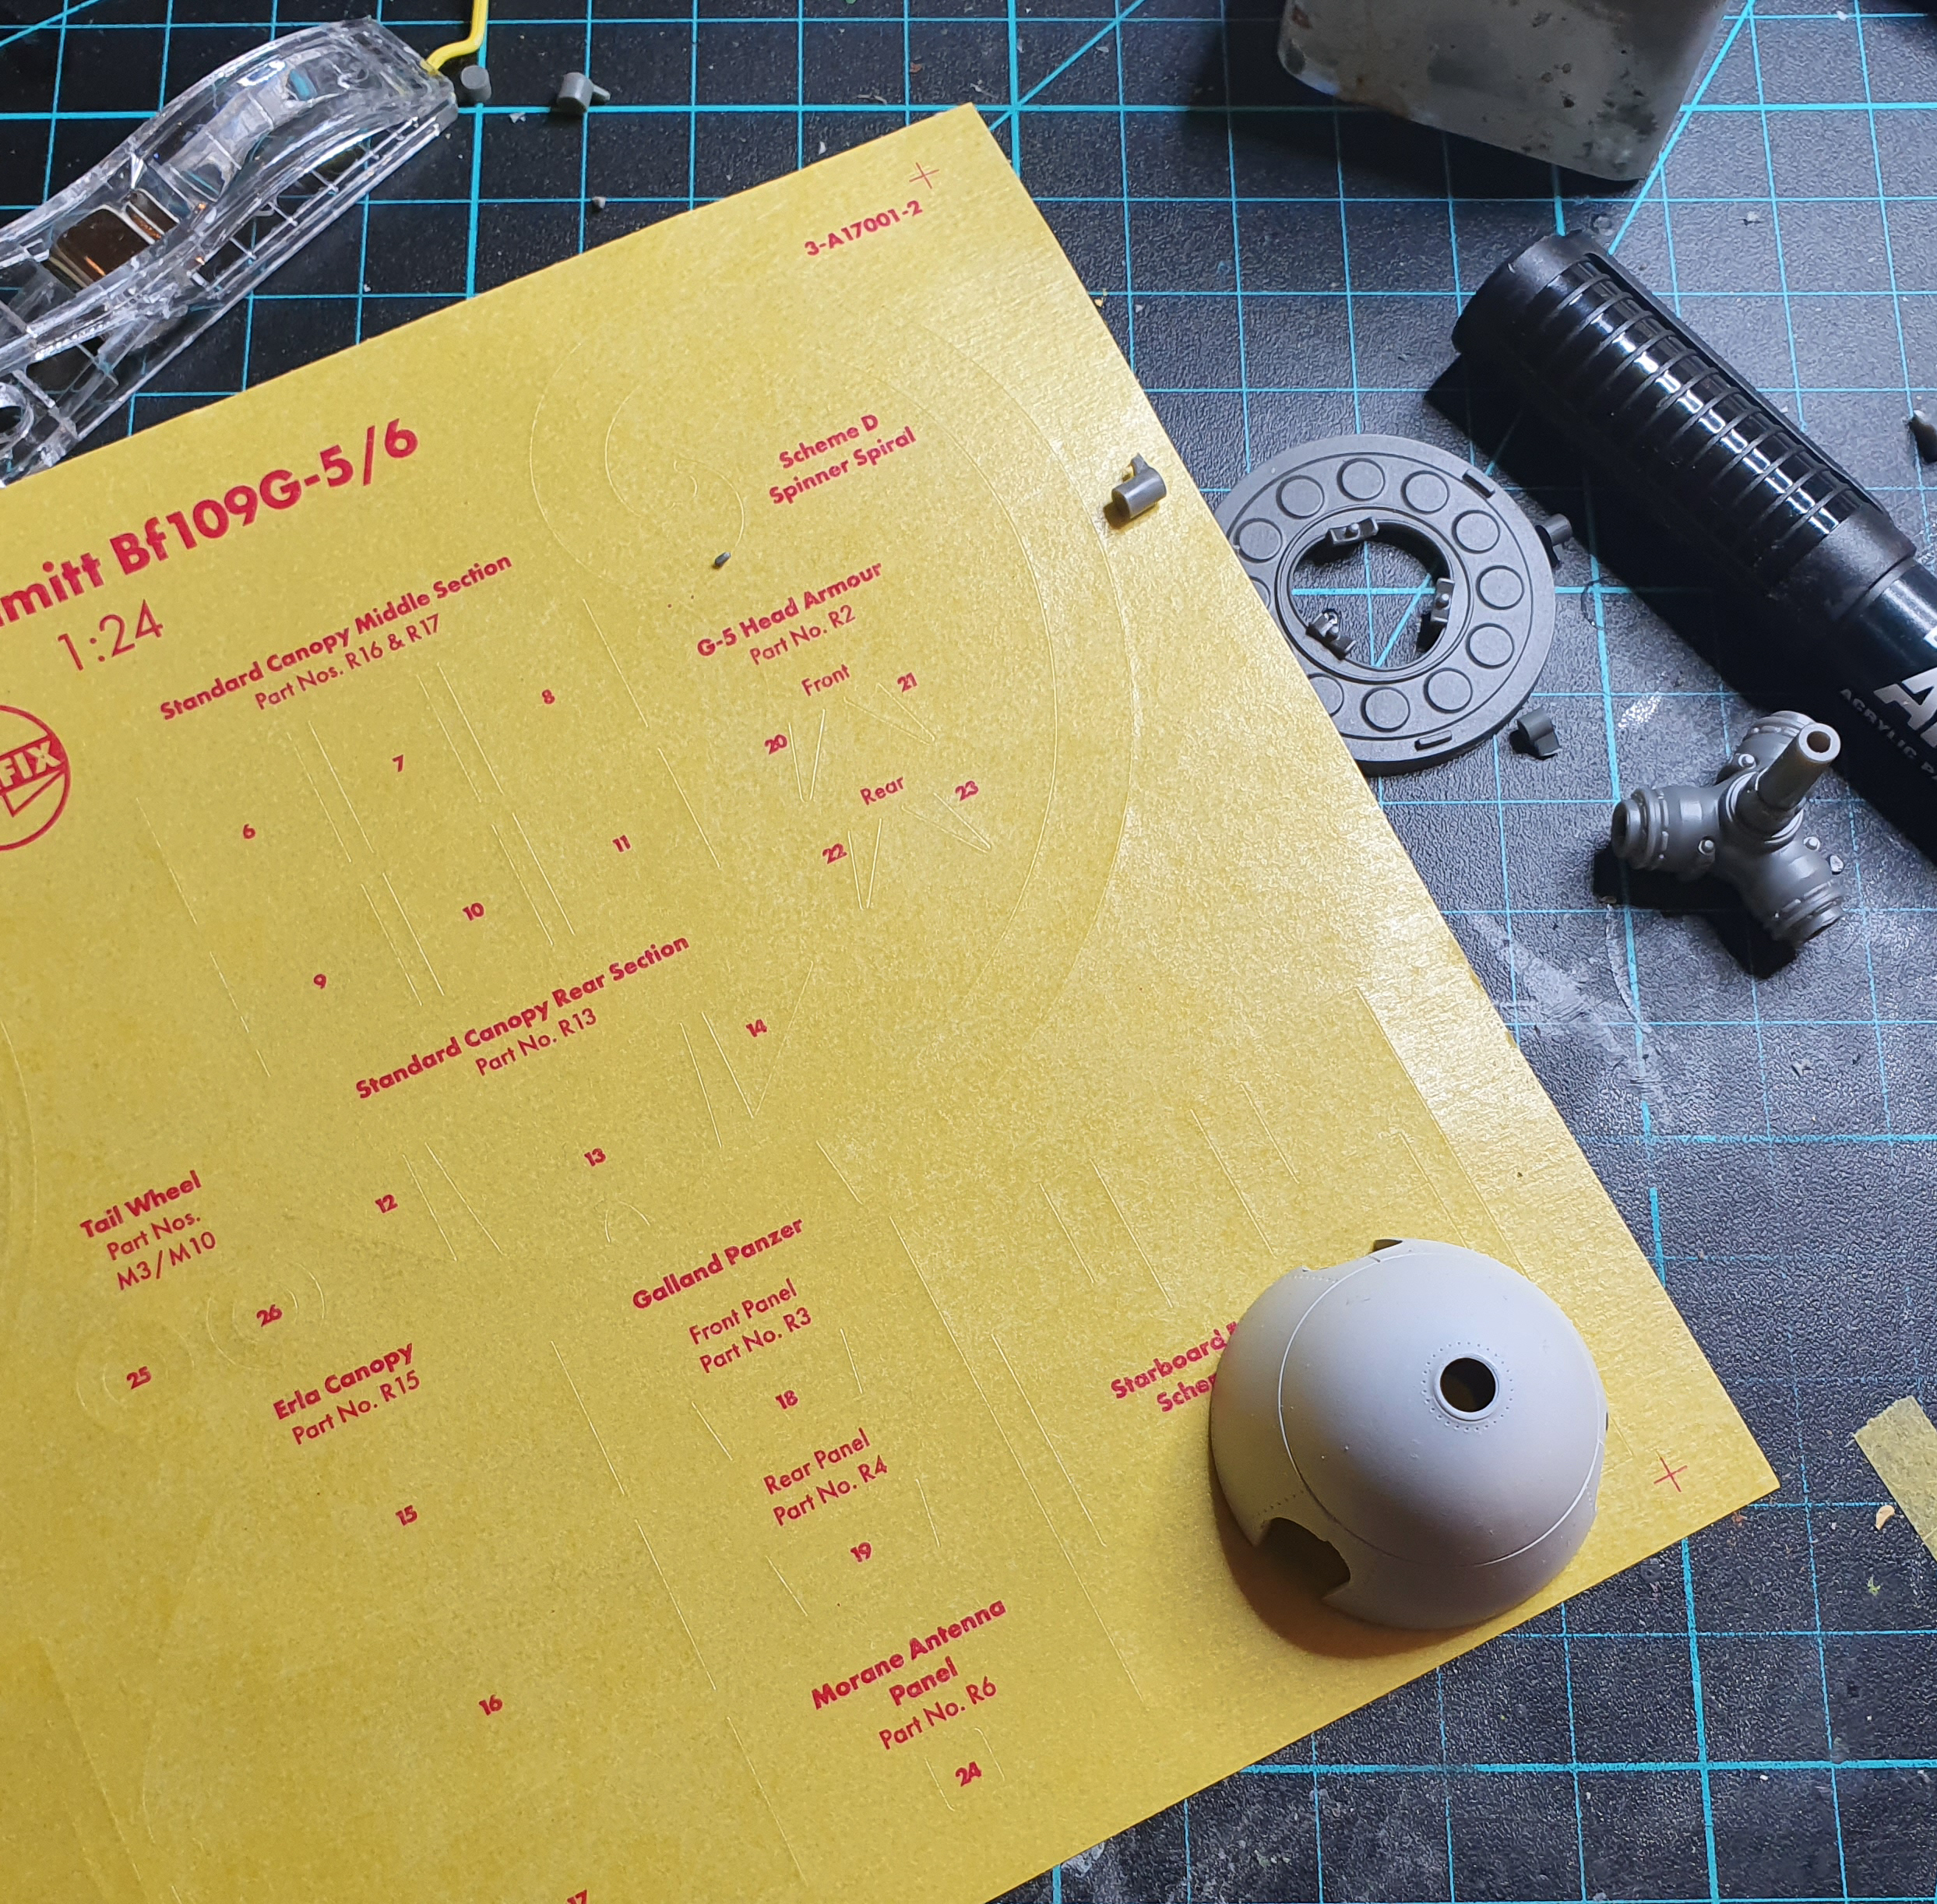
Clear as mud eh ? The plastic is a dark grey soft styrene common to modern Airfix kits and there’s been some reports 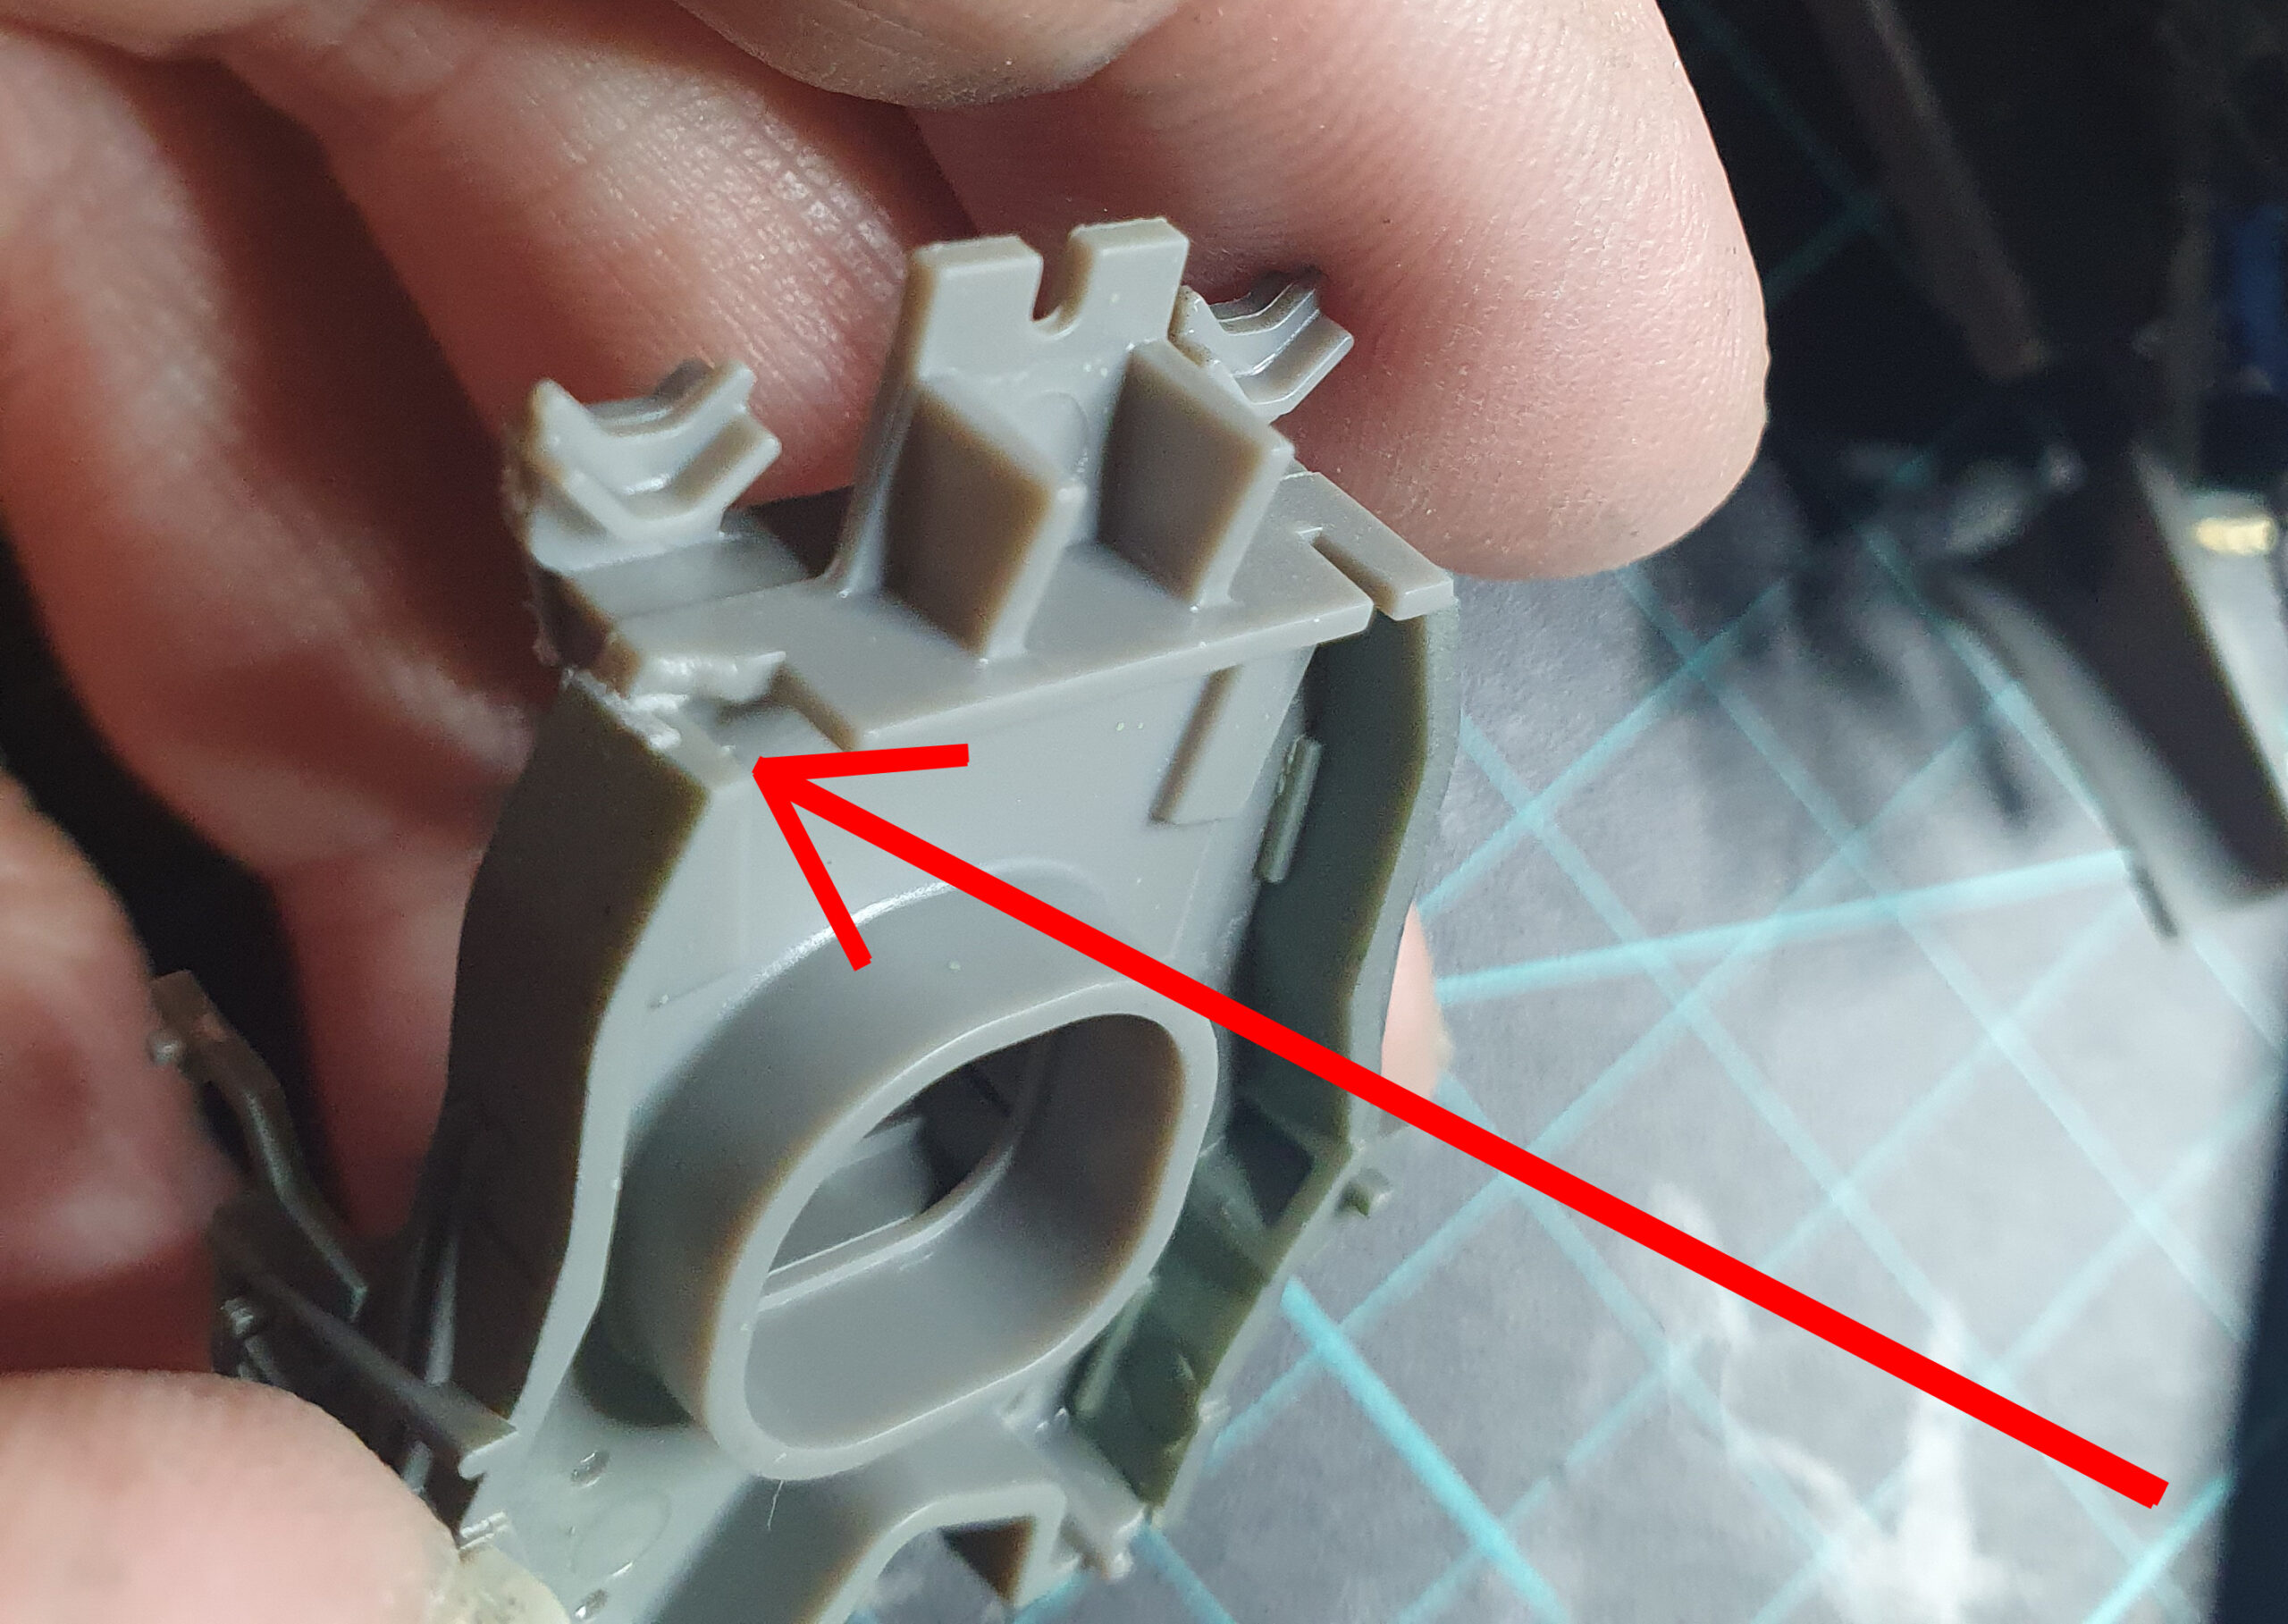 of warping of certain parts. My example had slight warping on the wing frame/runner/sprue but the parts were unaffected and as such I can report the only anomaly mine had was a miscast component ( see right ) and the decal sheet which was creased when inserted at the factory. Other than that all was sweet.
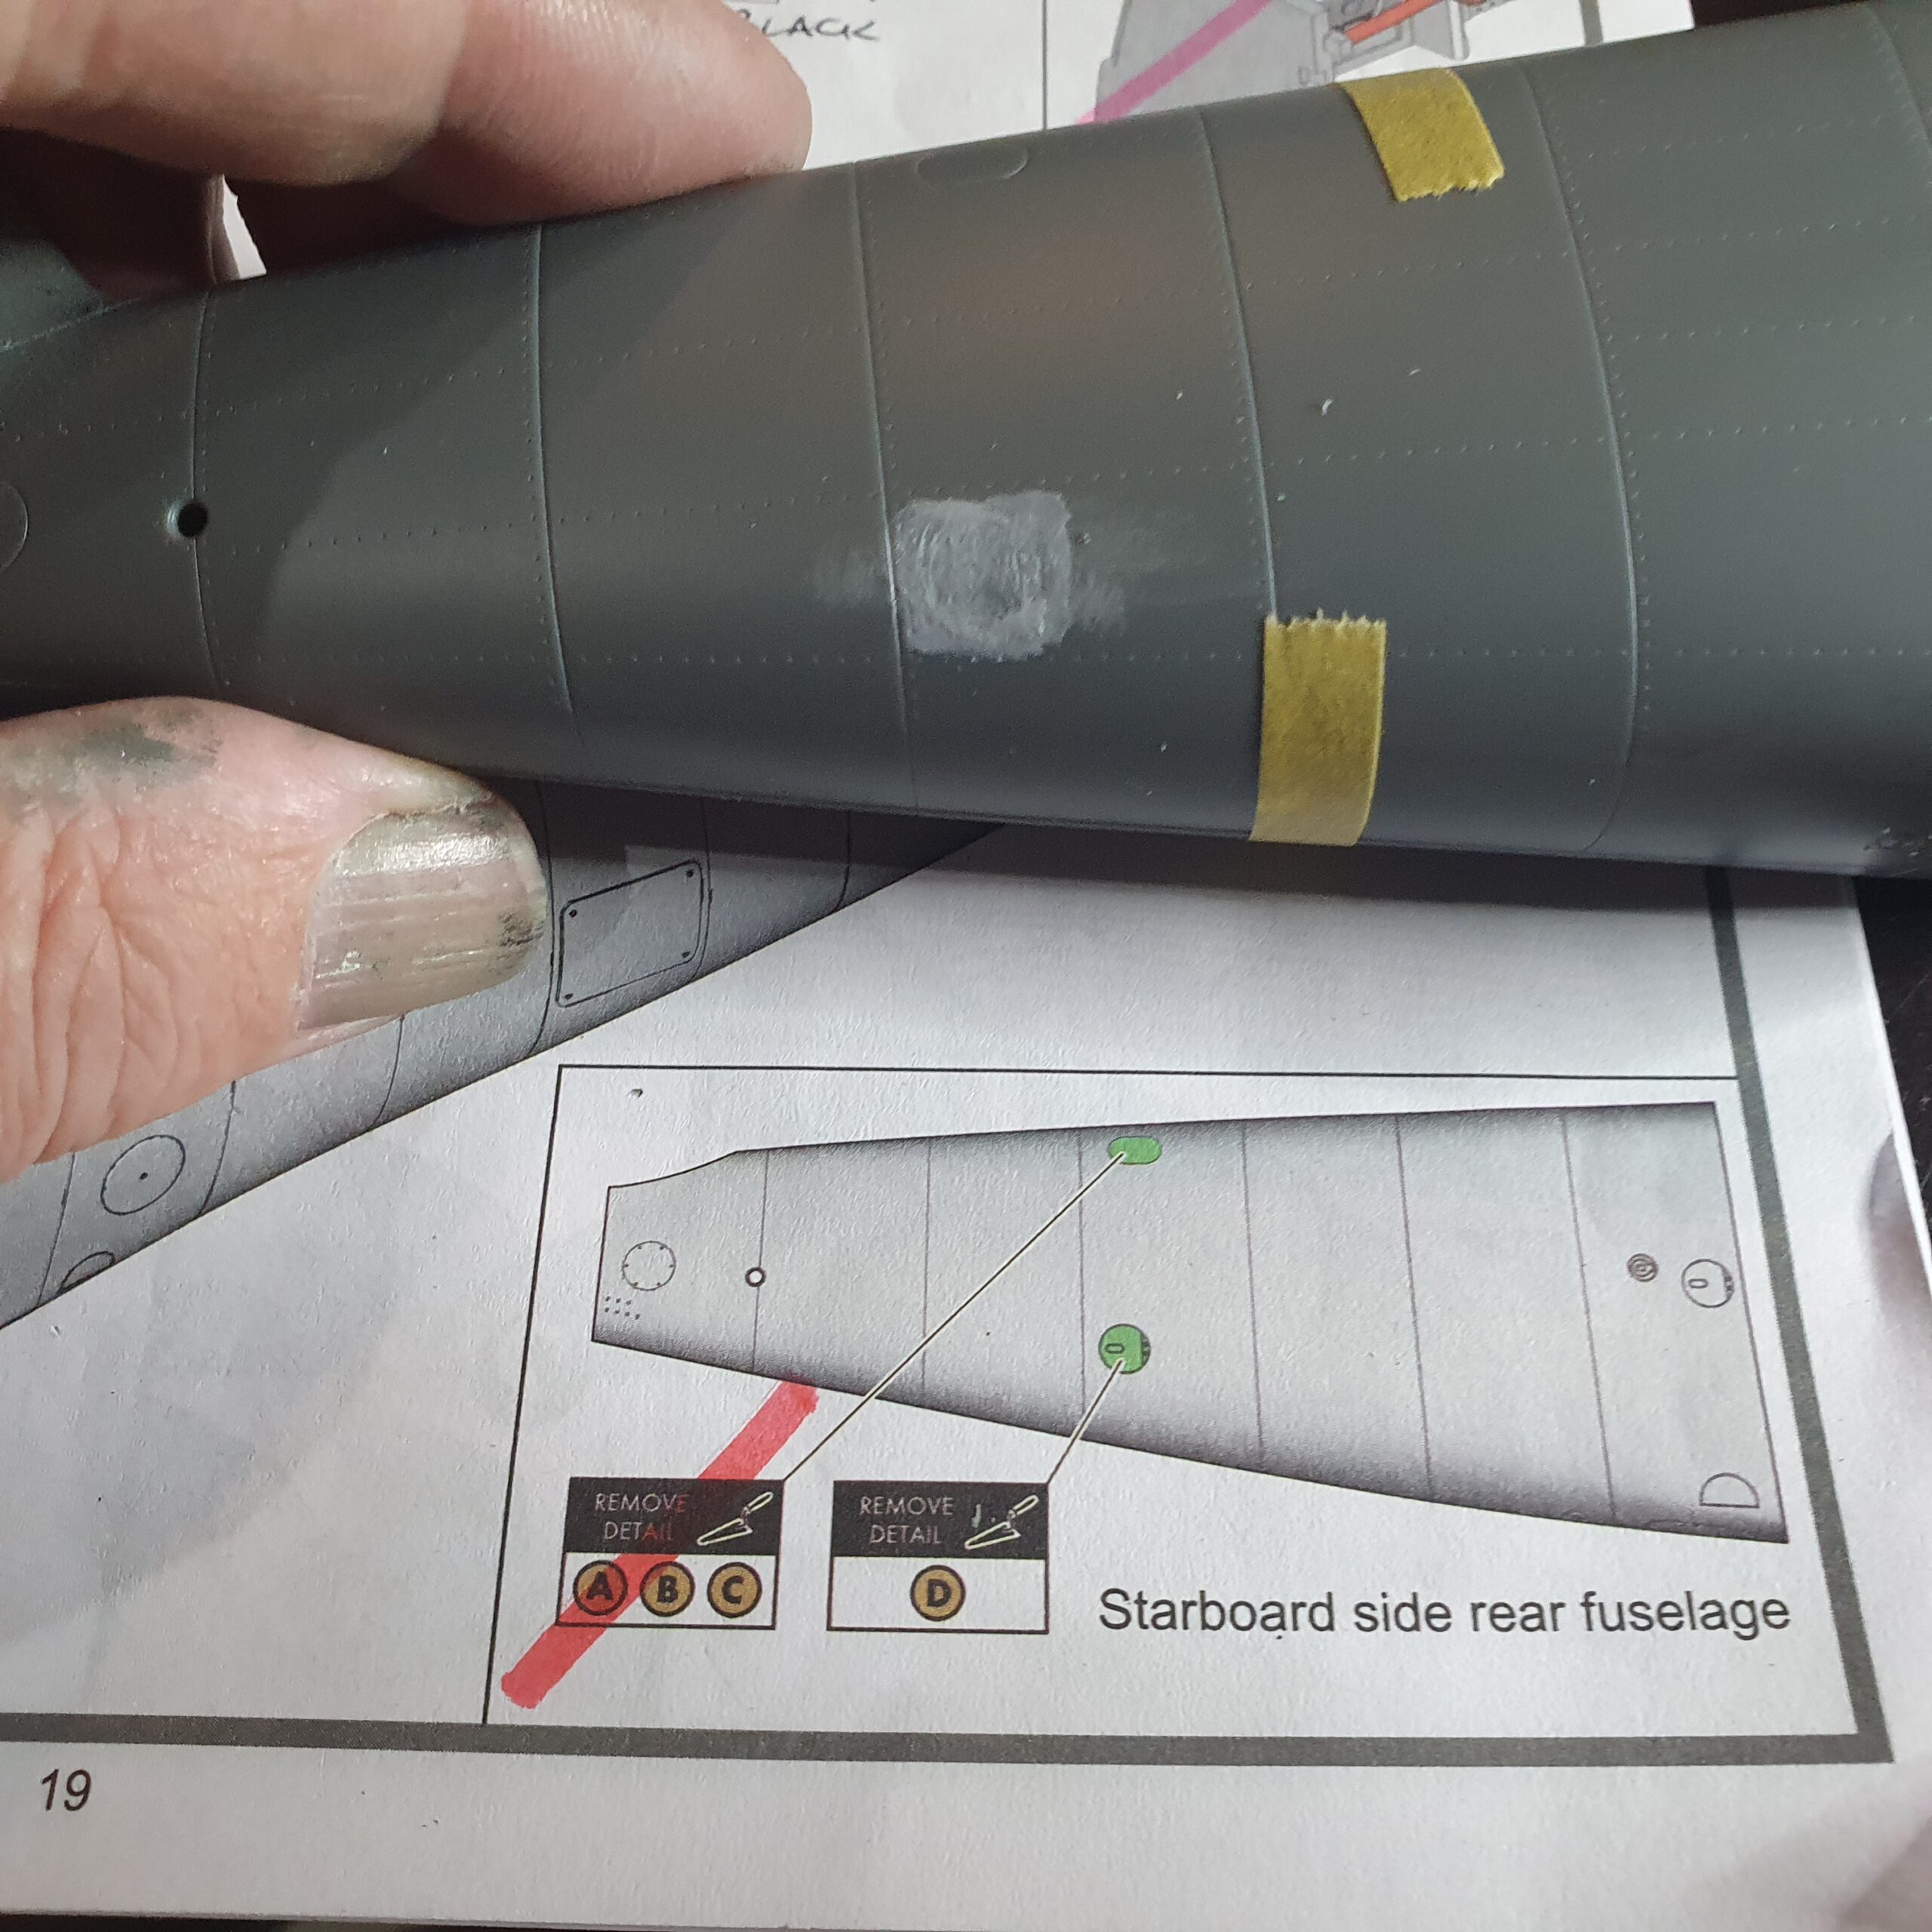
The only other hassle with the parts are the ejection pin marks which in some cases will need attention as they can be seen from the exterior. The marks in the wings however won’t be a problem as they’re on the inside and don’t interfere with fit or alignment. However the engine covers and flaps will definitely need cleaning up before assembly
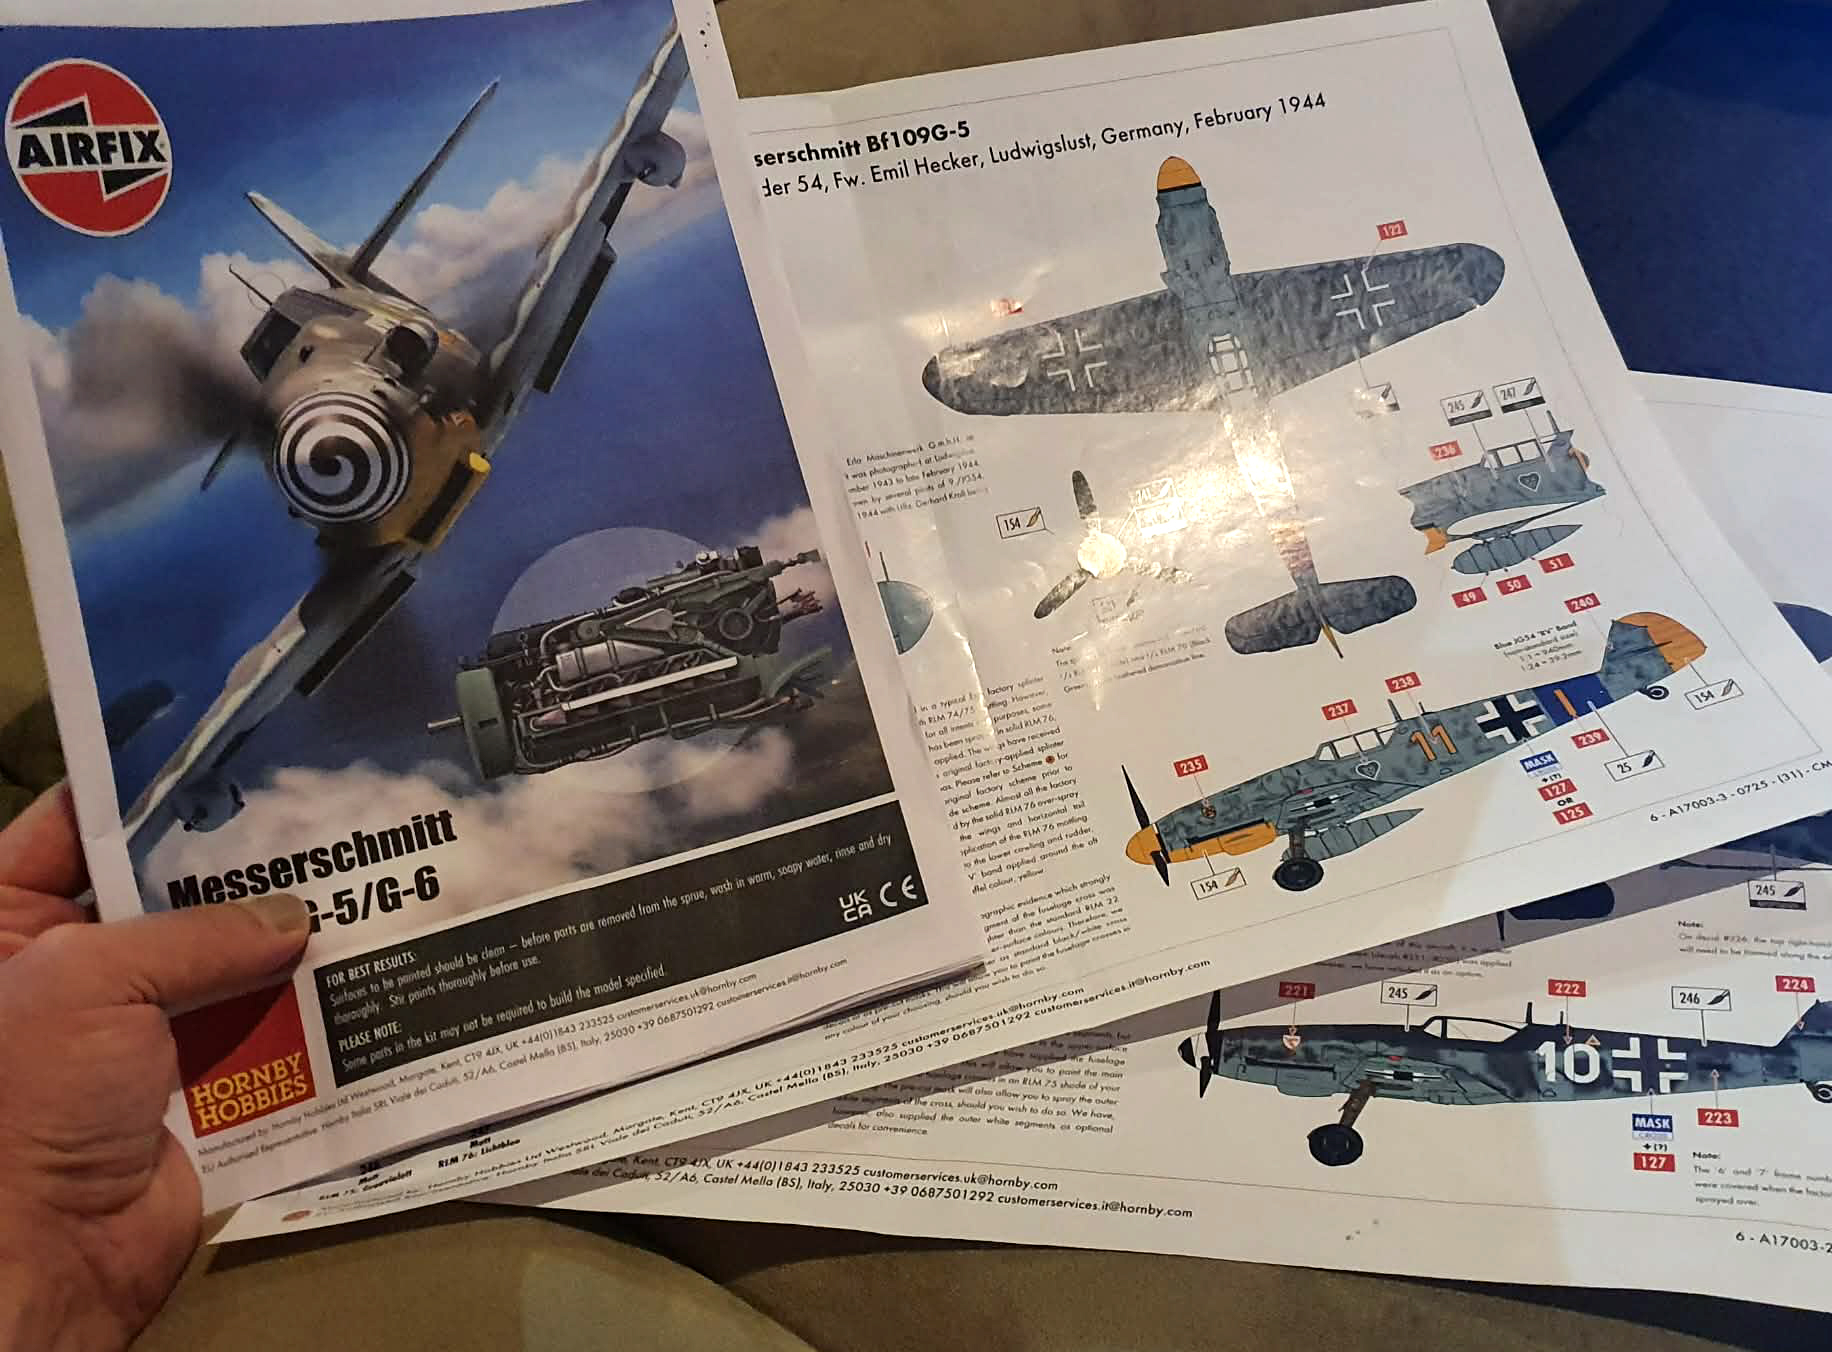
At this point I decided which version I’d do – there’s 5 options and plenty of literature !
If you want to see the options check here https://www.scalemates.com/kits/airfix-a17003-messerschmitt-bf109g-5-g-6–1676615
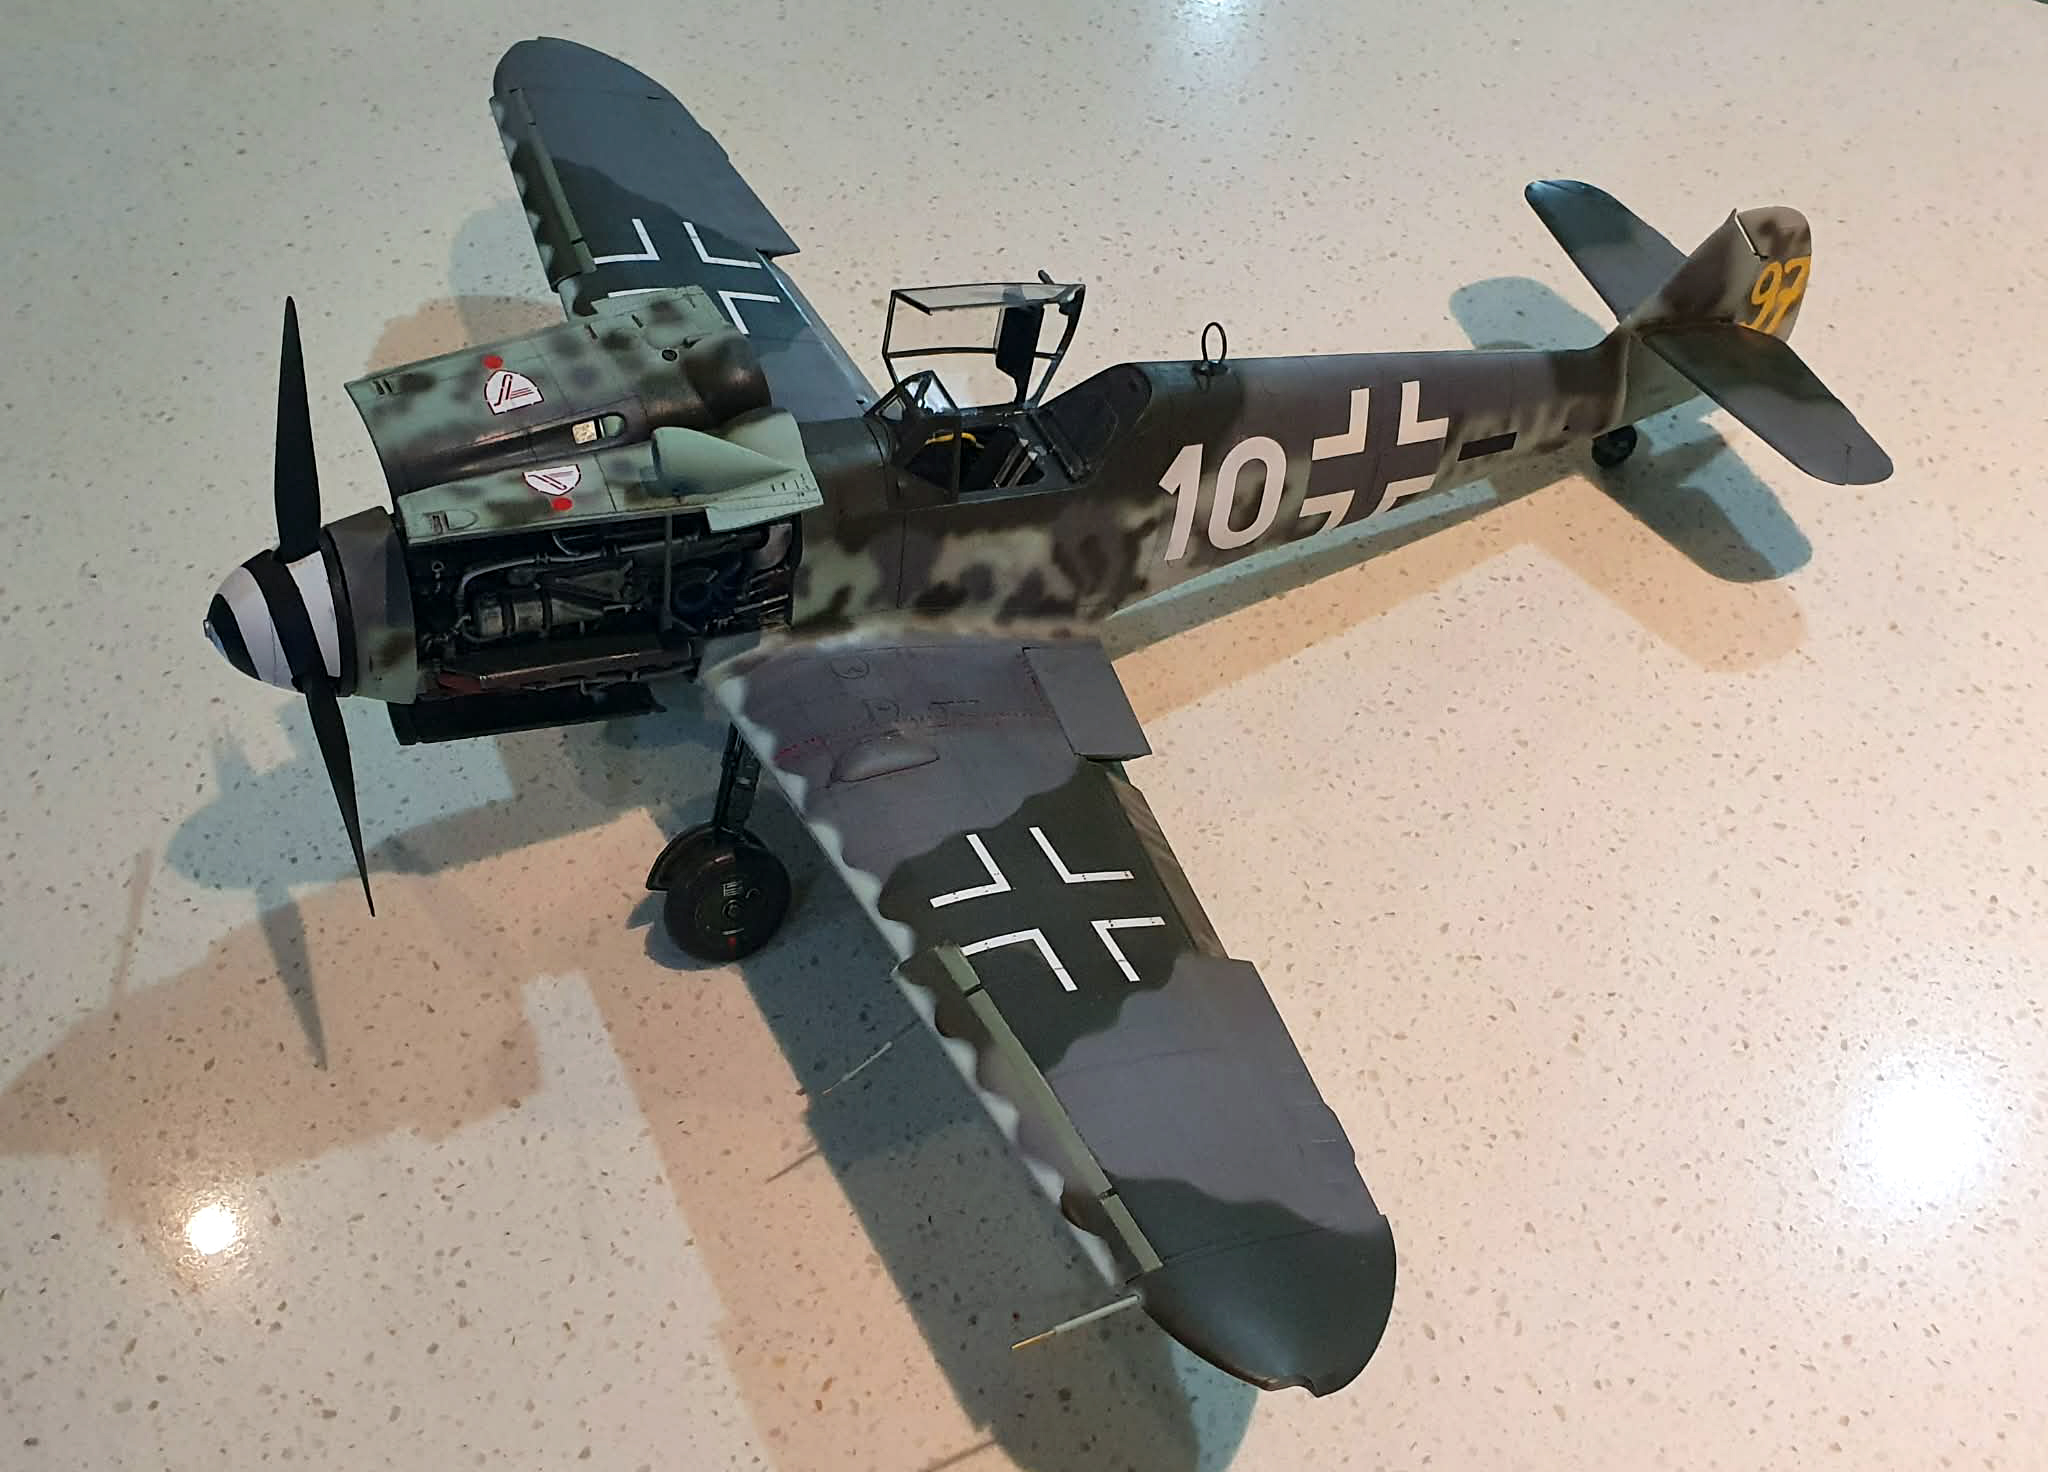
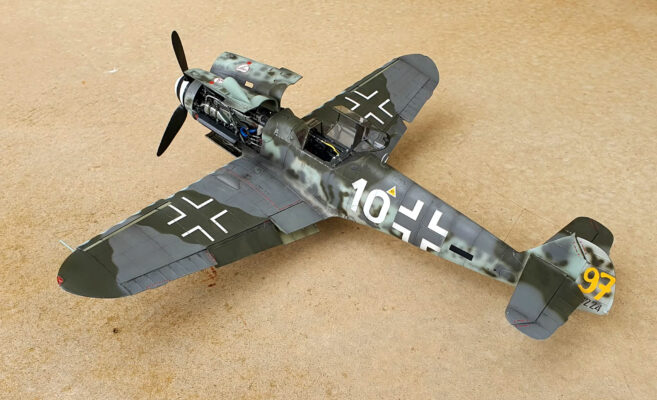
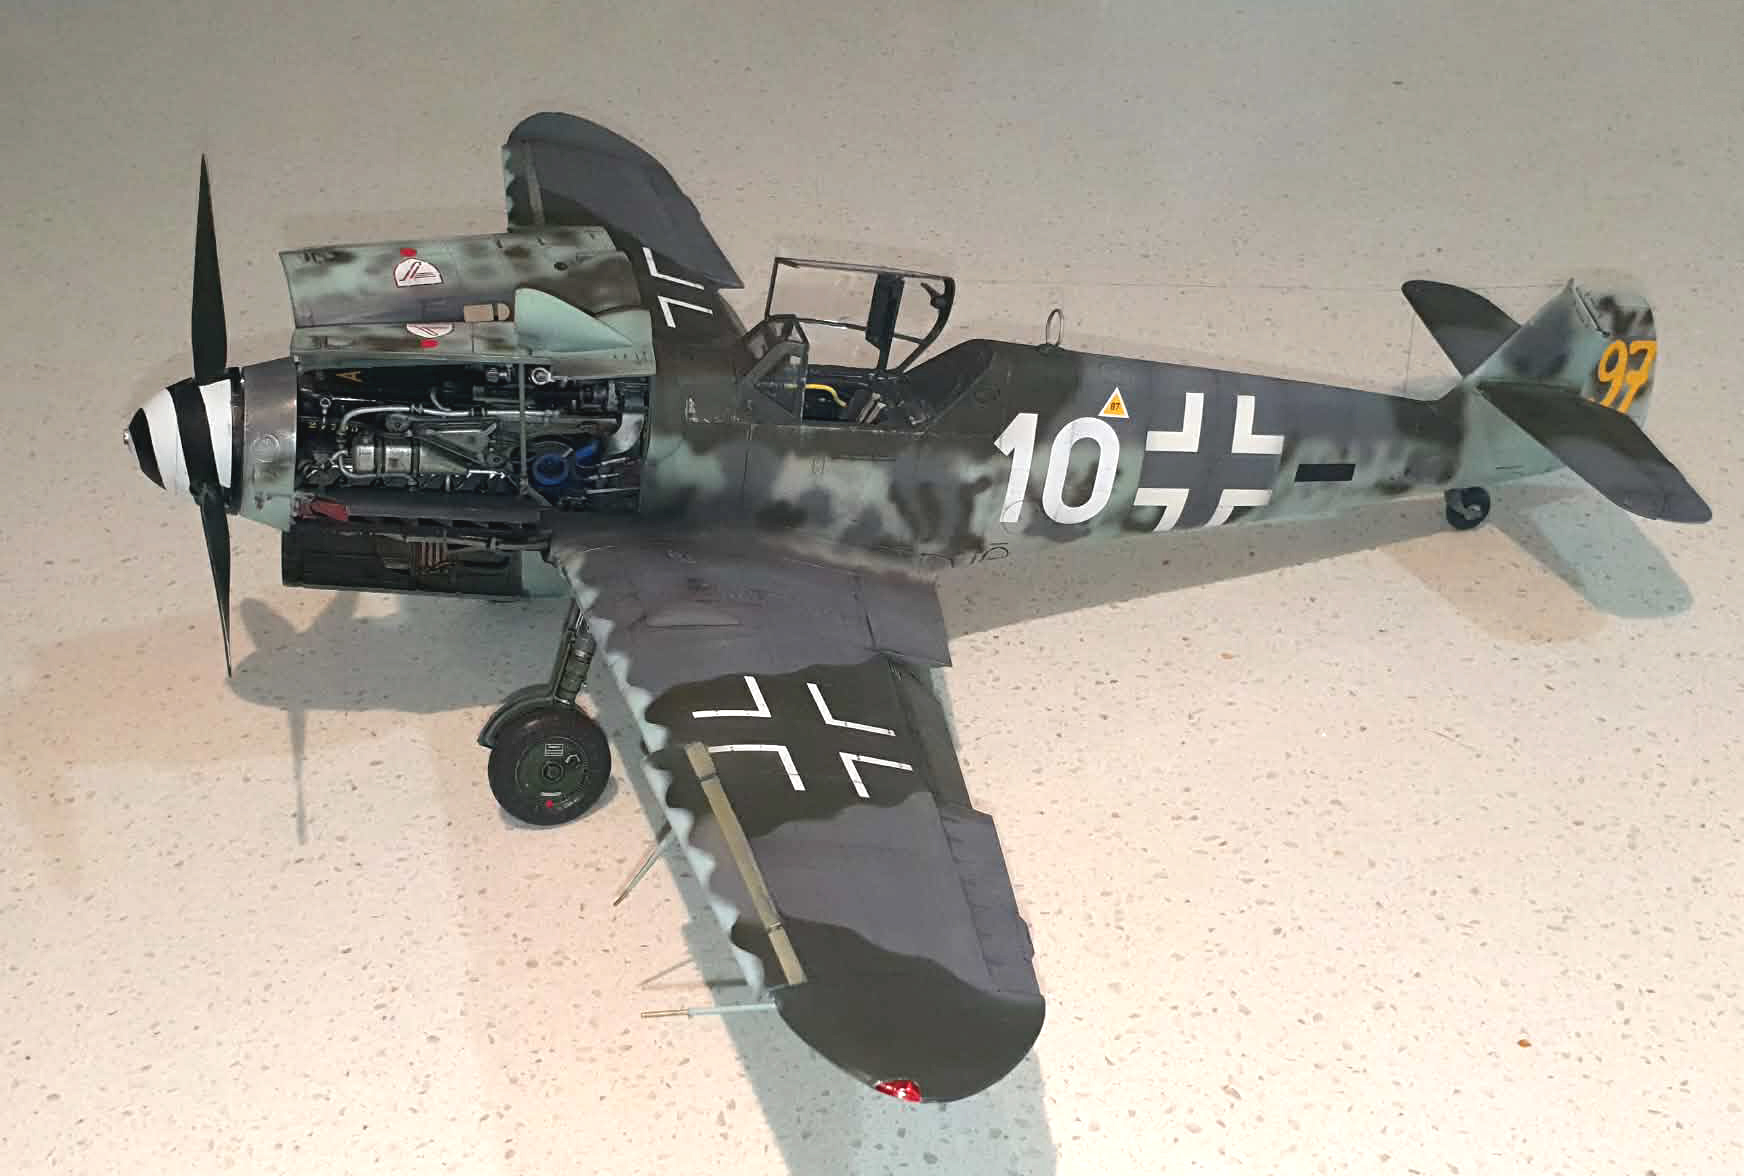
I went with option D, white10 with the sexy Erla canopy. The instructions are quite specific and I recommend a good read of them first before cutting plastic.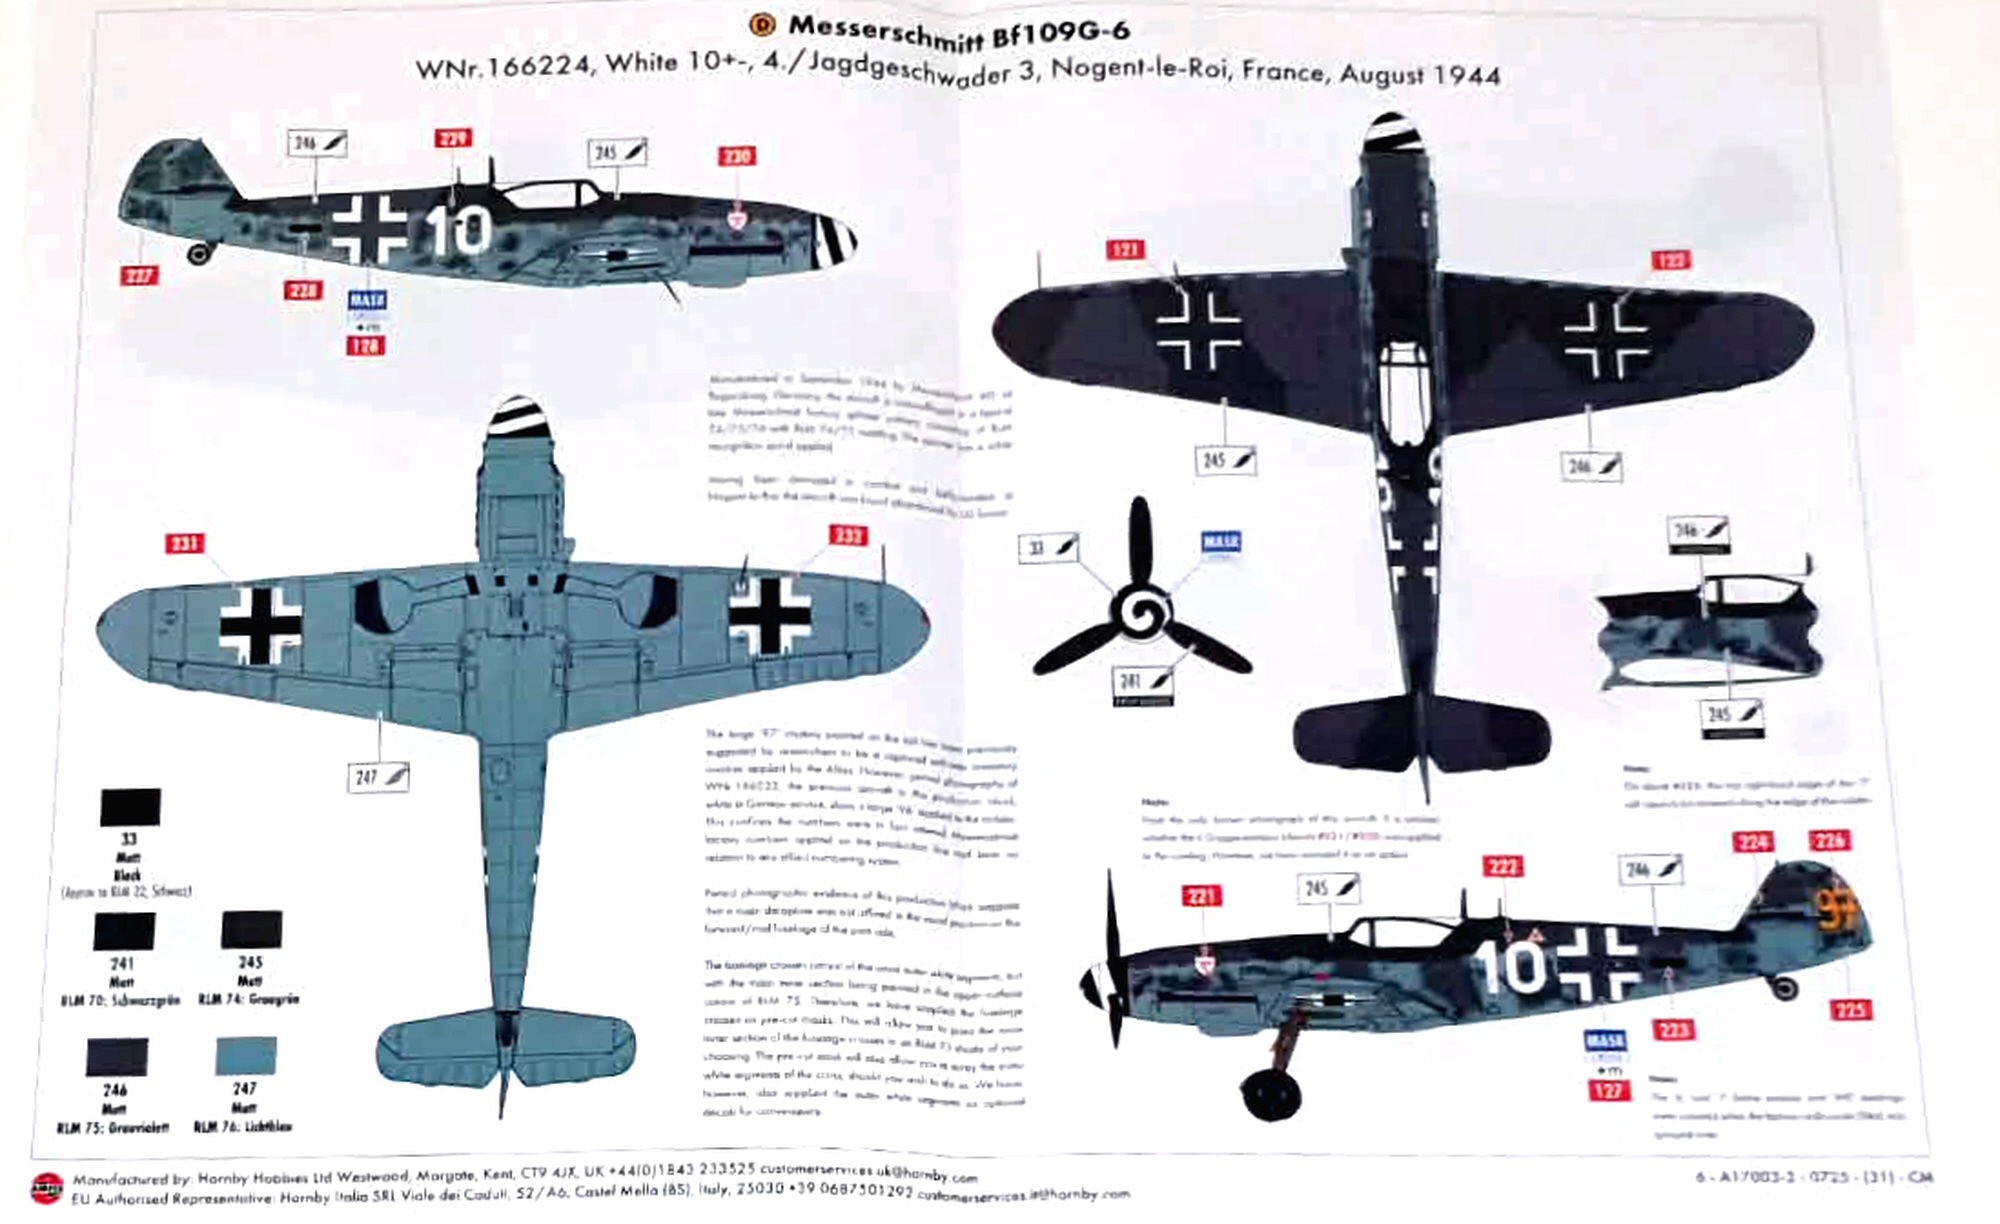
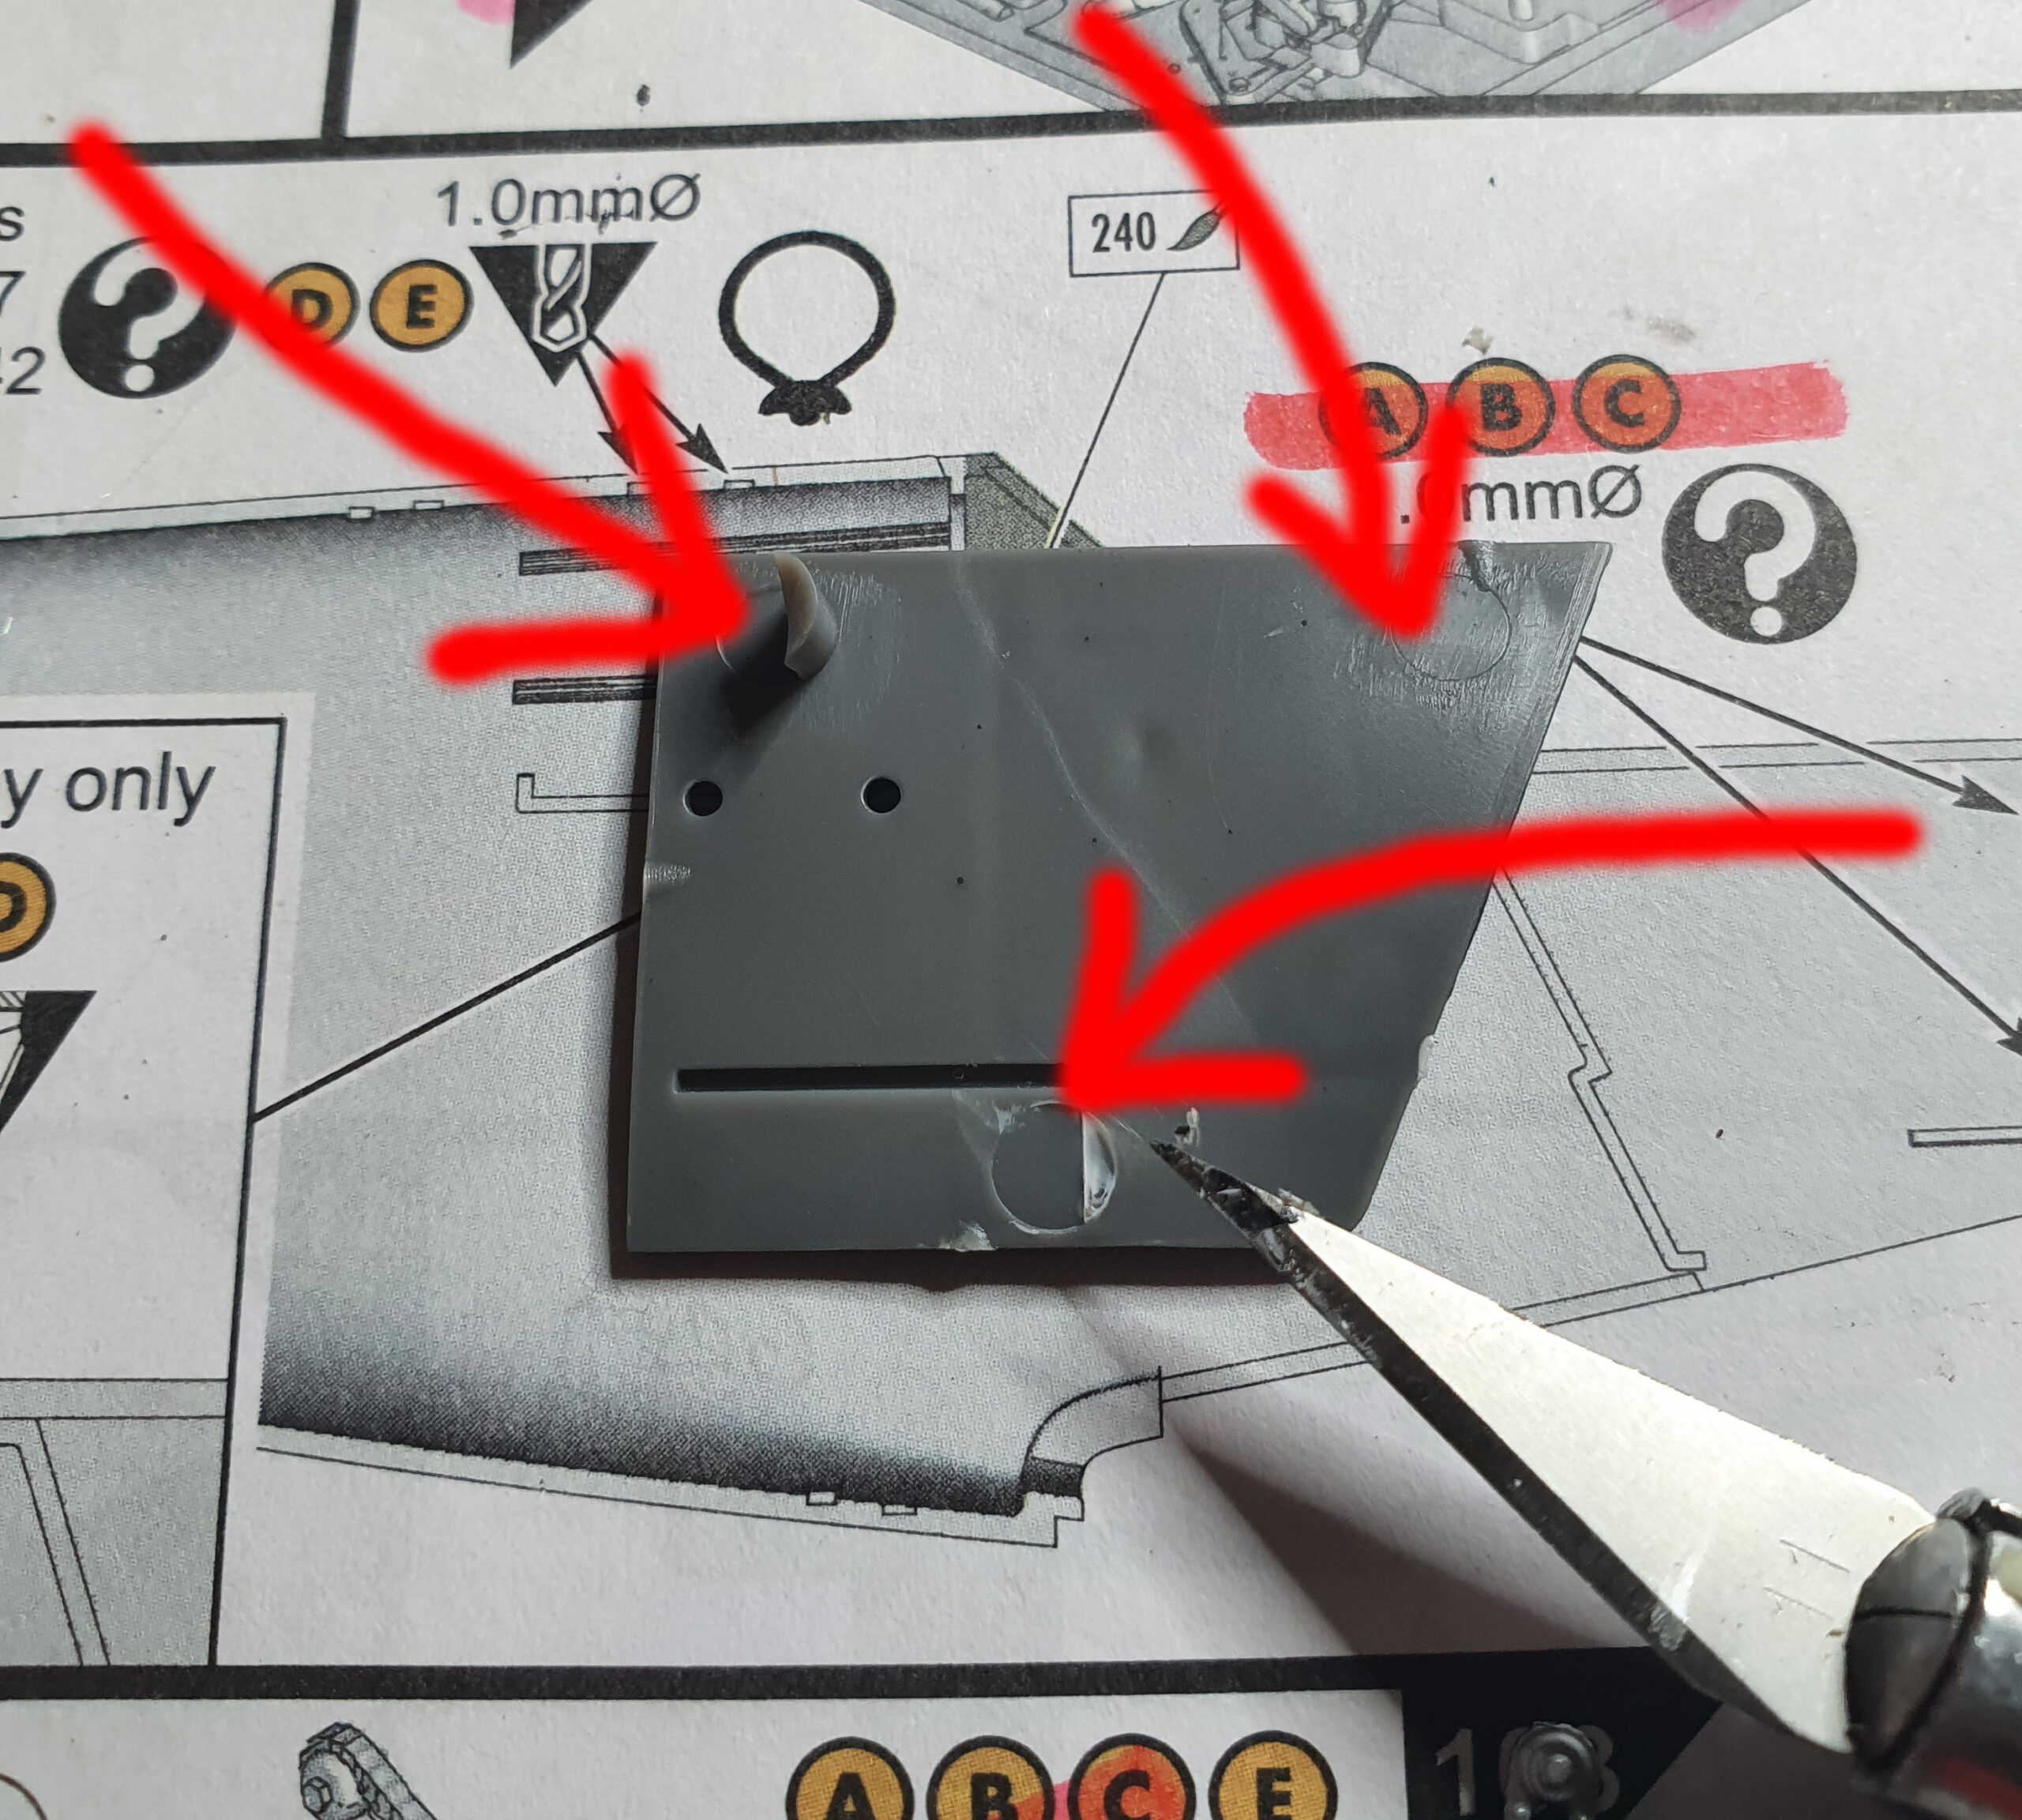
The arrows indicate where ejection detritus needs to be removed.
Holes will need to be drilled and these are entirely option dependant so be sure to know which is which.
![]()
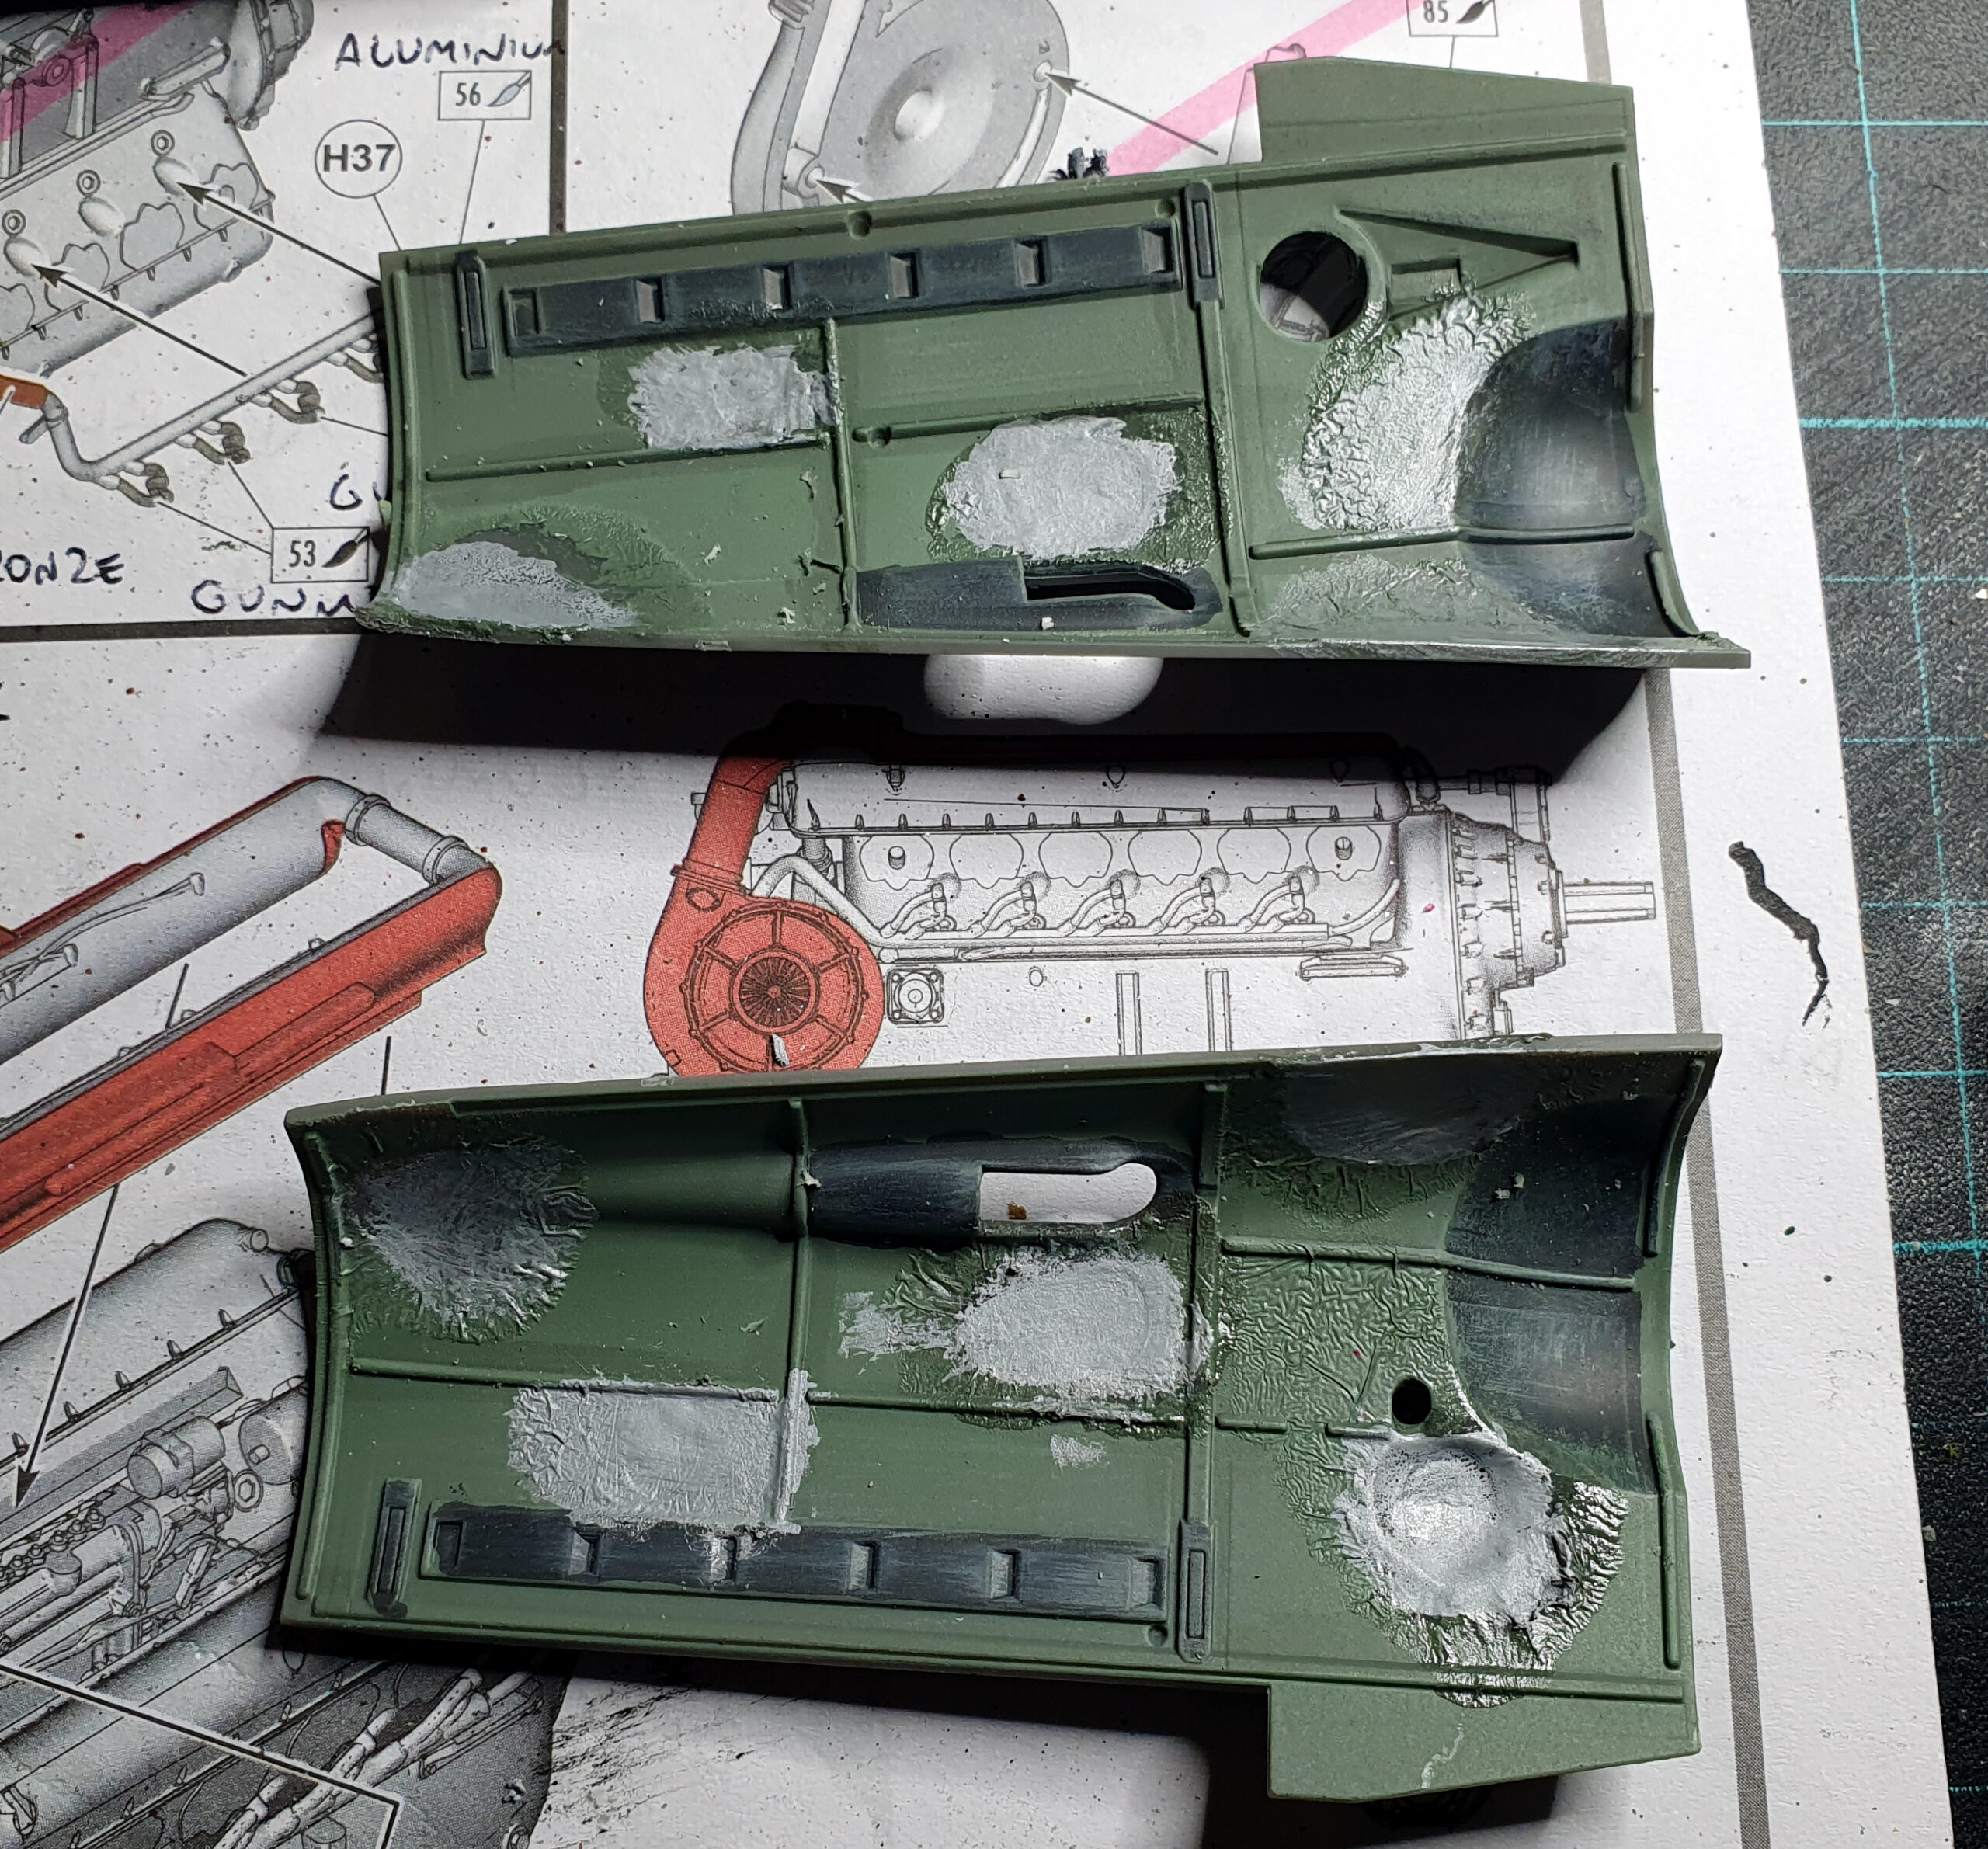
I’ll say at this point that if you FOLLOW THE INSTRUCTIONS in order and take your time, like the Spitfire kit last year, everything clicks together and there little needs for filler other than for filling the ejection marks or follwing instructions as some details need to be removed according to which version you’re building as can be seen in the folling images.
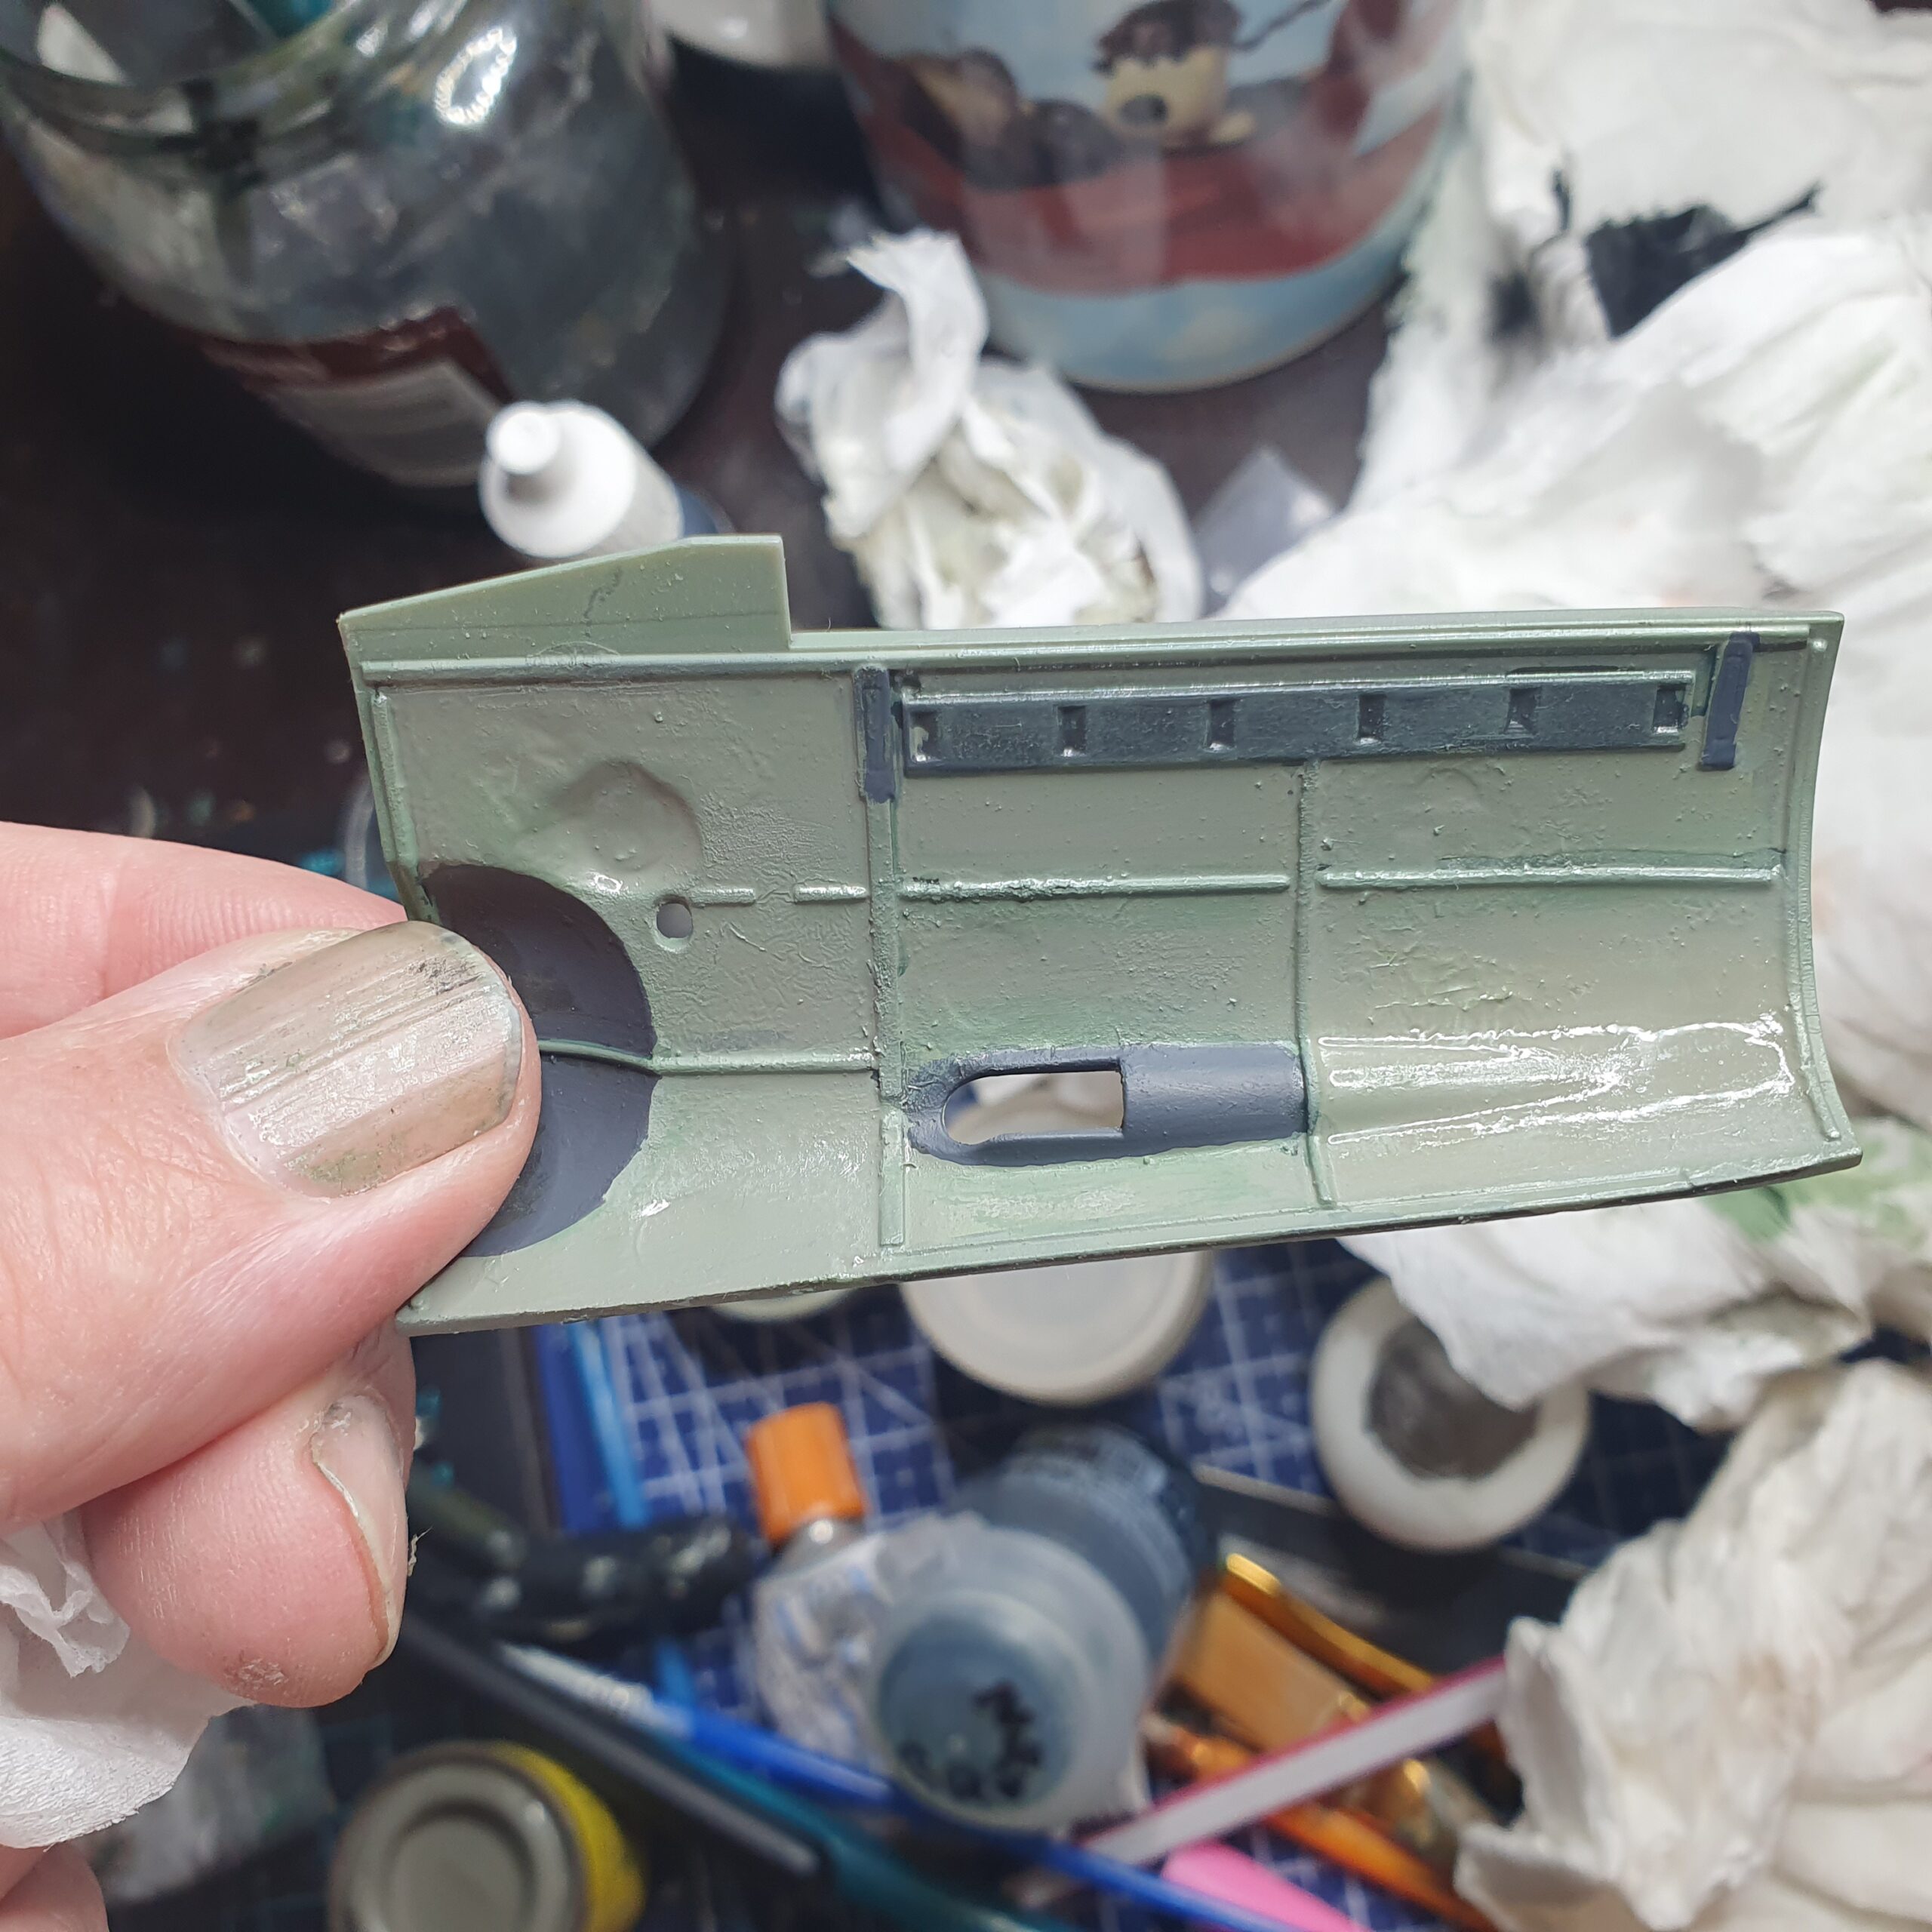
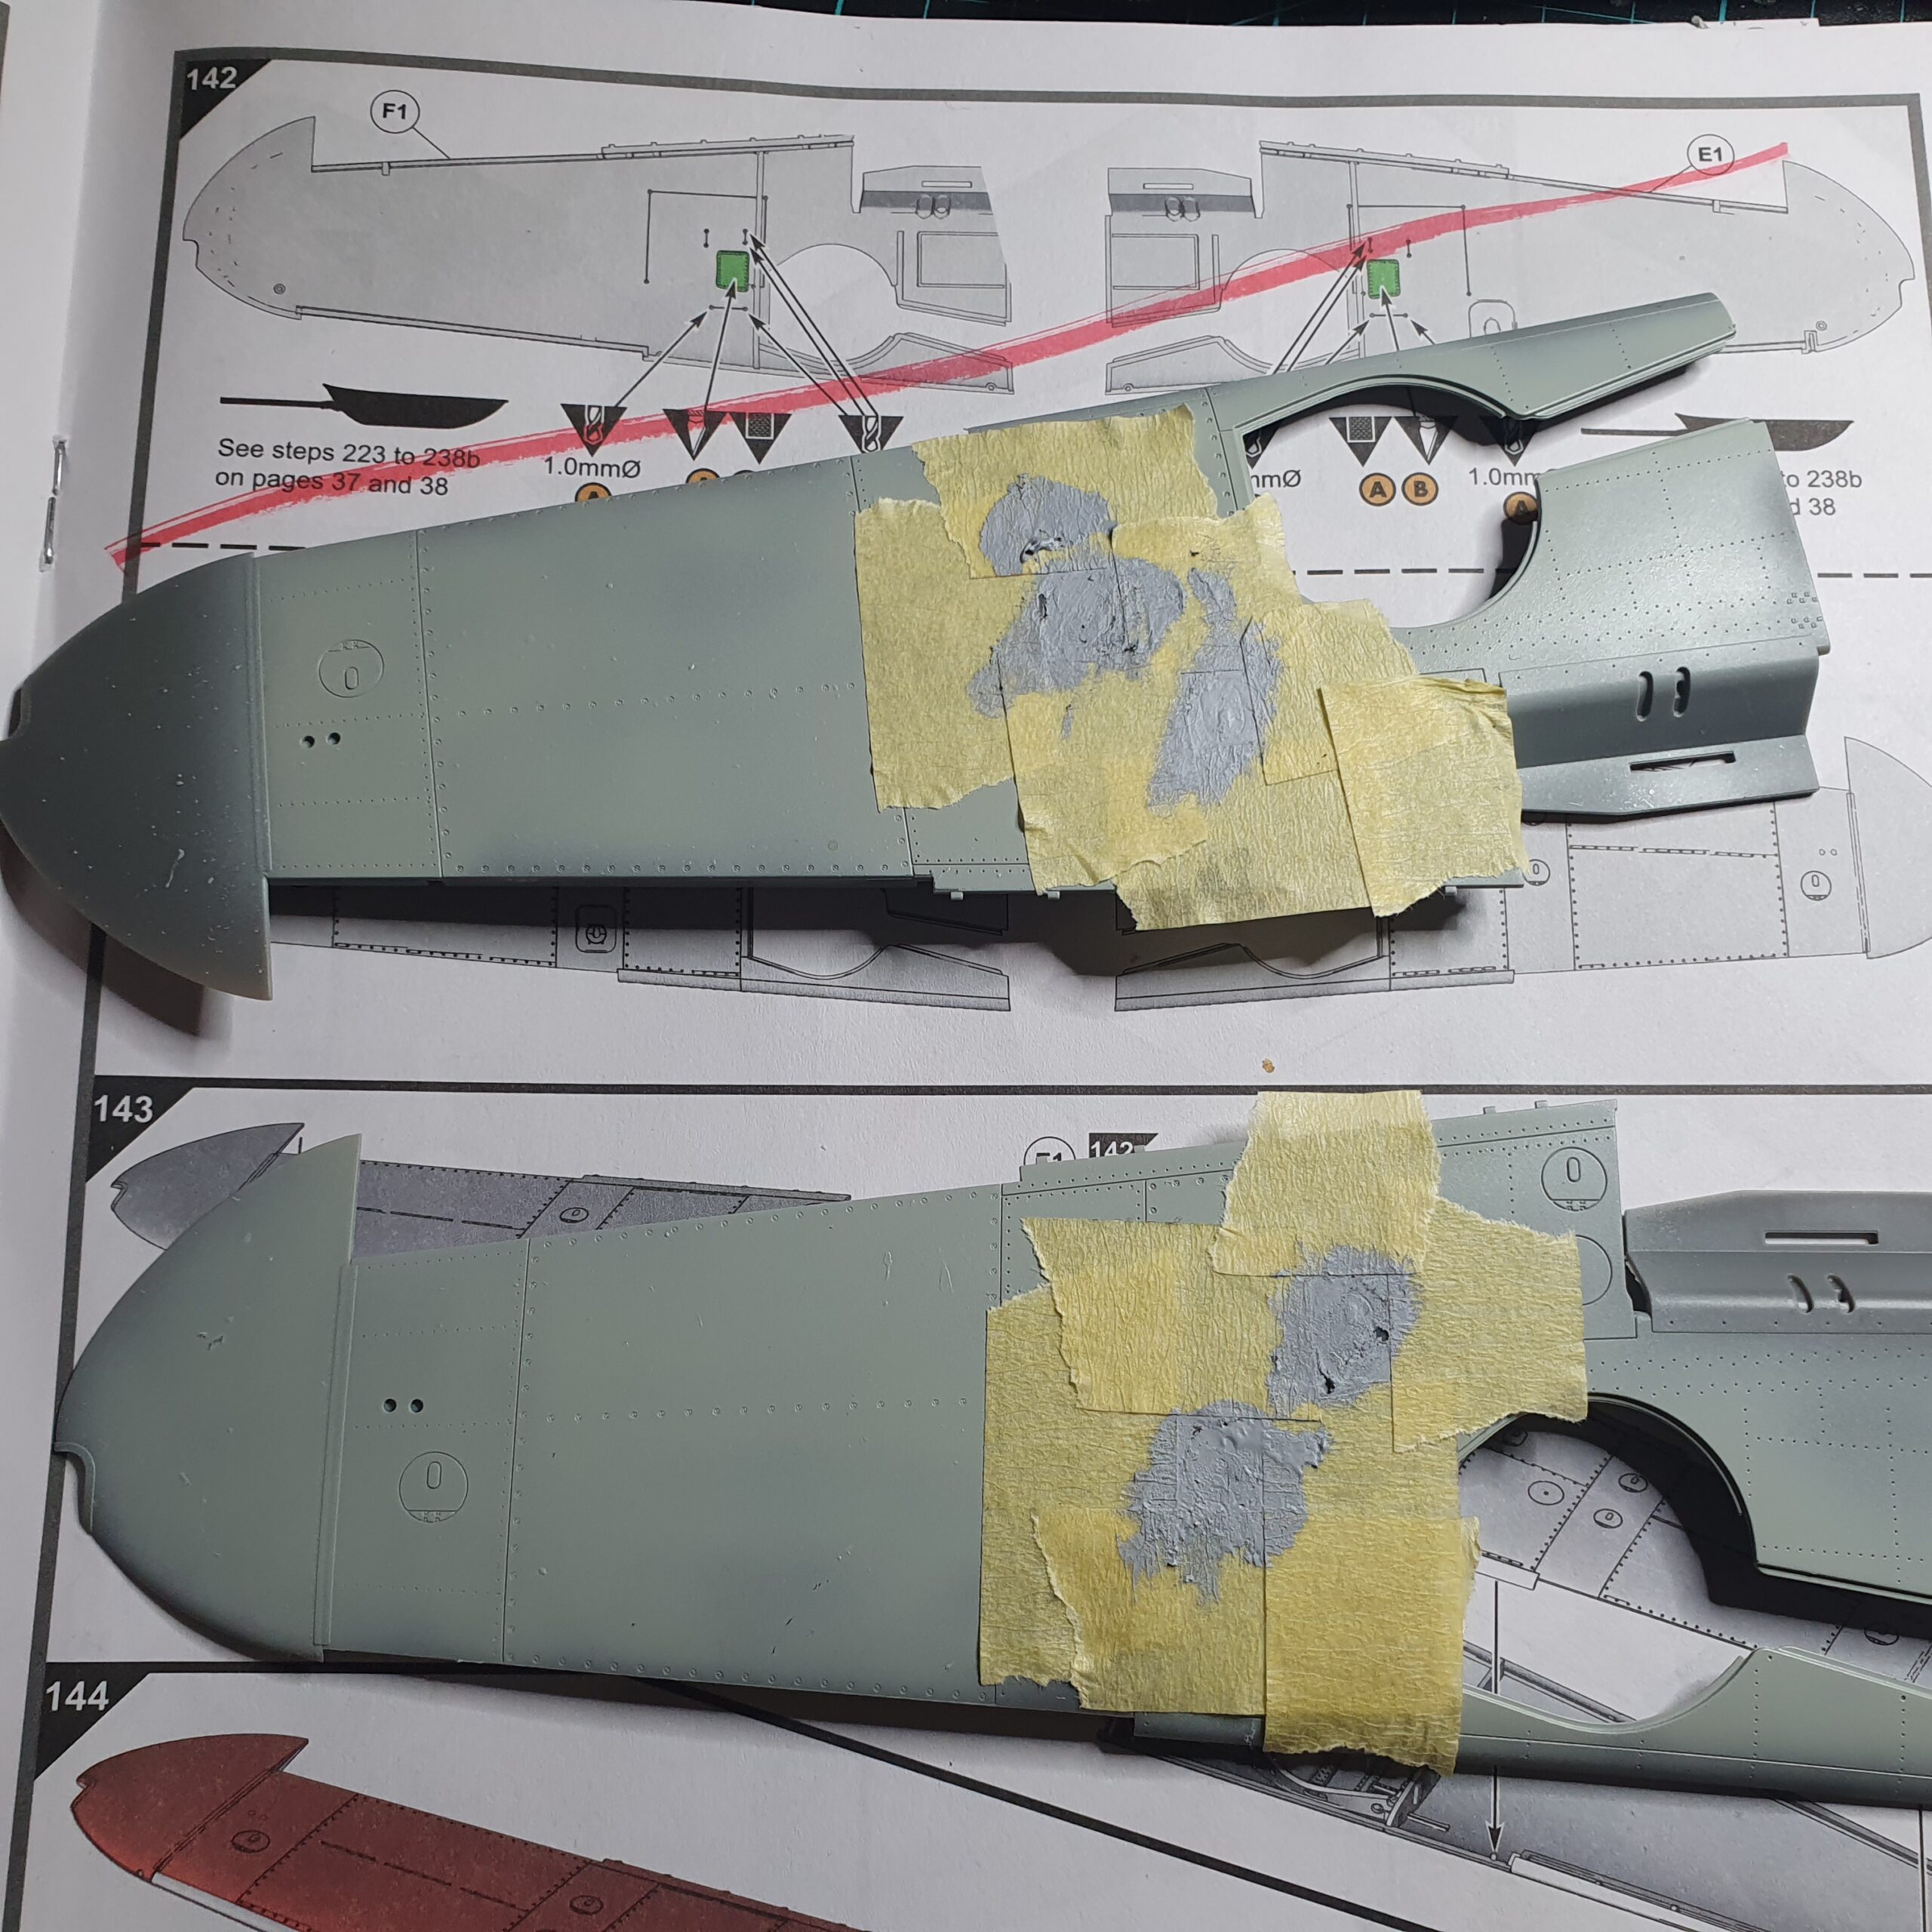
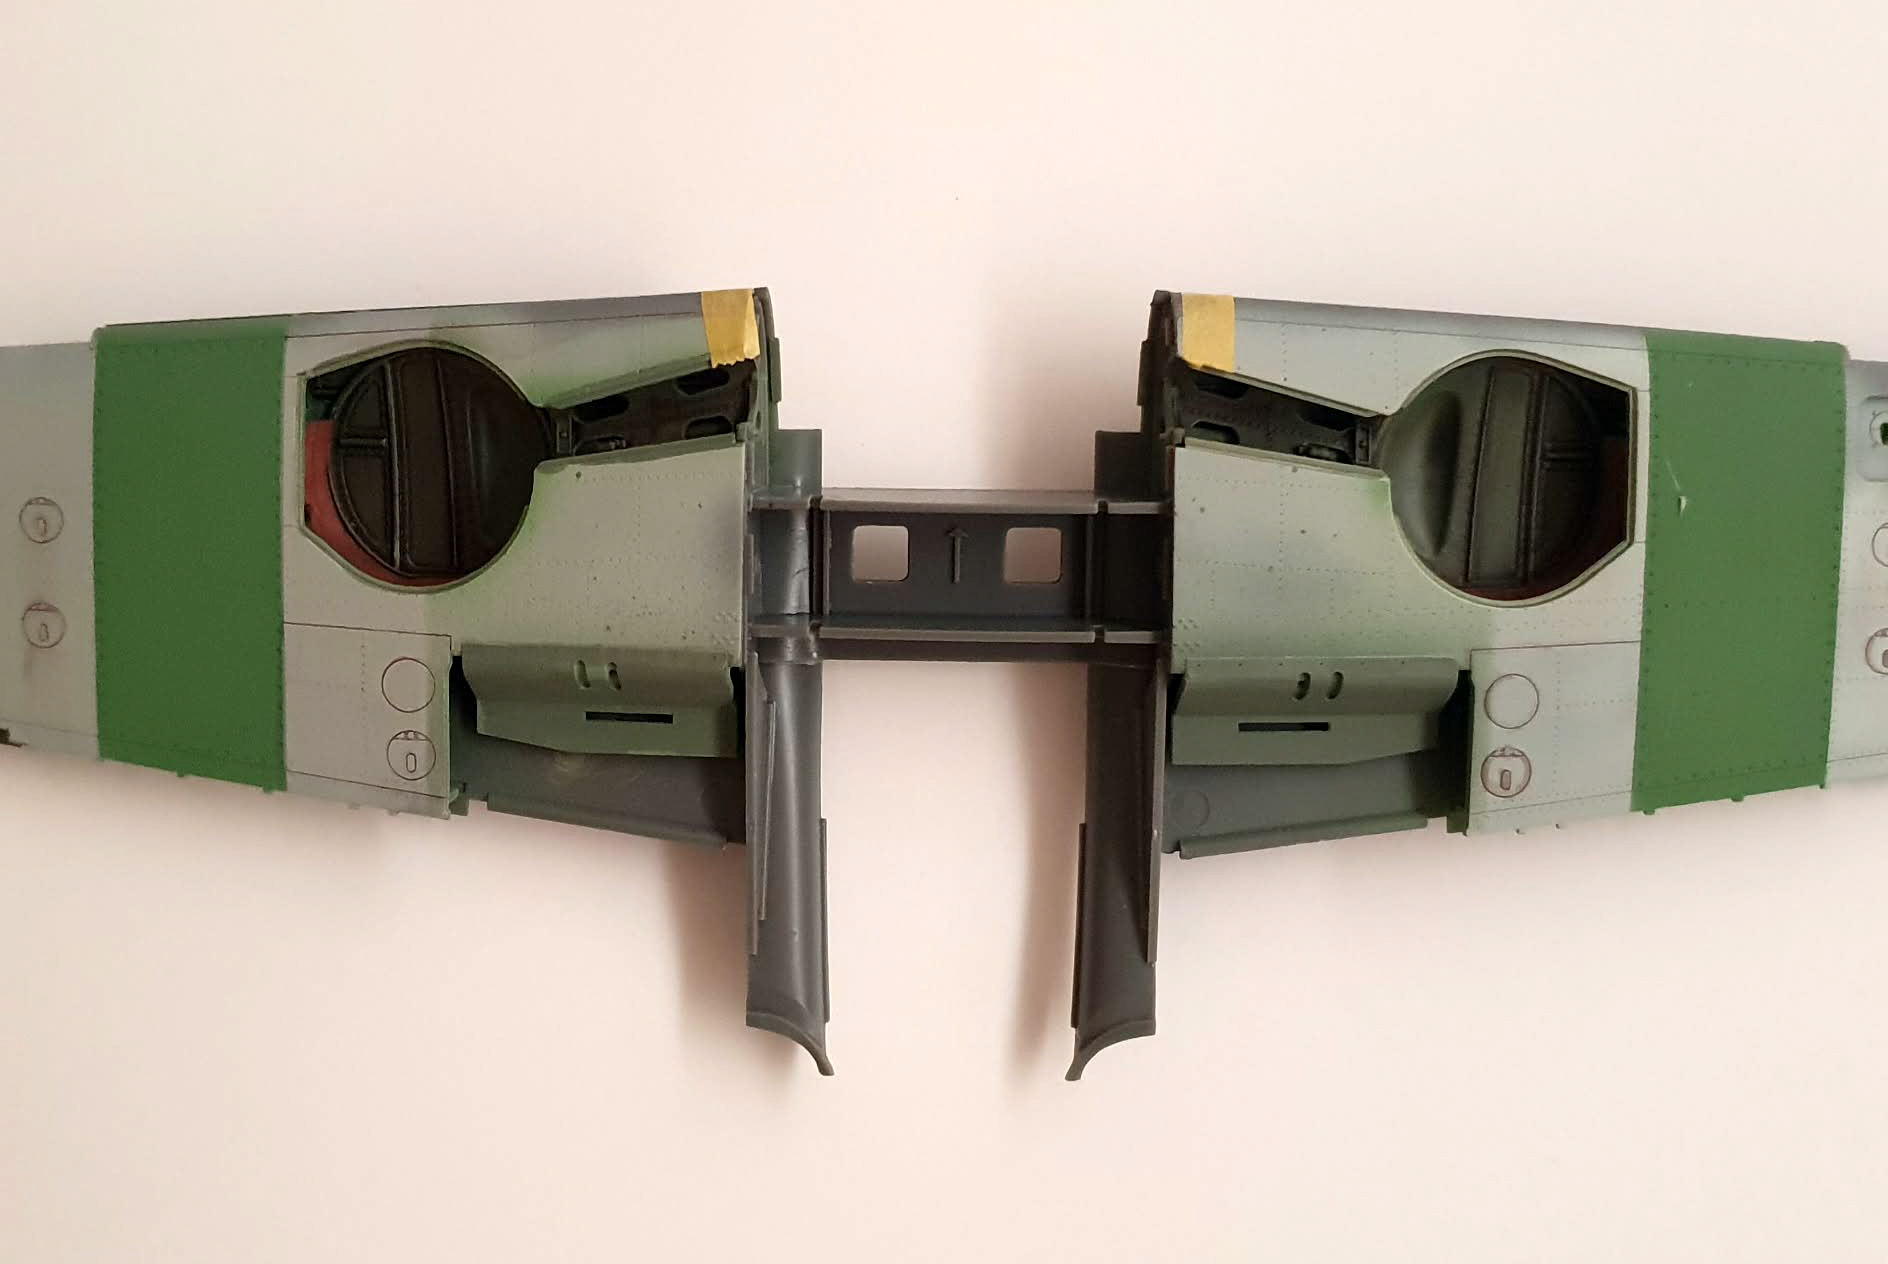
The wing roots will be the area things don’t fit if you haven’t assembled the internal structures properly.
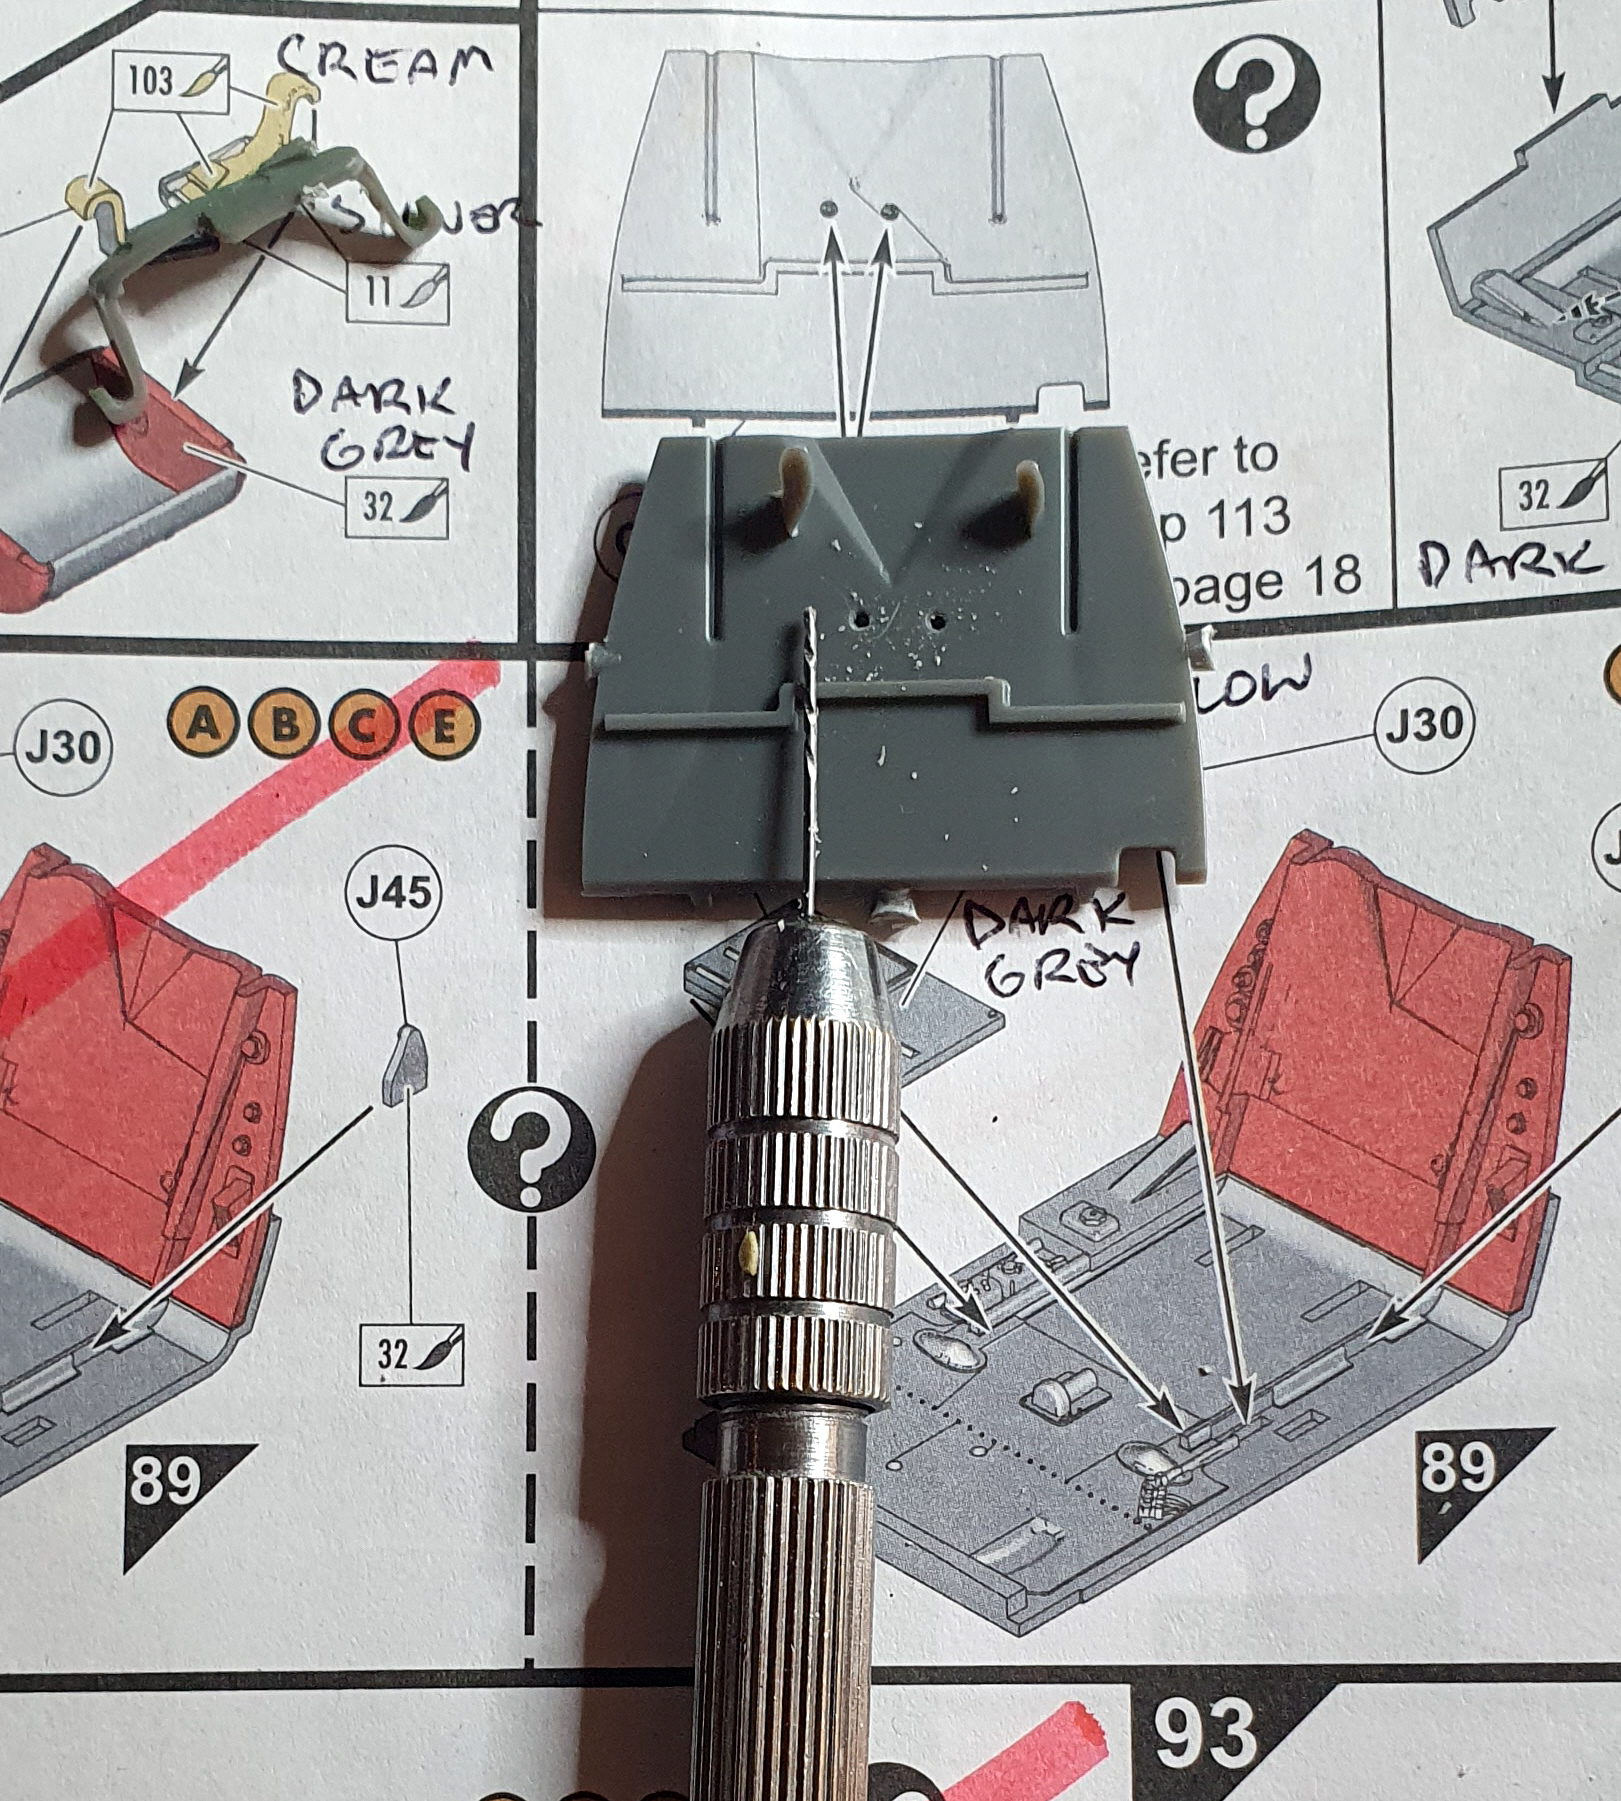
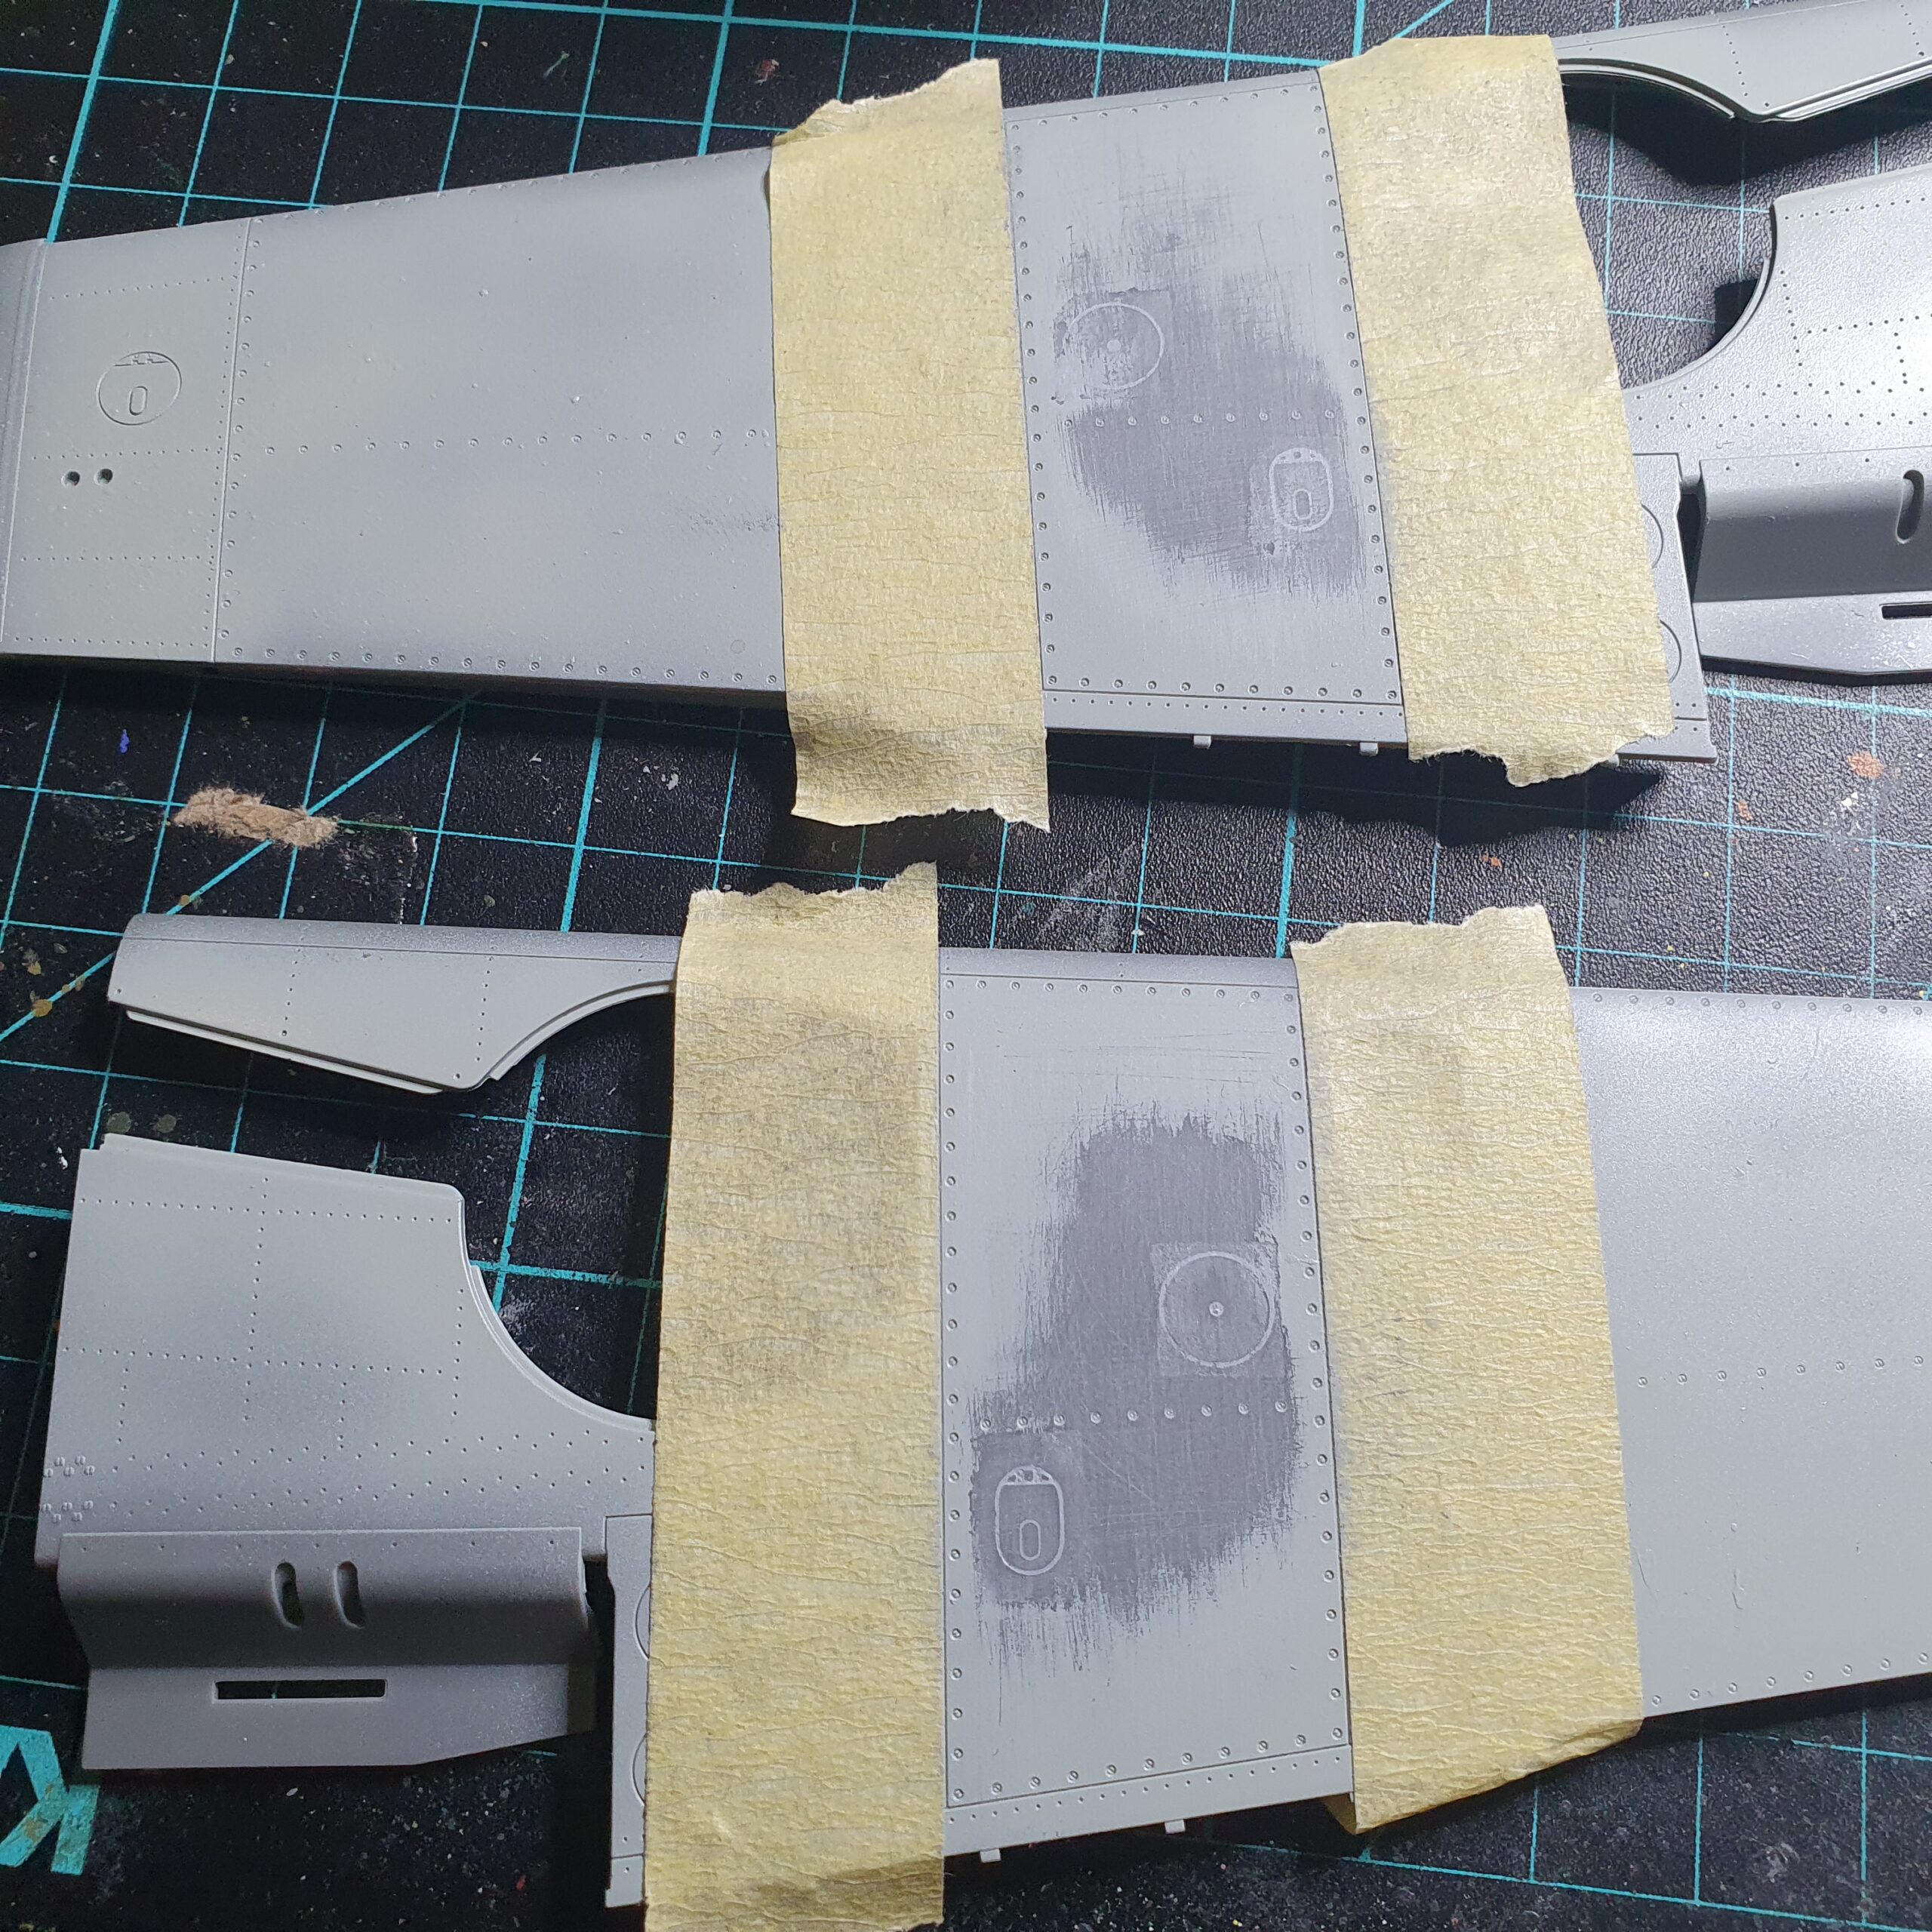
Some parts are better painted on the sprue.
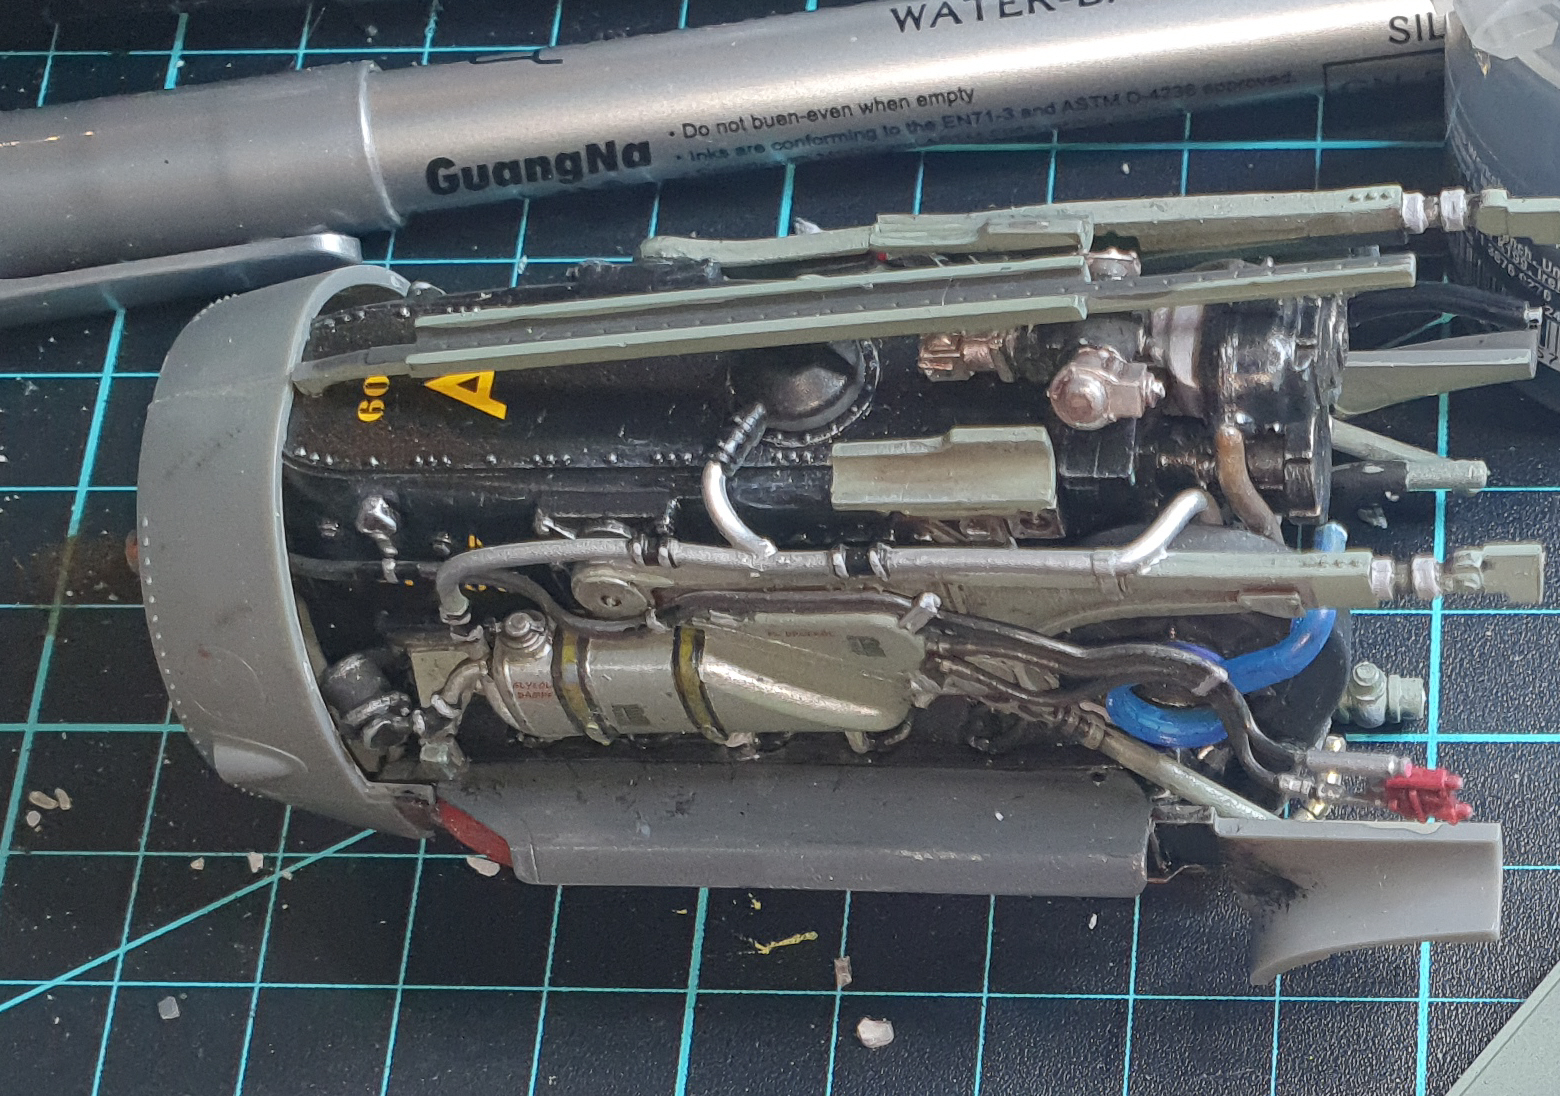
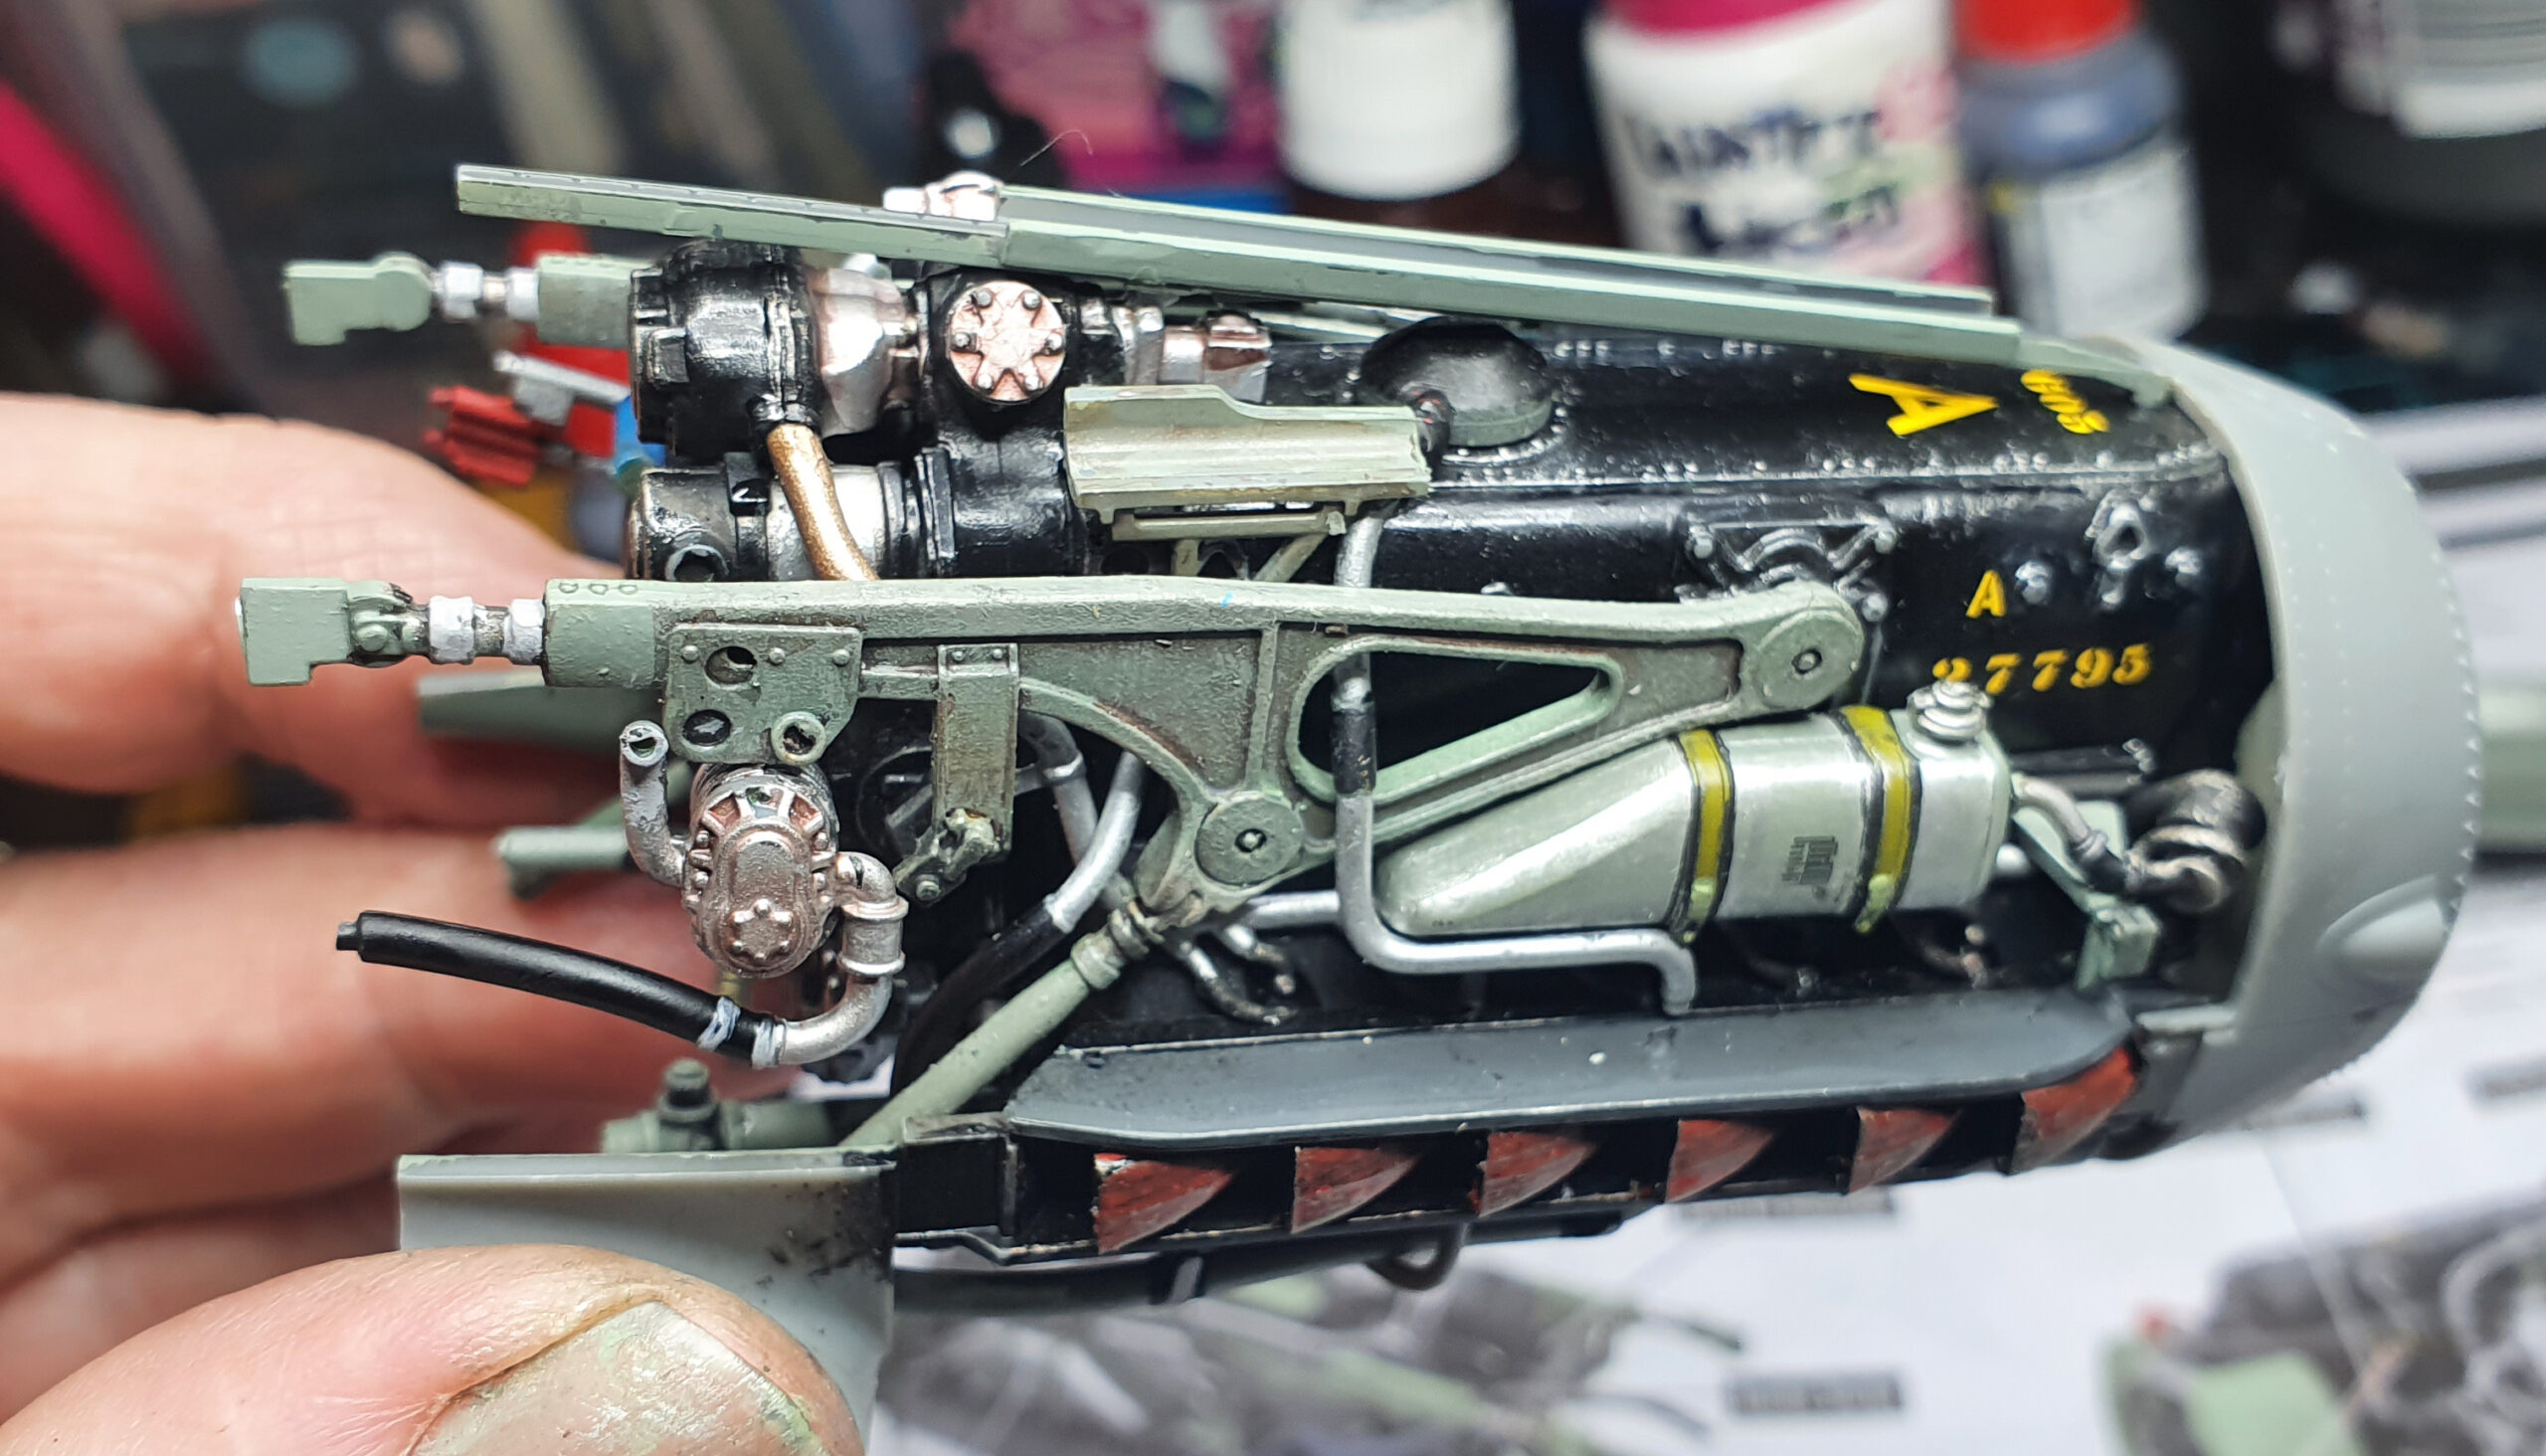
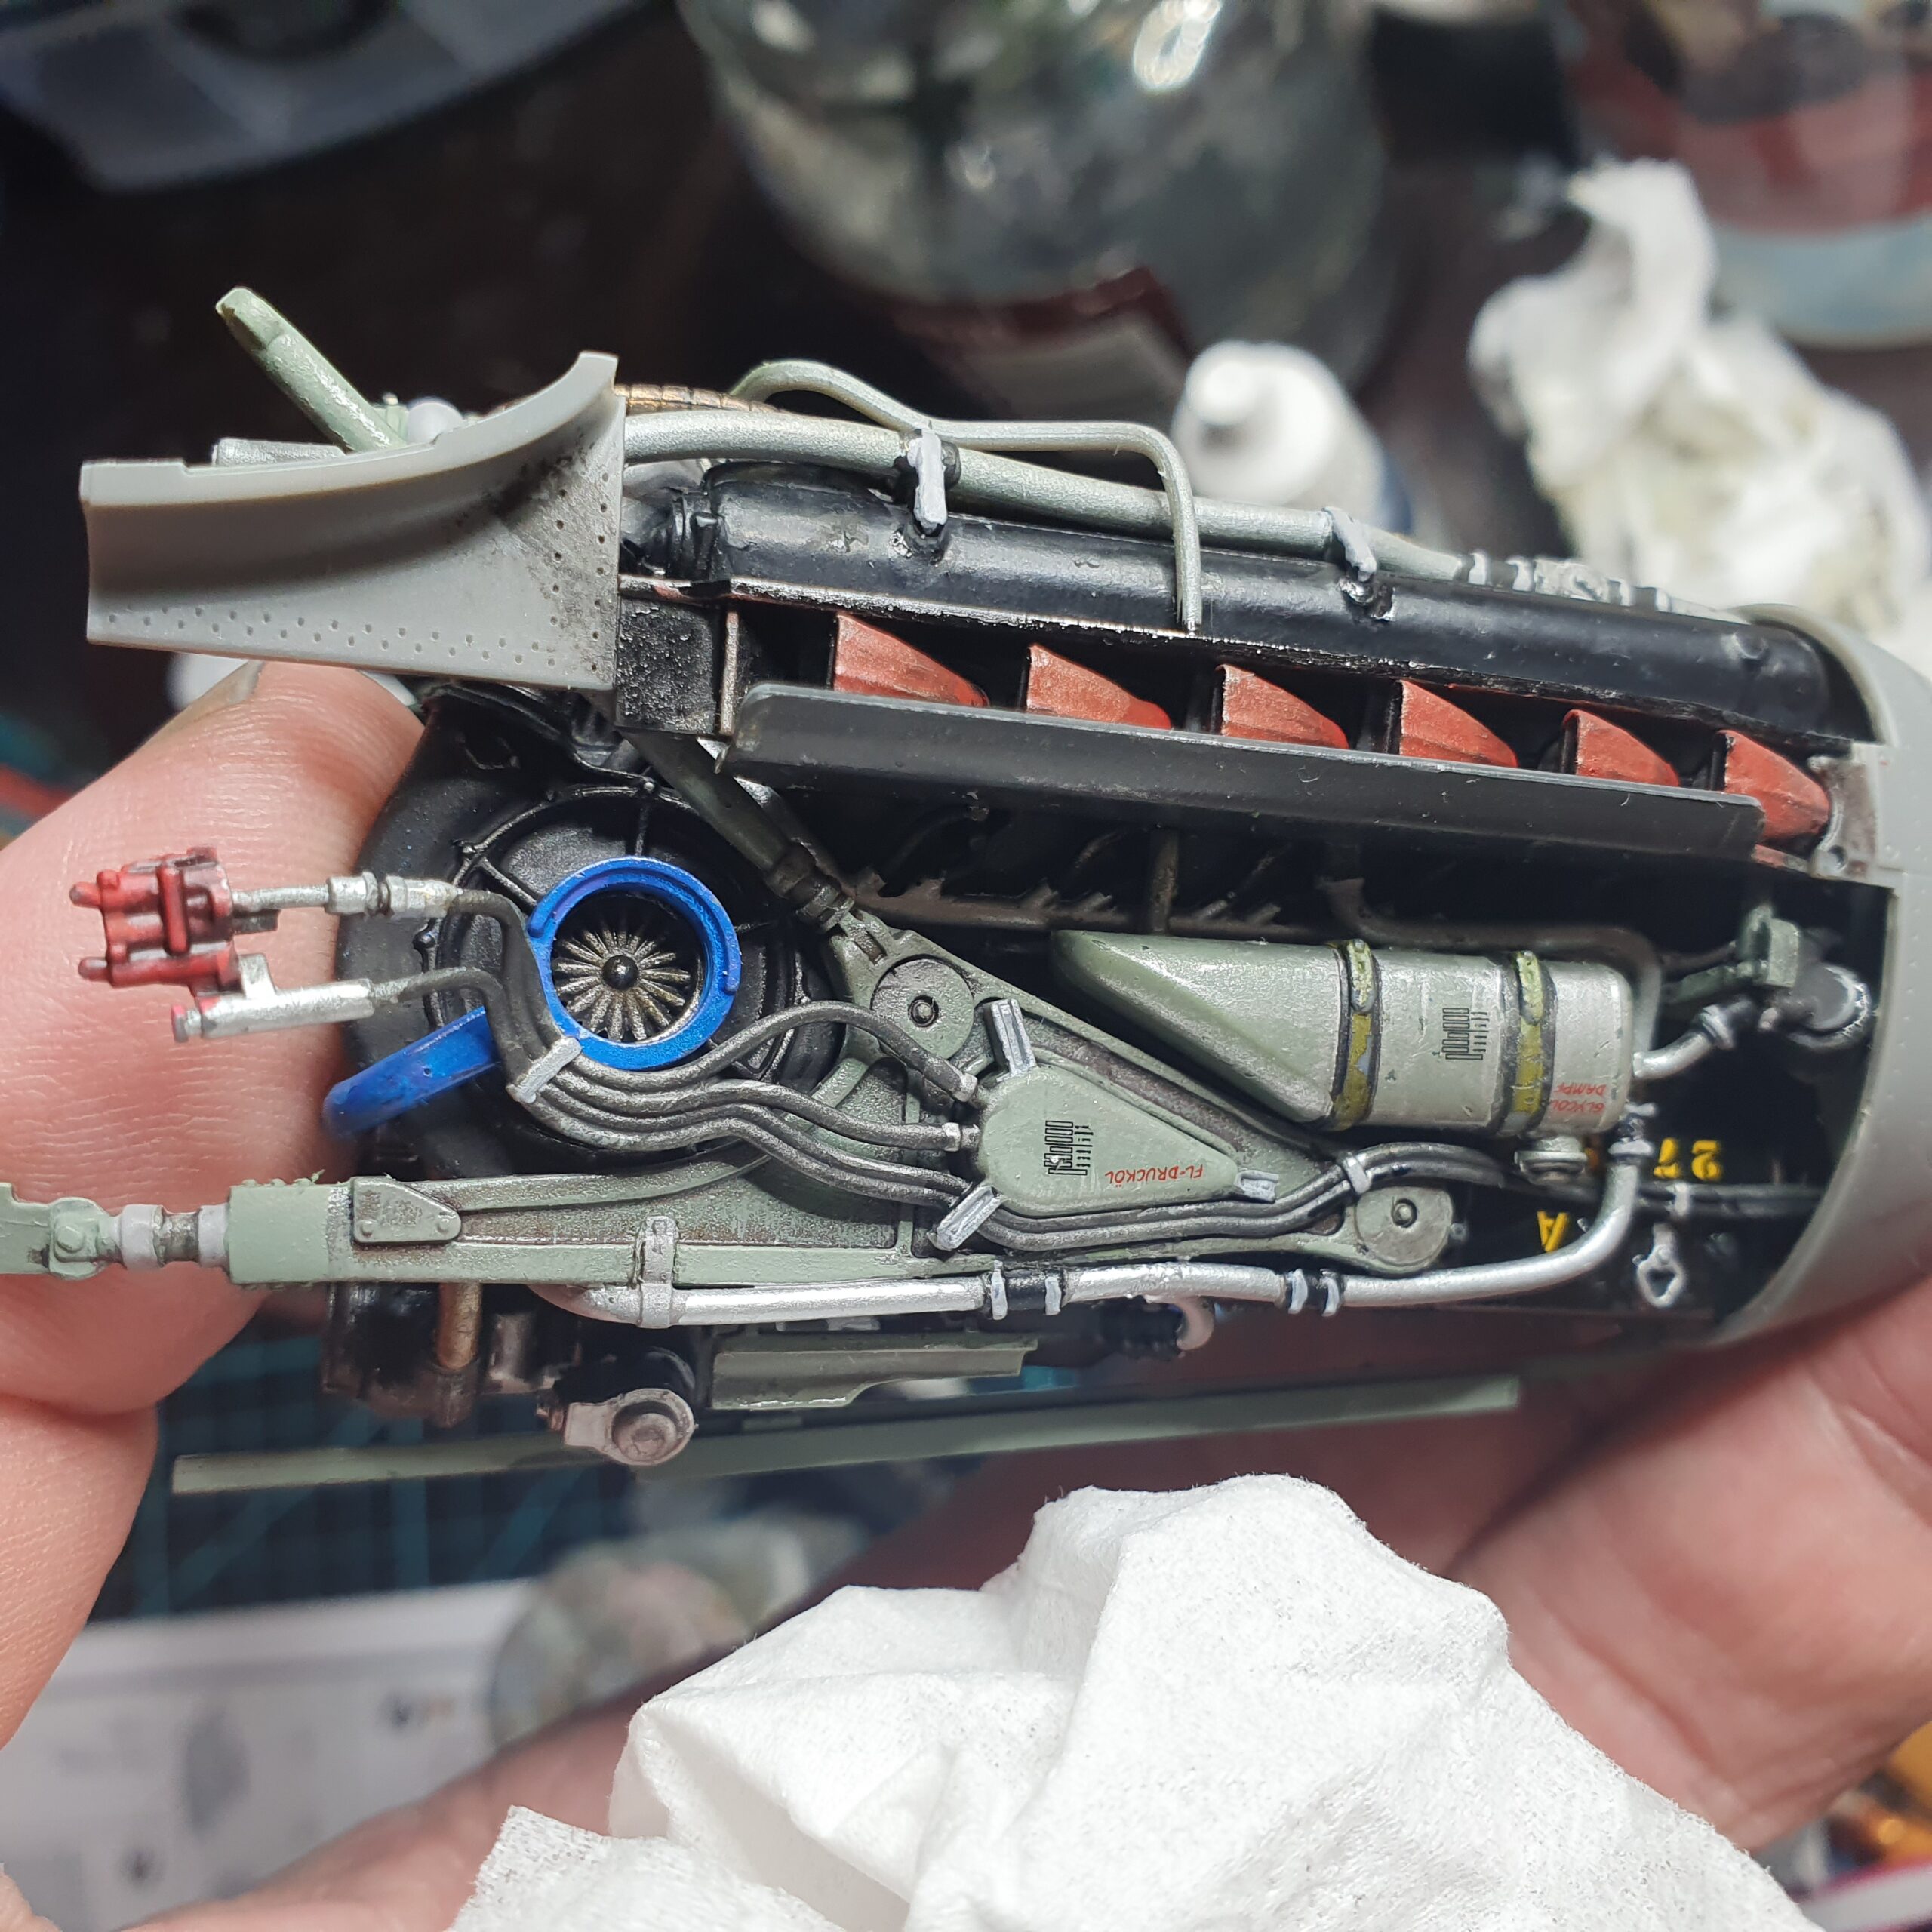
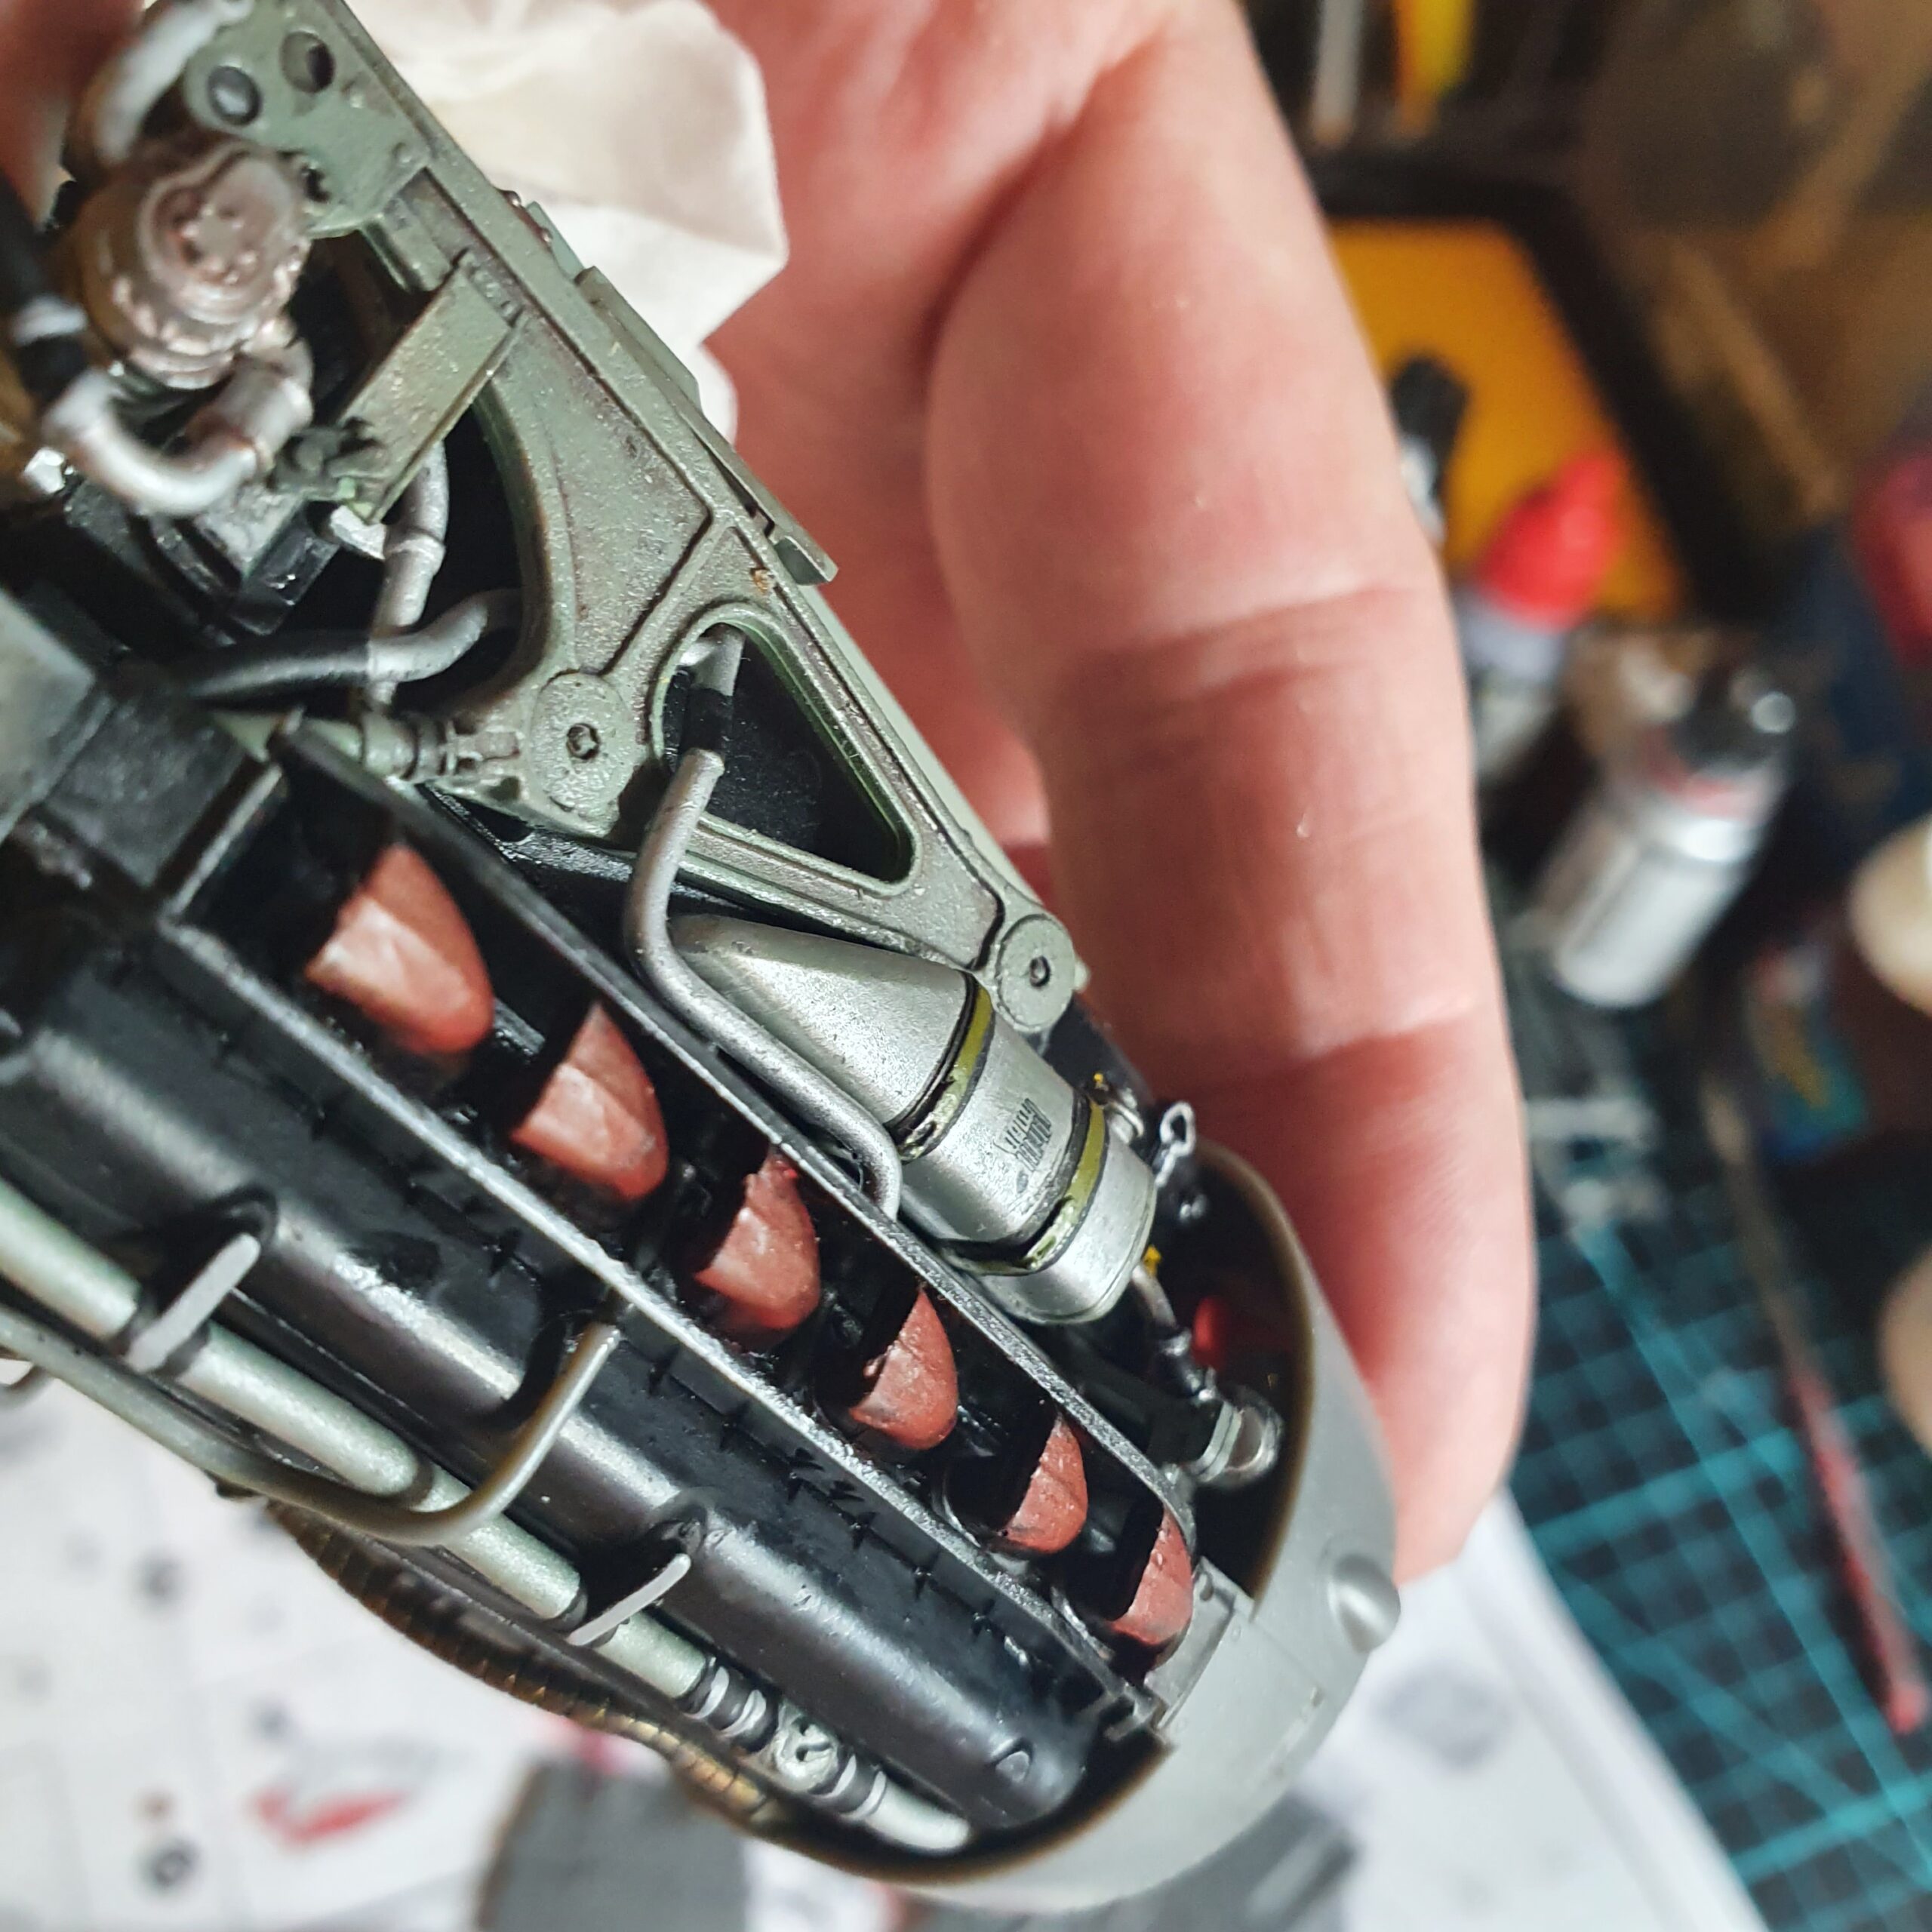
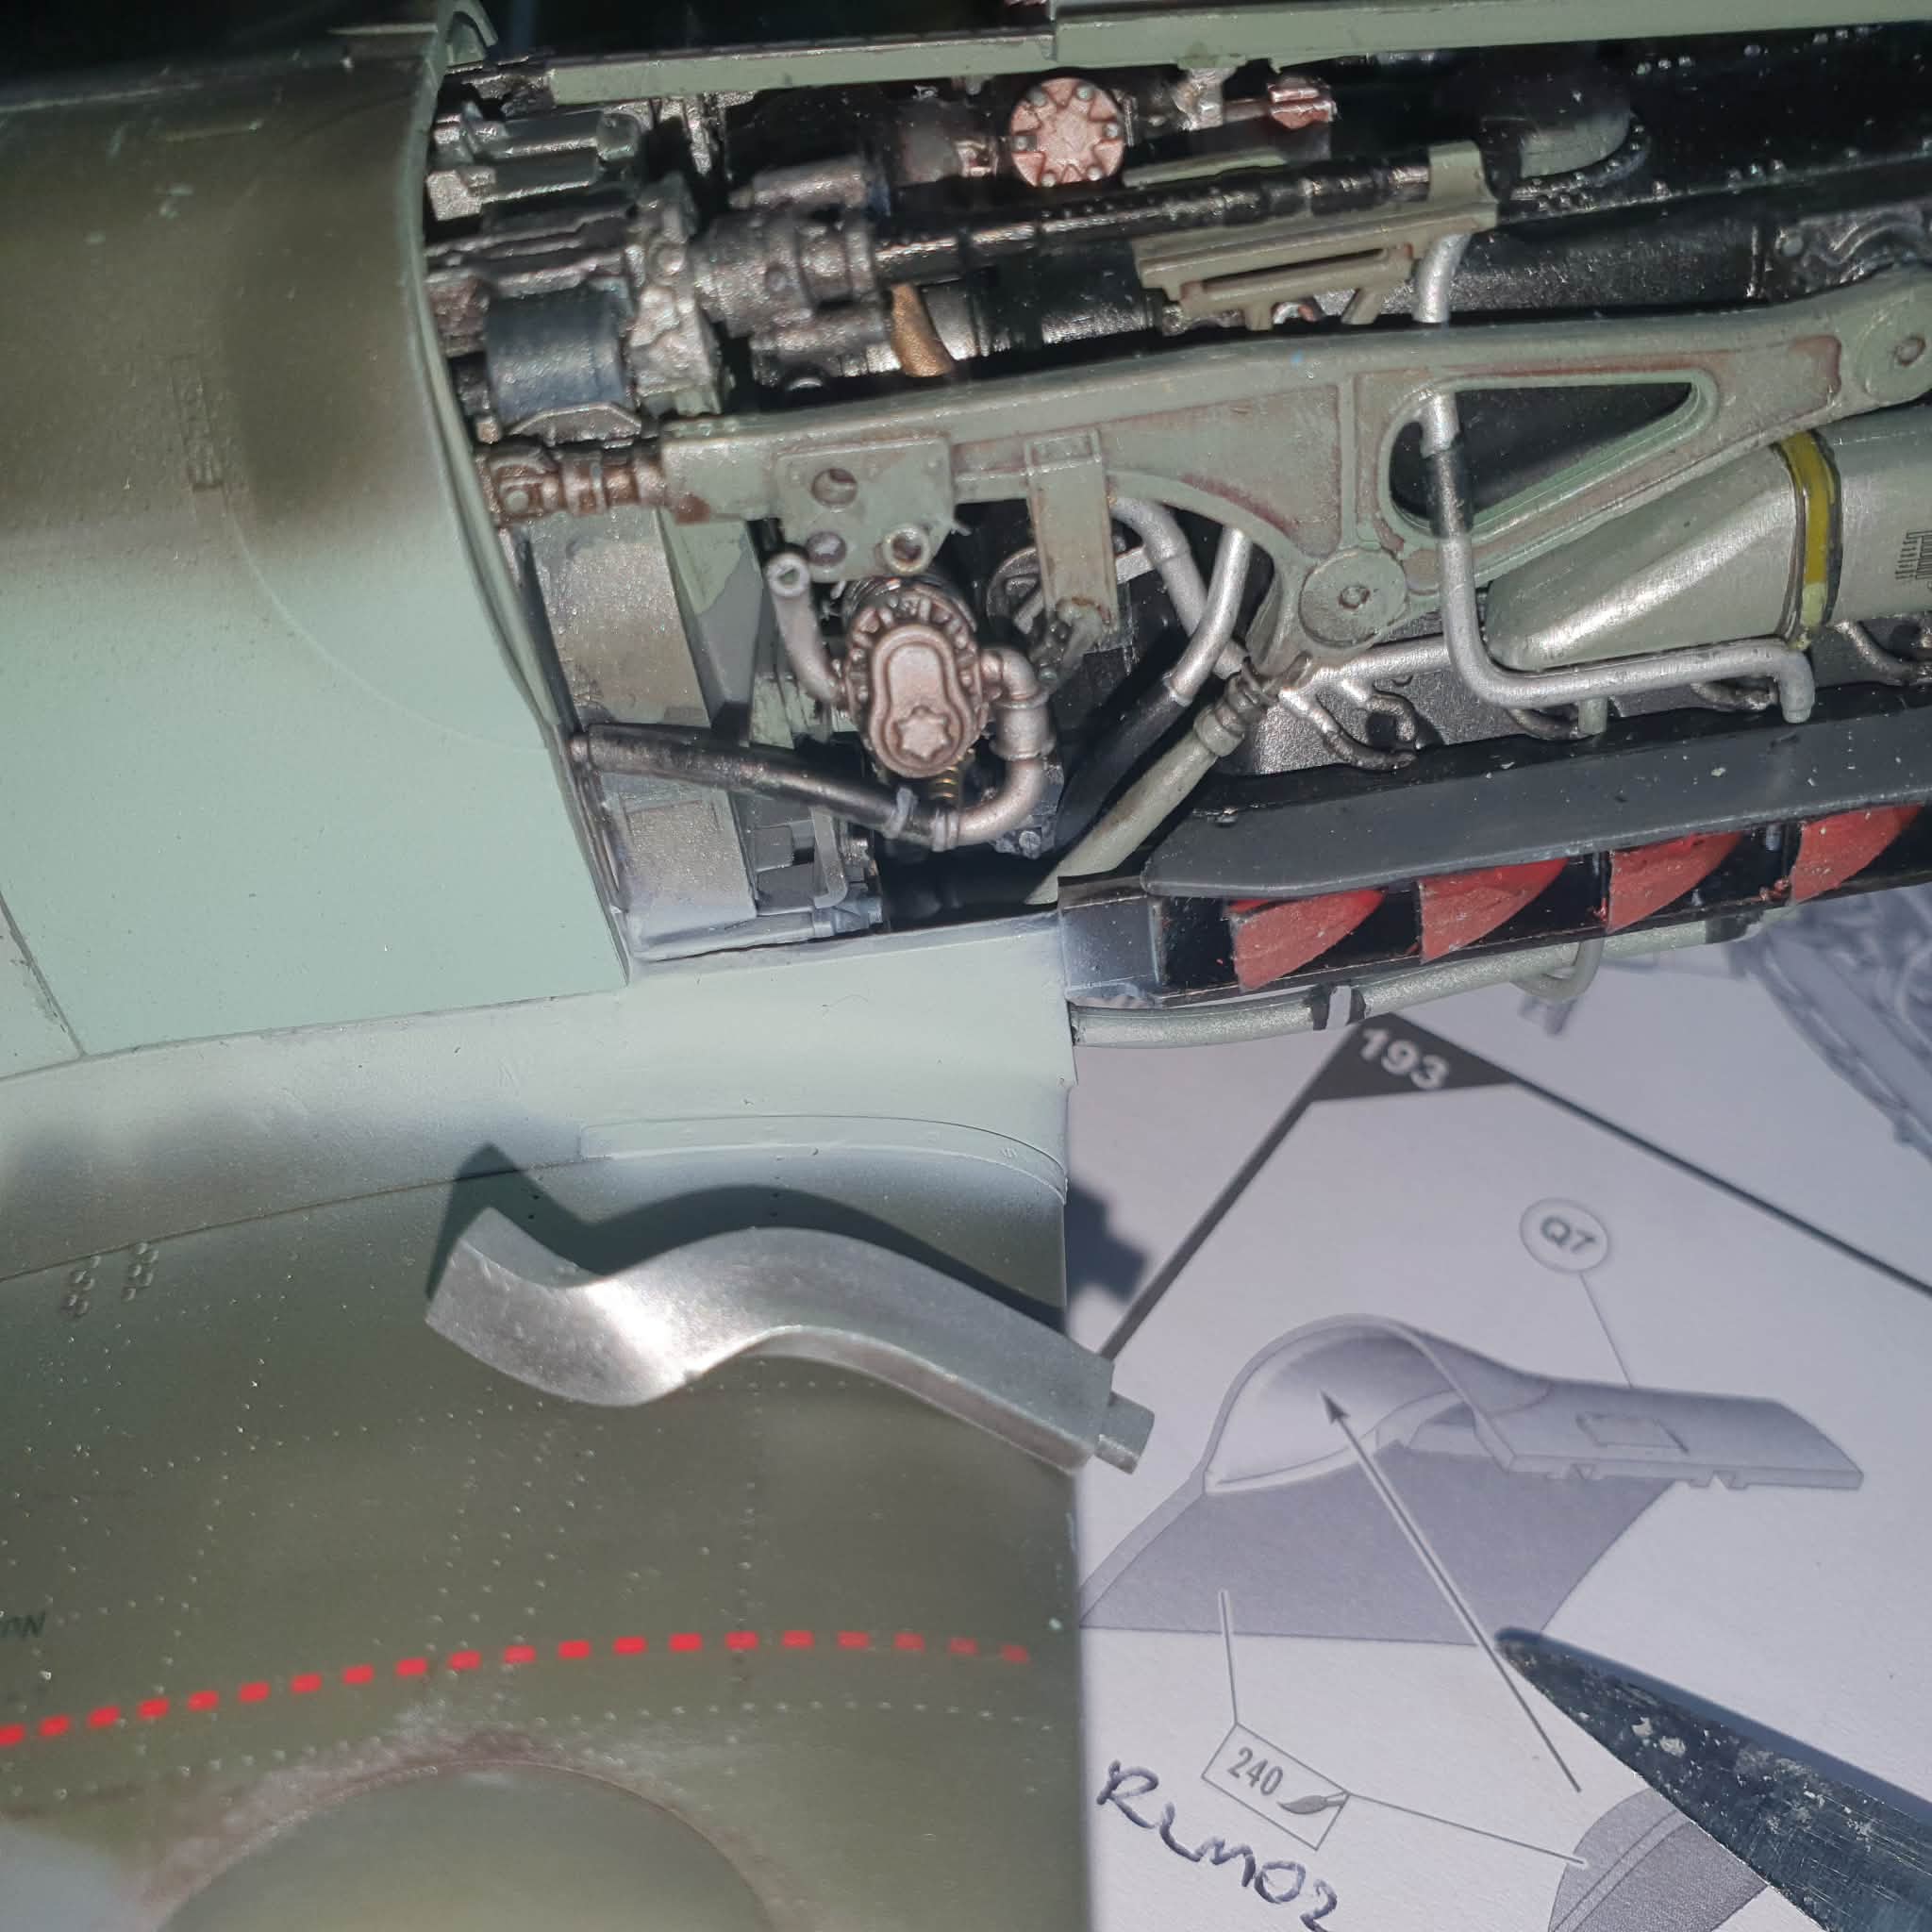
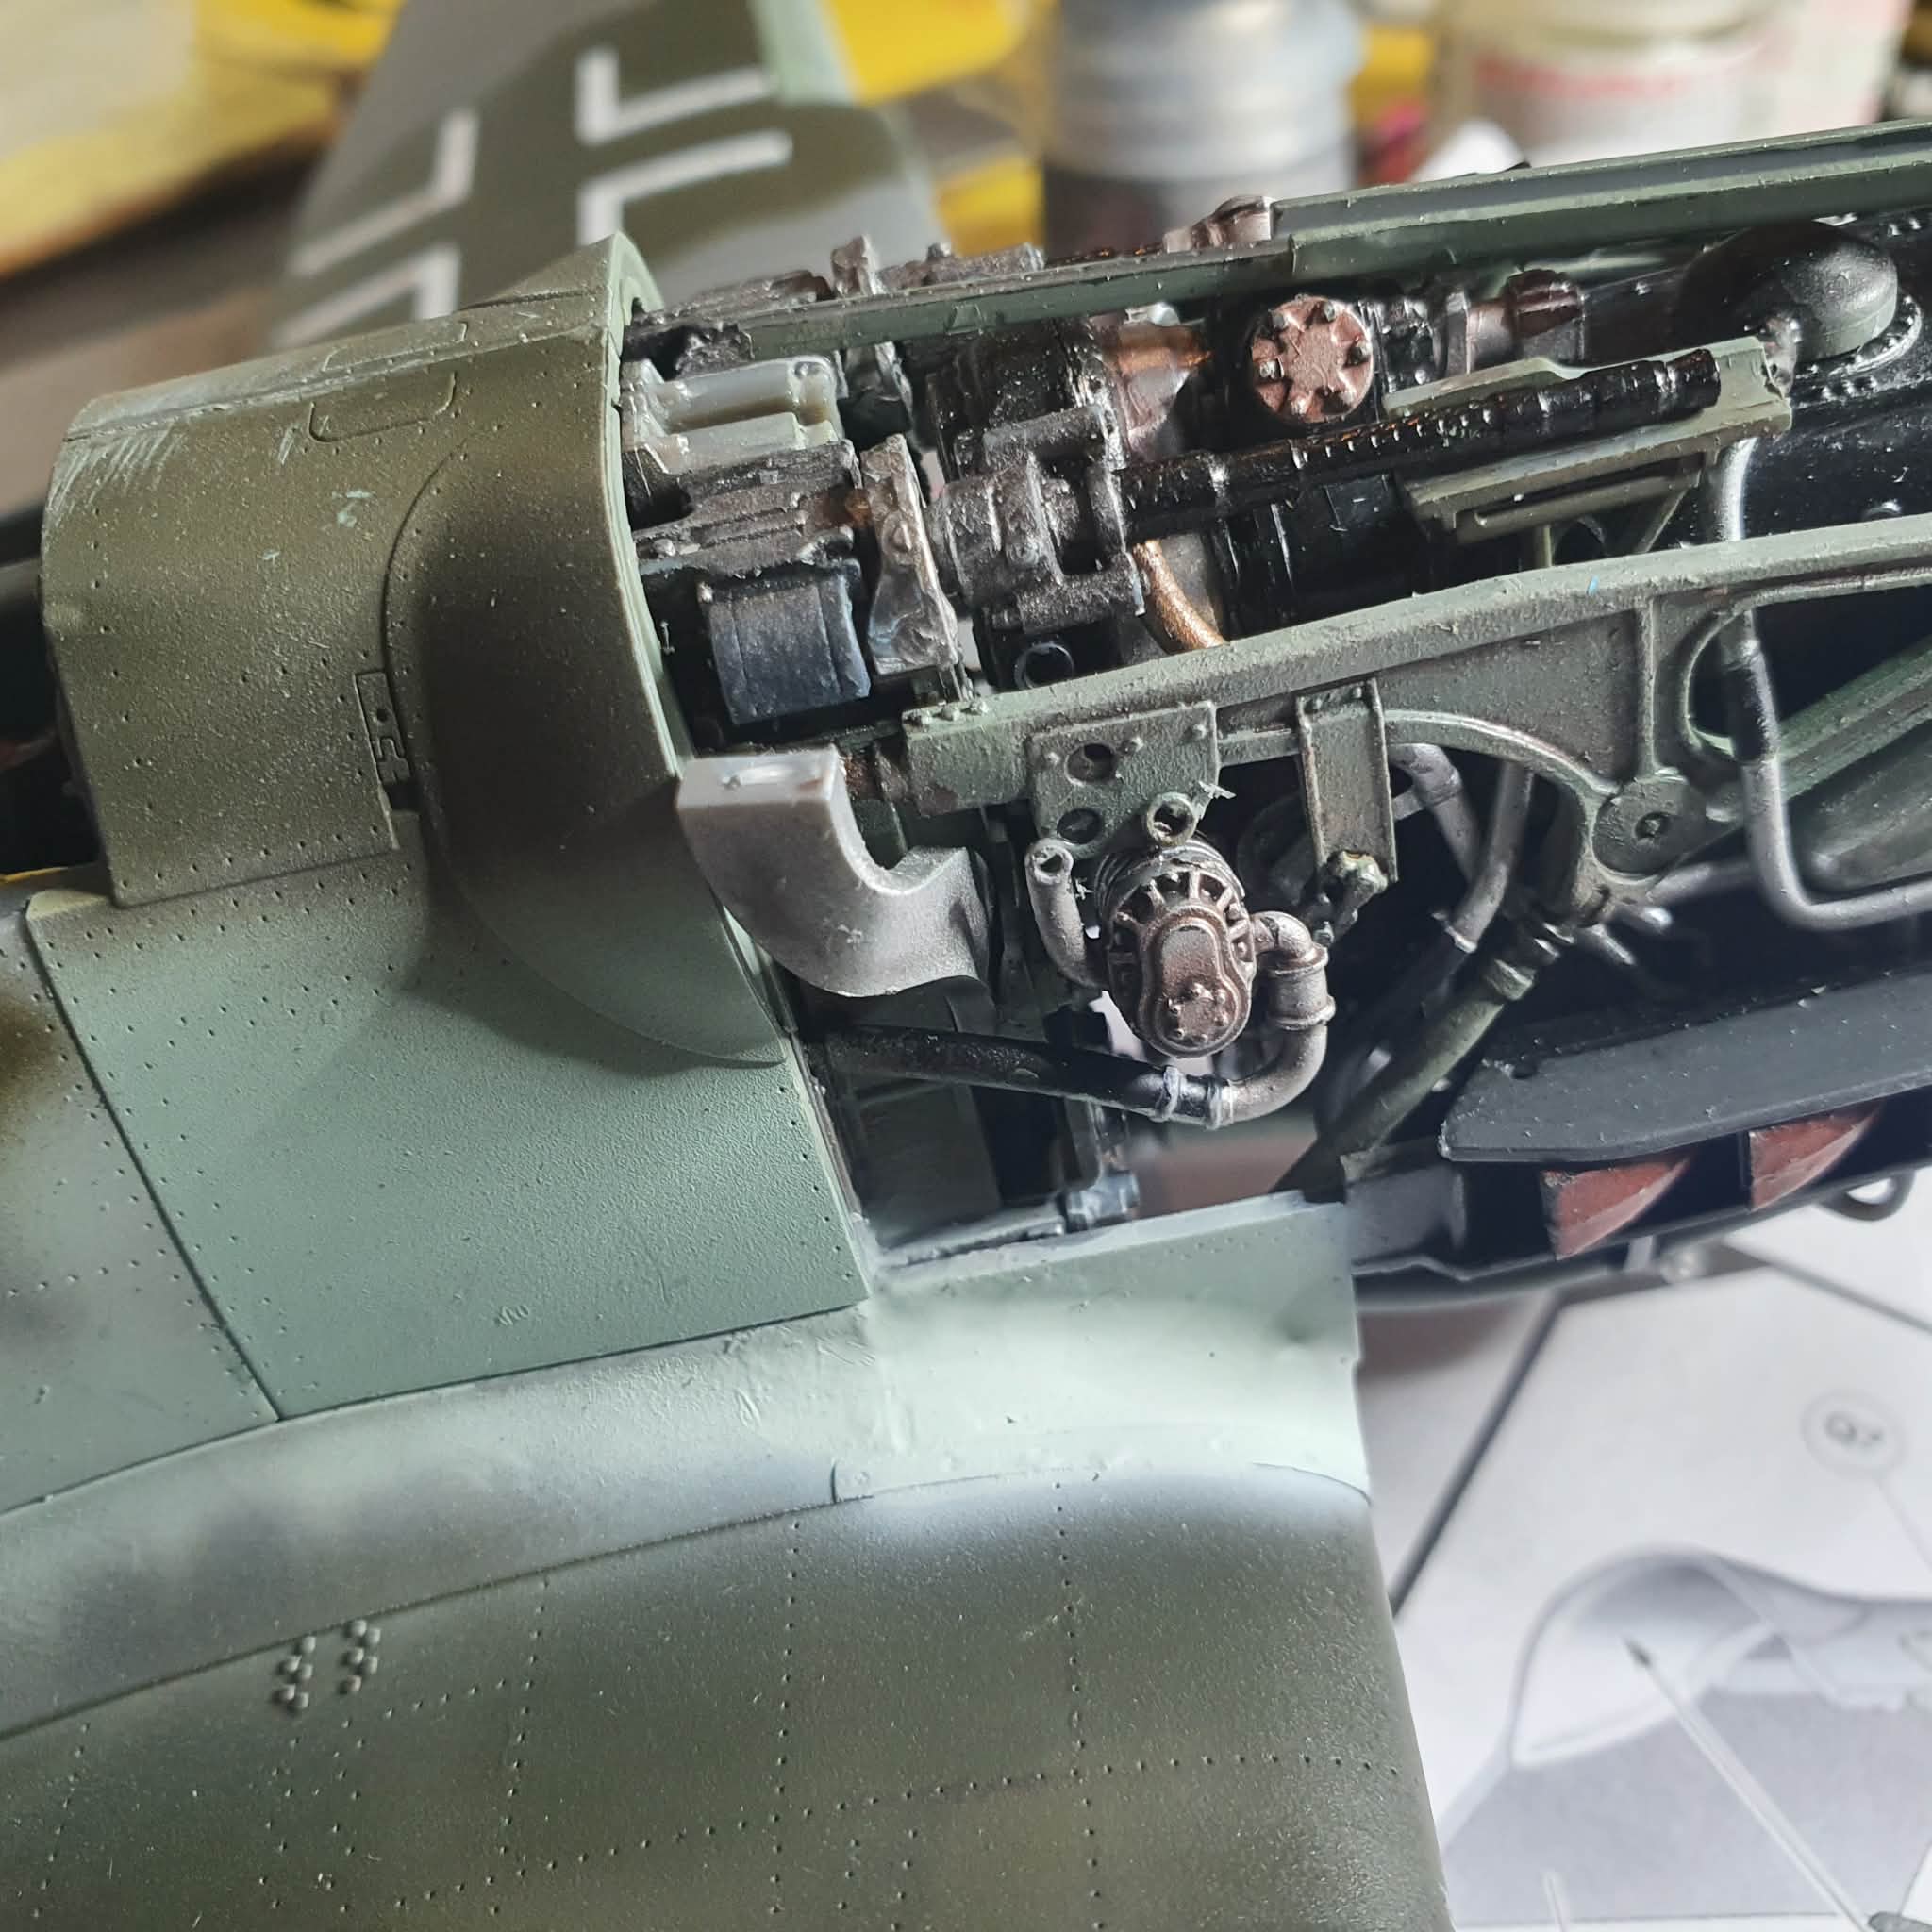
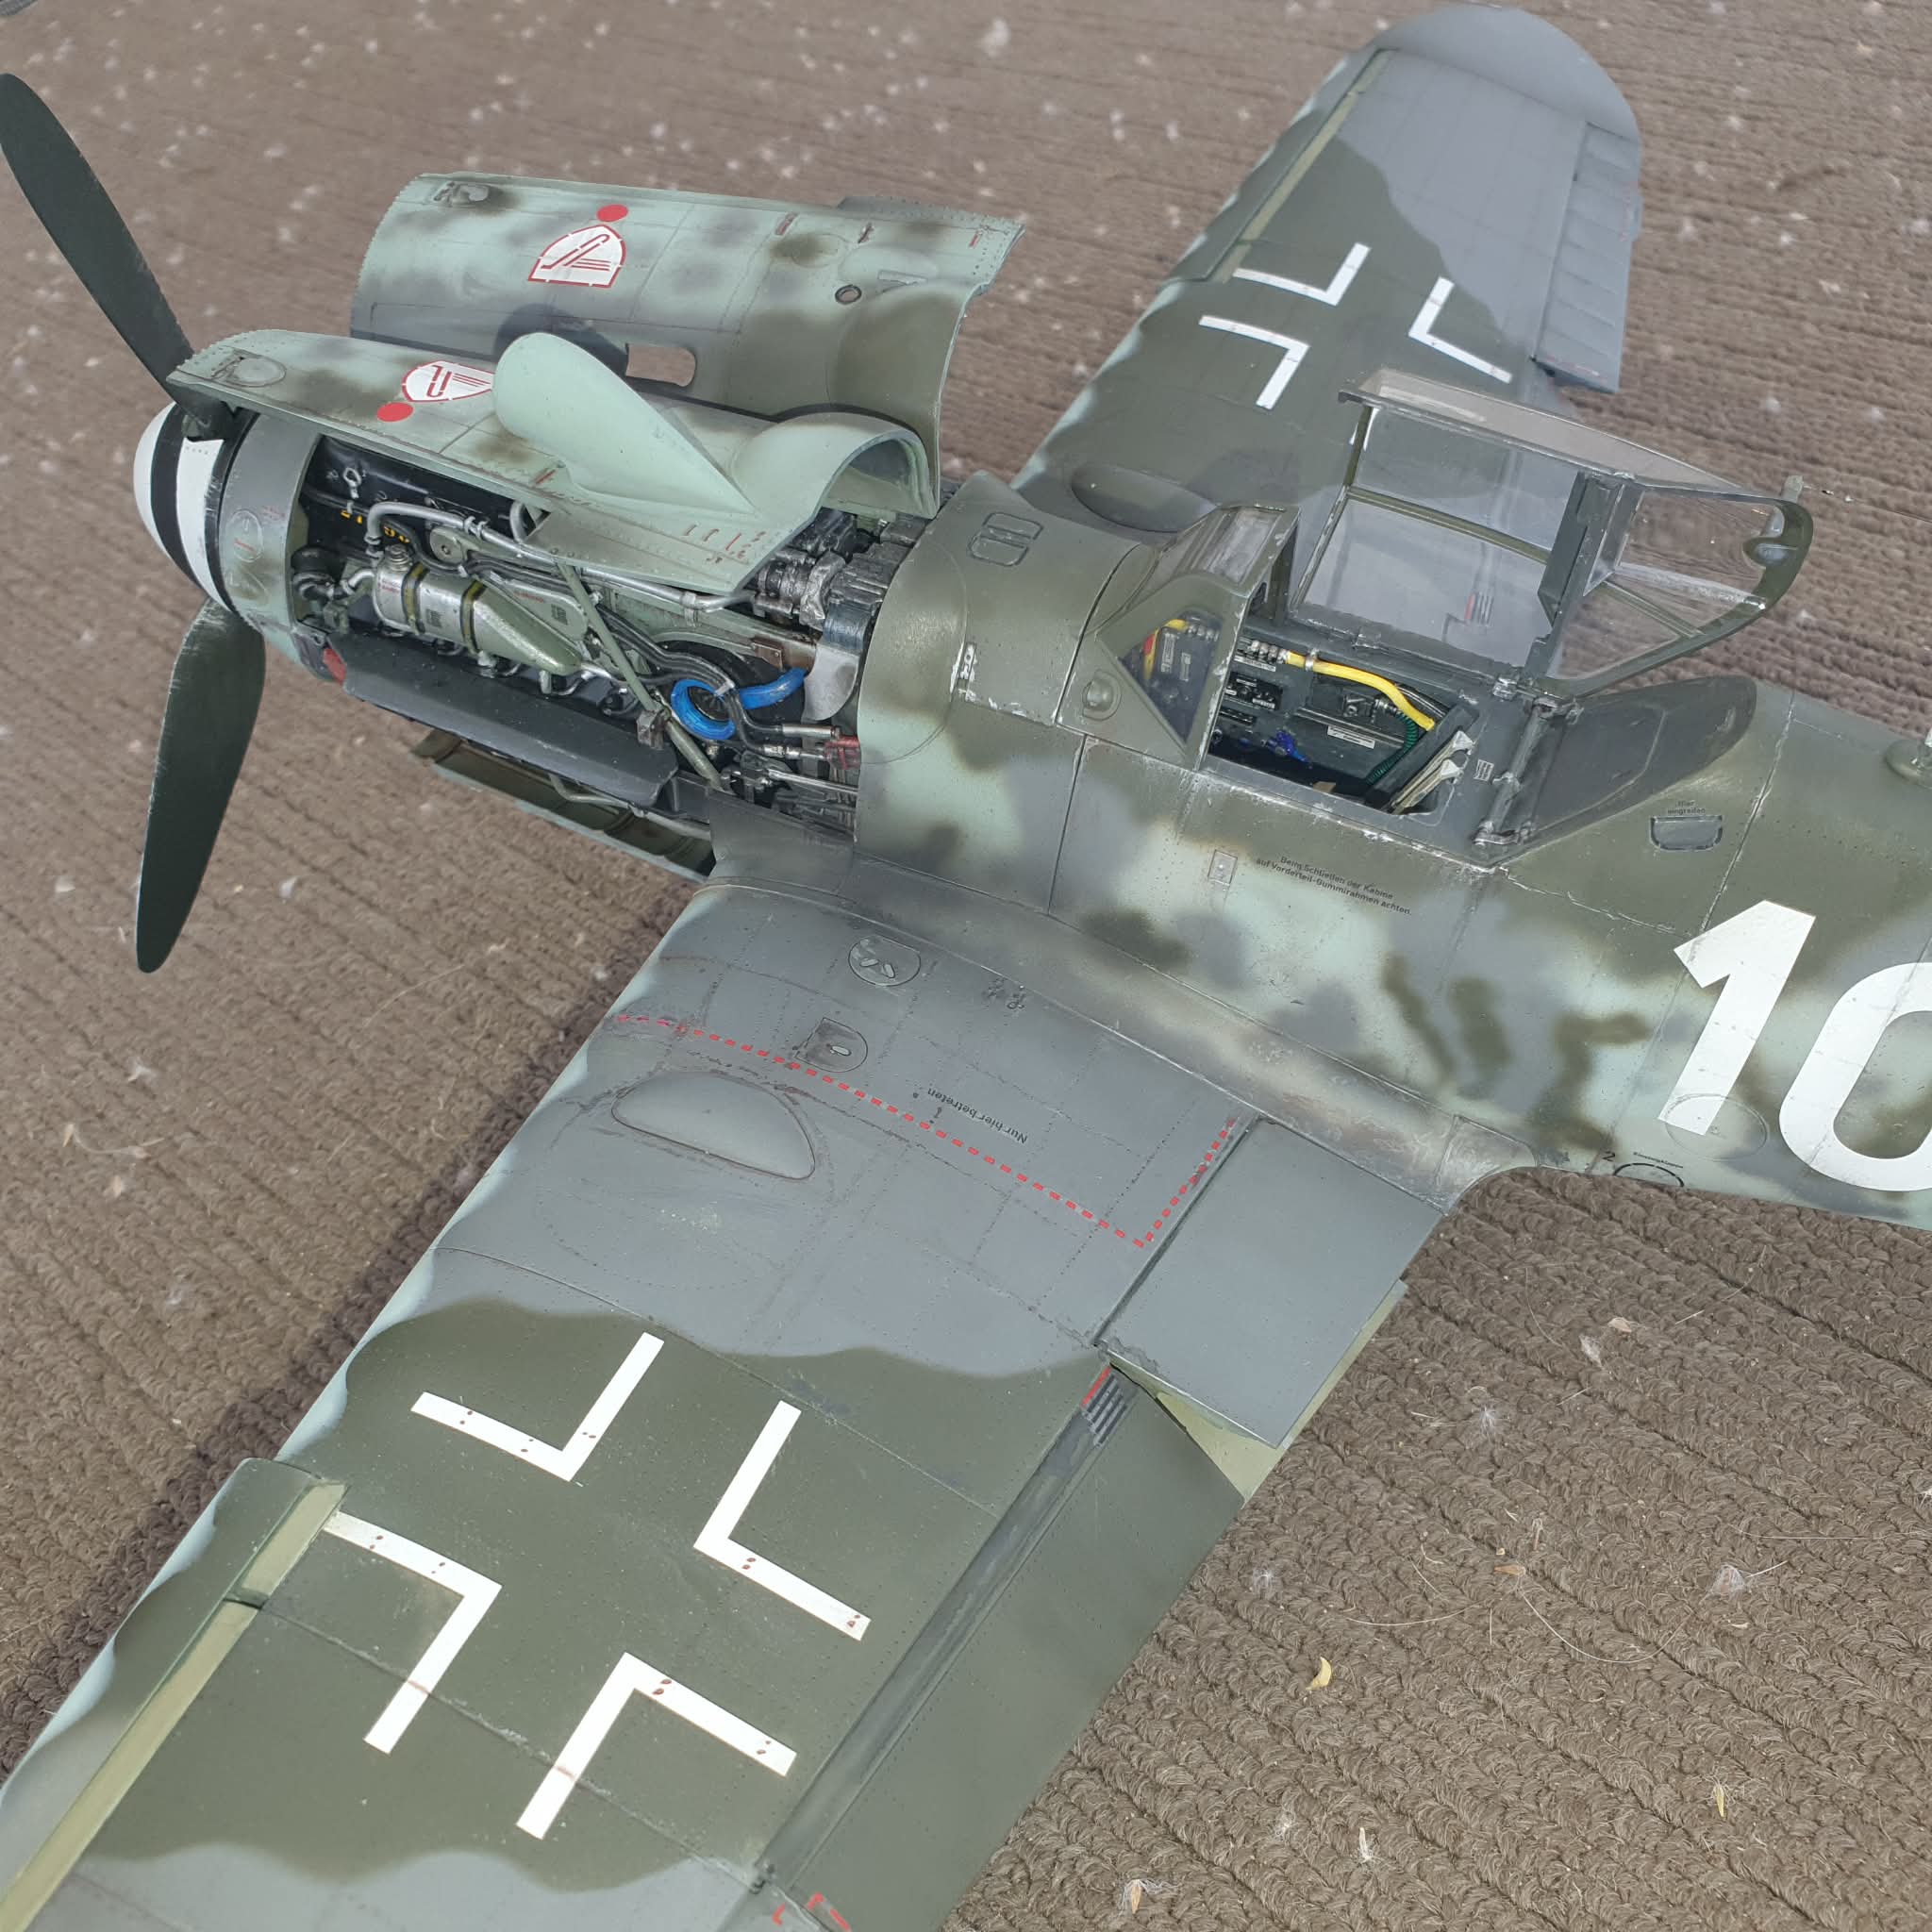
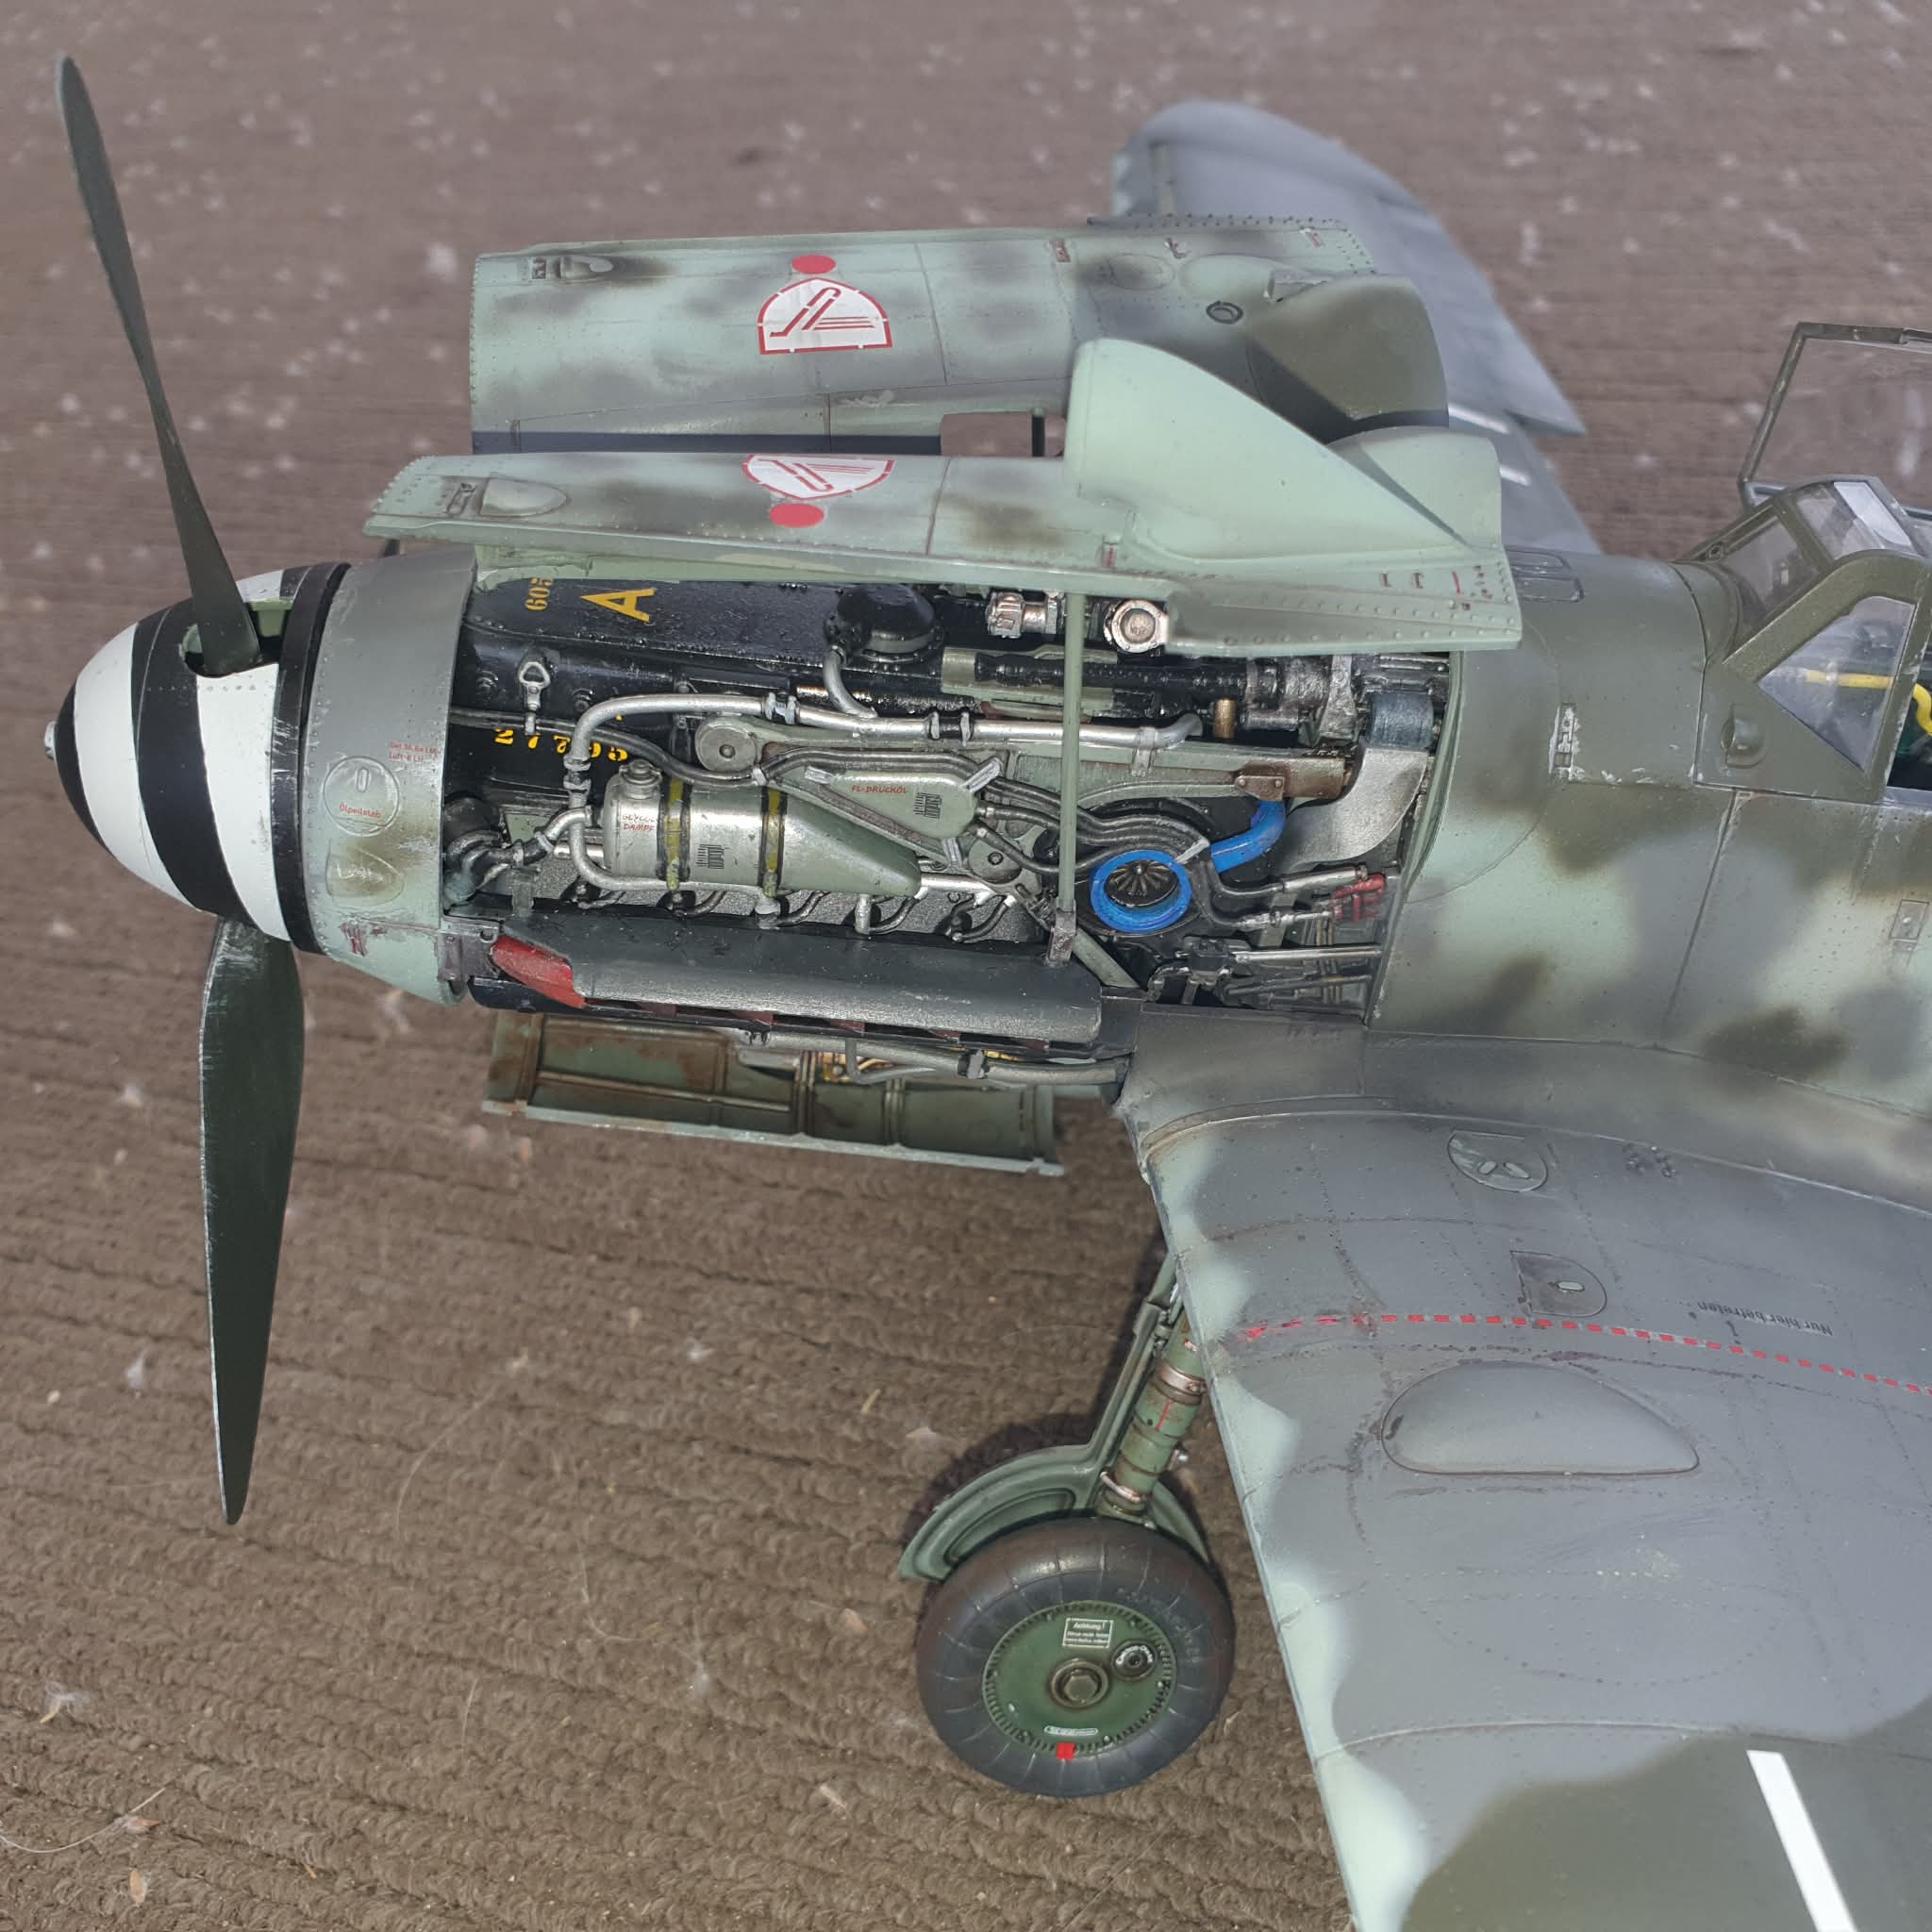
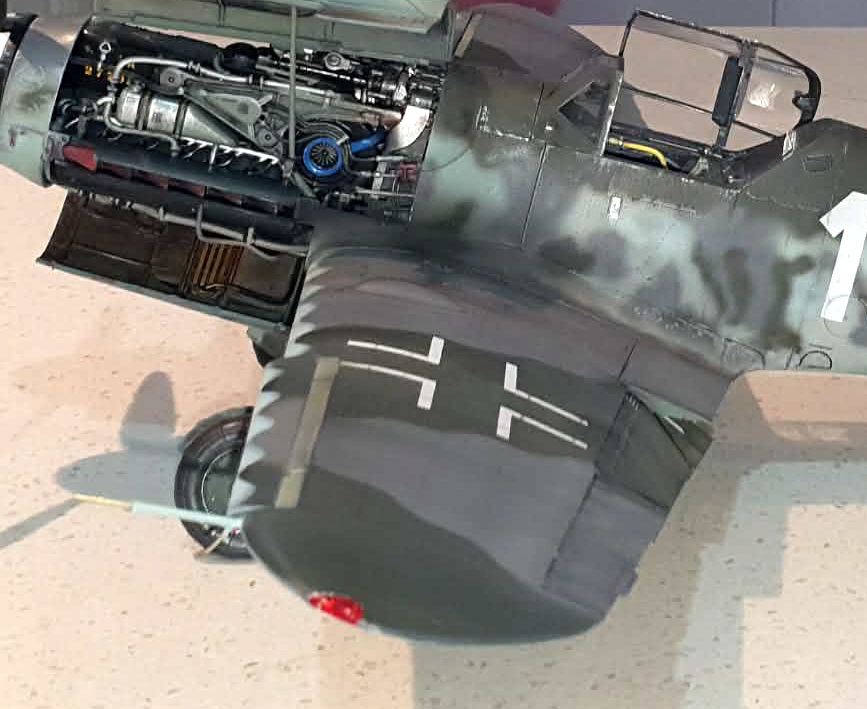
The first major sub assembly I built was the engine. This one proved to be far simpler than the Spitfire for many reasons ( German engineering versus British ?? ) Everything just fell into place. There appears to be plenty of detail for anyone wanting to make their aircraft into an autopsy scene. I’m sure more detail could be added but seriously, what’s there looks the bizz. Colours used were what the instructions suggested and I applied a little wash here and there to give an oily look but I held back on the weathering.
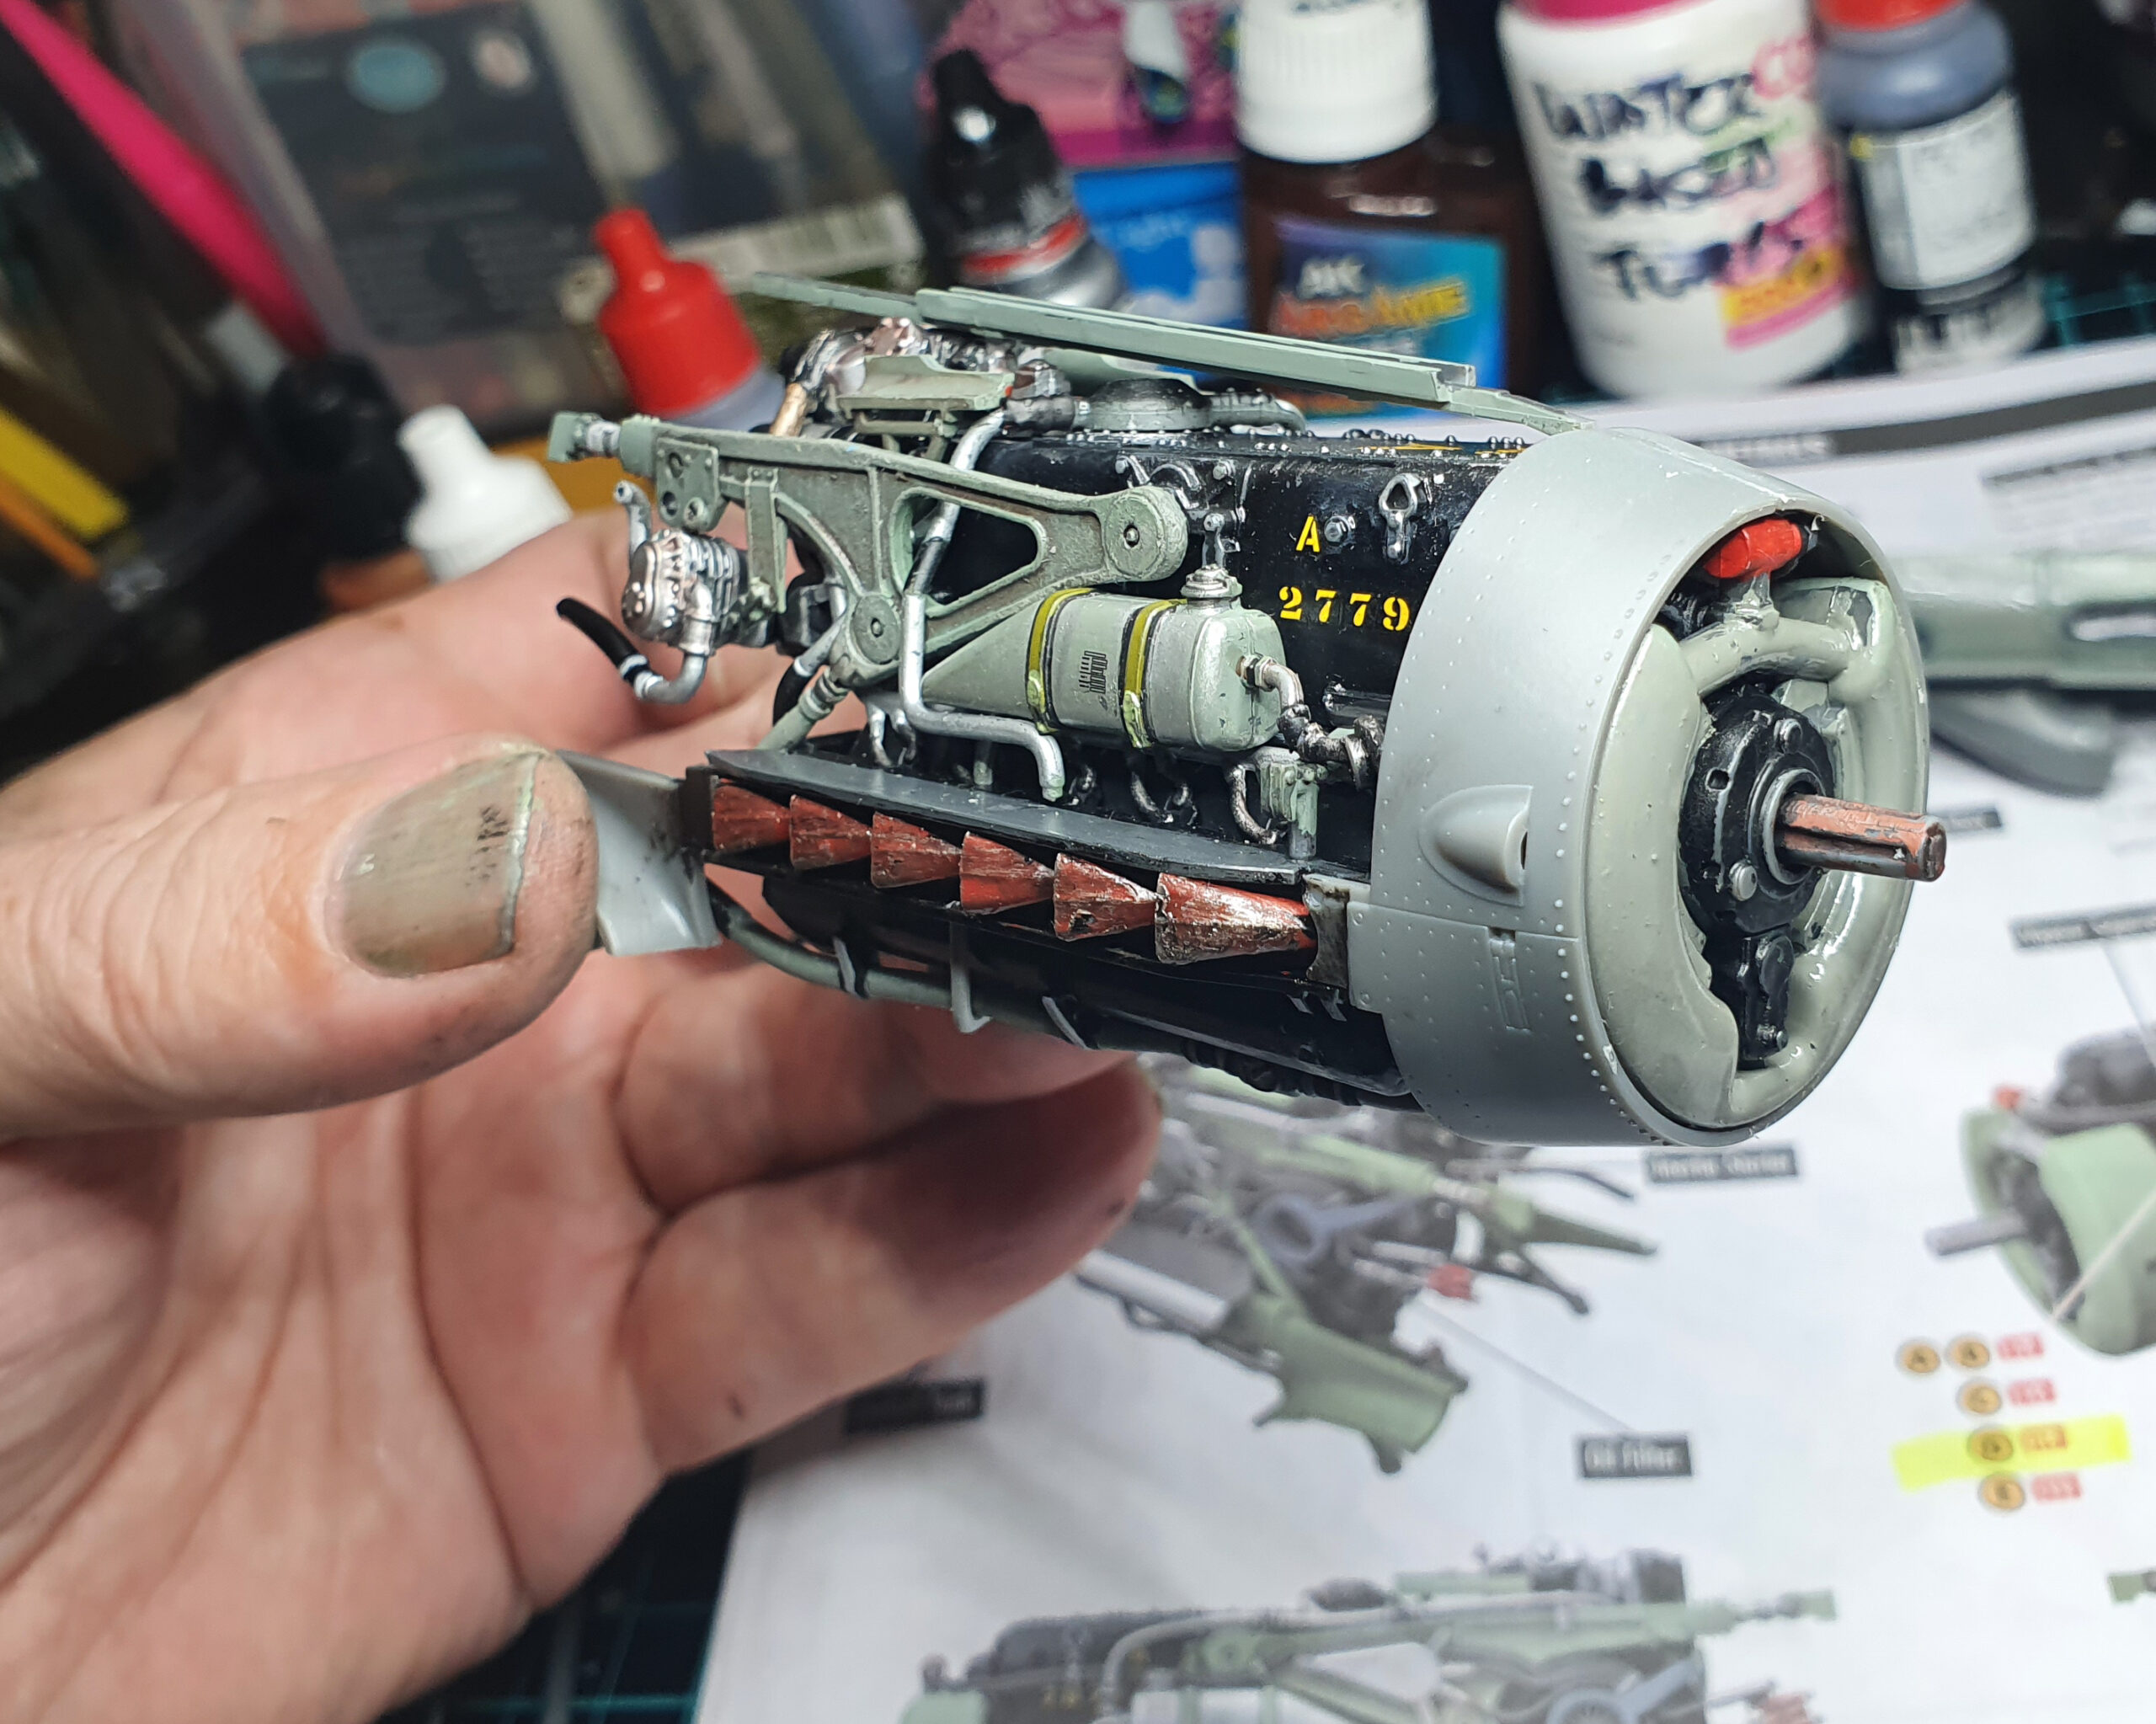
I just followed the instructions and the colour callouts making use of acrylic markers along the way.
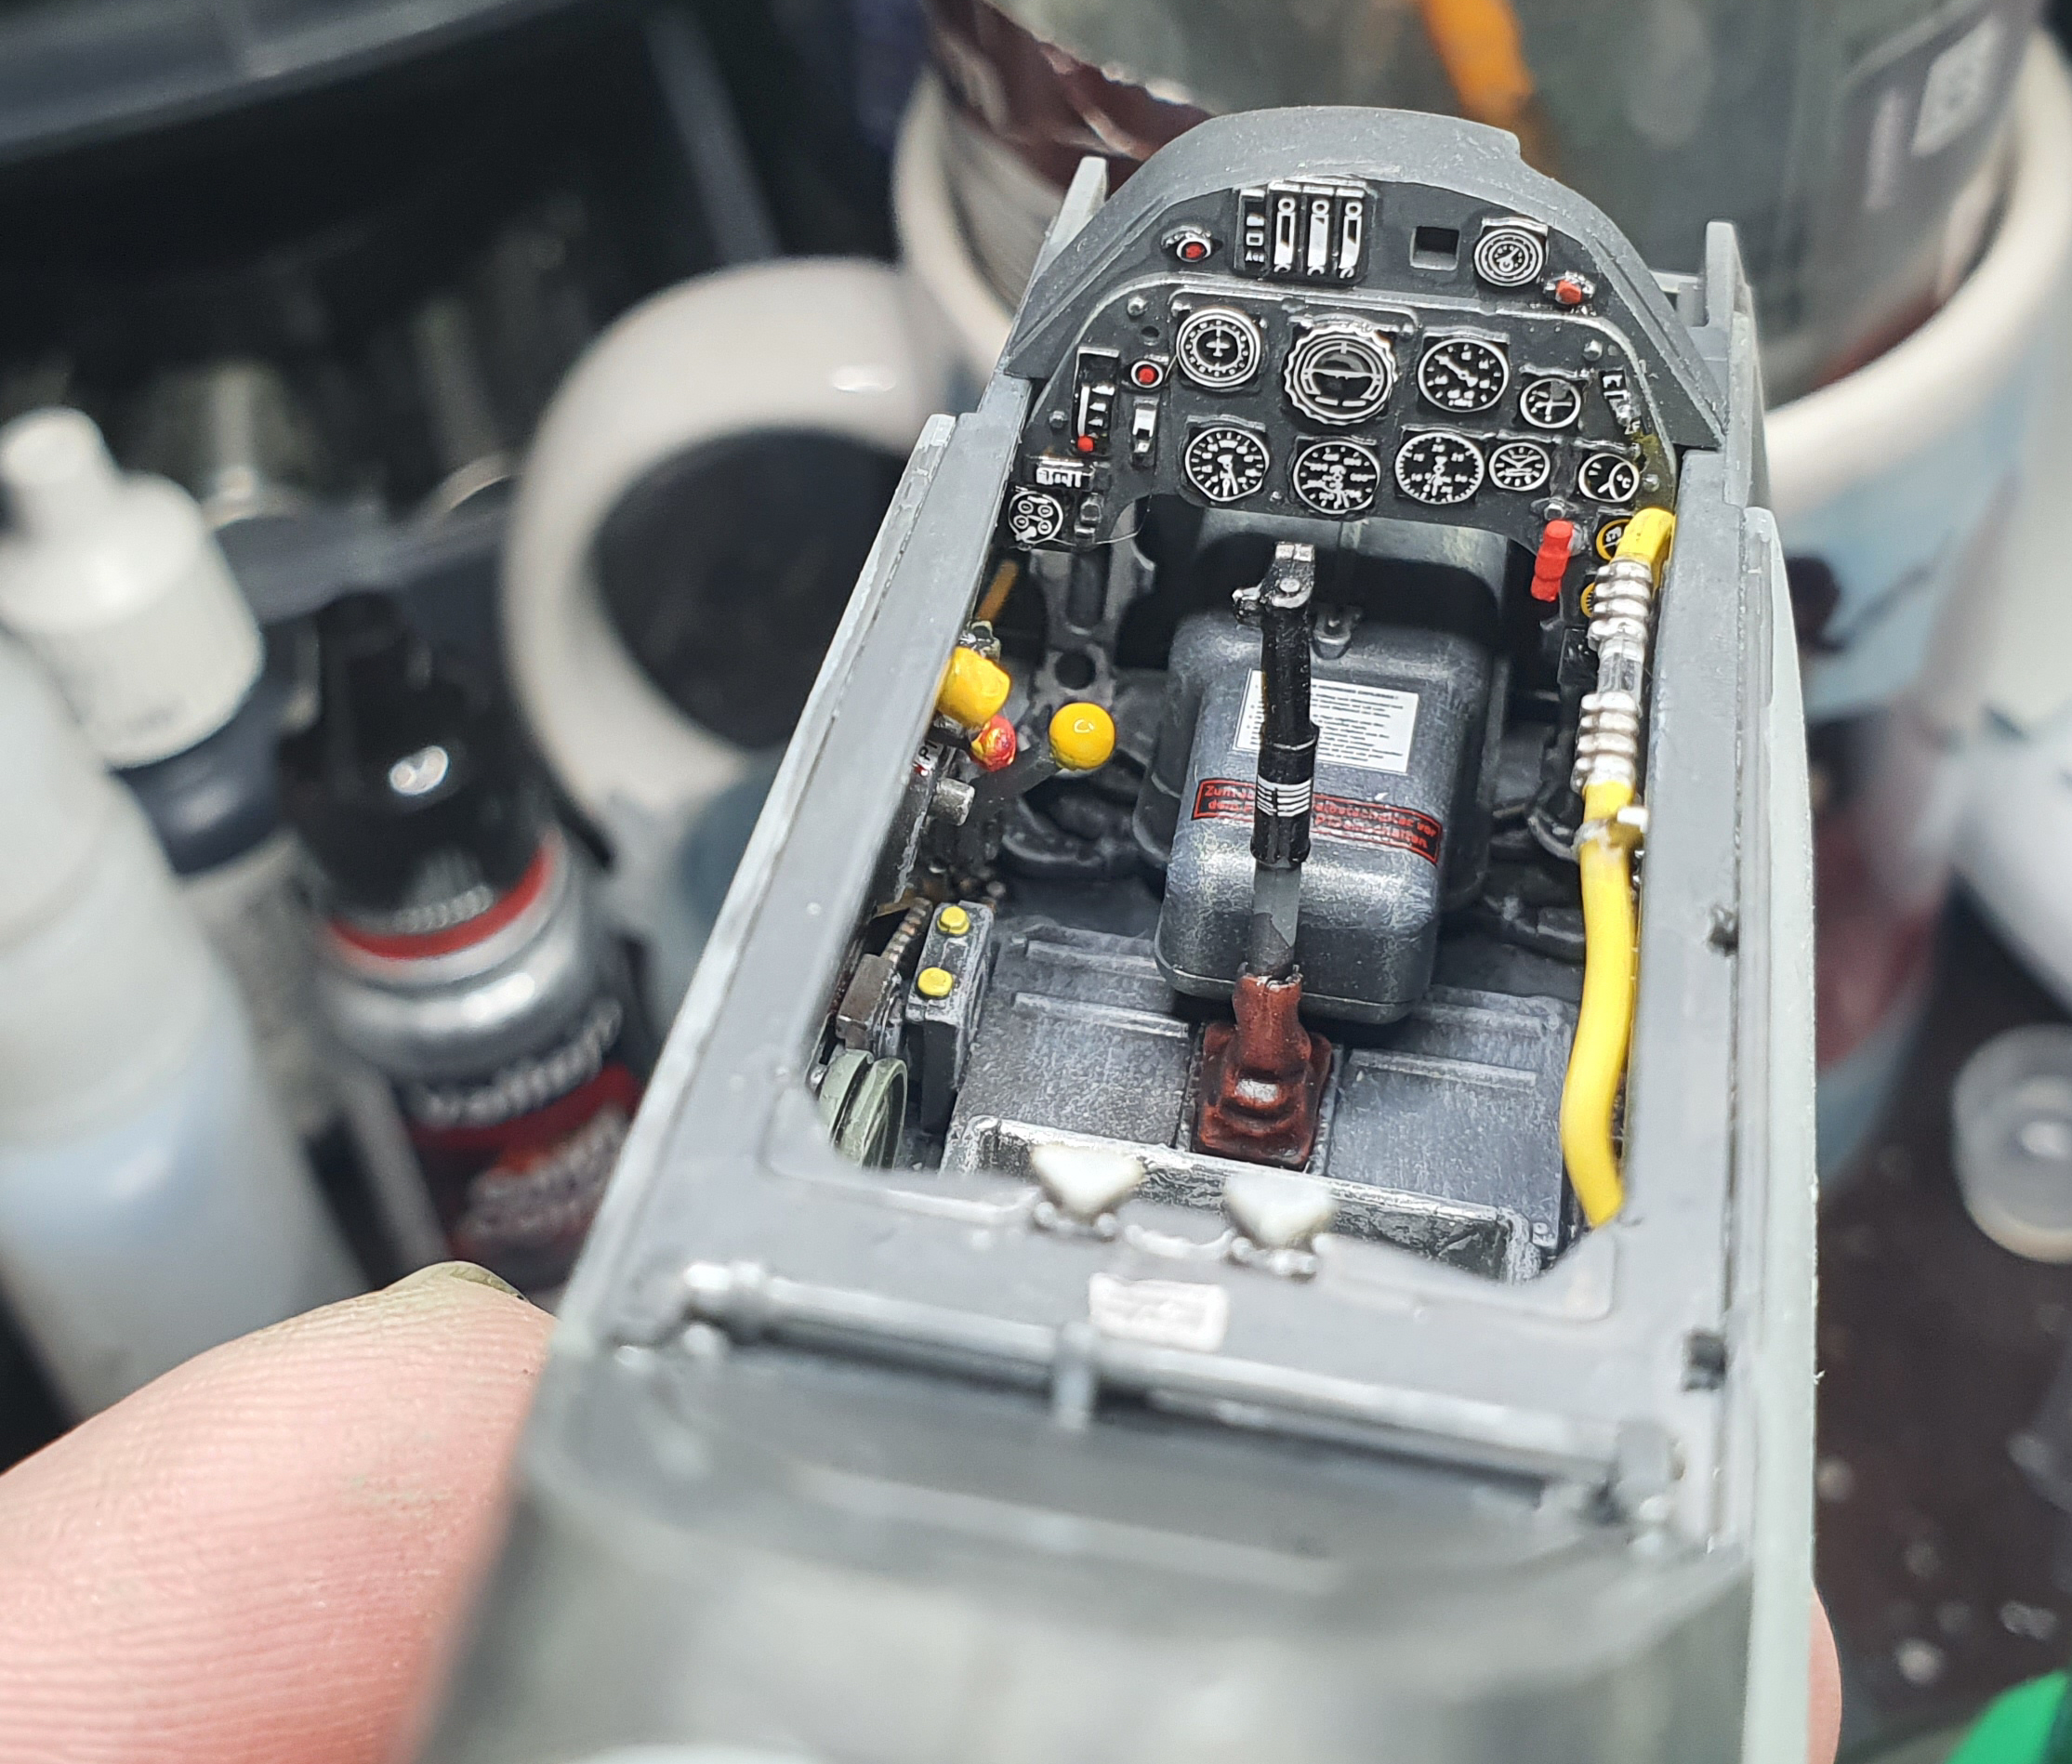
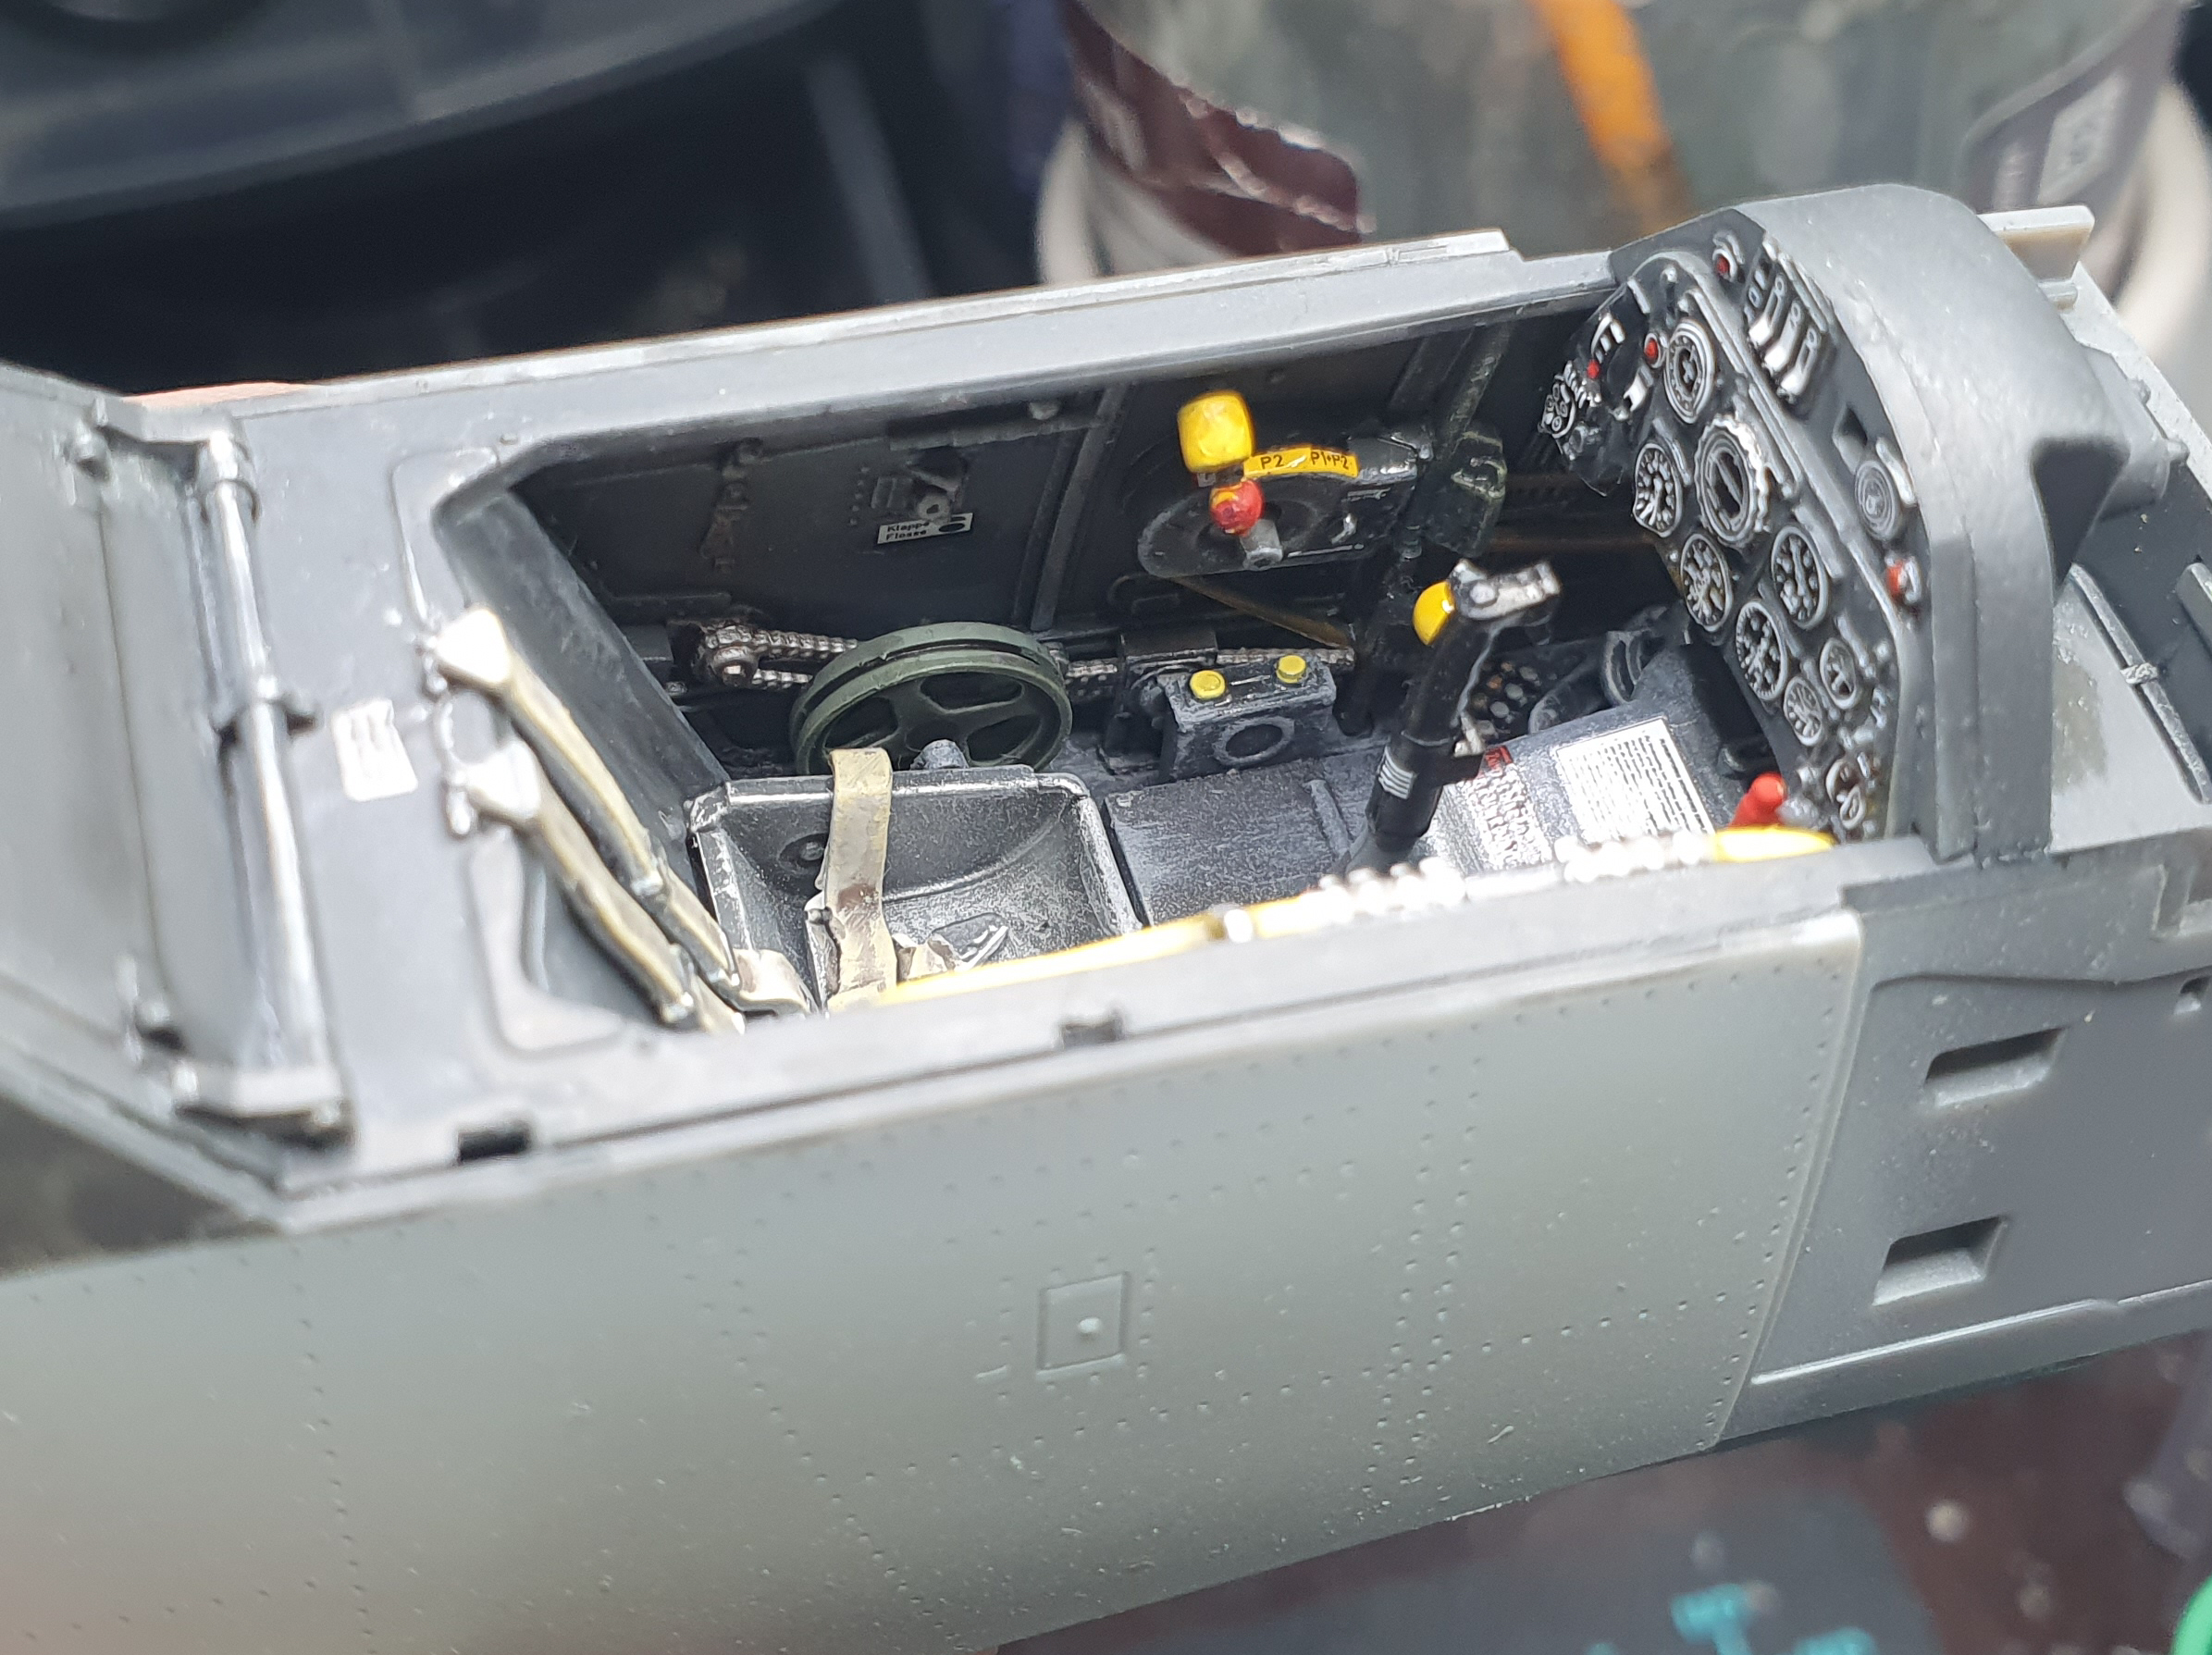
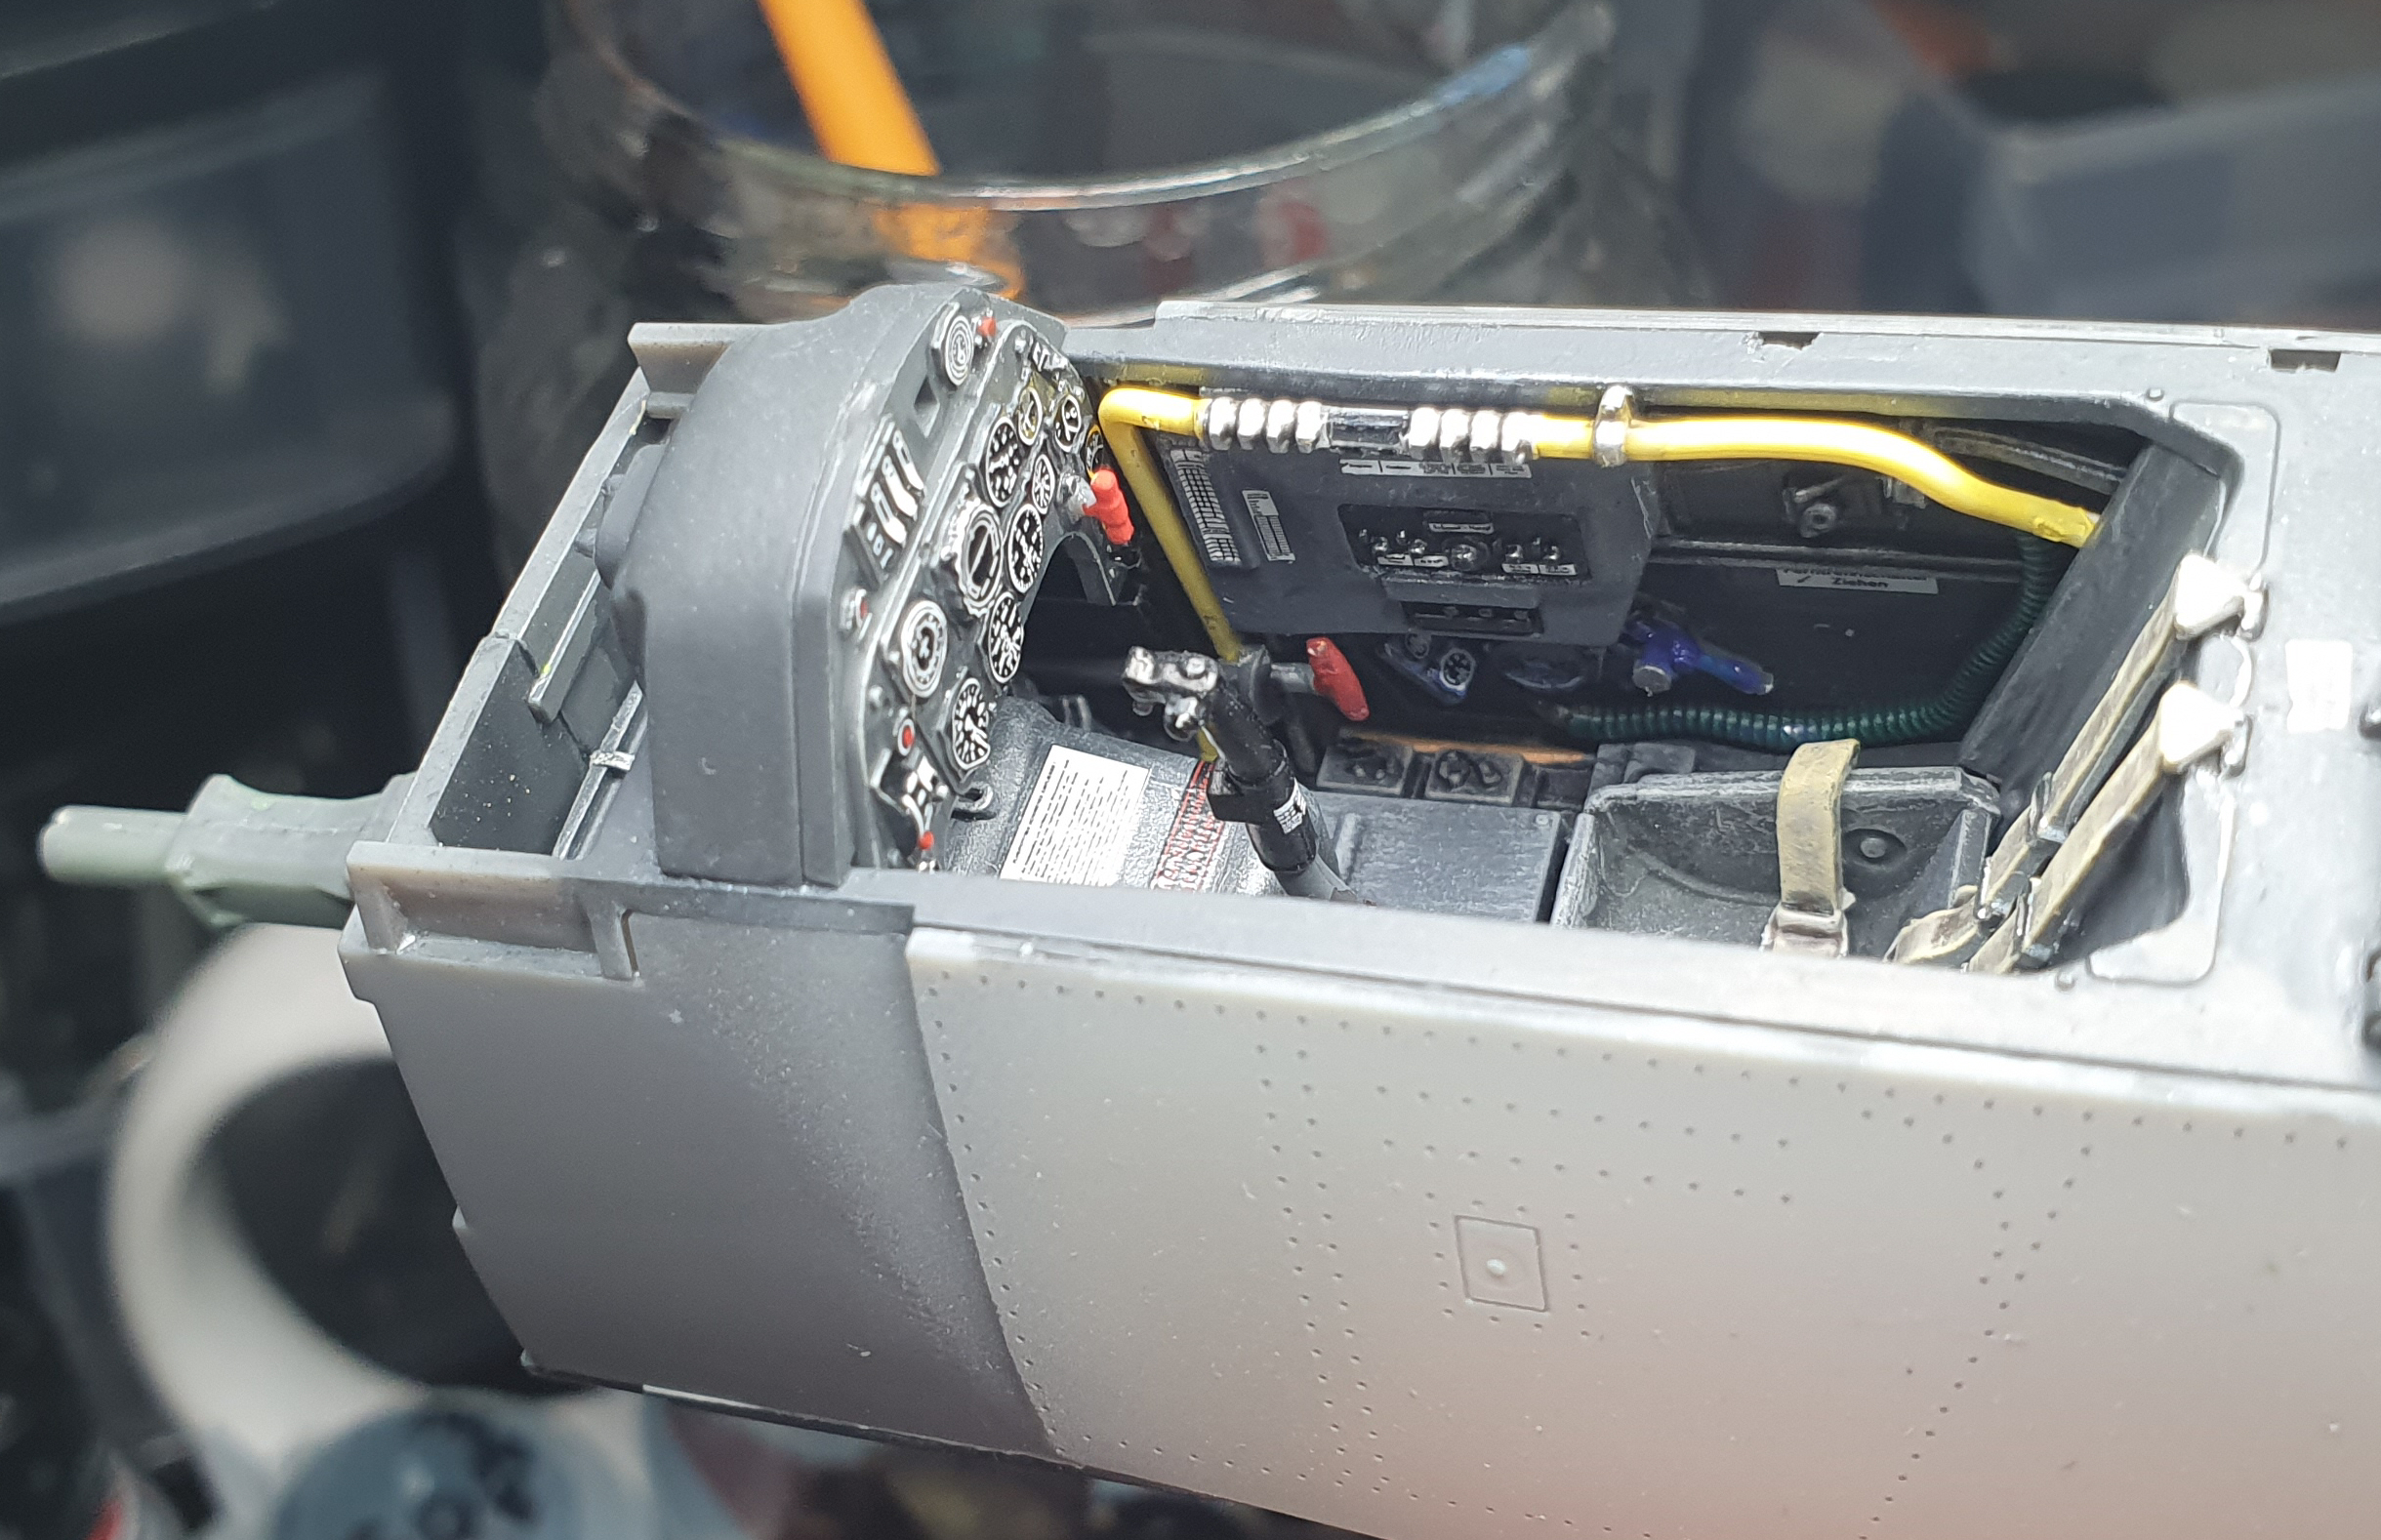
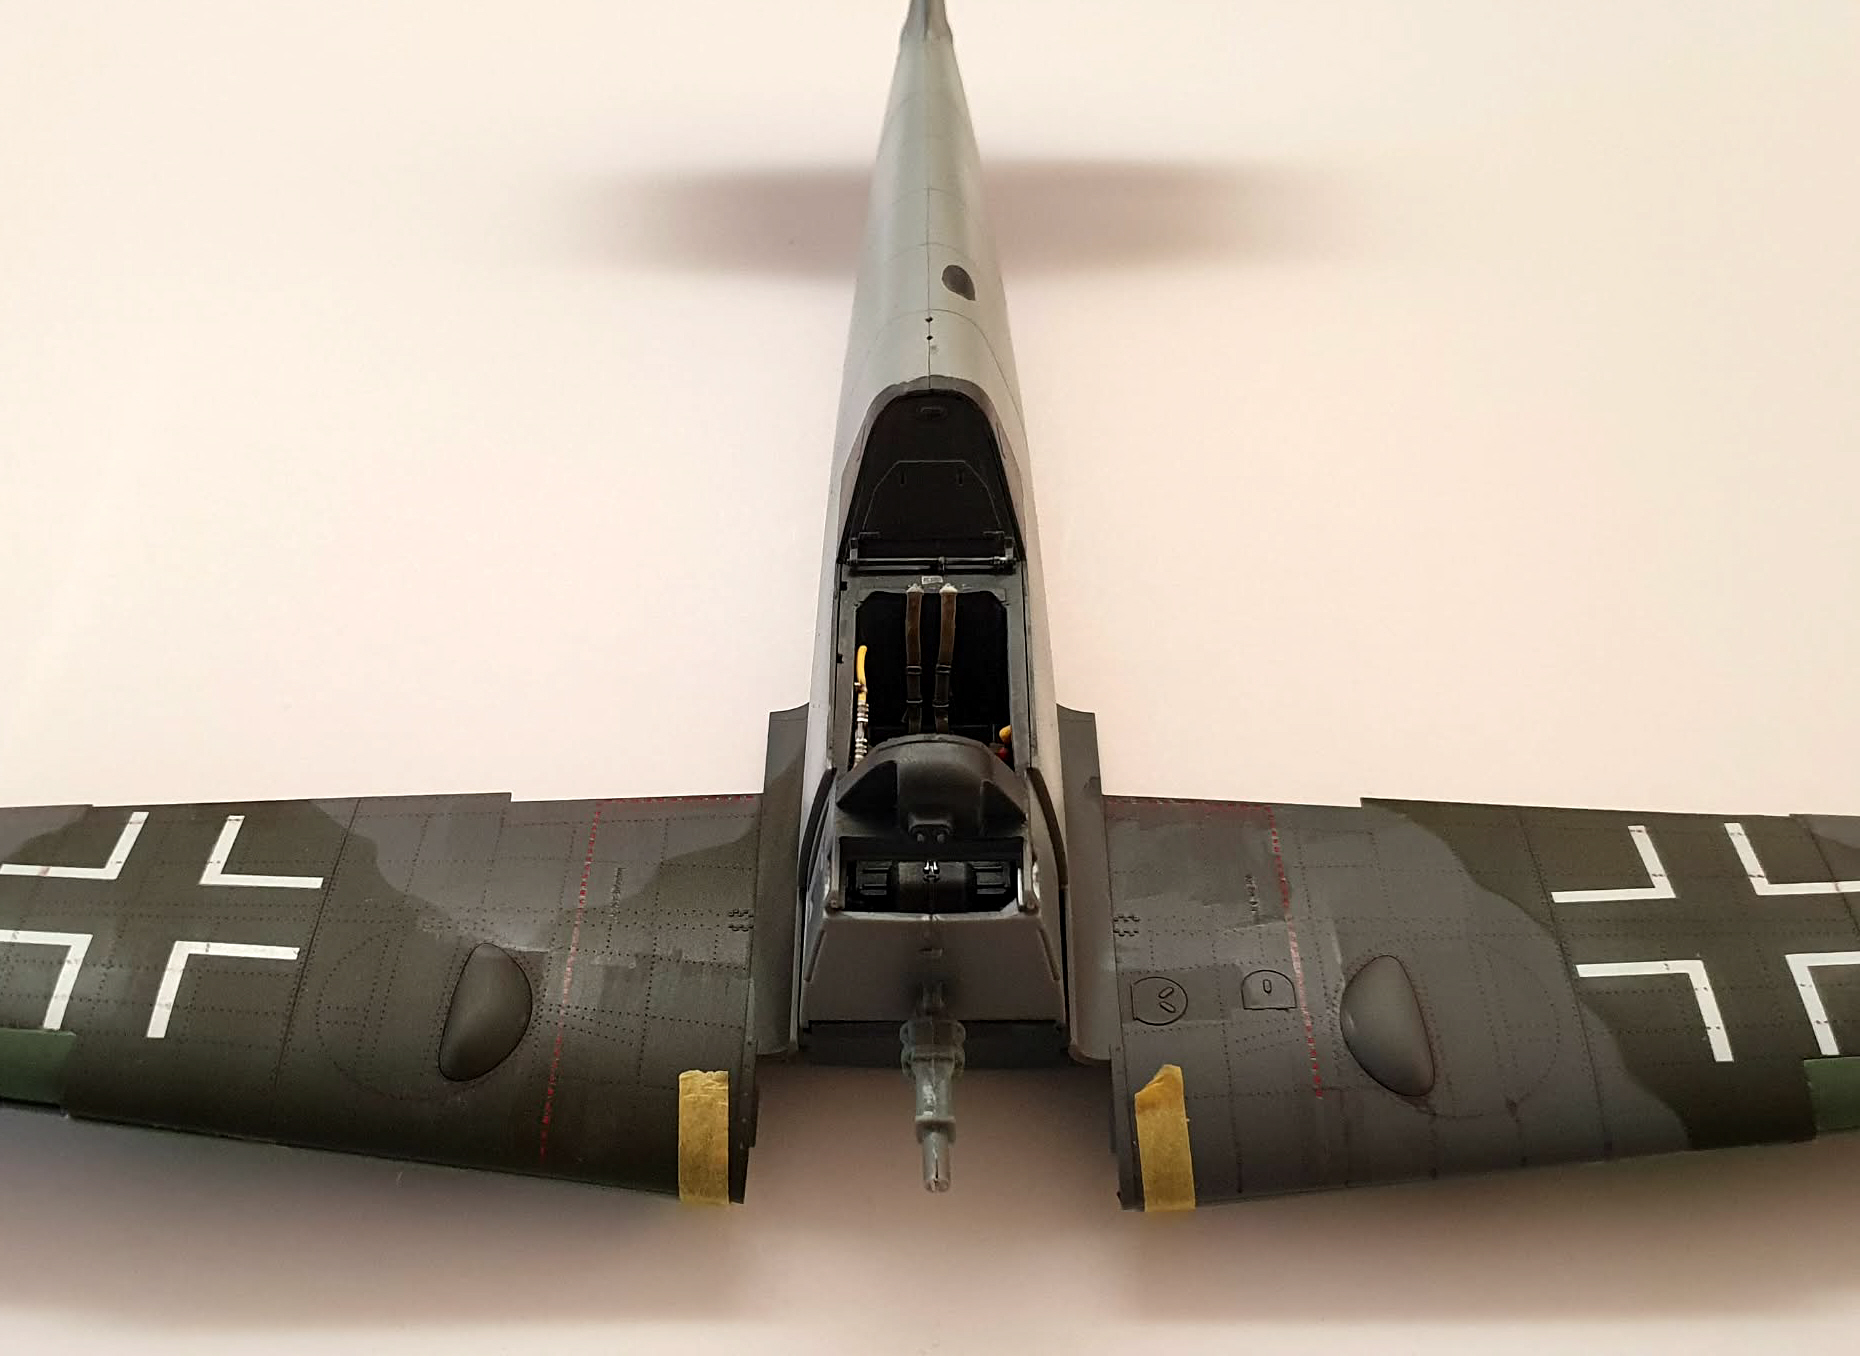
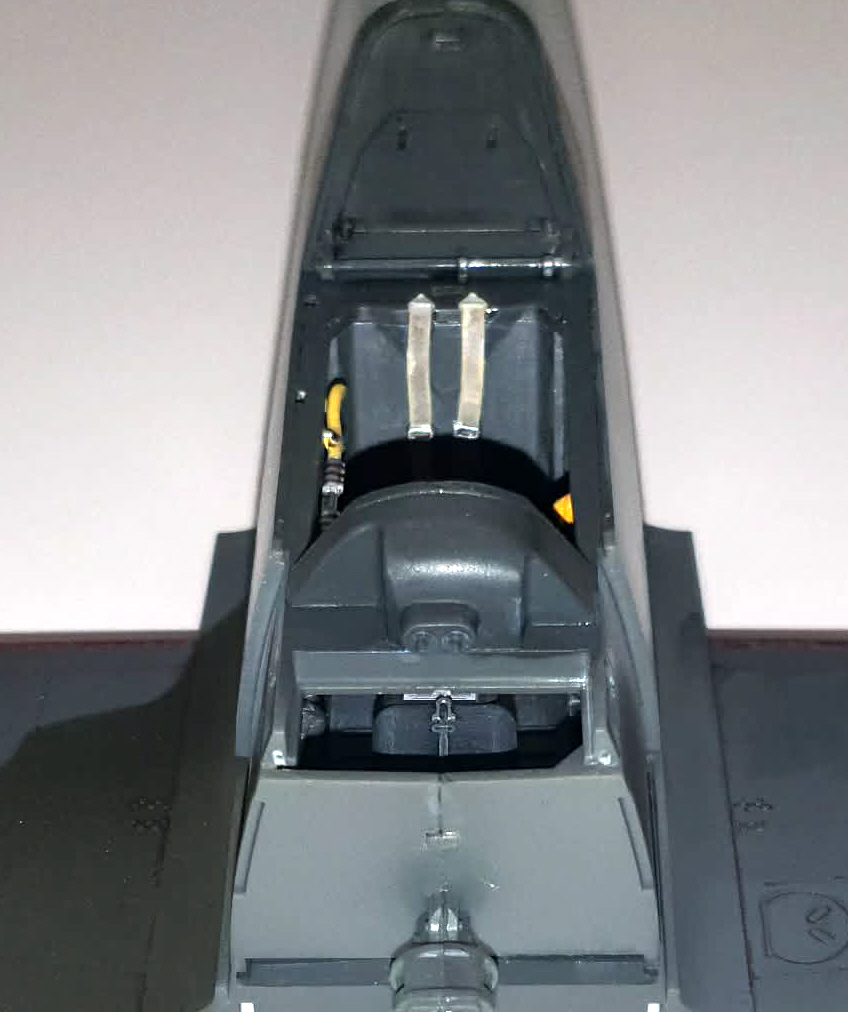
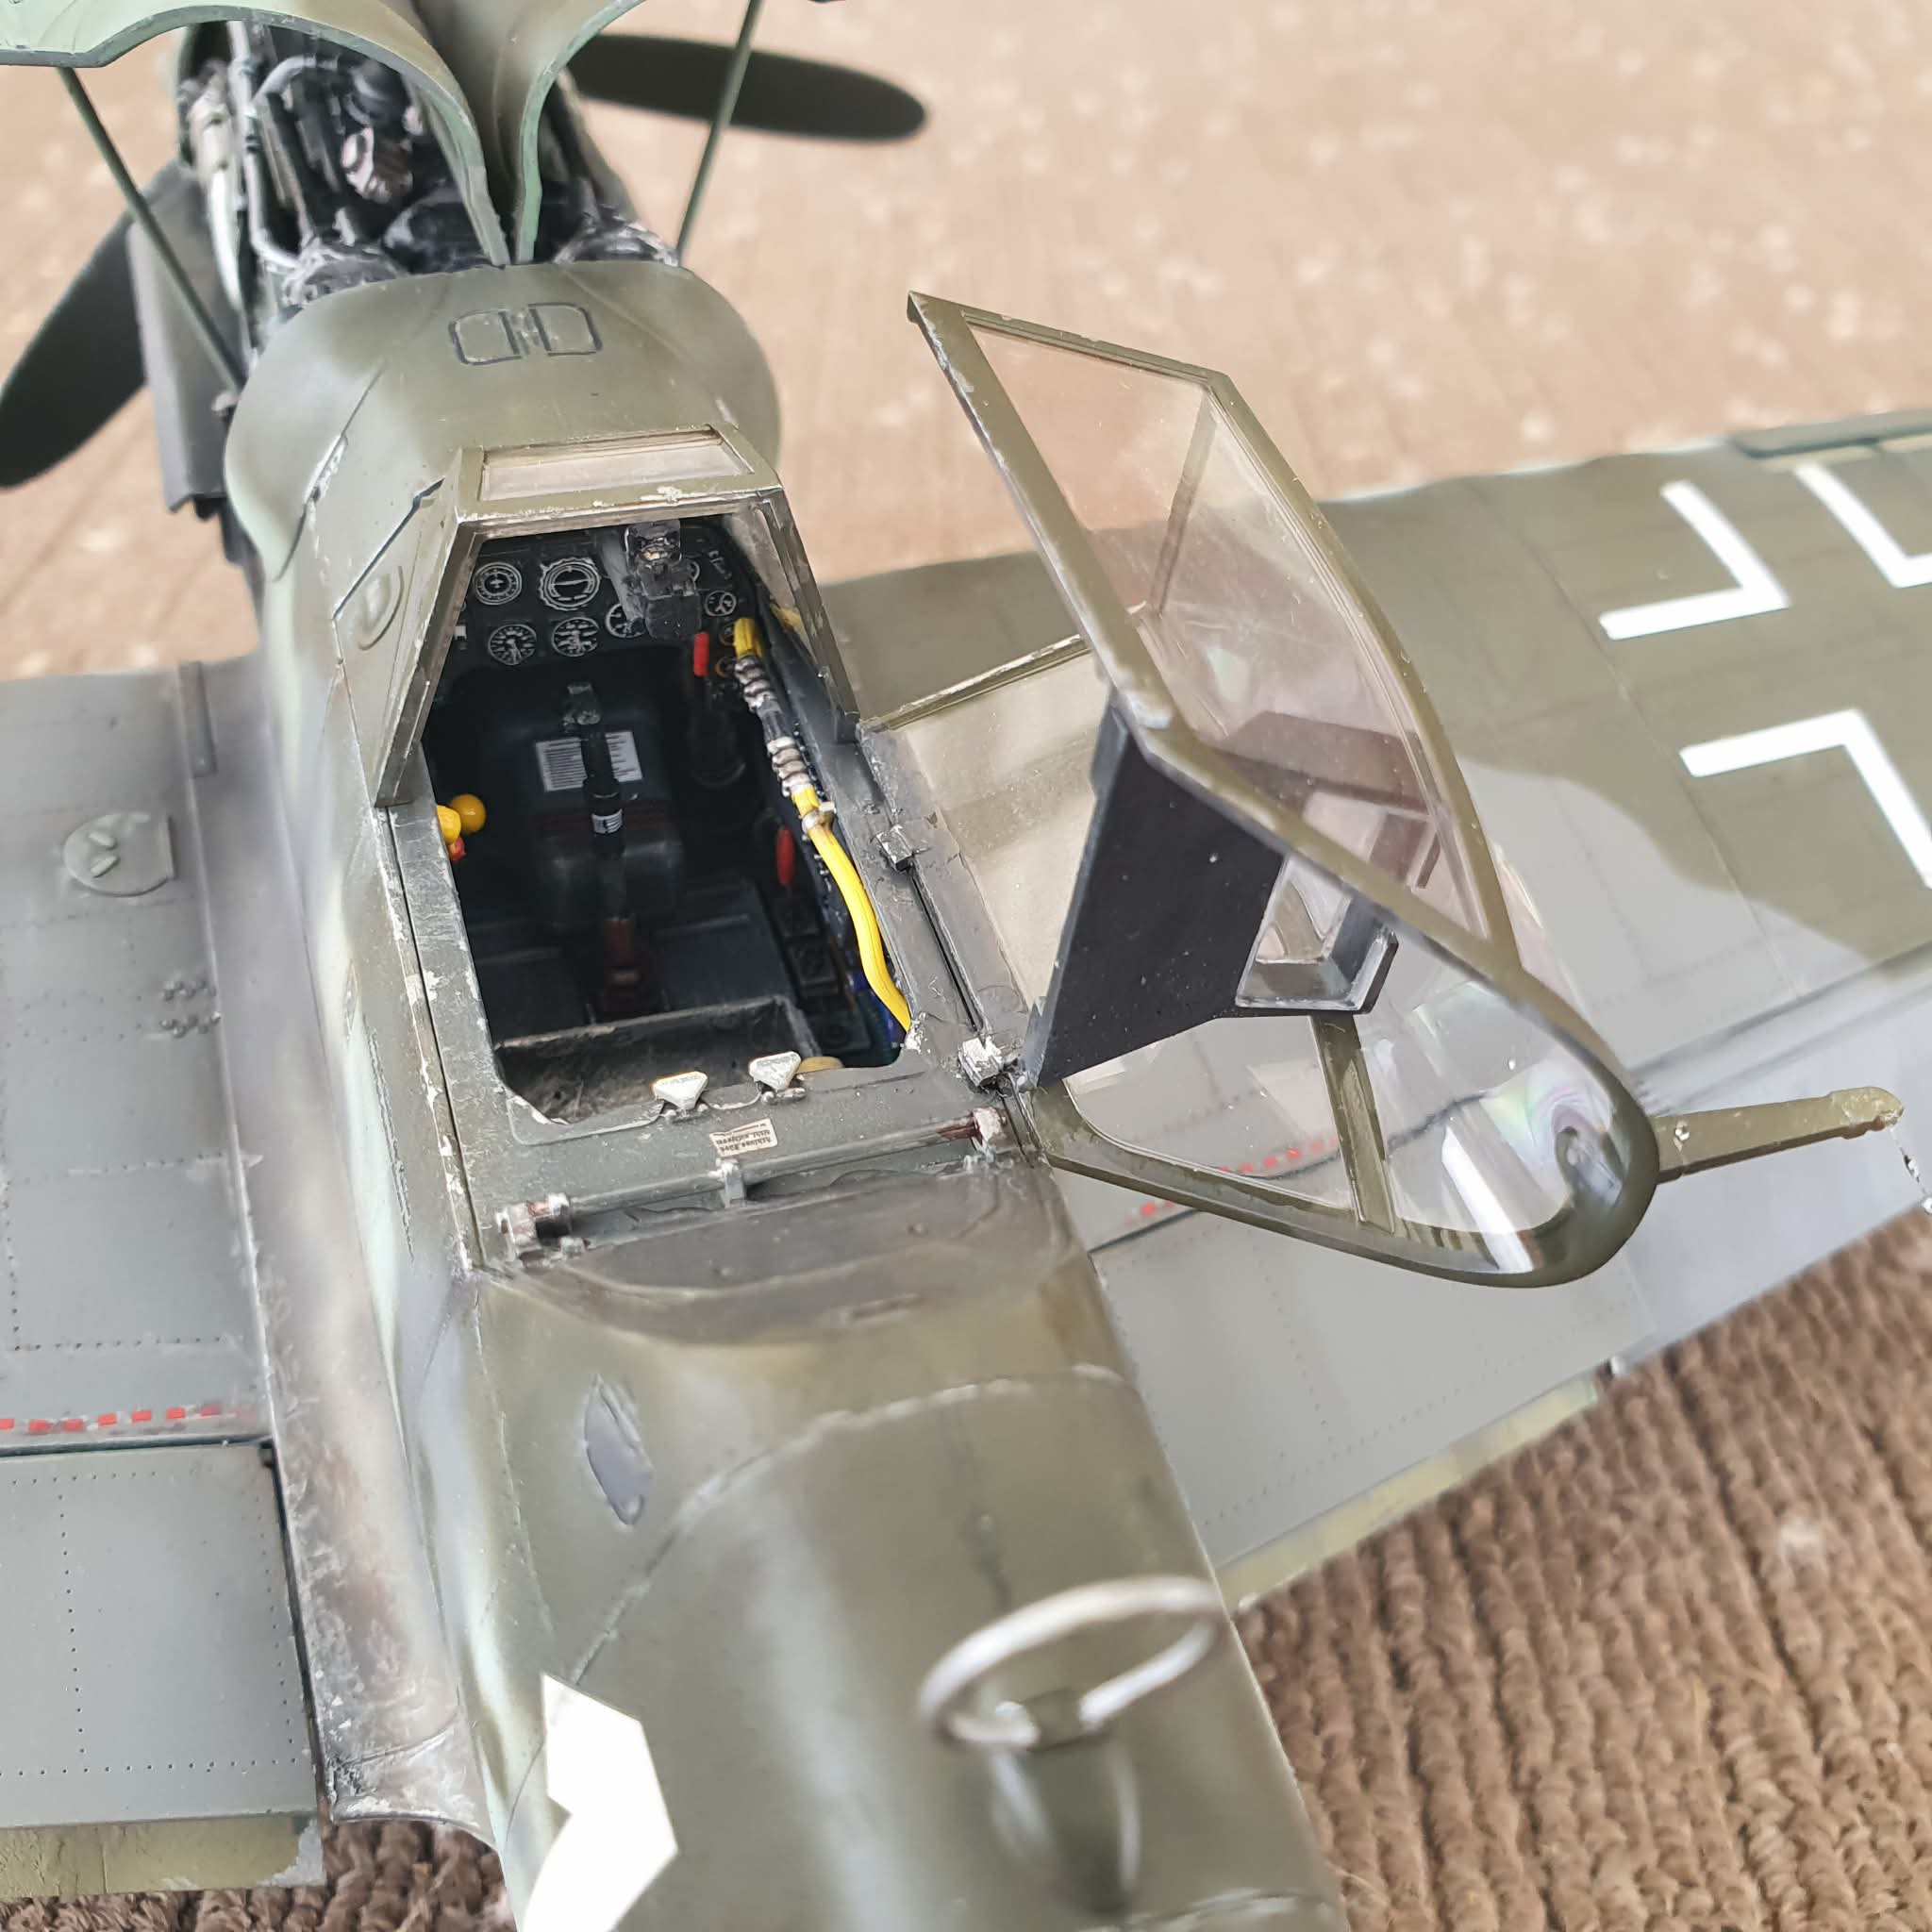
Next comes the cockpit. The kit belts are fine but at this scale some will probably go for aftermarket replacements. There’s options in the controls as well and the instructions feature some very nice colour diagrams with explicit detail. 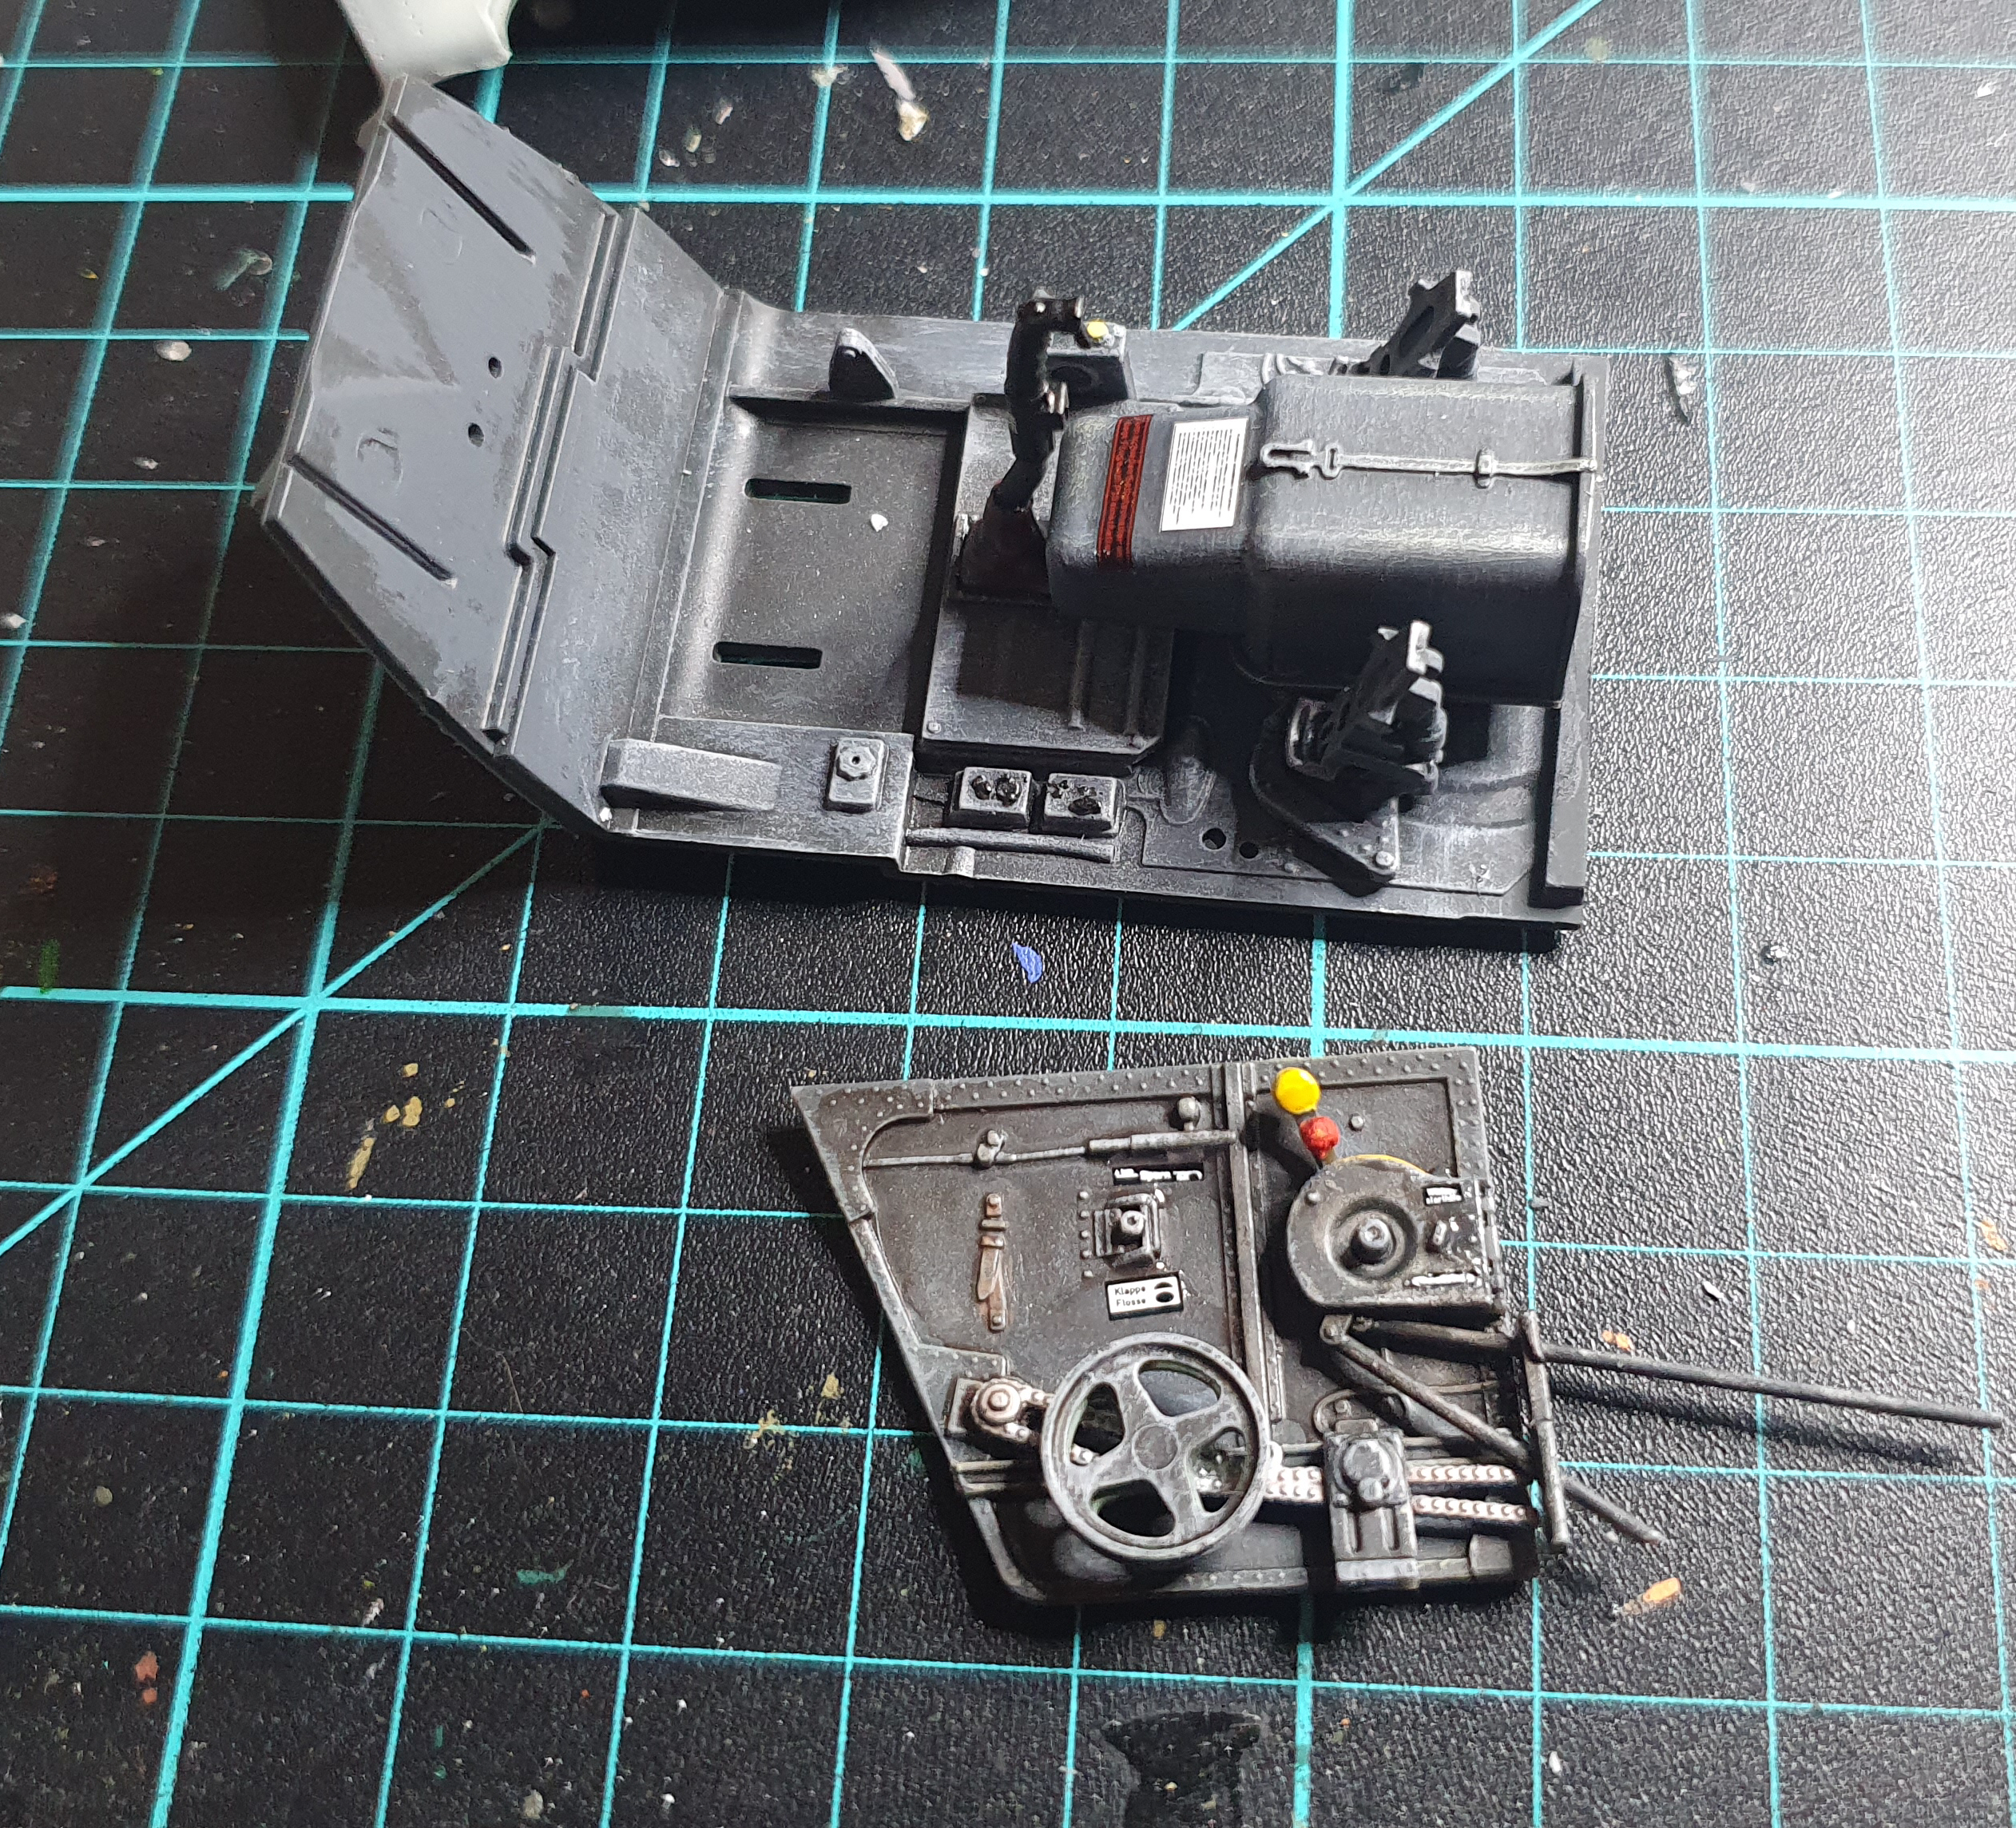
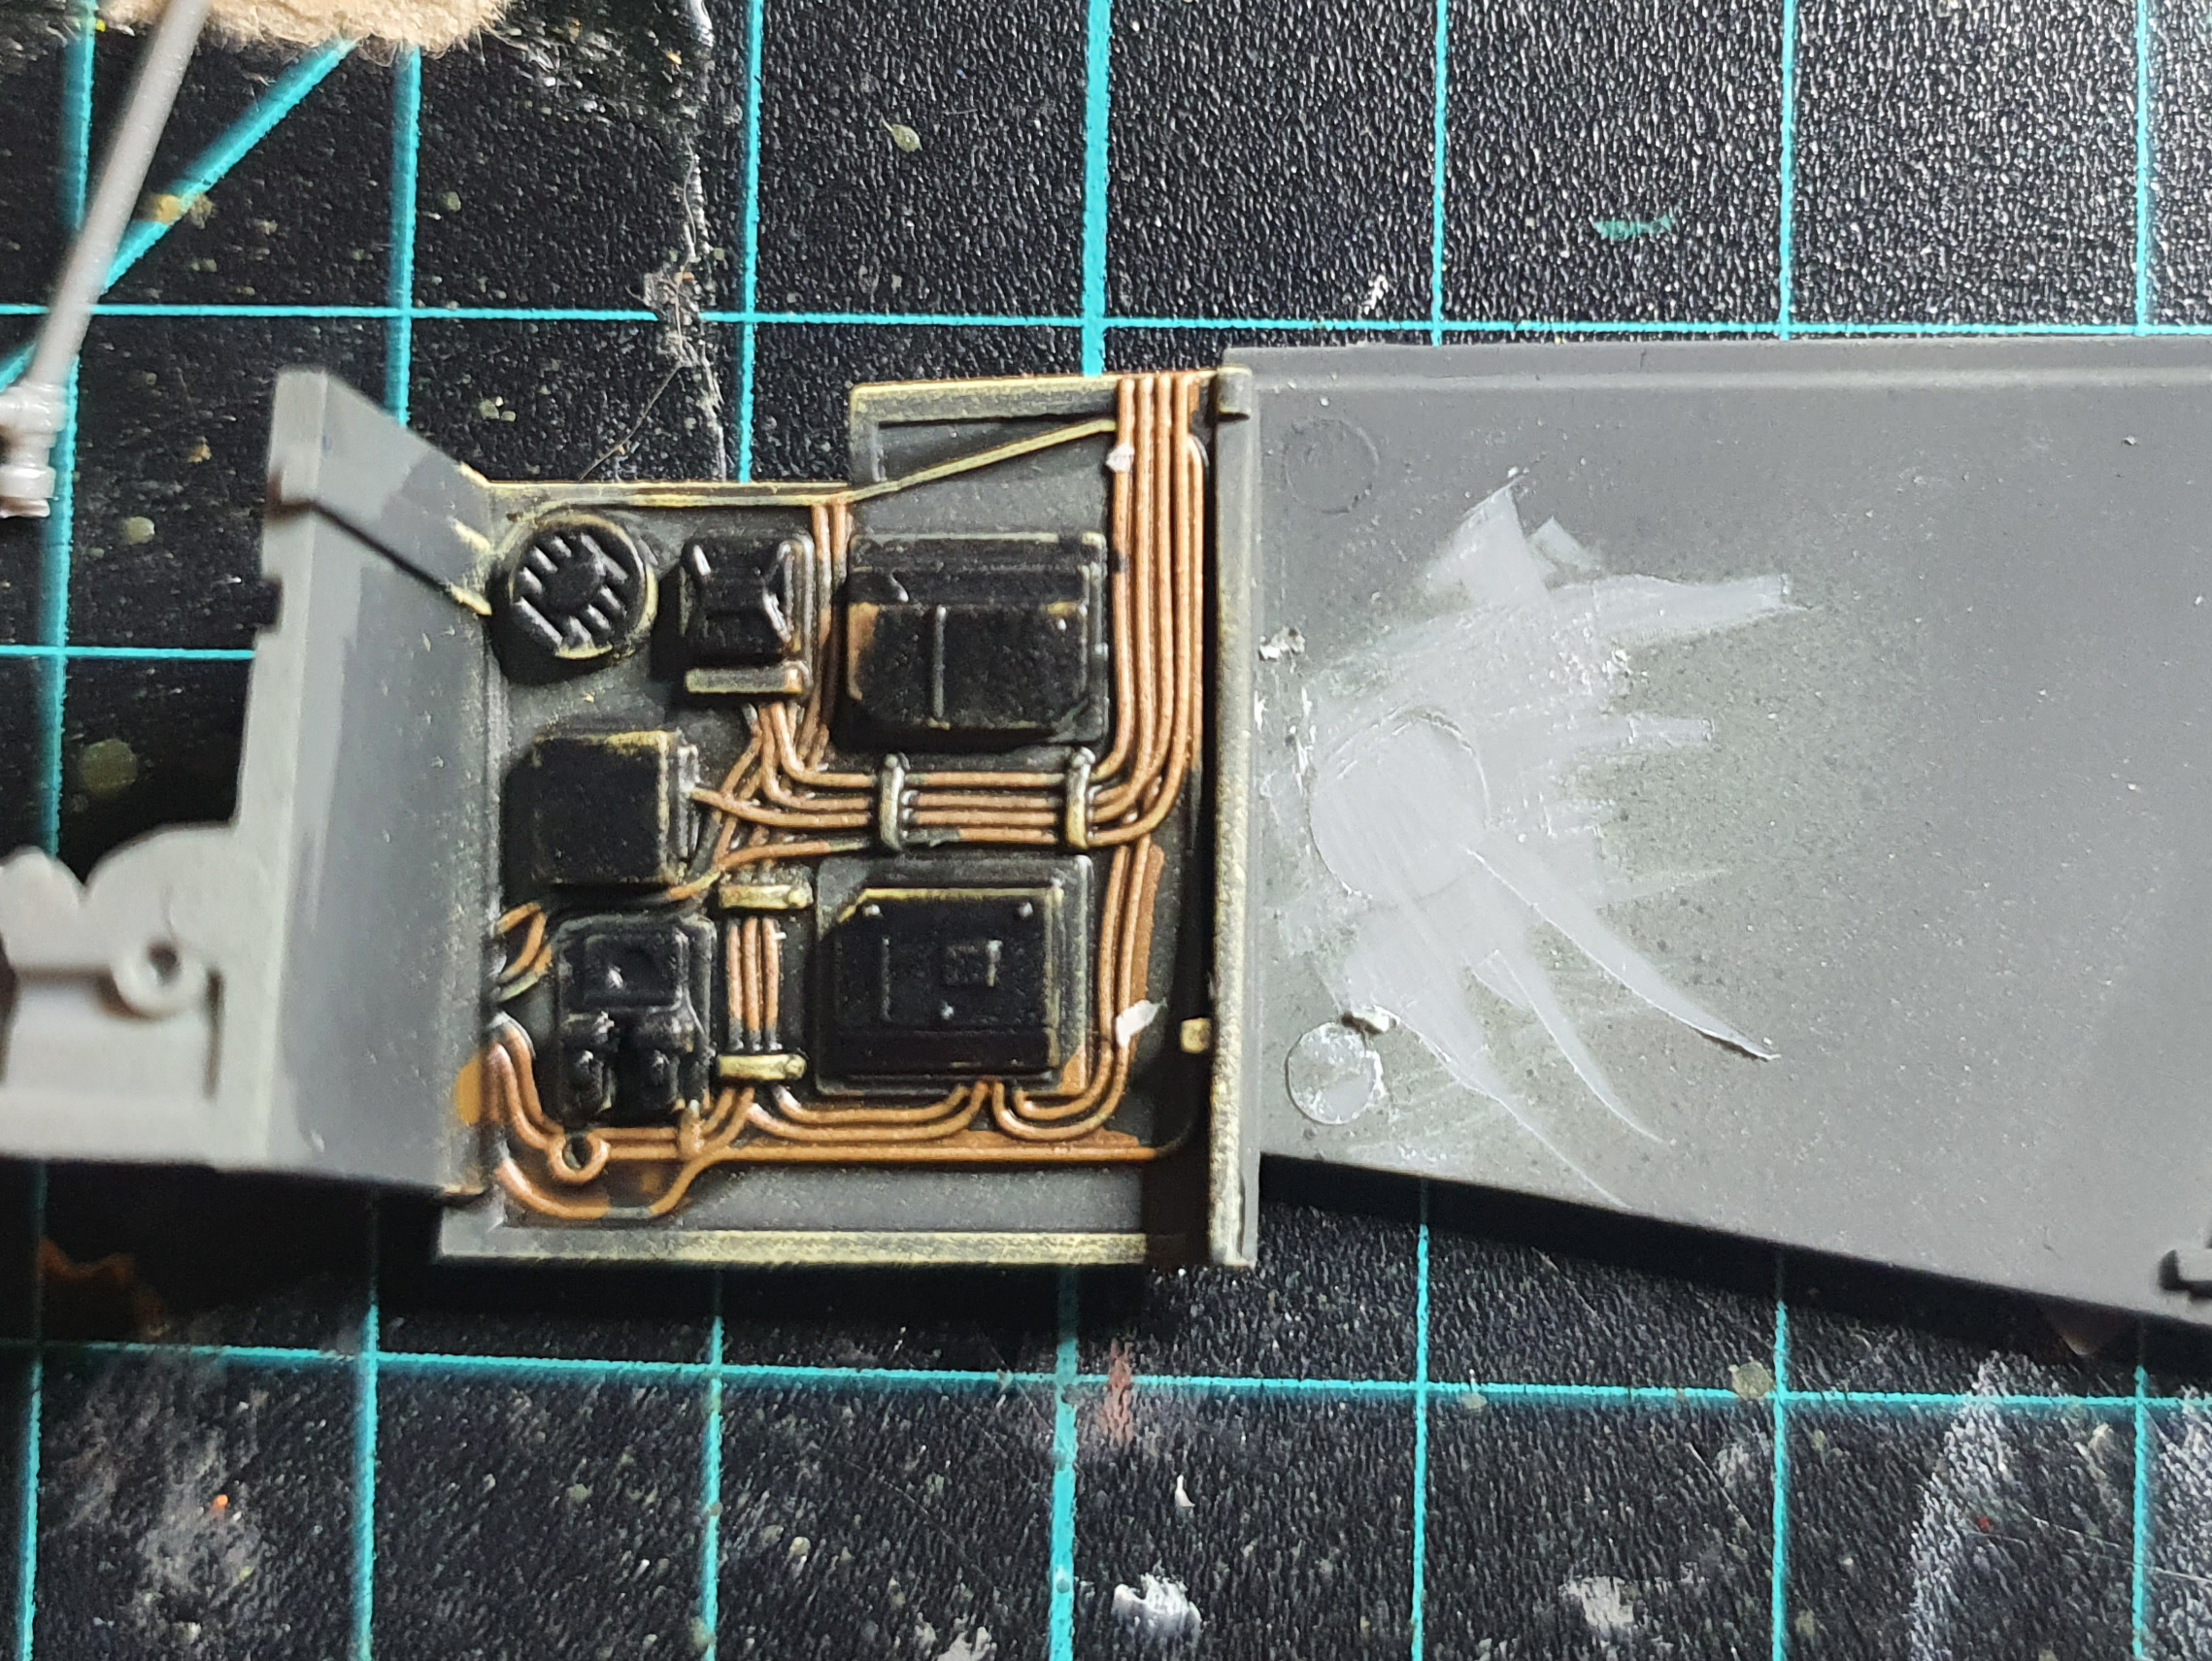
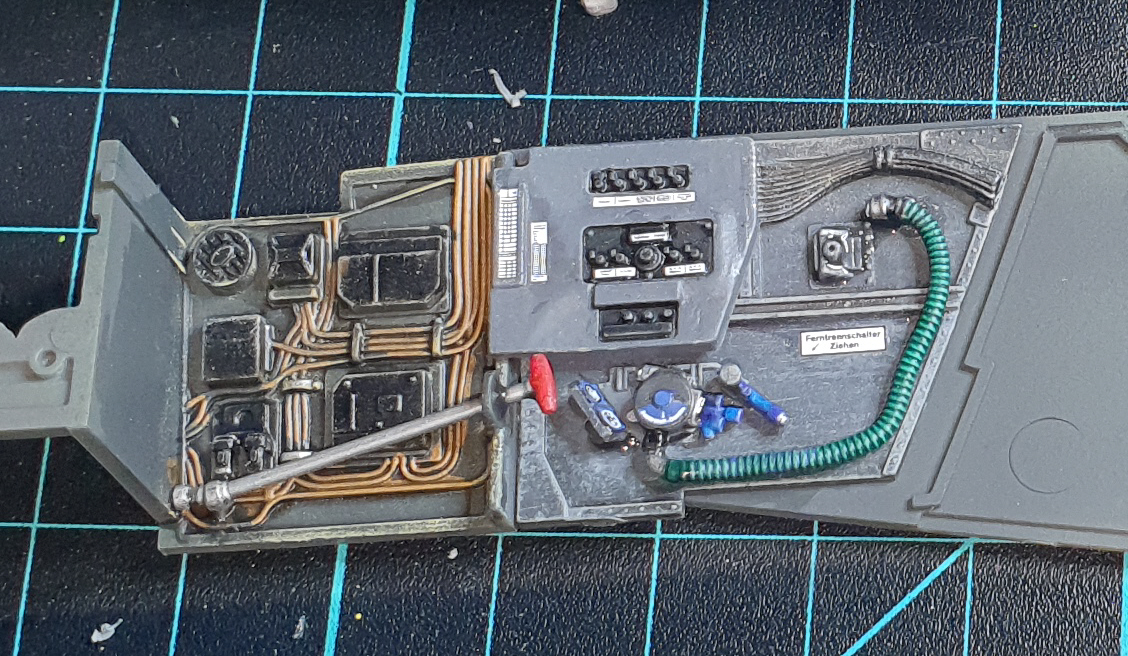
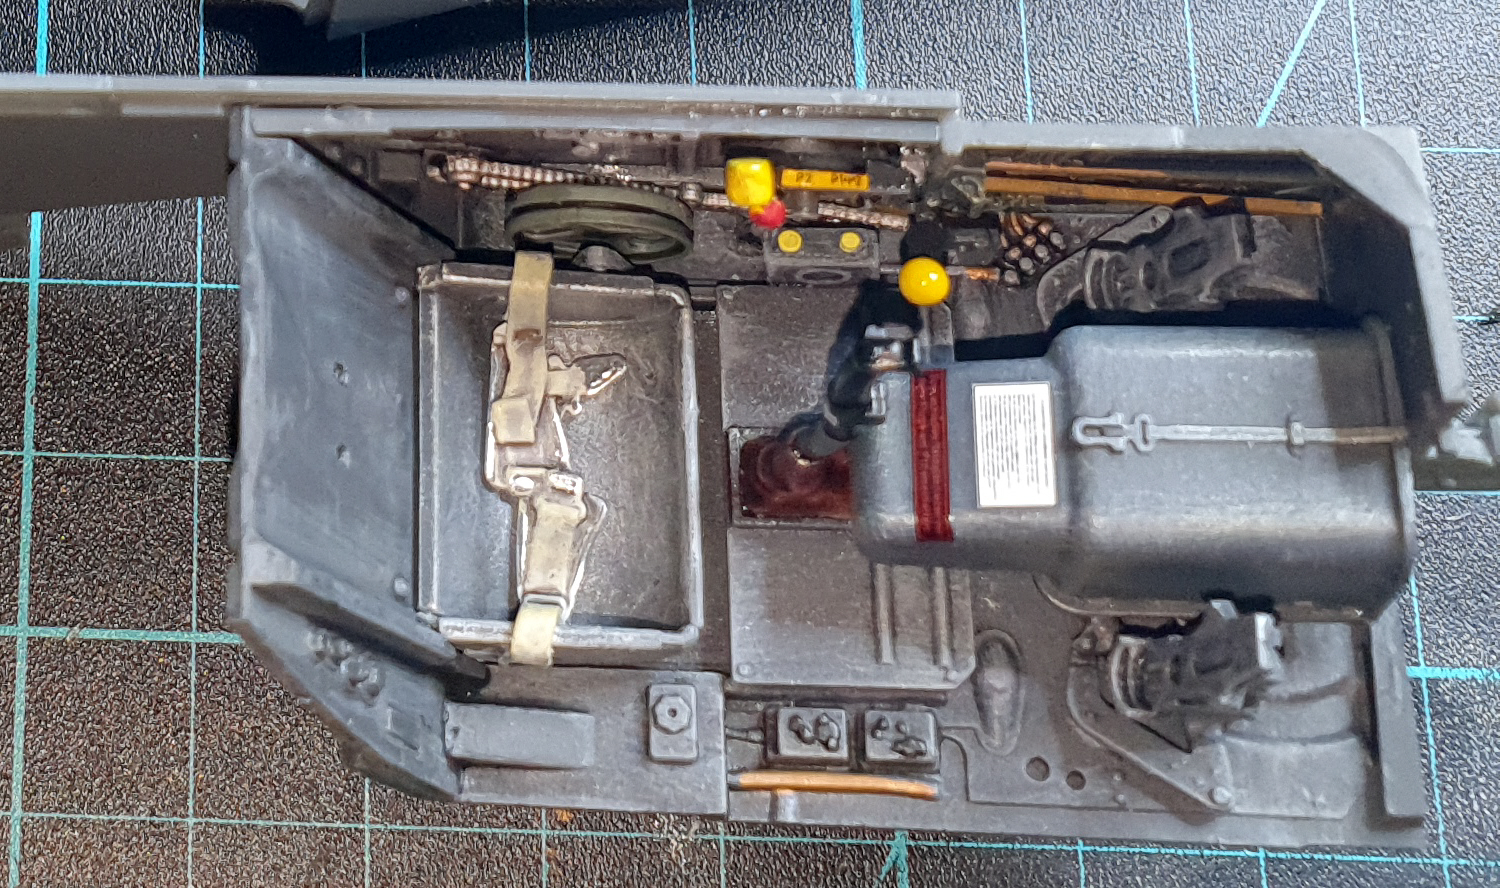
There’s a lot of opportunity here and the basic fitout is excellent from my point of view. Choice of floor pan and pedal is nice but I reckon if you got the wrong one in there no one would know !
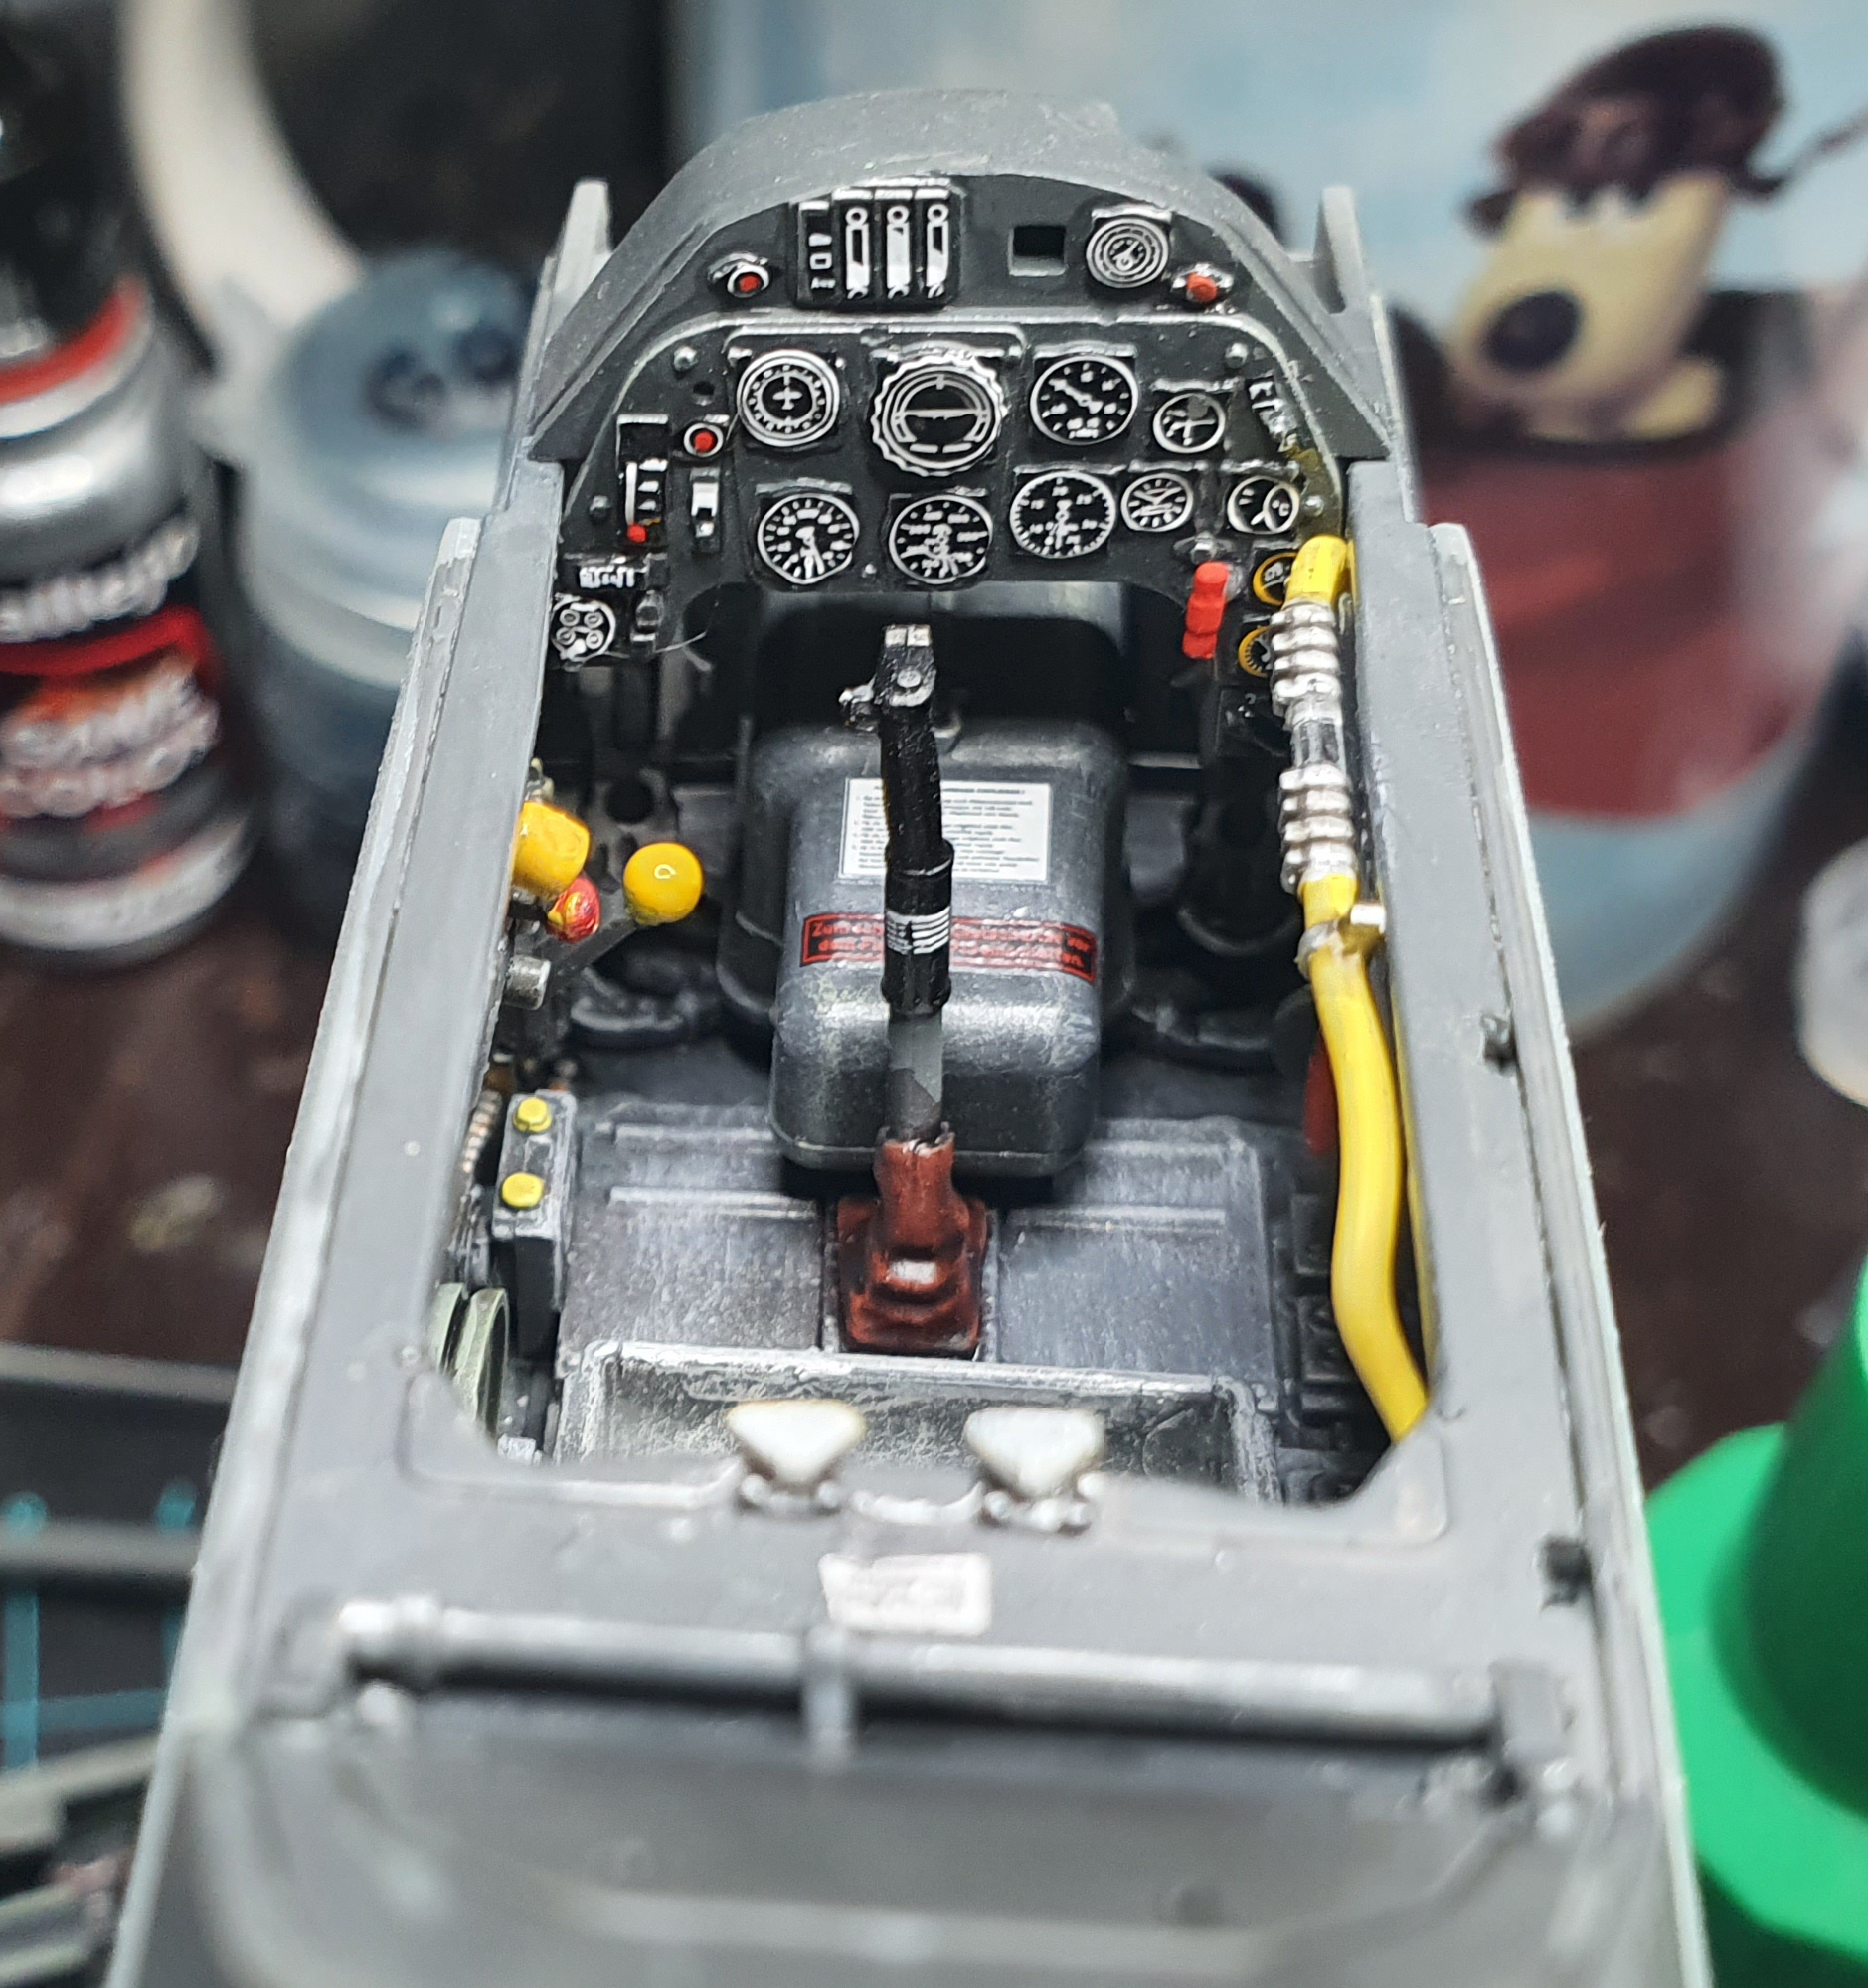
The kit parts and decal are sufficient for an adequate instrument panel.
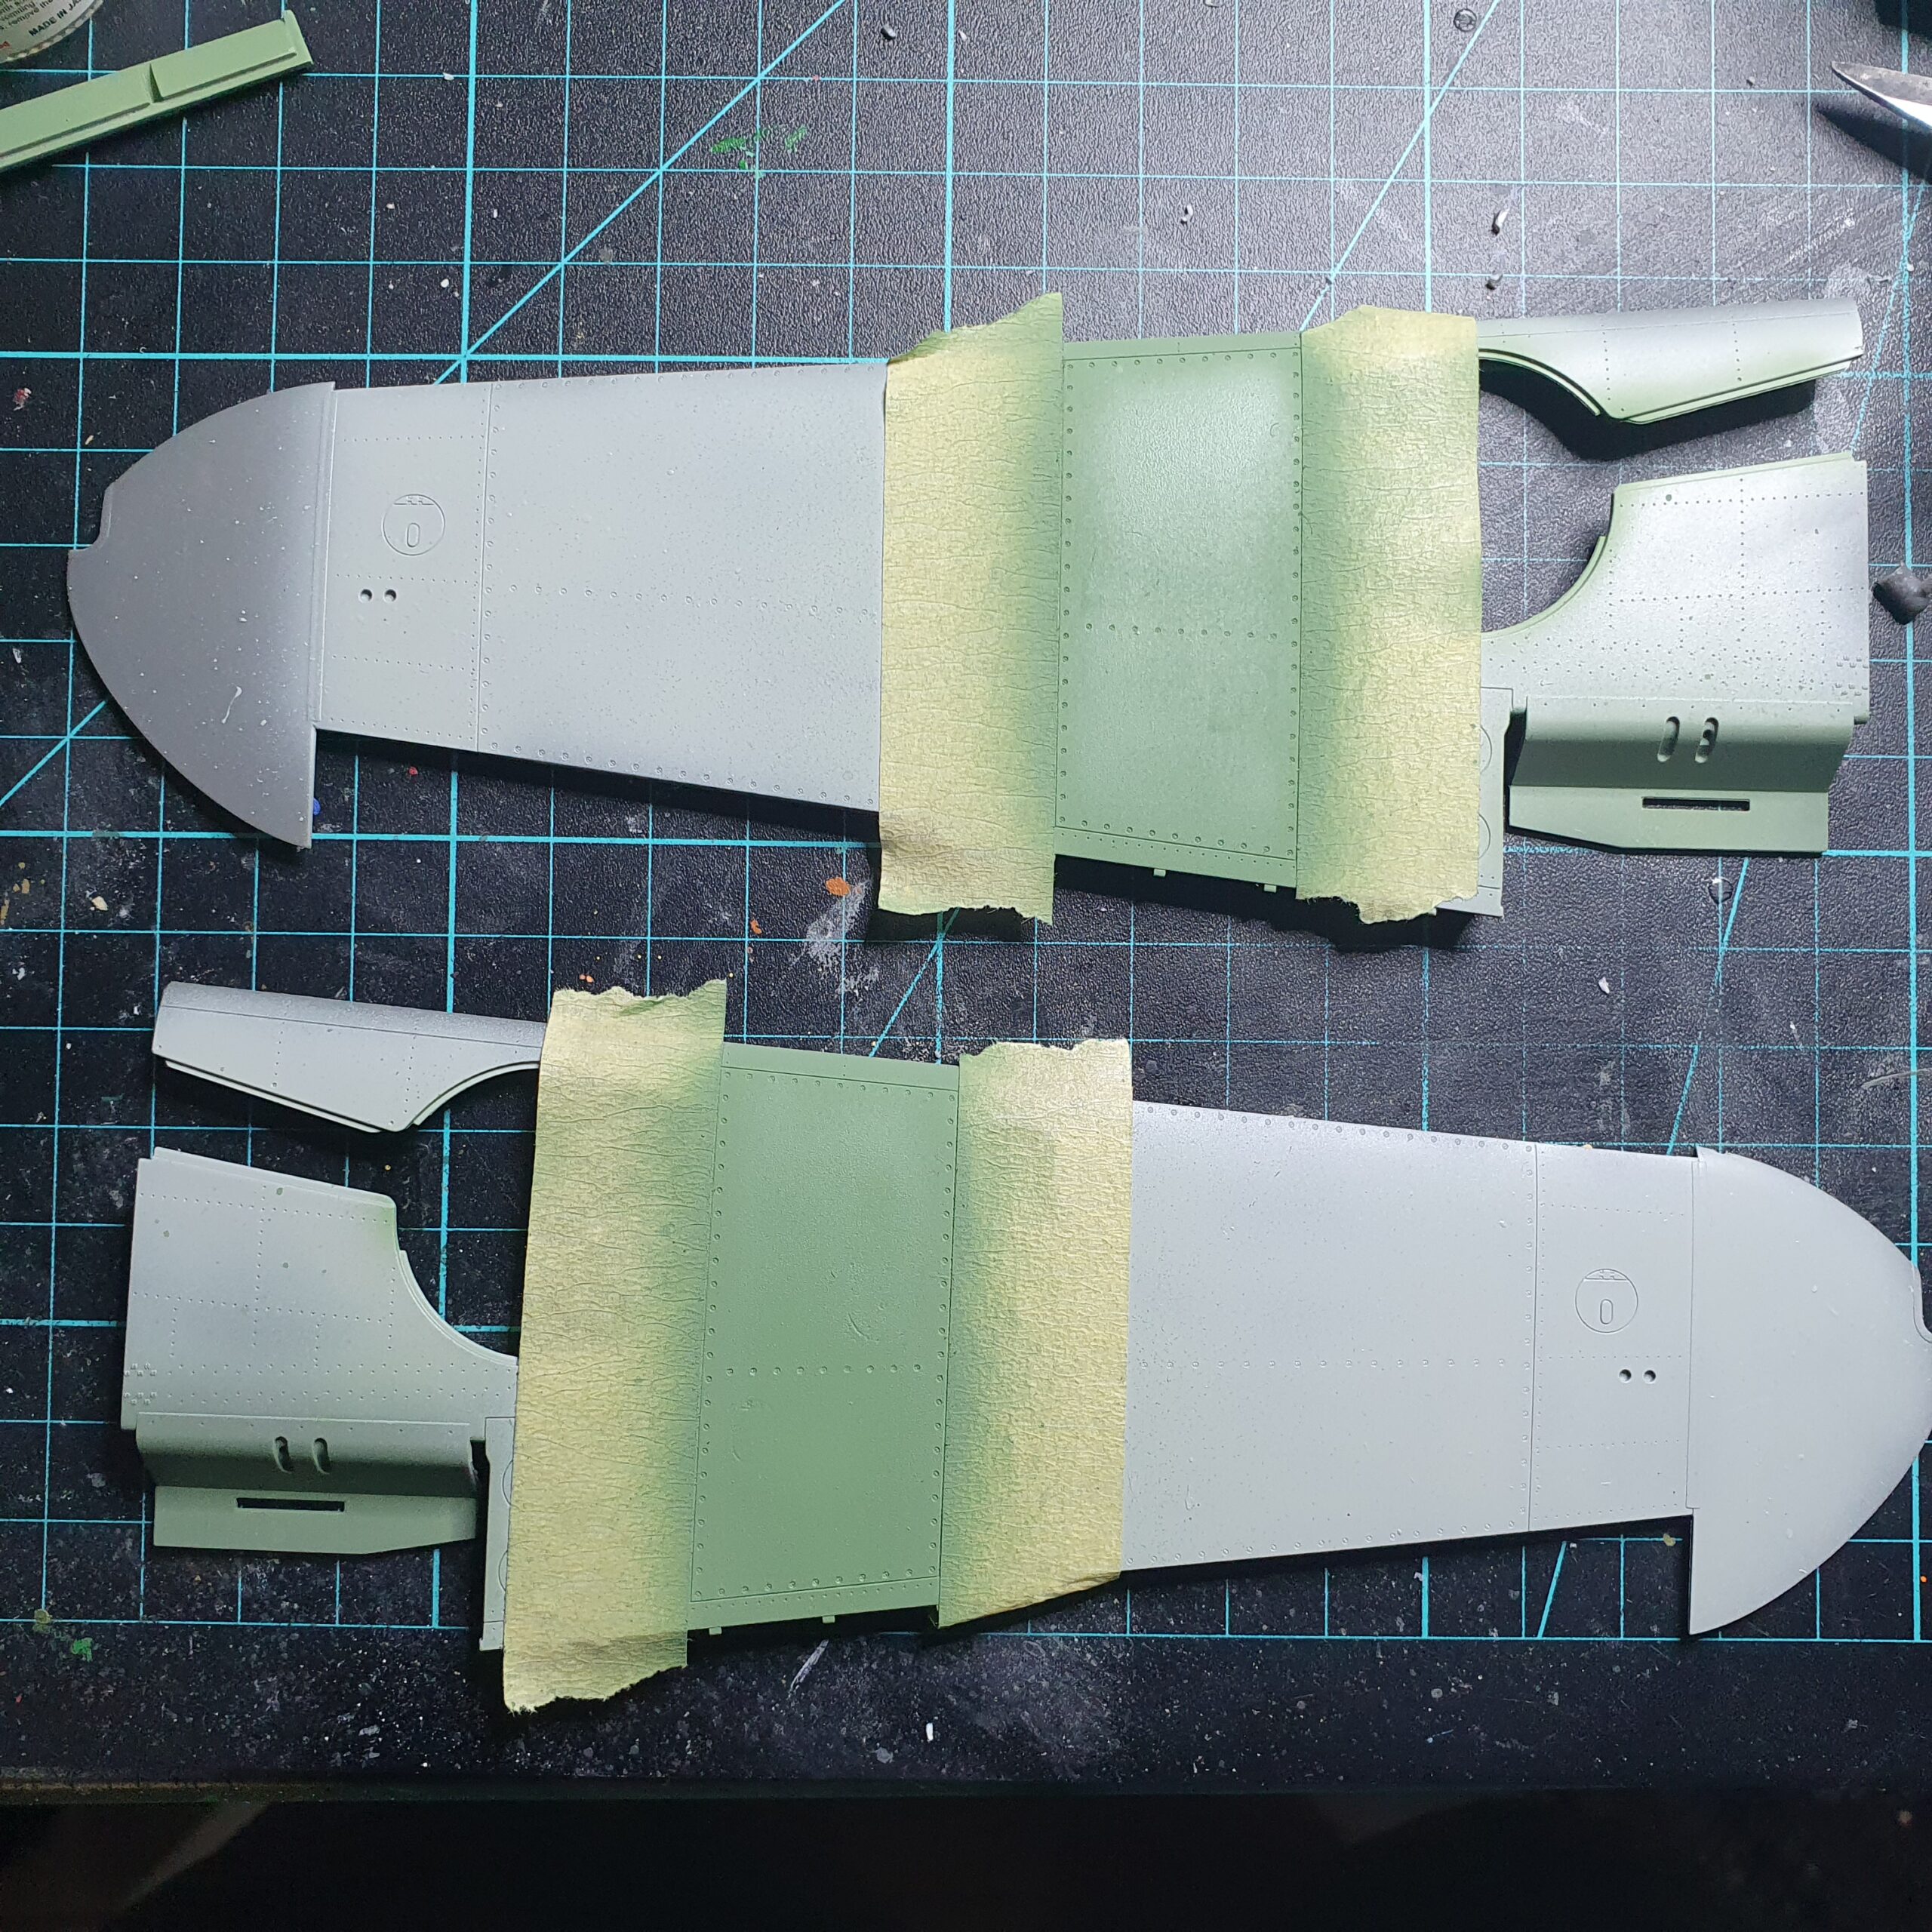
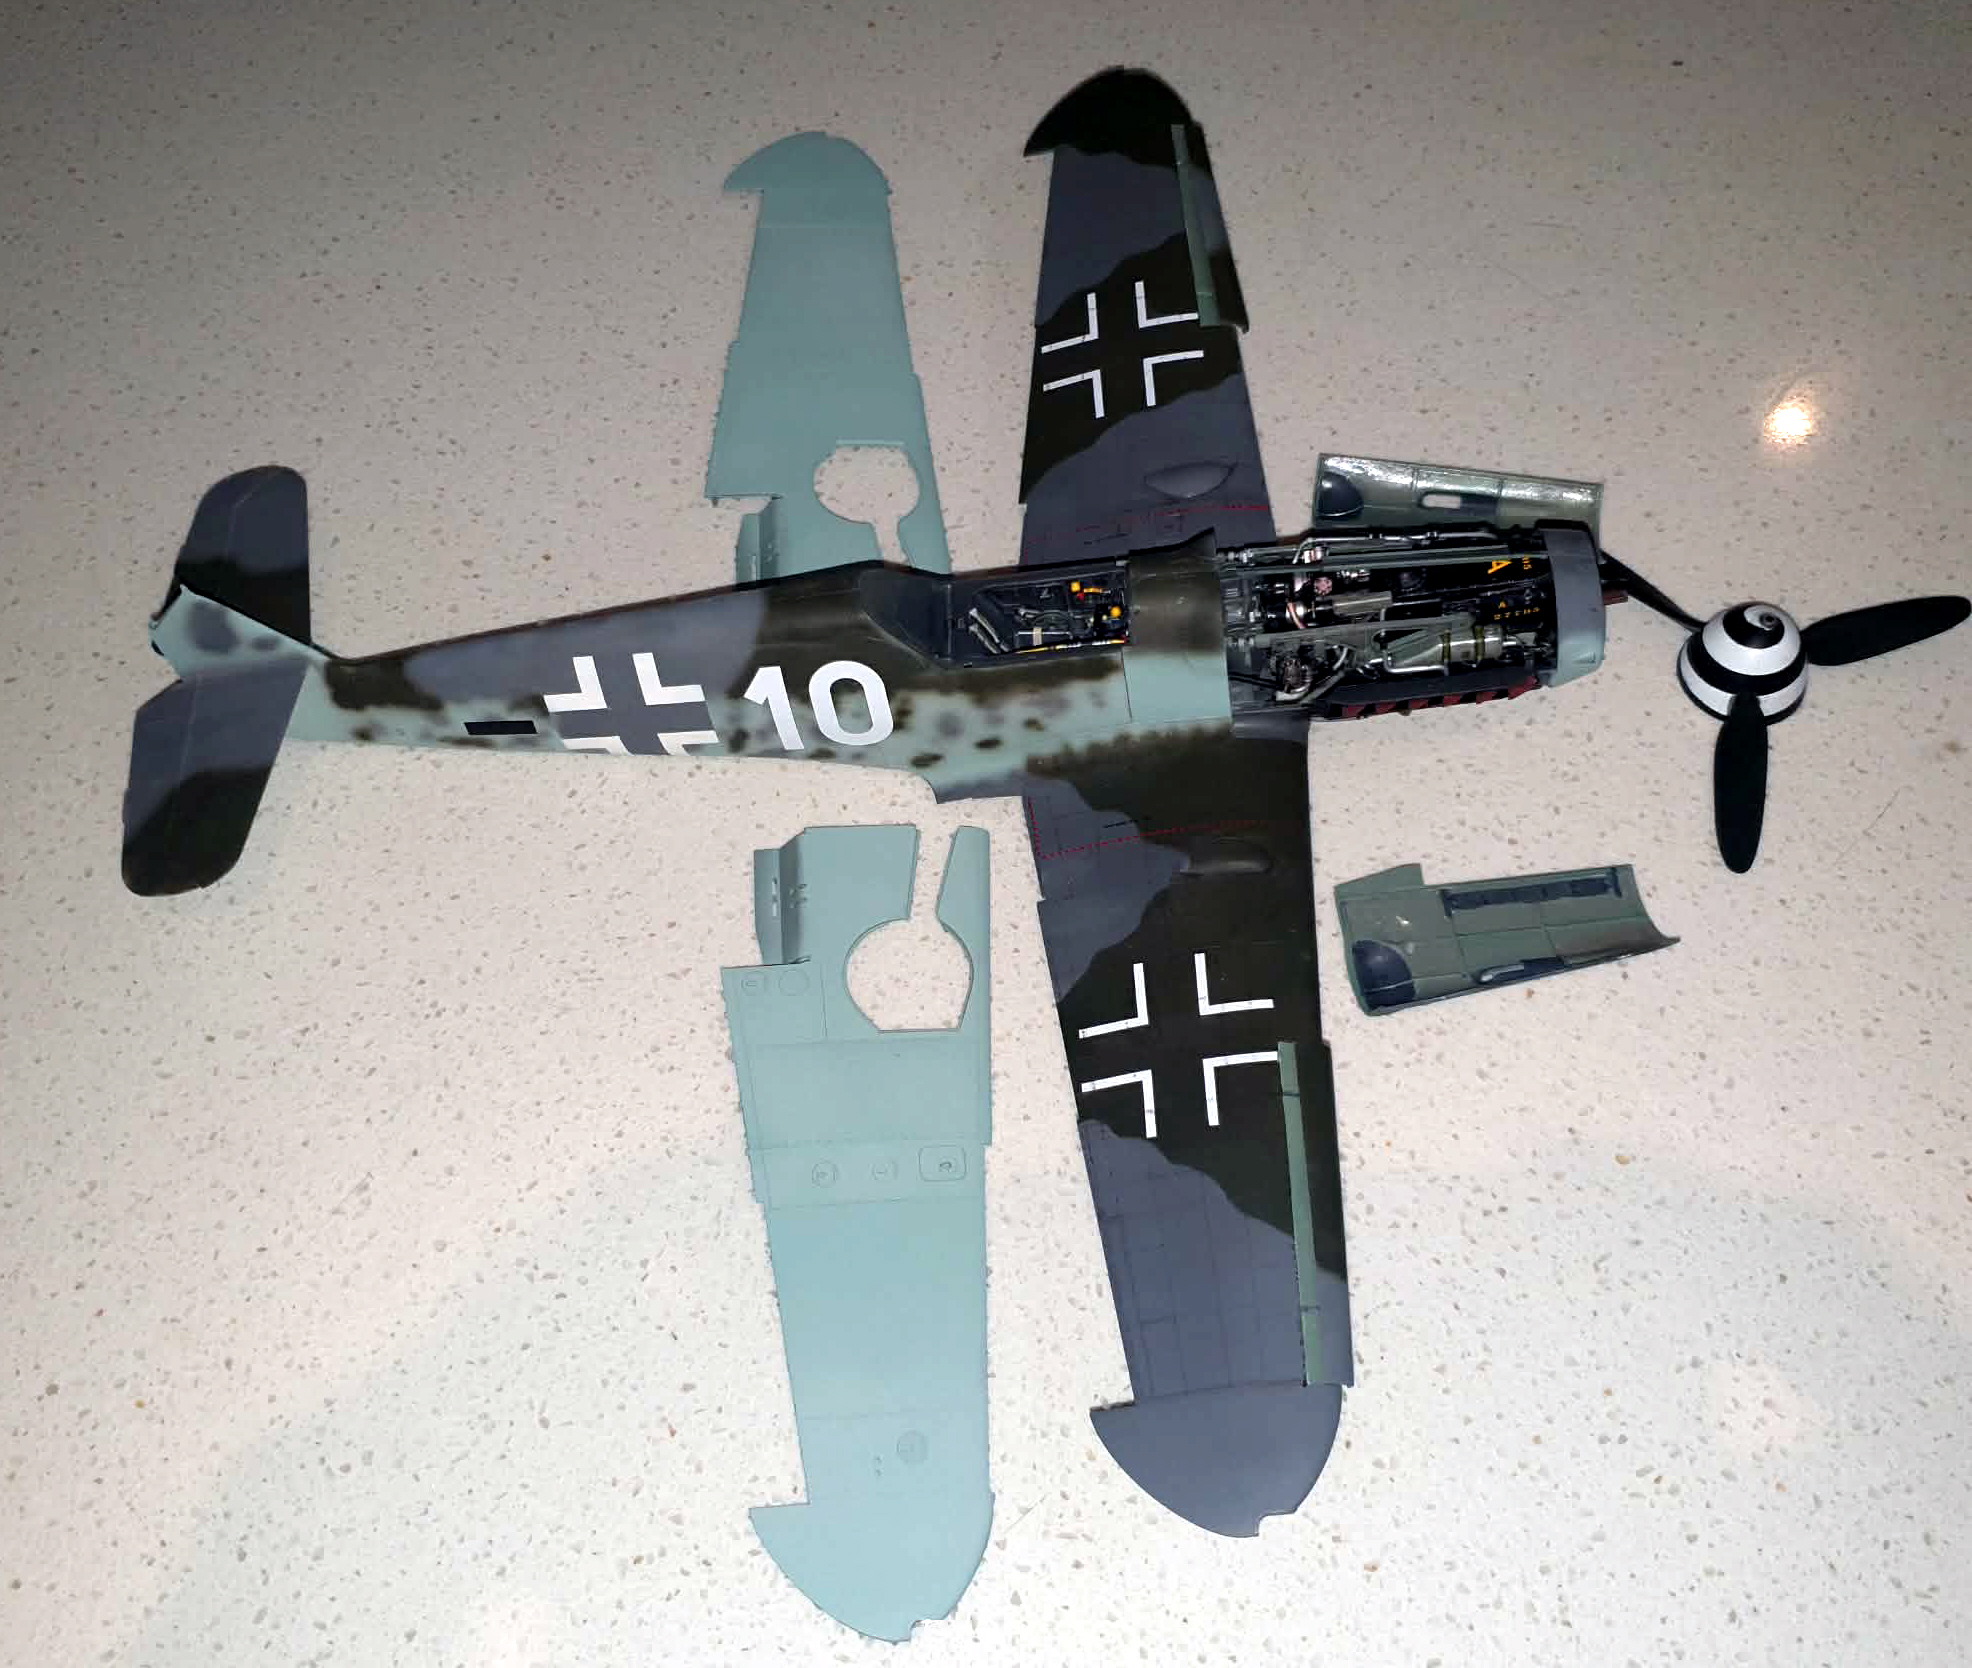
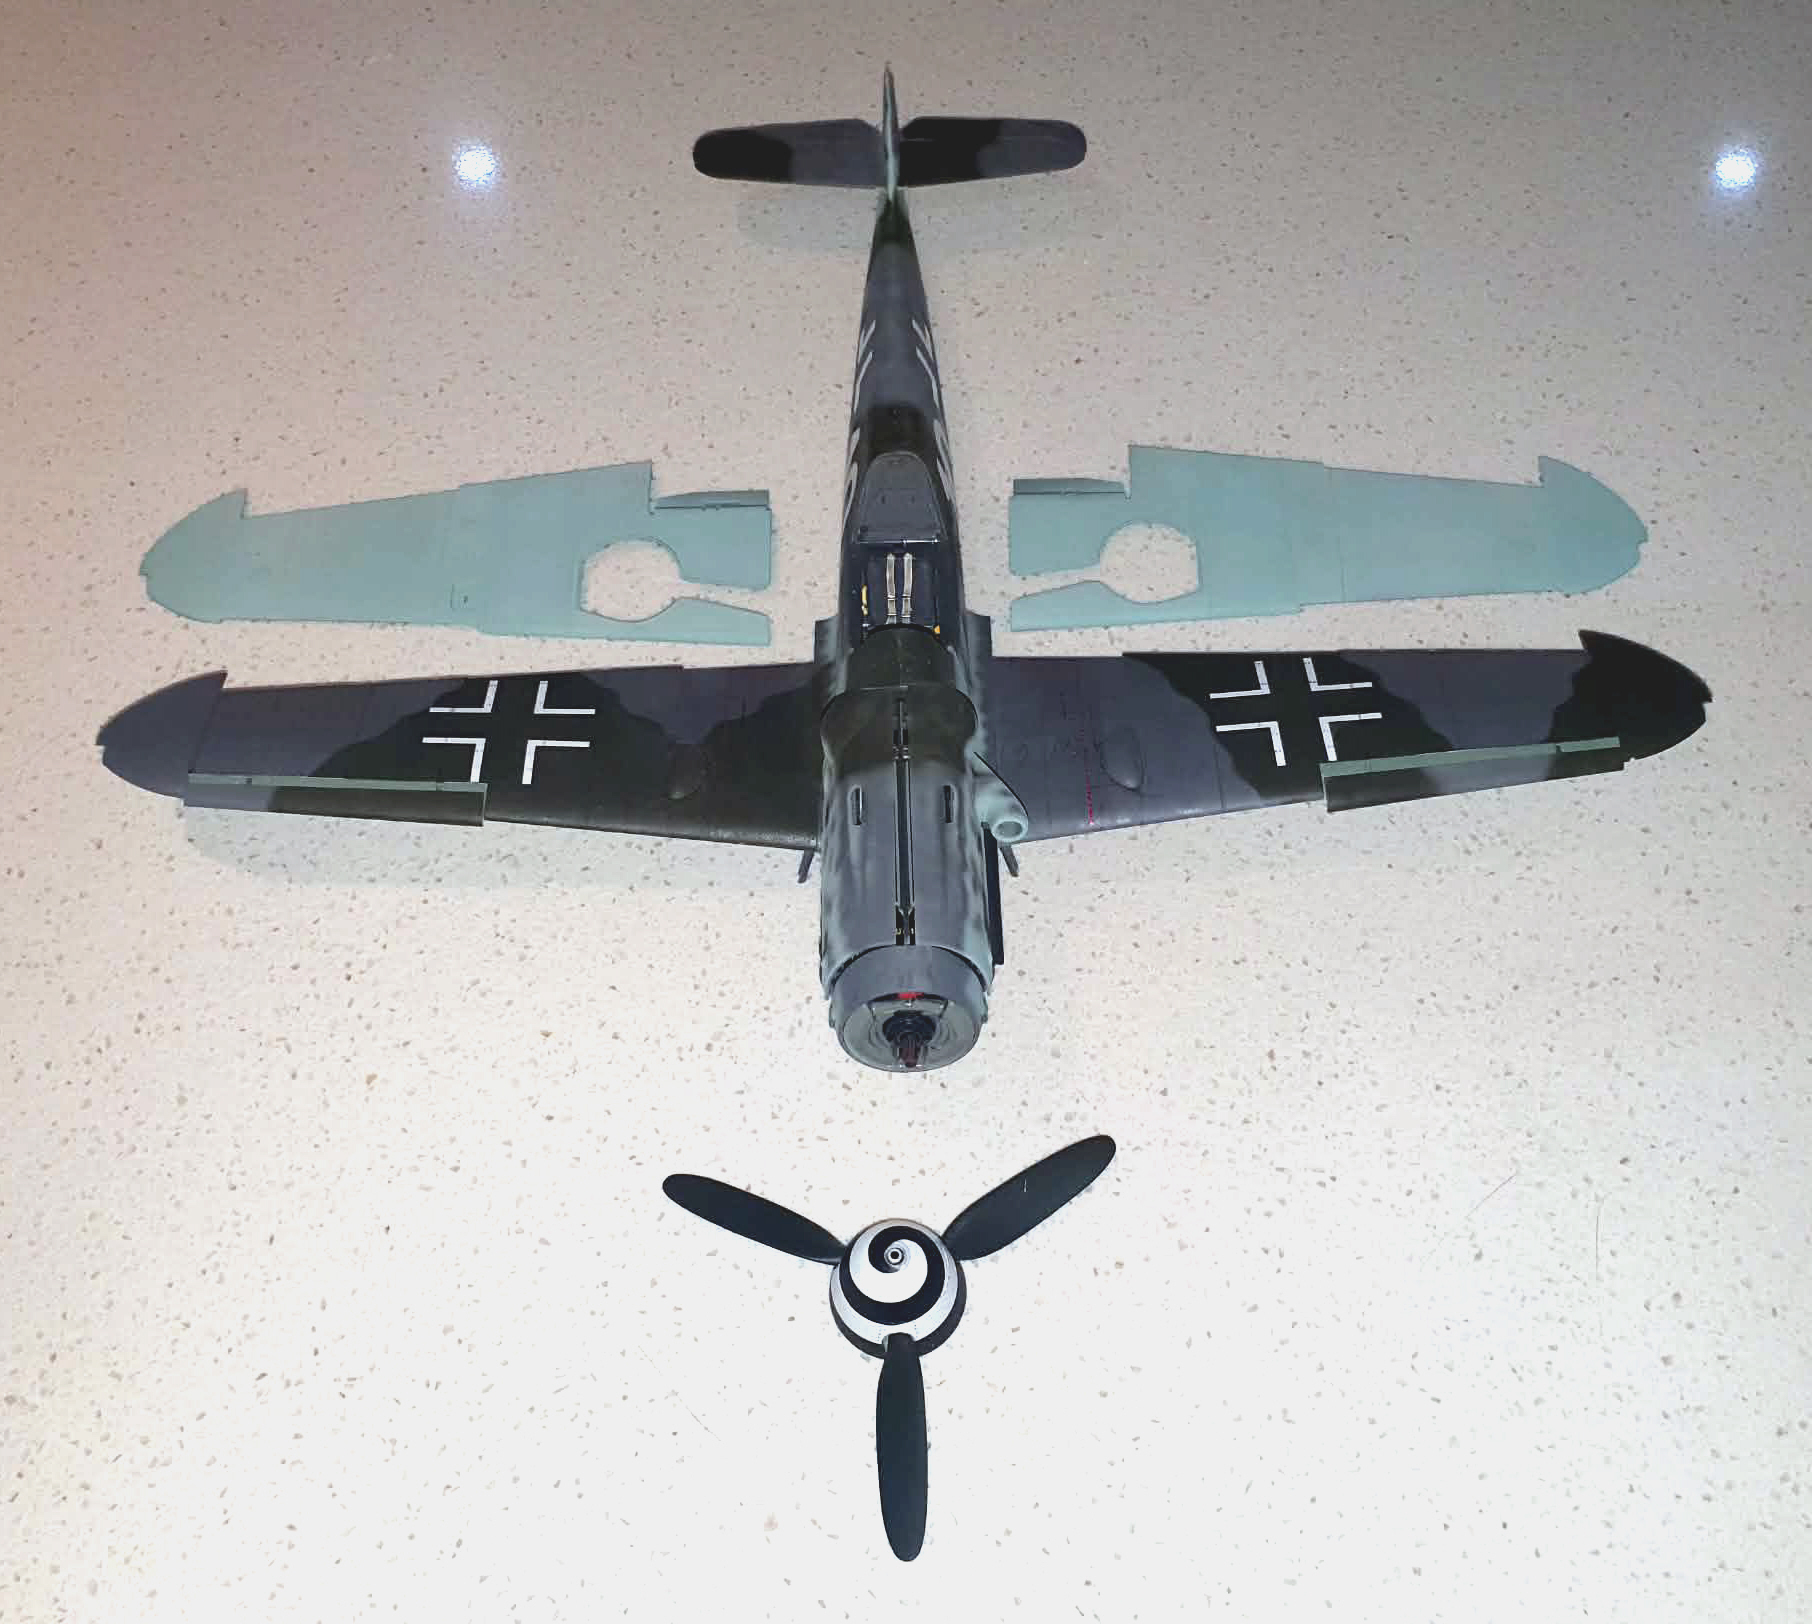
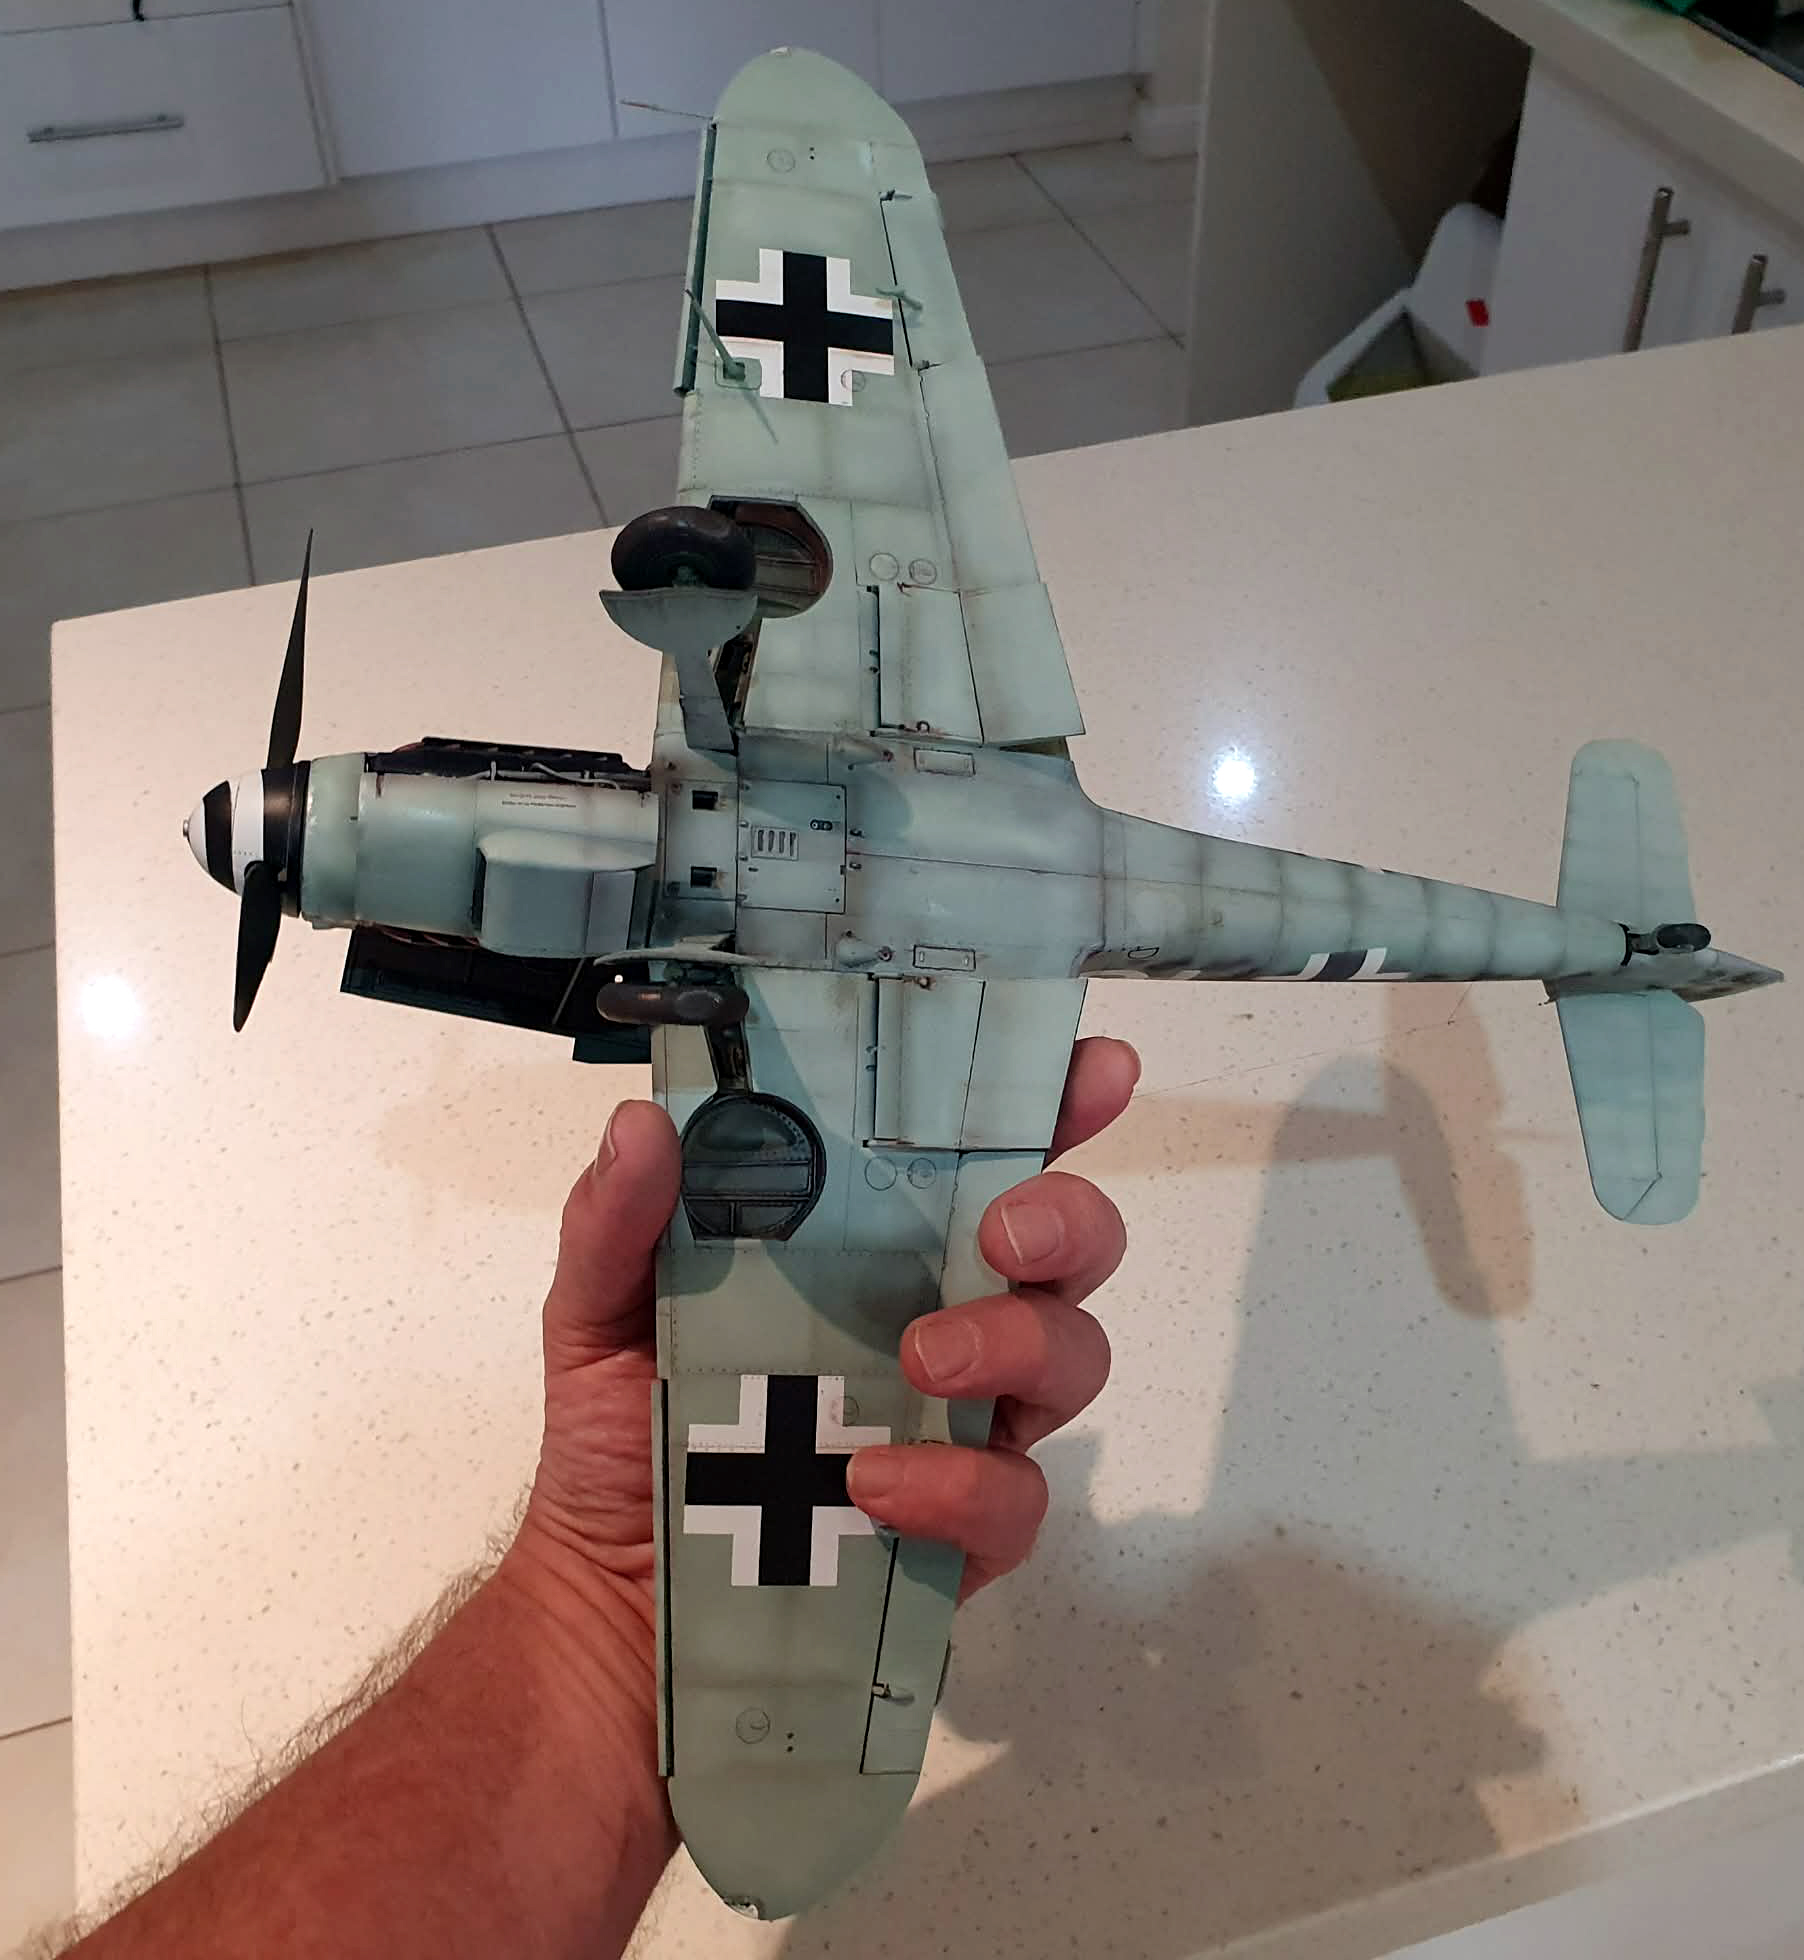
Time to give the wings some love:
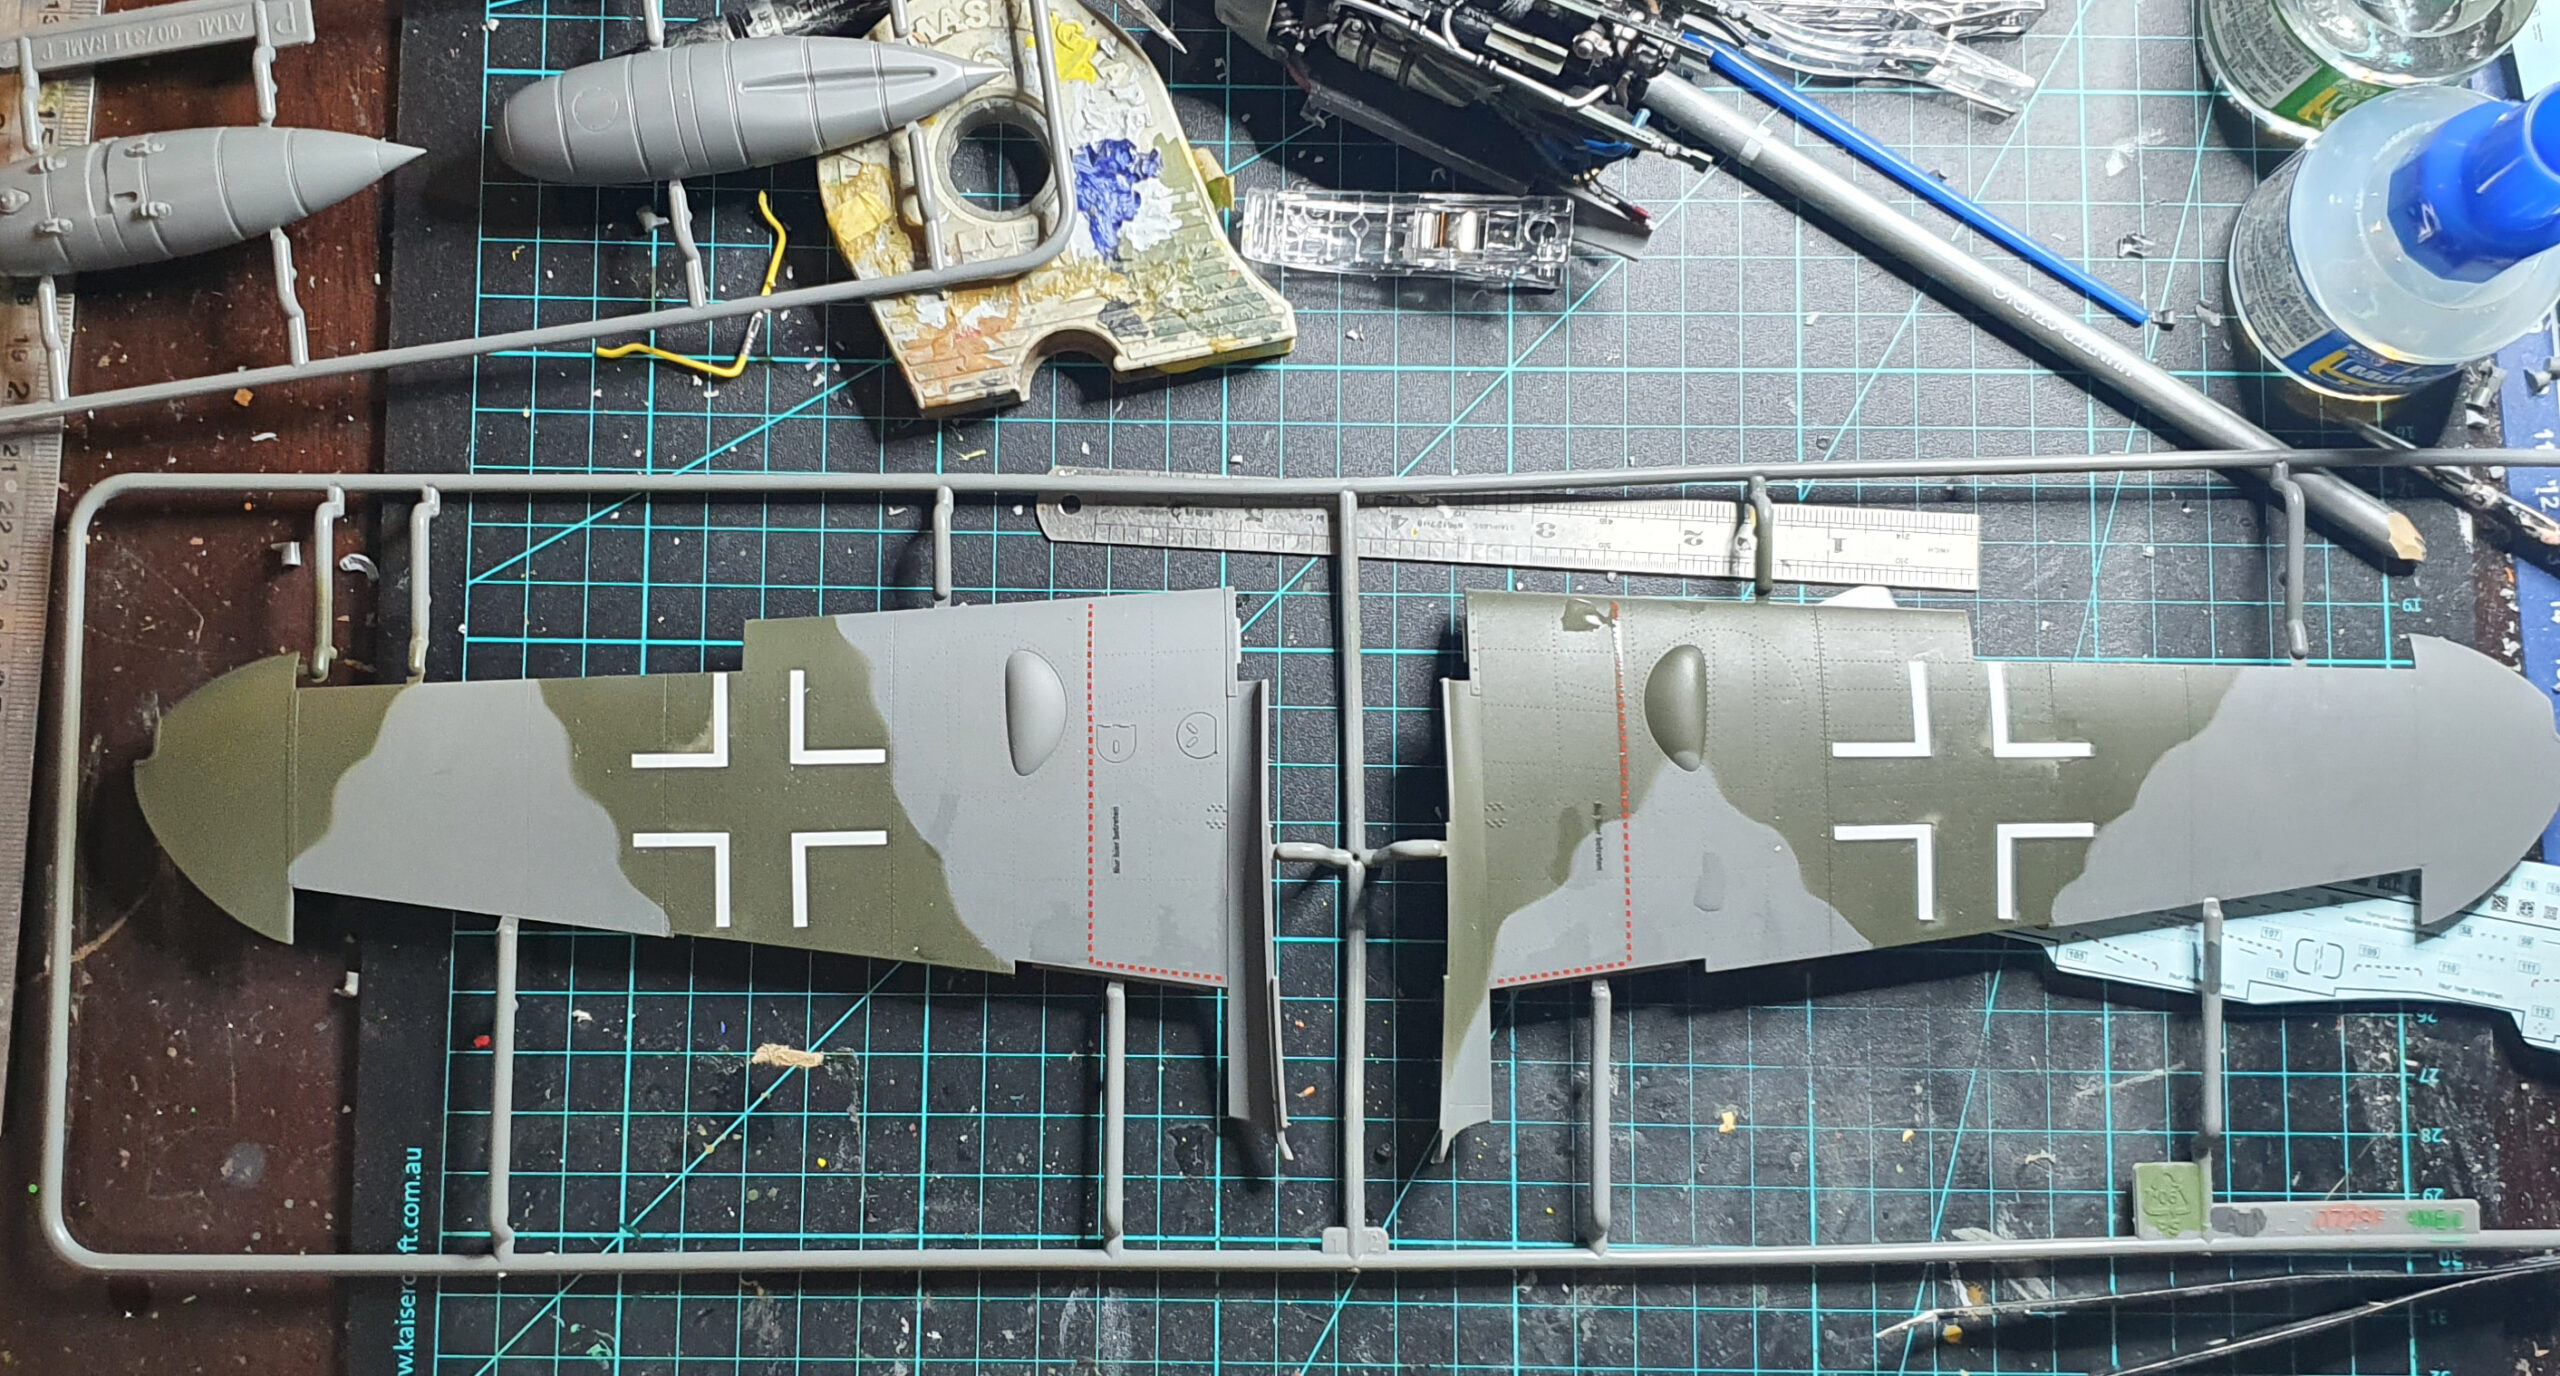
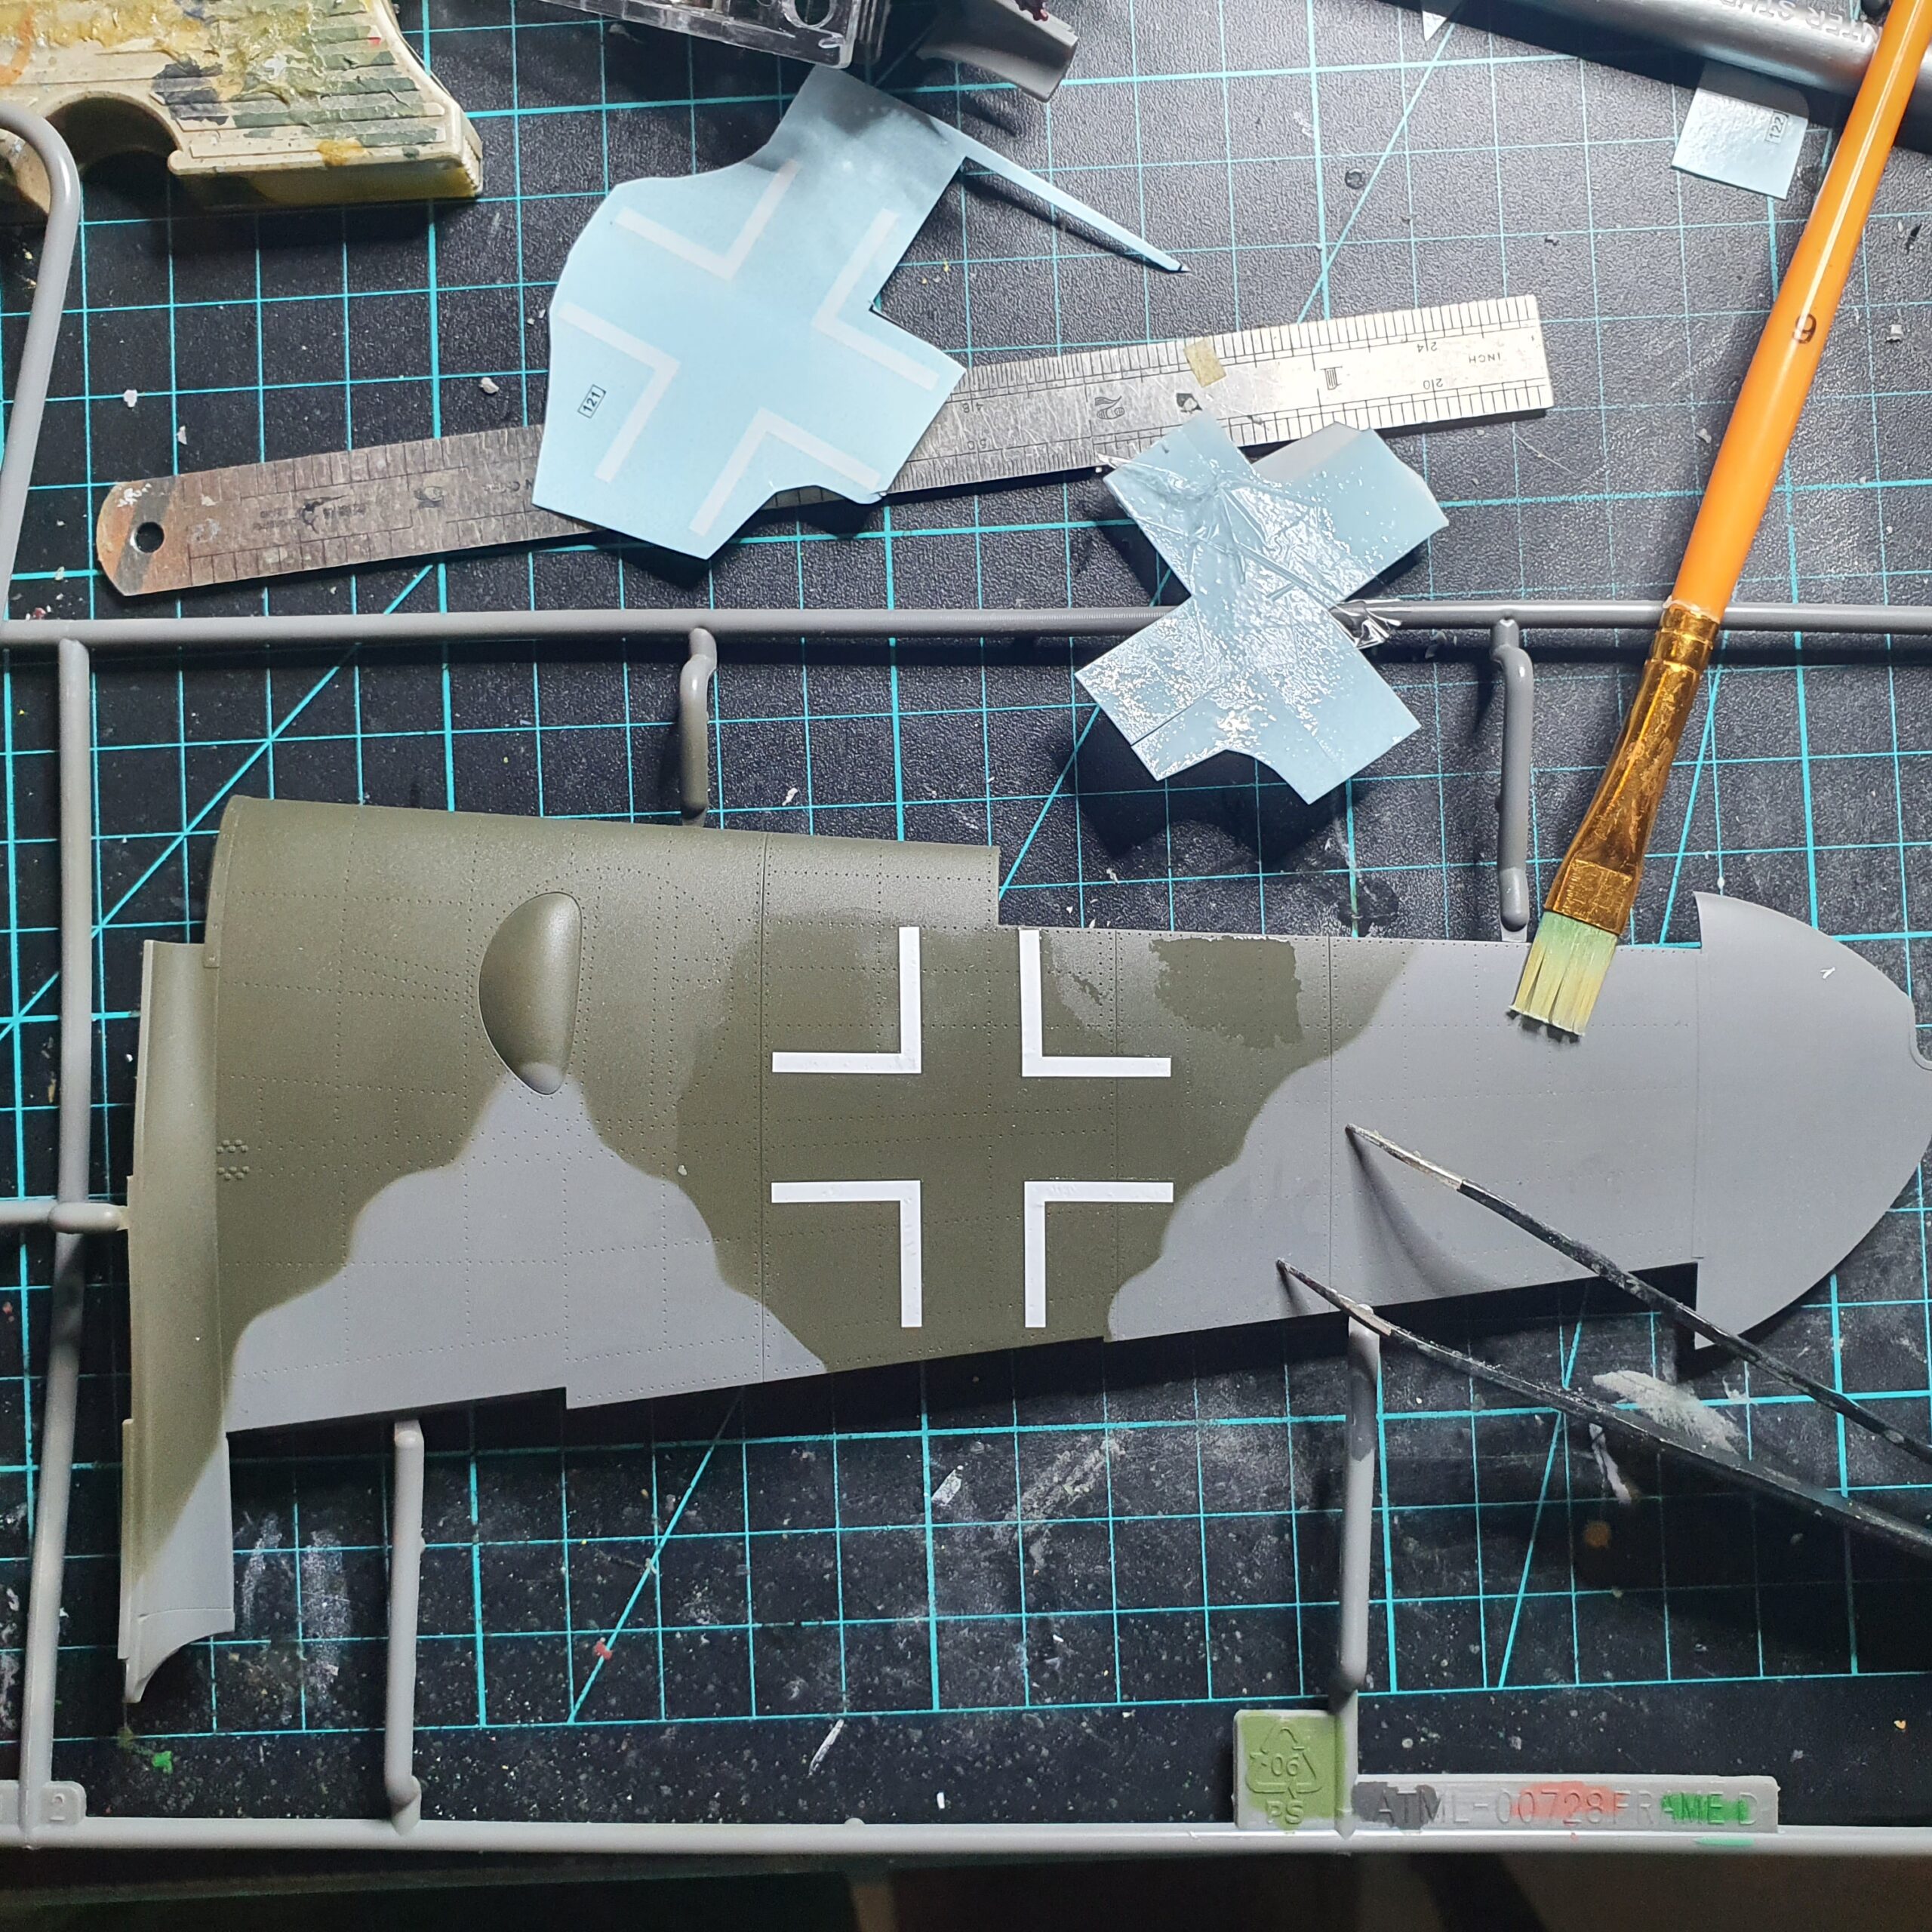
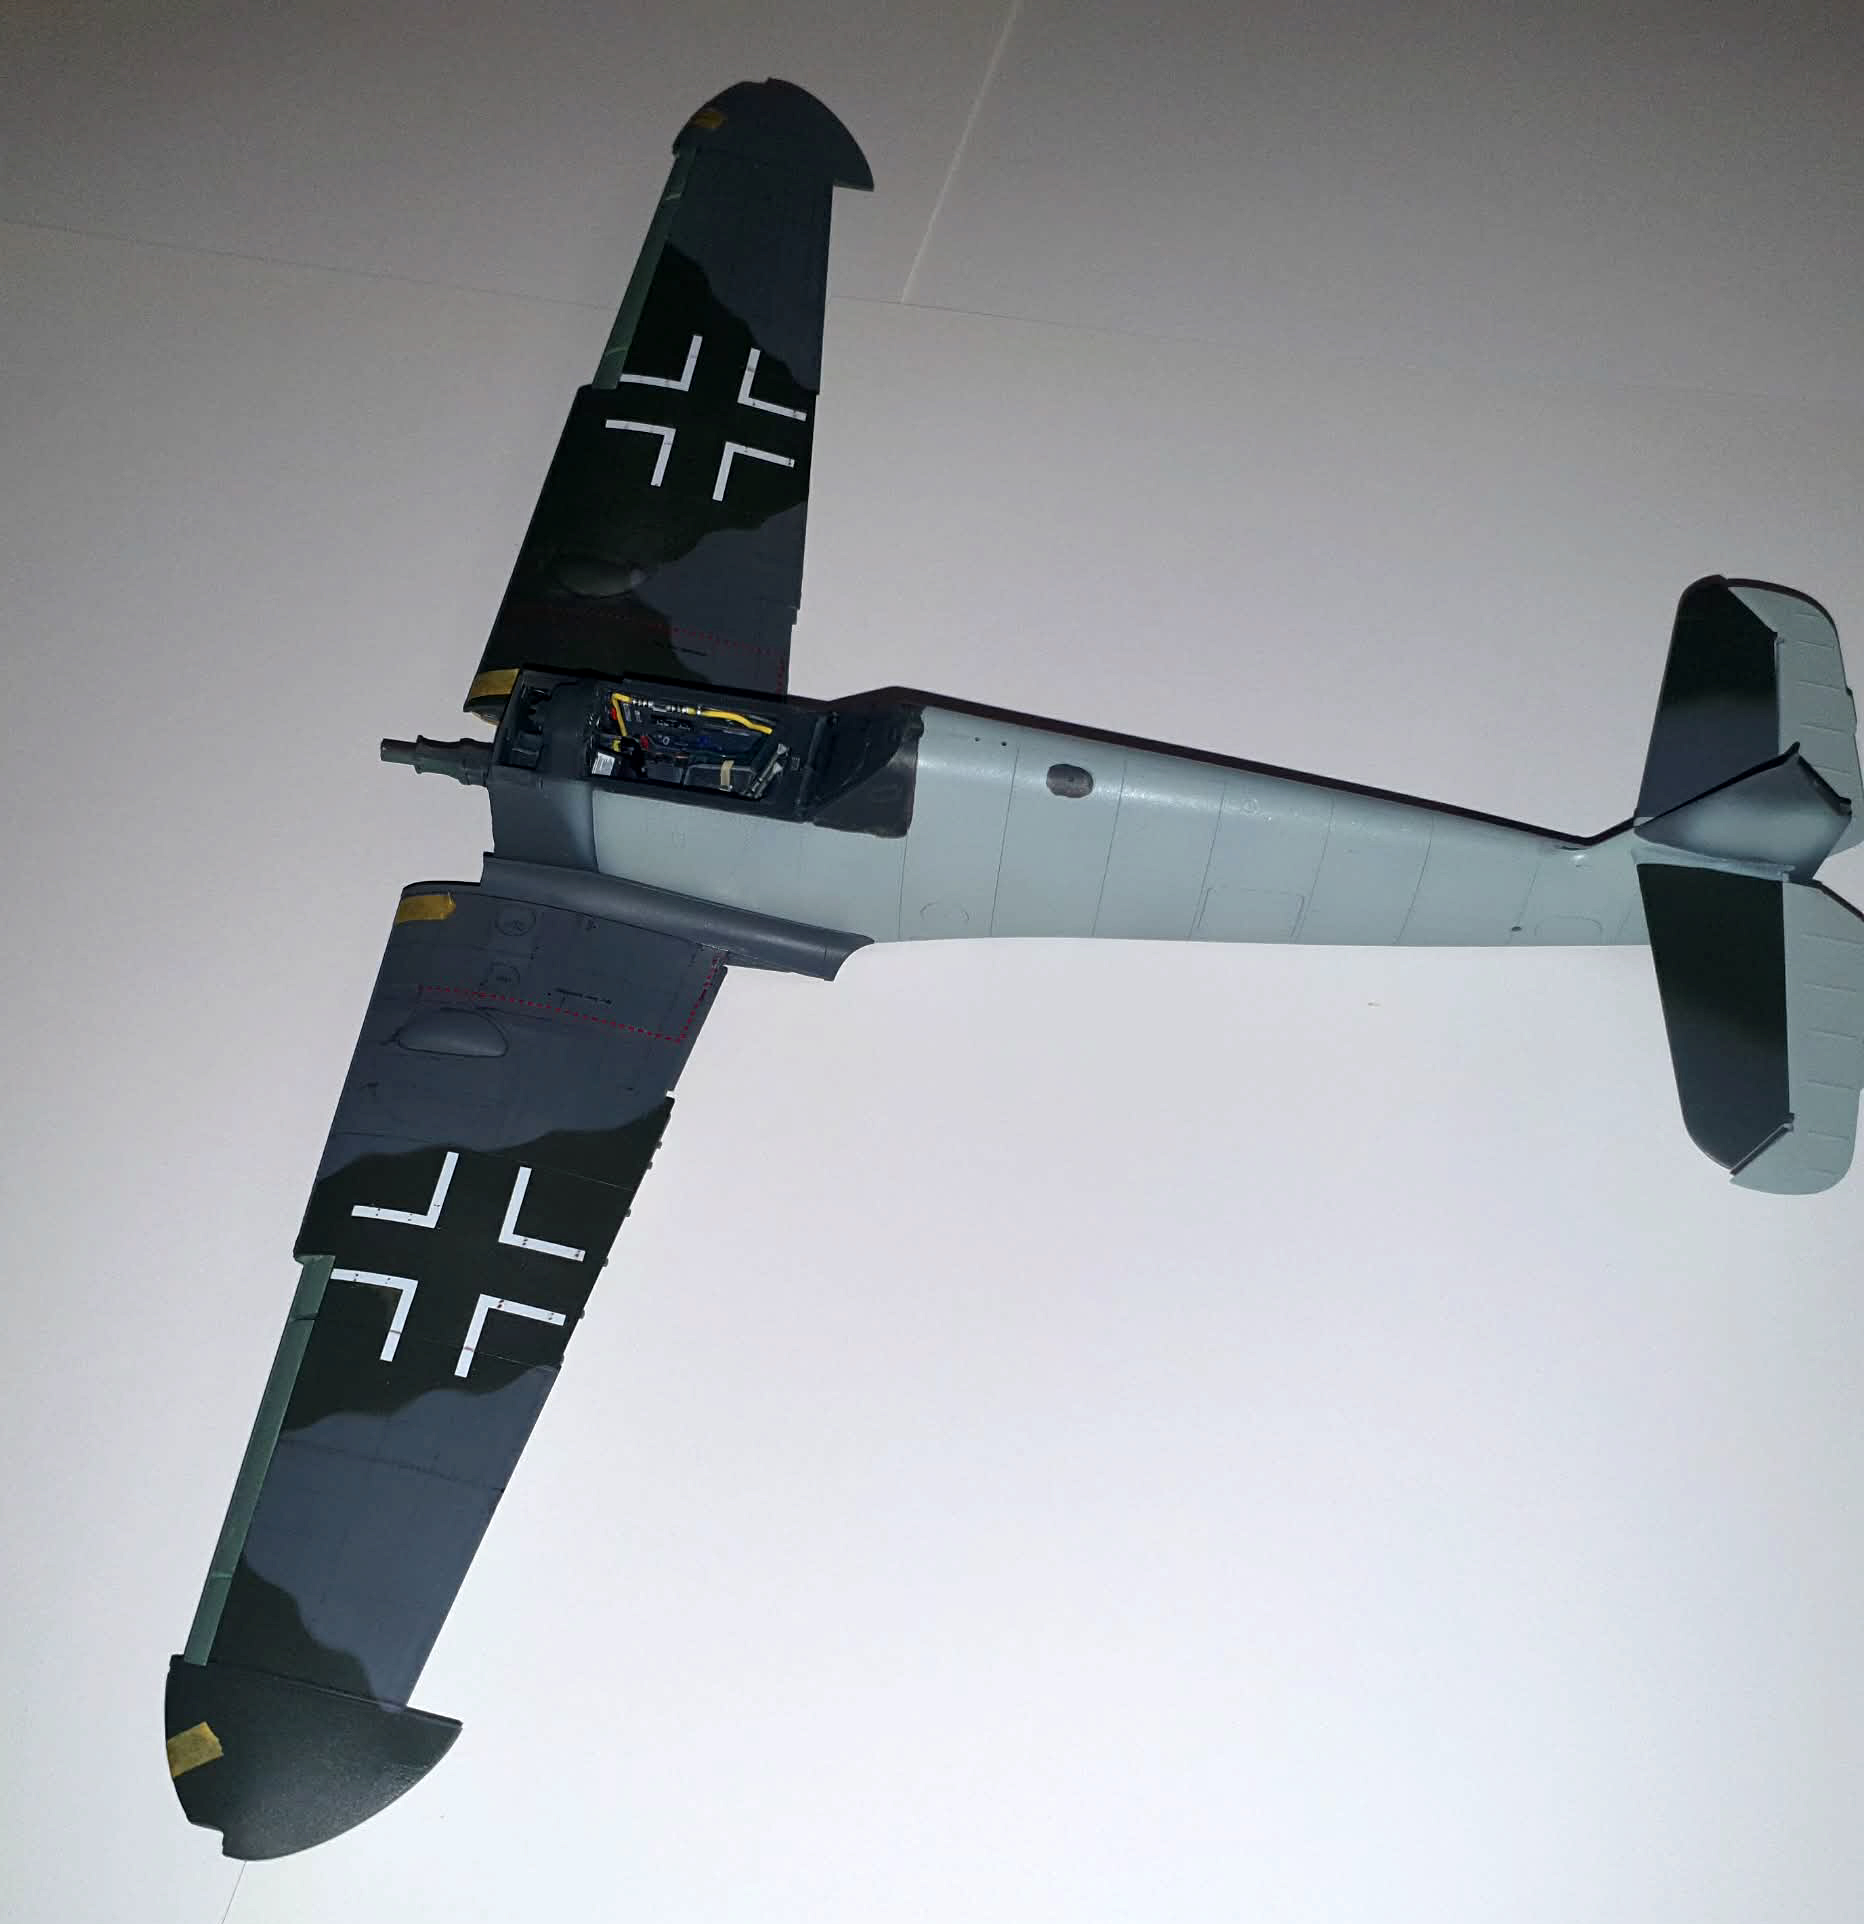
I chose to paint them whilst on the sprue so I could keep it steady. The marking you see here are the kit decals which went on a treat. I trimmed them back to limit silvering but using the usual Tamiya varnish trick to pull them down is all you need.
Now we start to piece it together
Checking alignments

I used a chrome marker on the buckles followed with a little thinned black acting as a wash which I reckon made them pop.
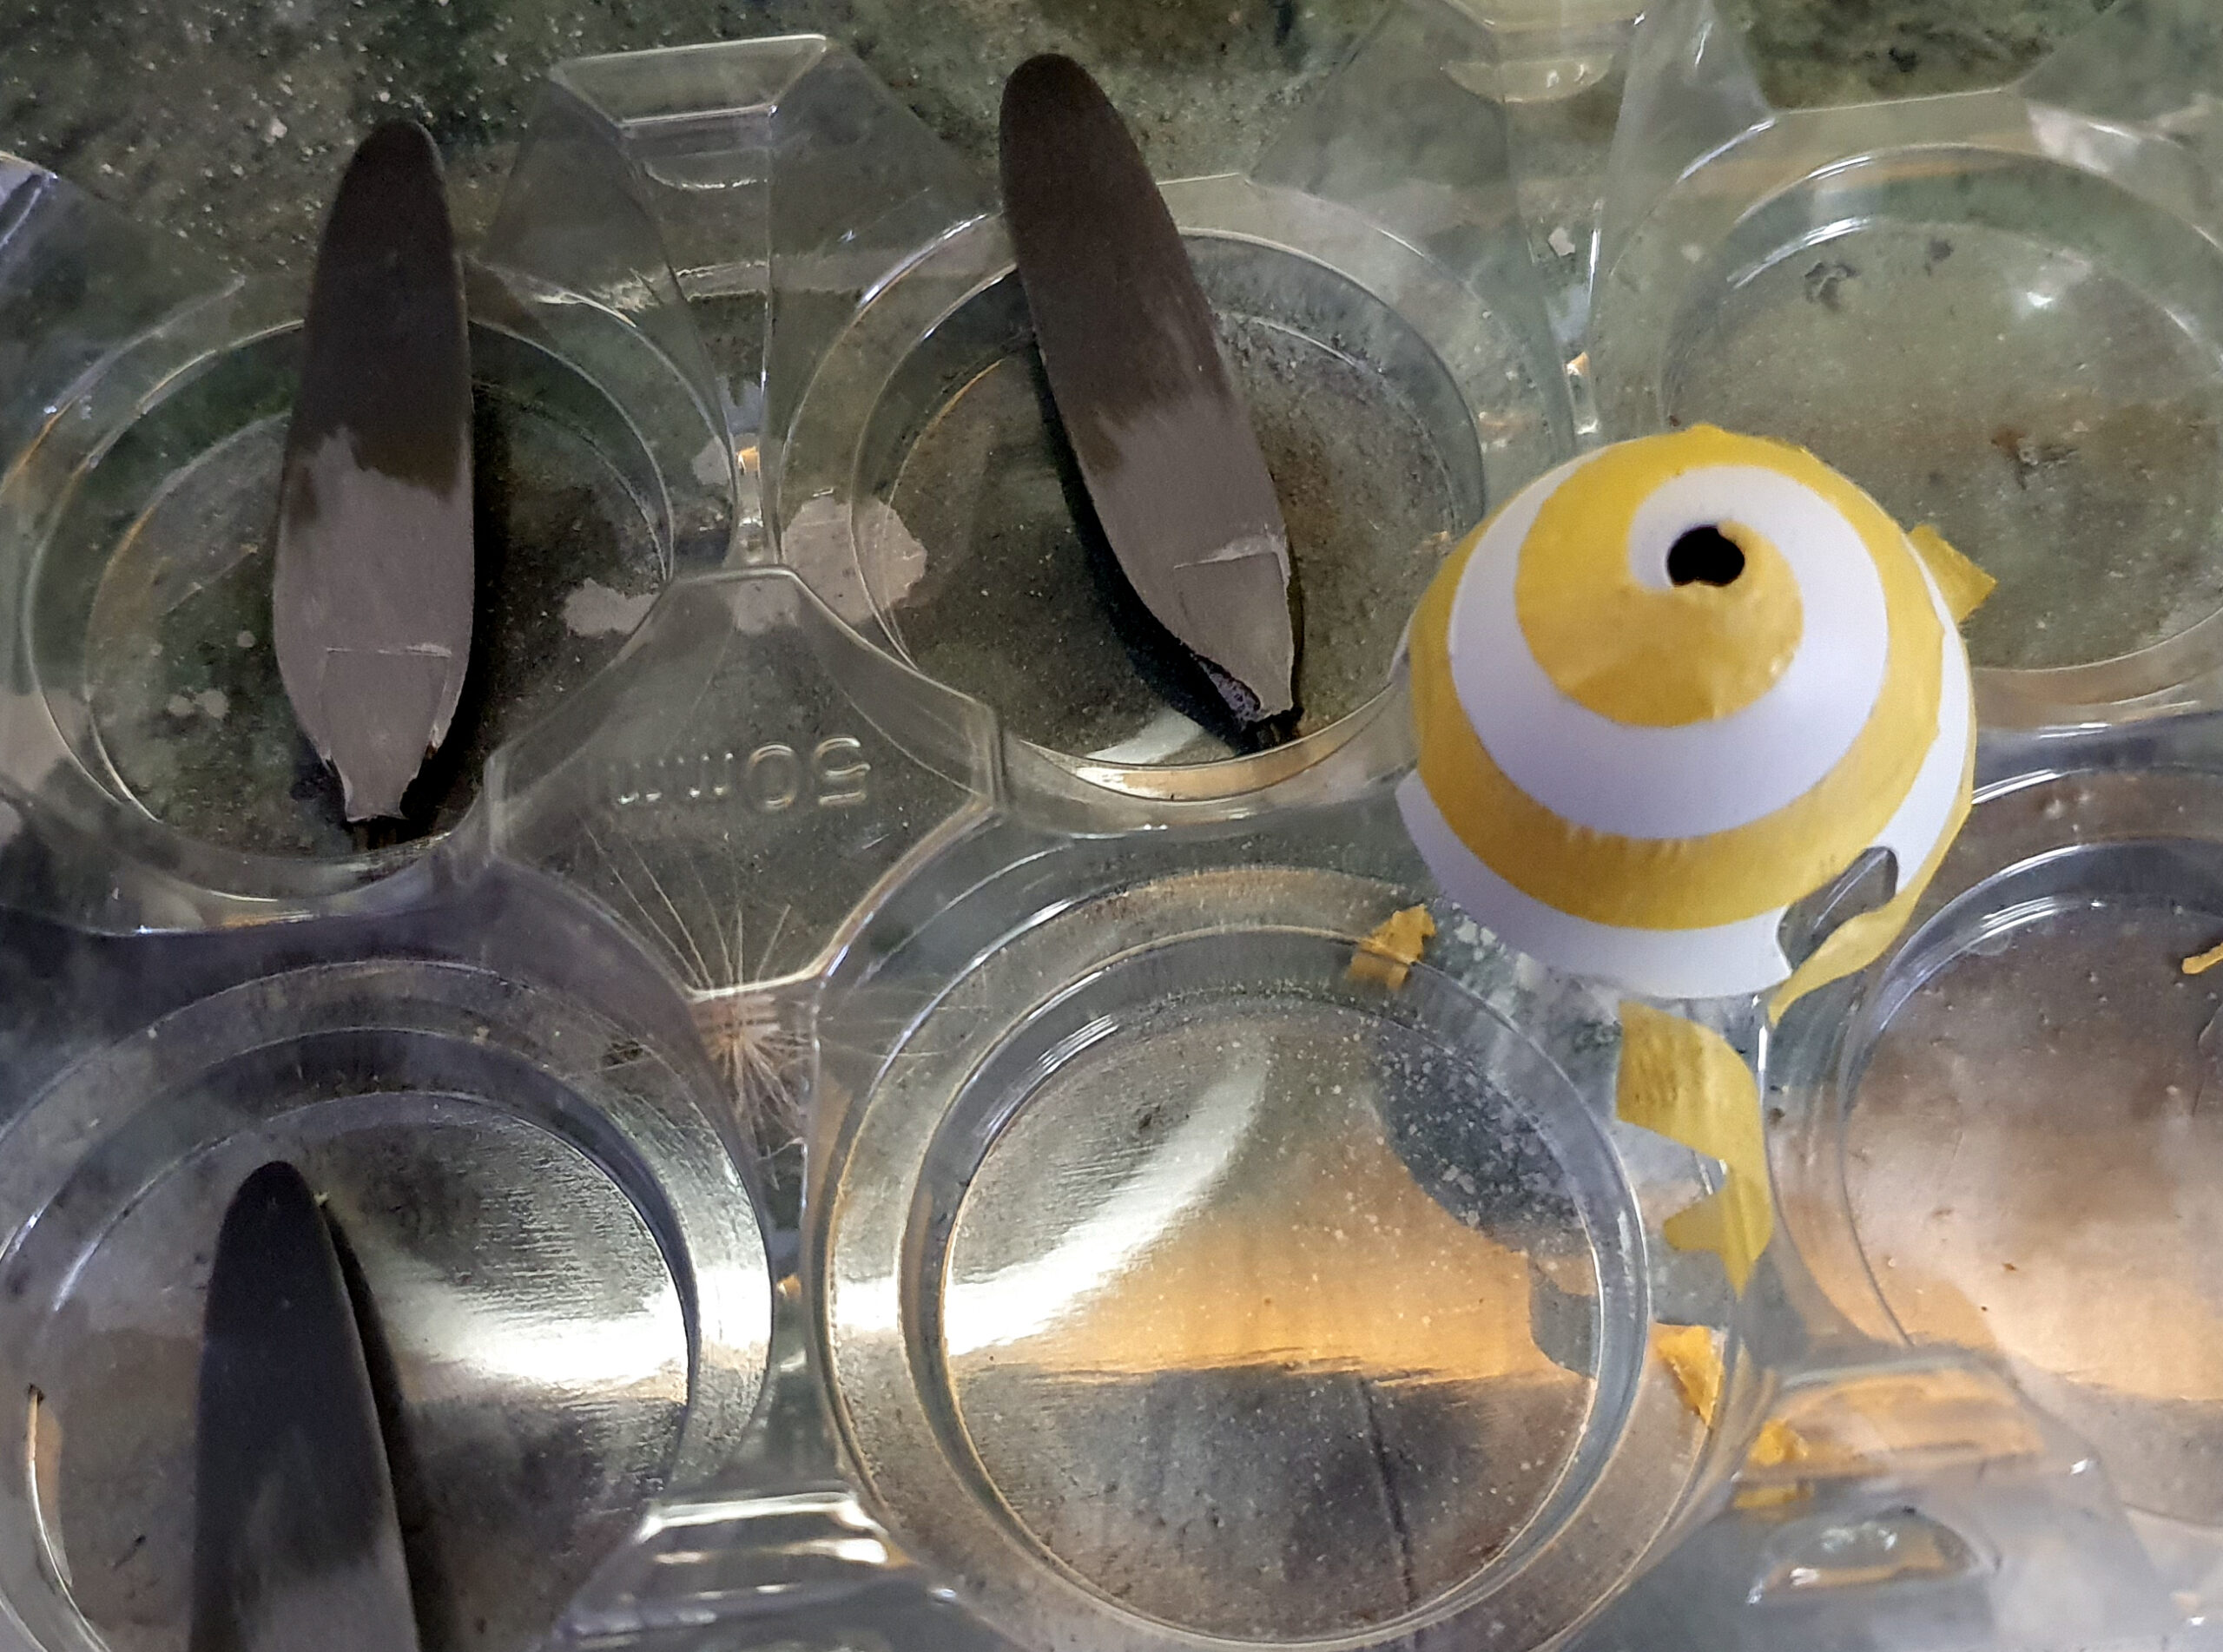
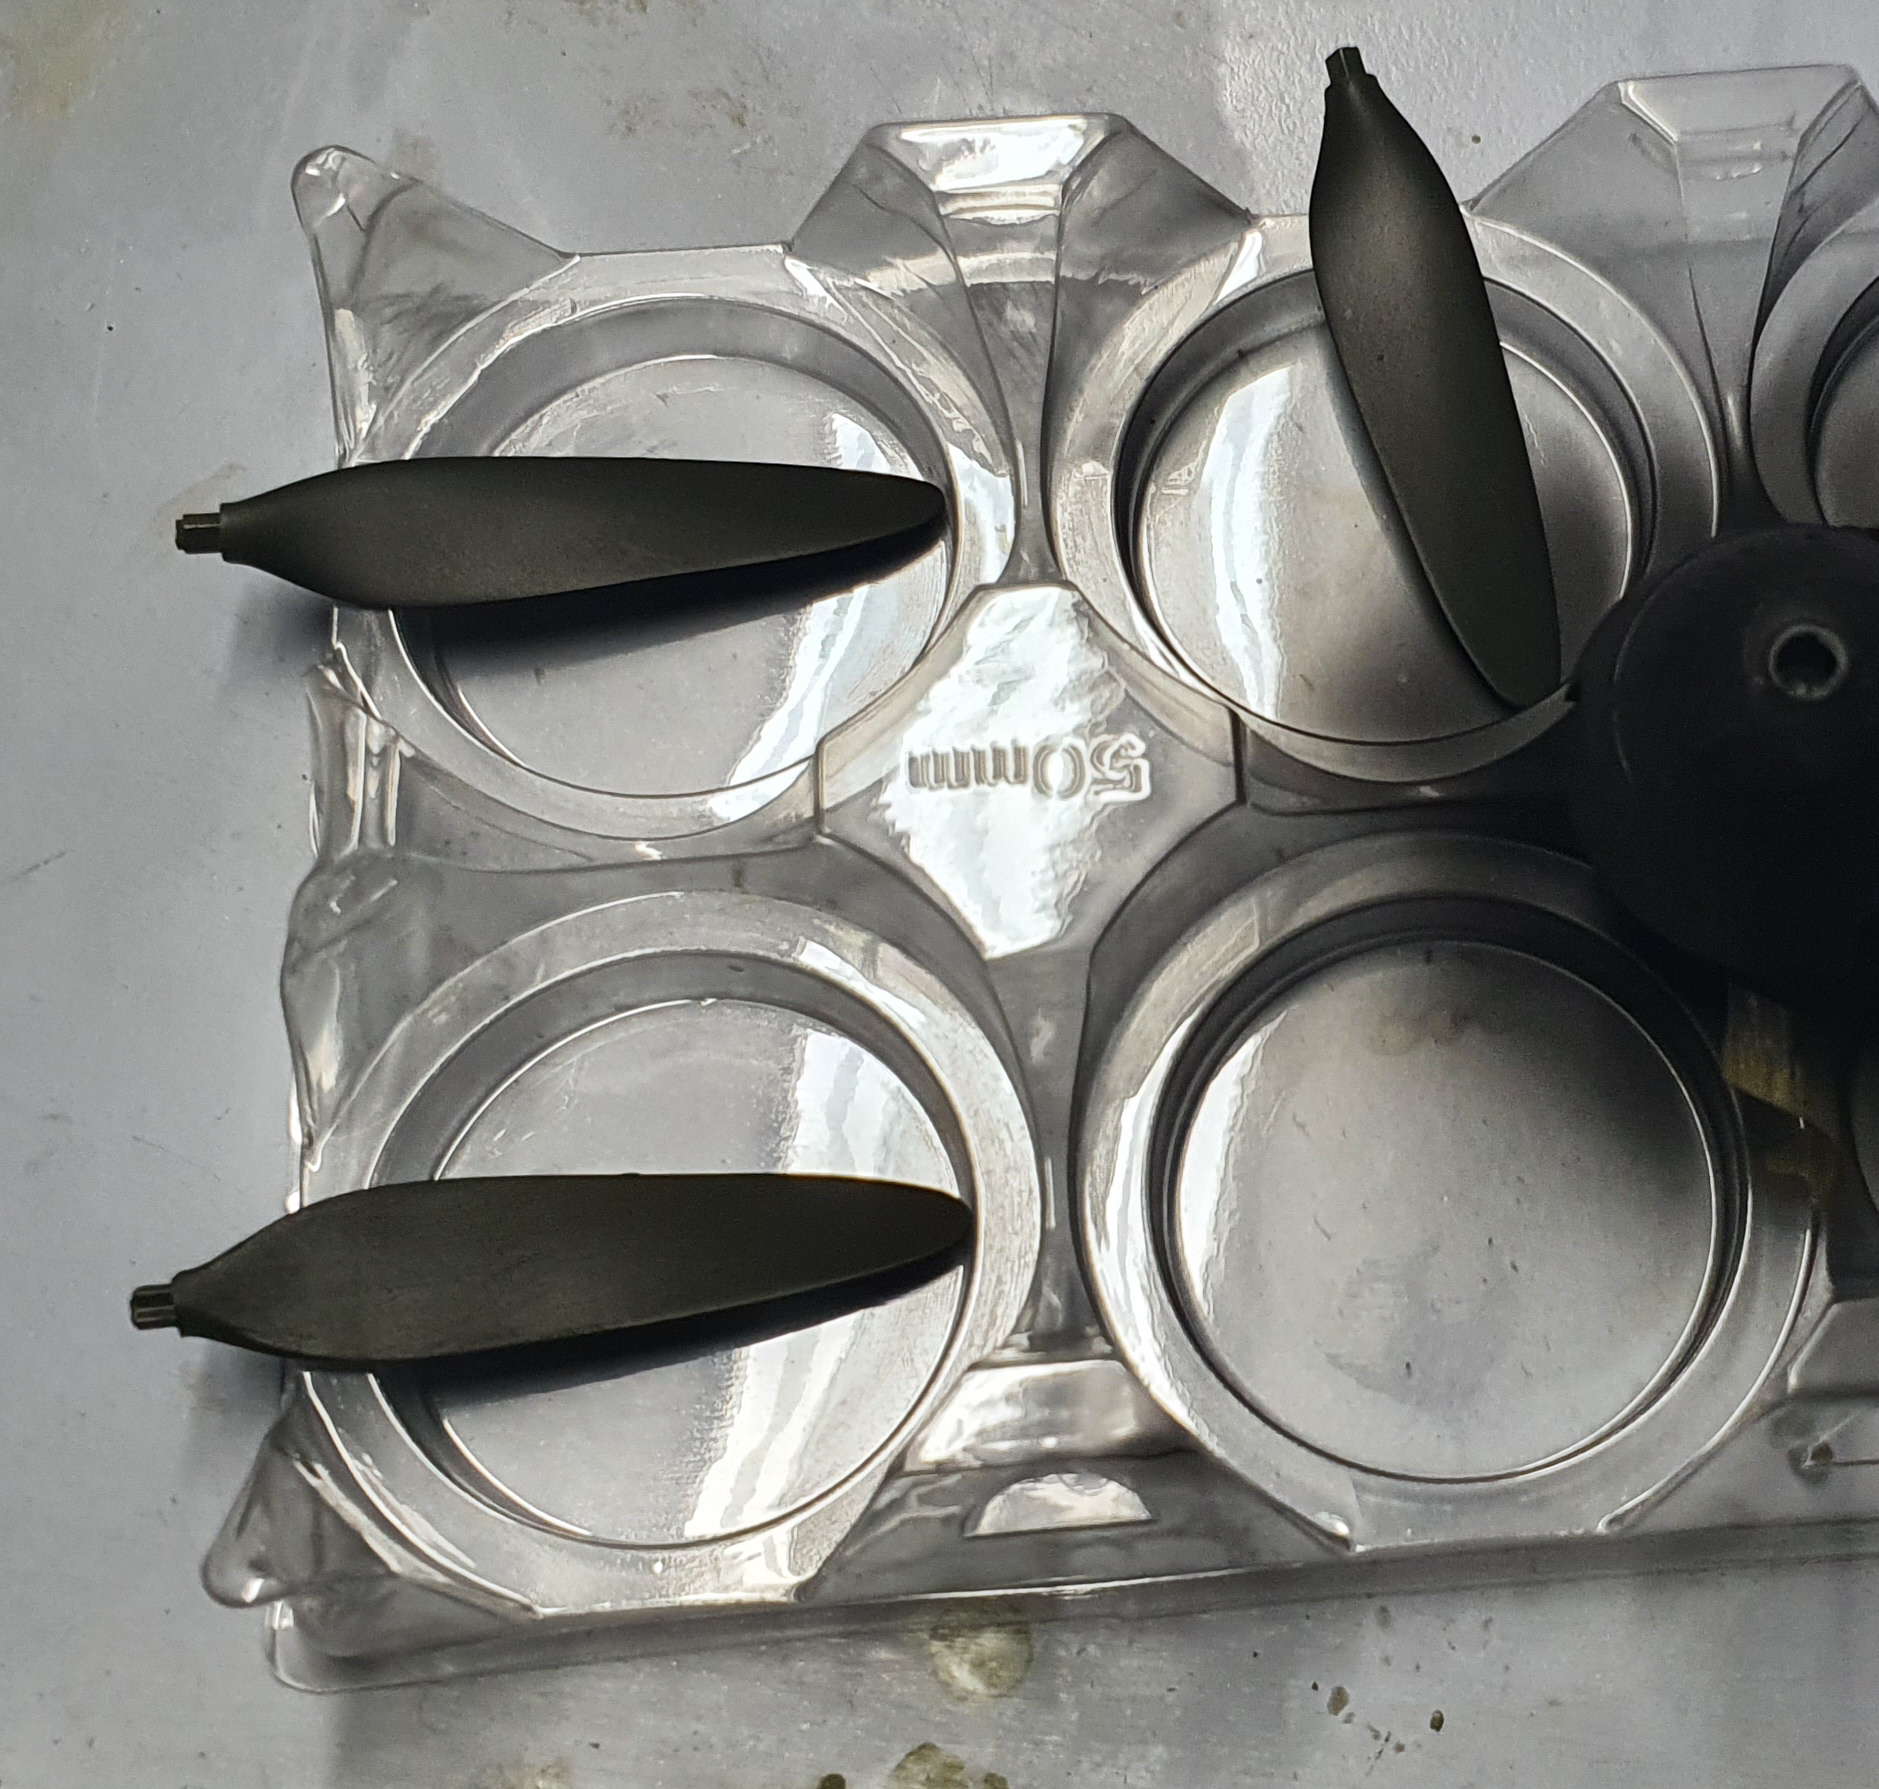
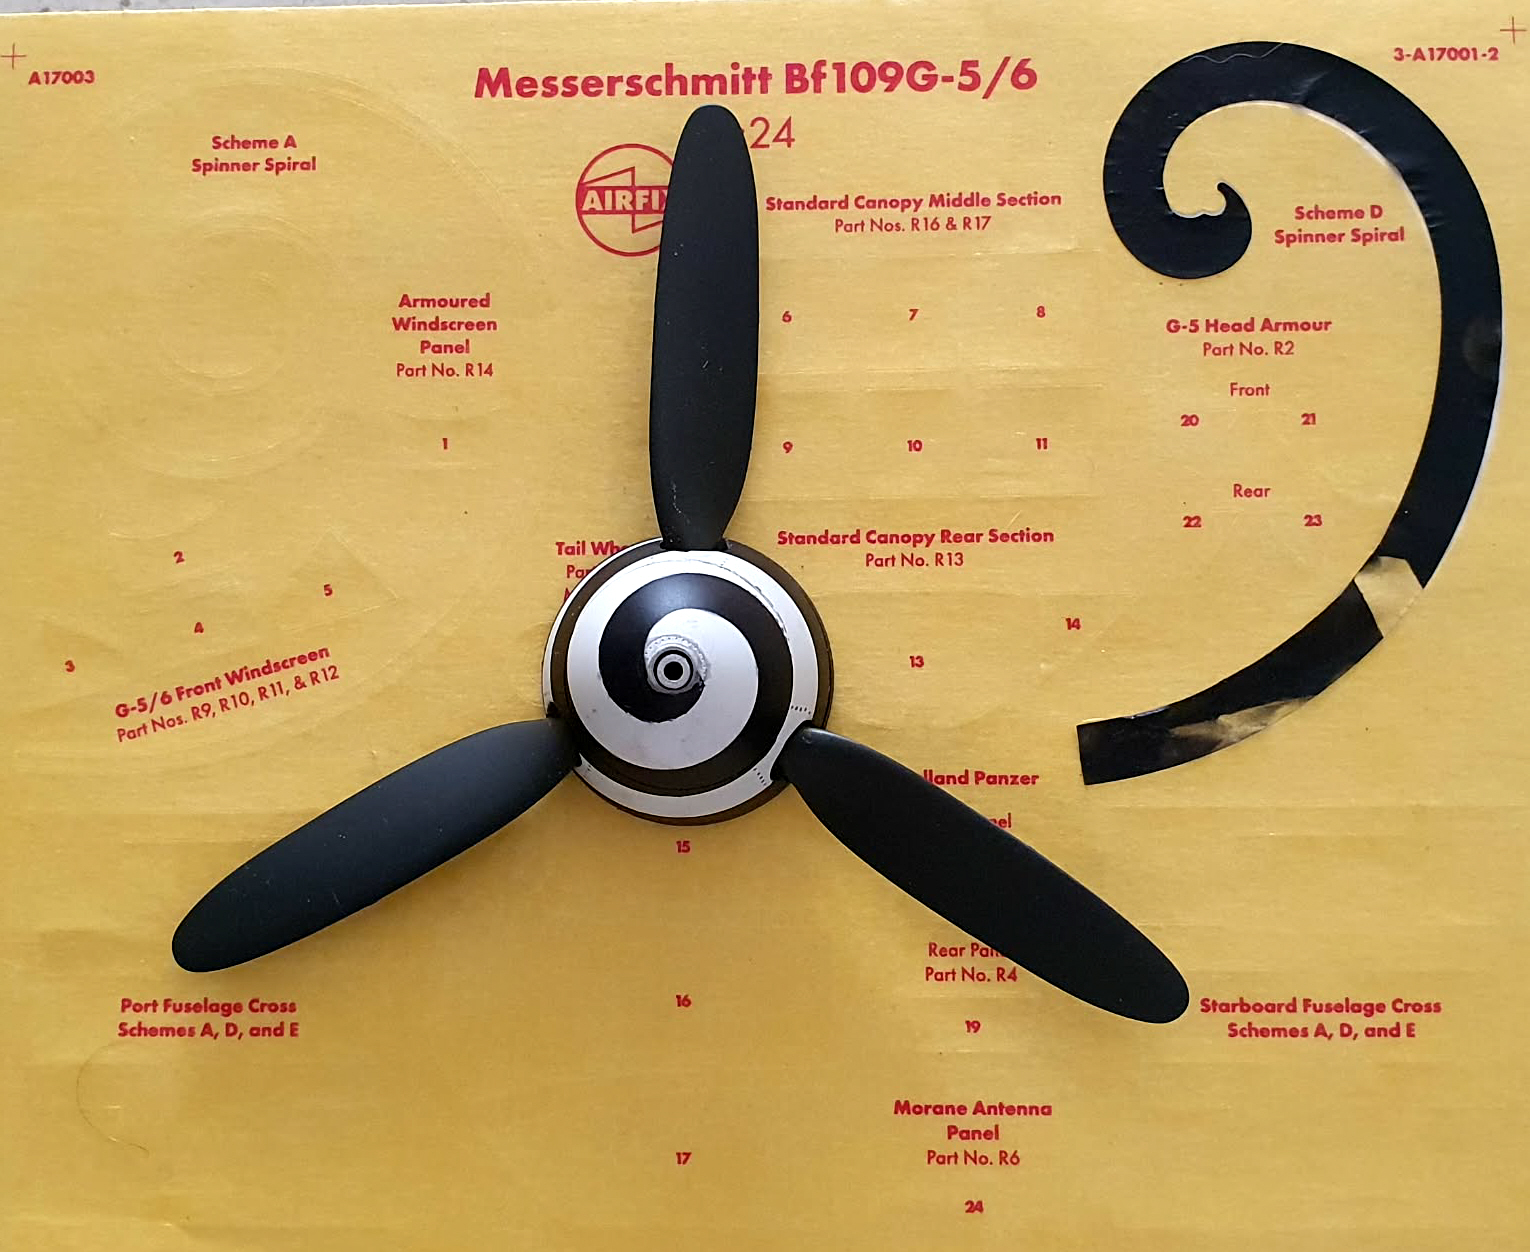
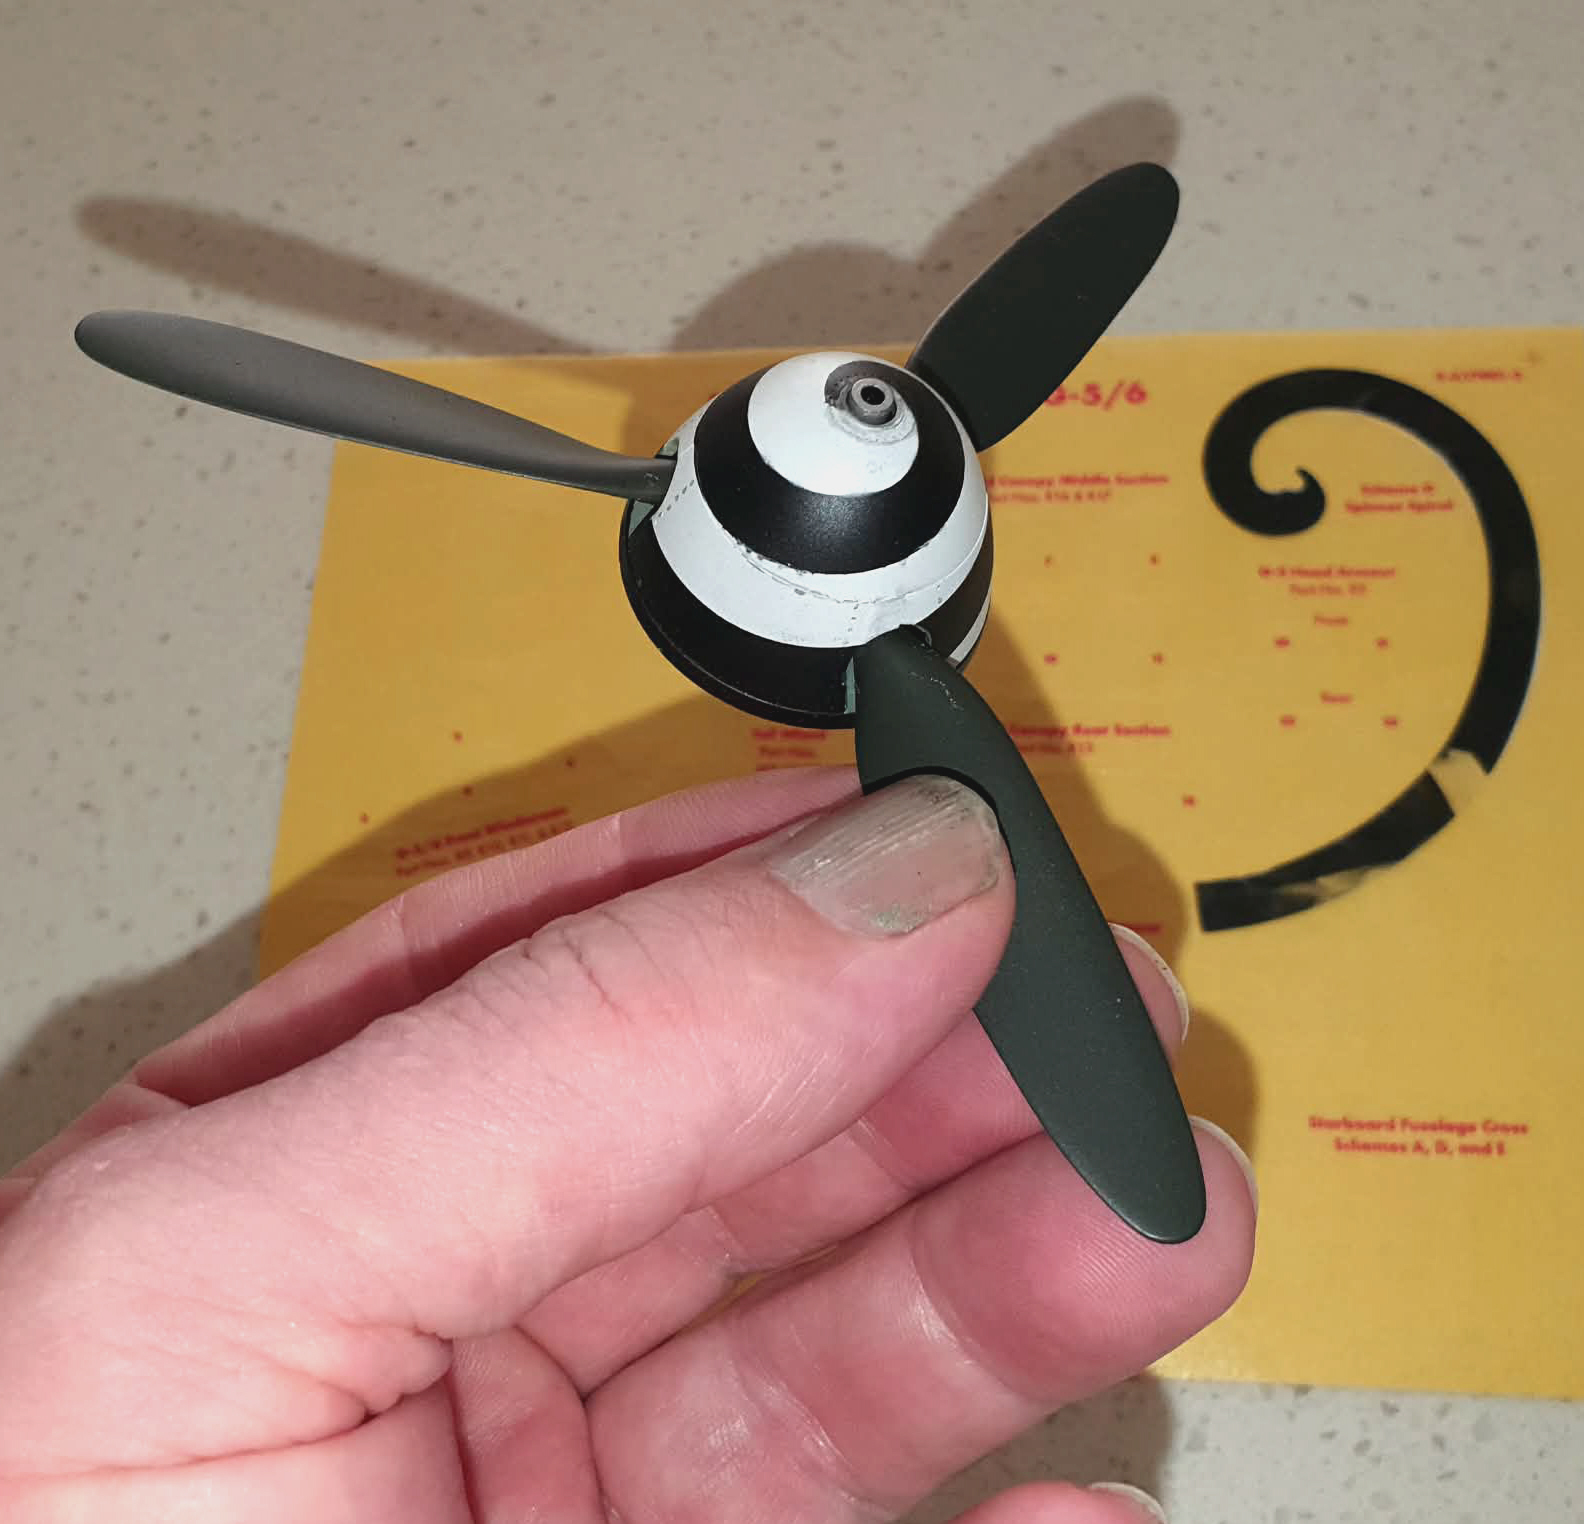
Now comes the prop. This was relatively easy made even easier by the inclusion of a mask set as part of the kit. With a little fettling the adhesion was good and the result speaks for itself. I retained the masks ( the canopy got some masking too ) in case I wish to use them on my Trumpeter kit at a later date.
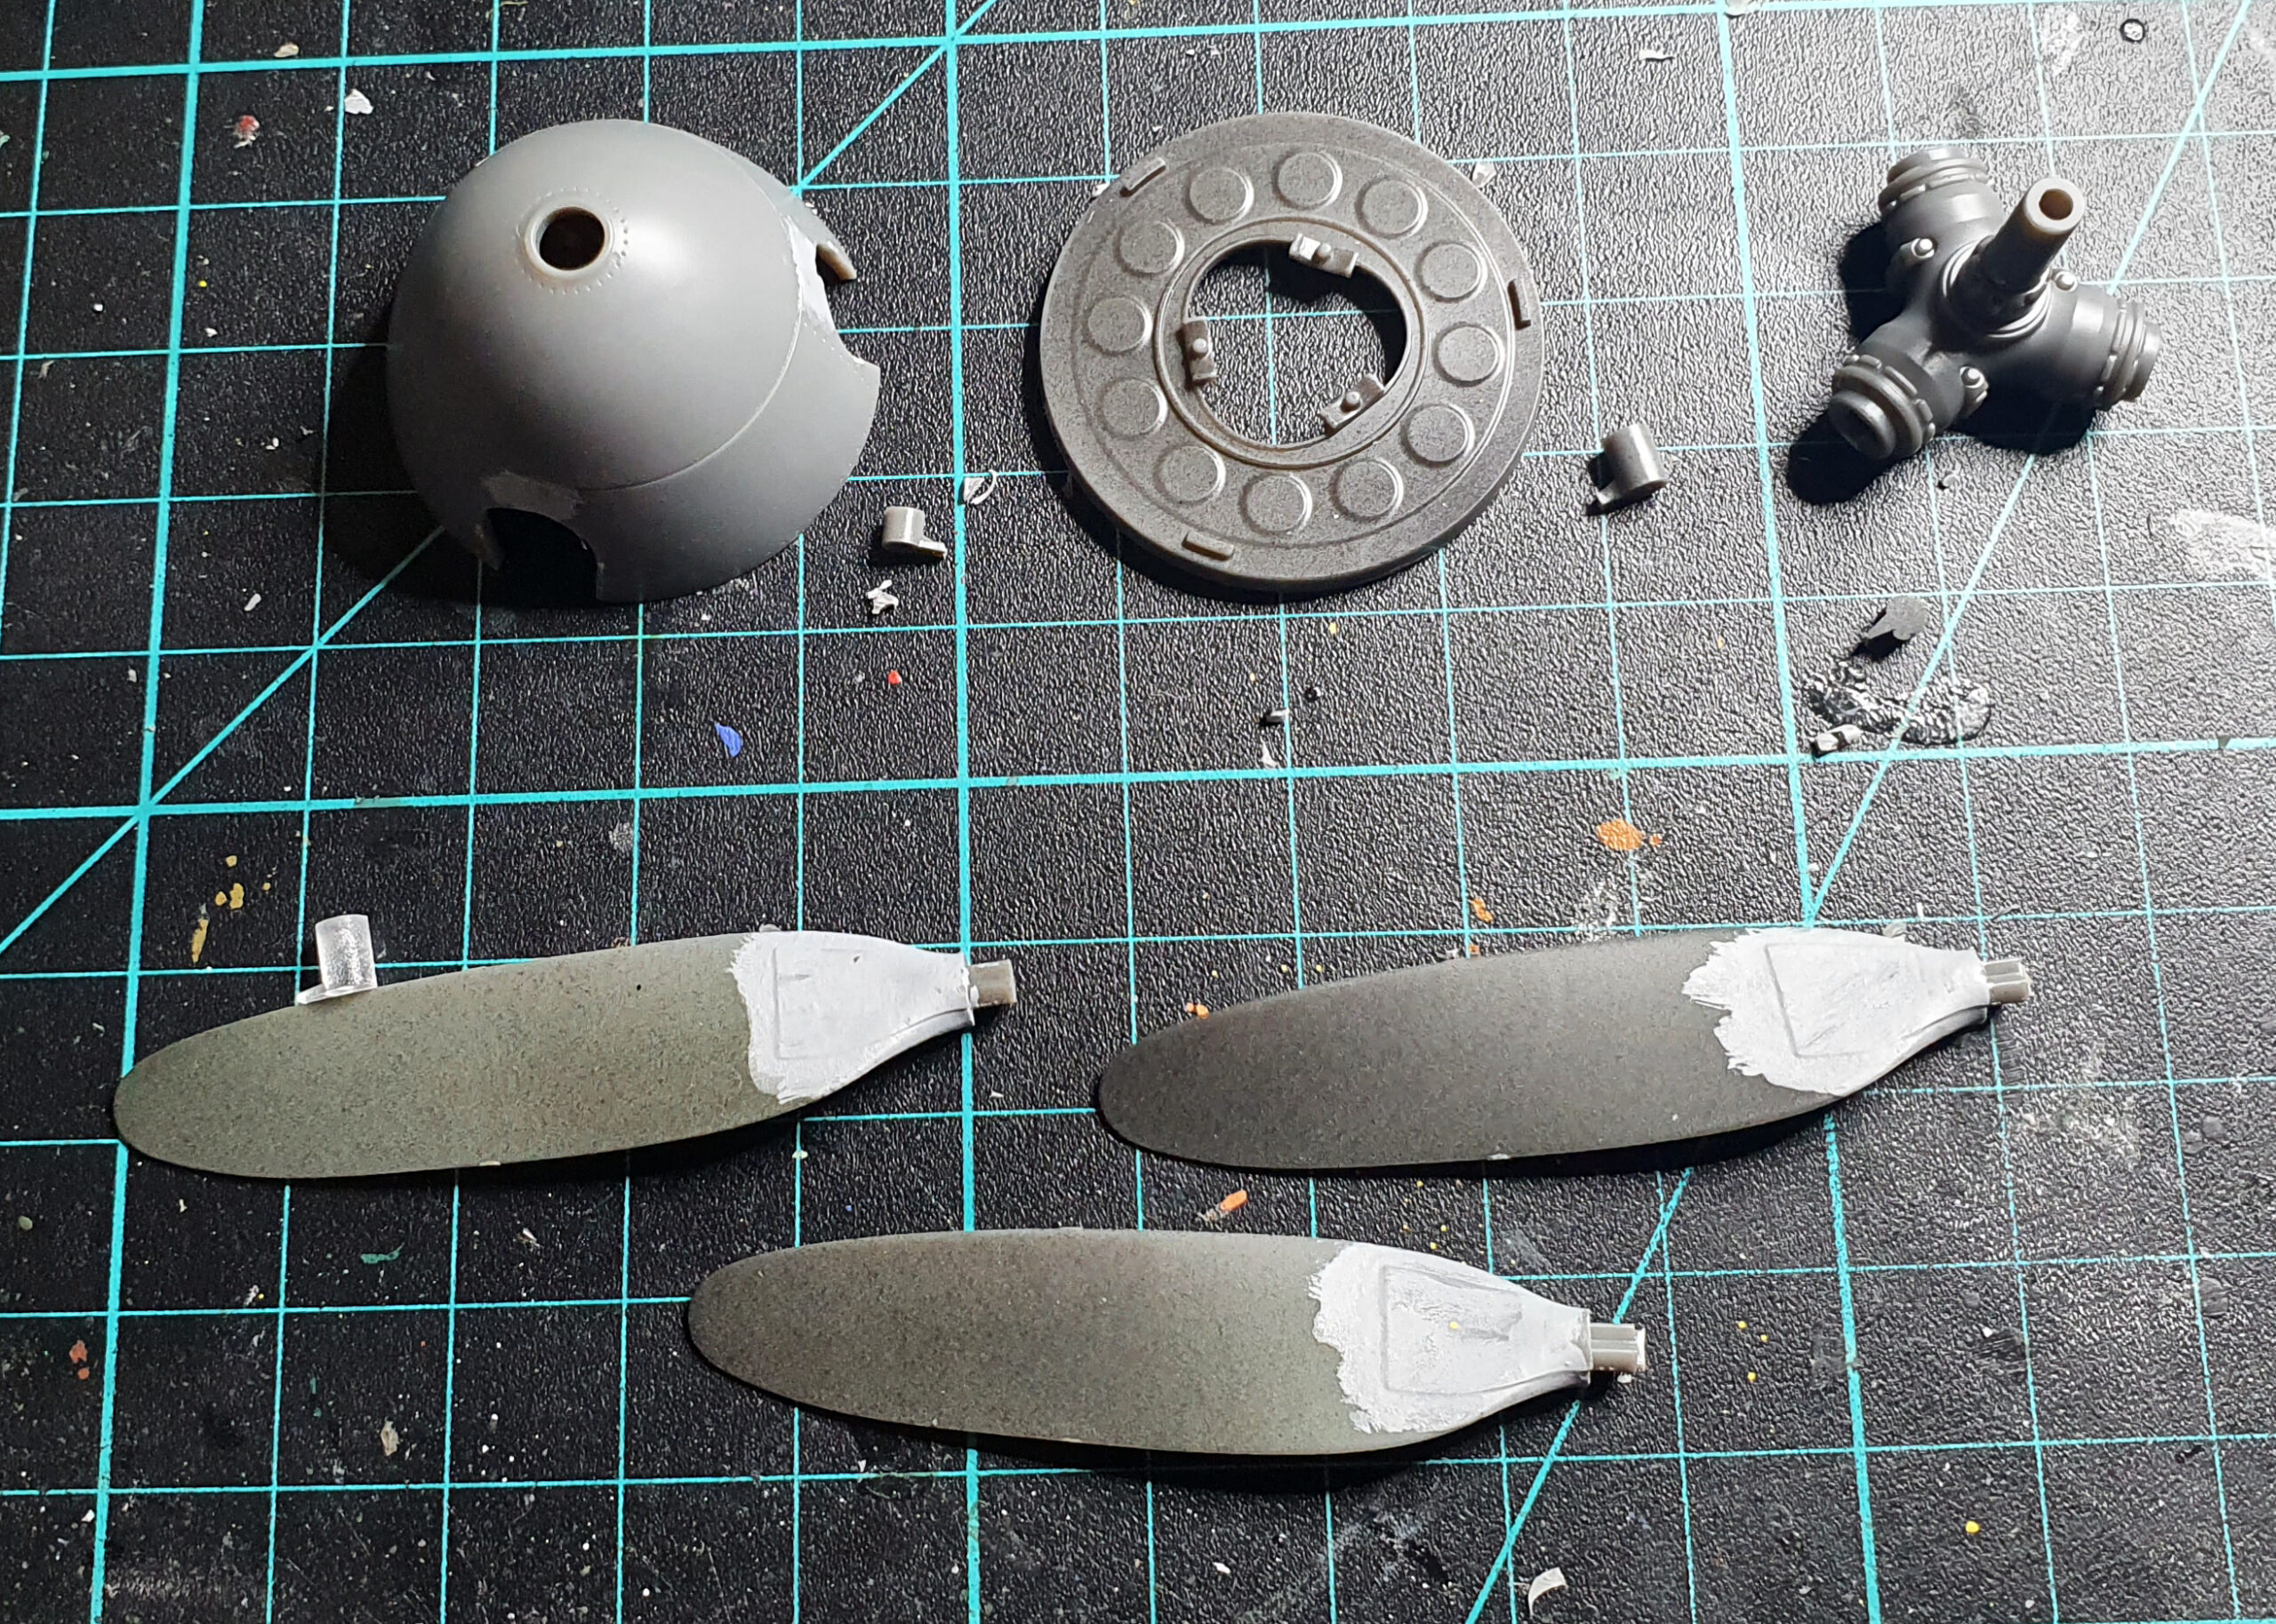
Some light filling and sanding is required at the base of the props where they come together.
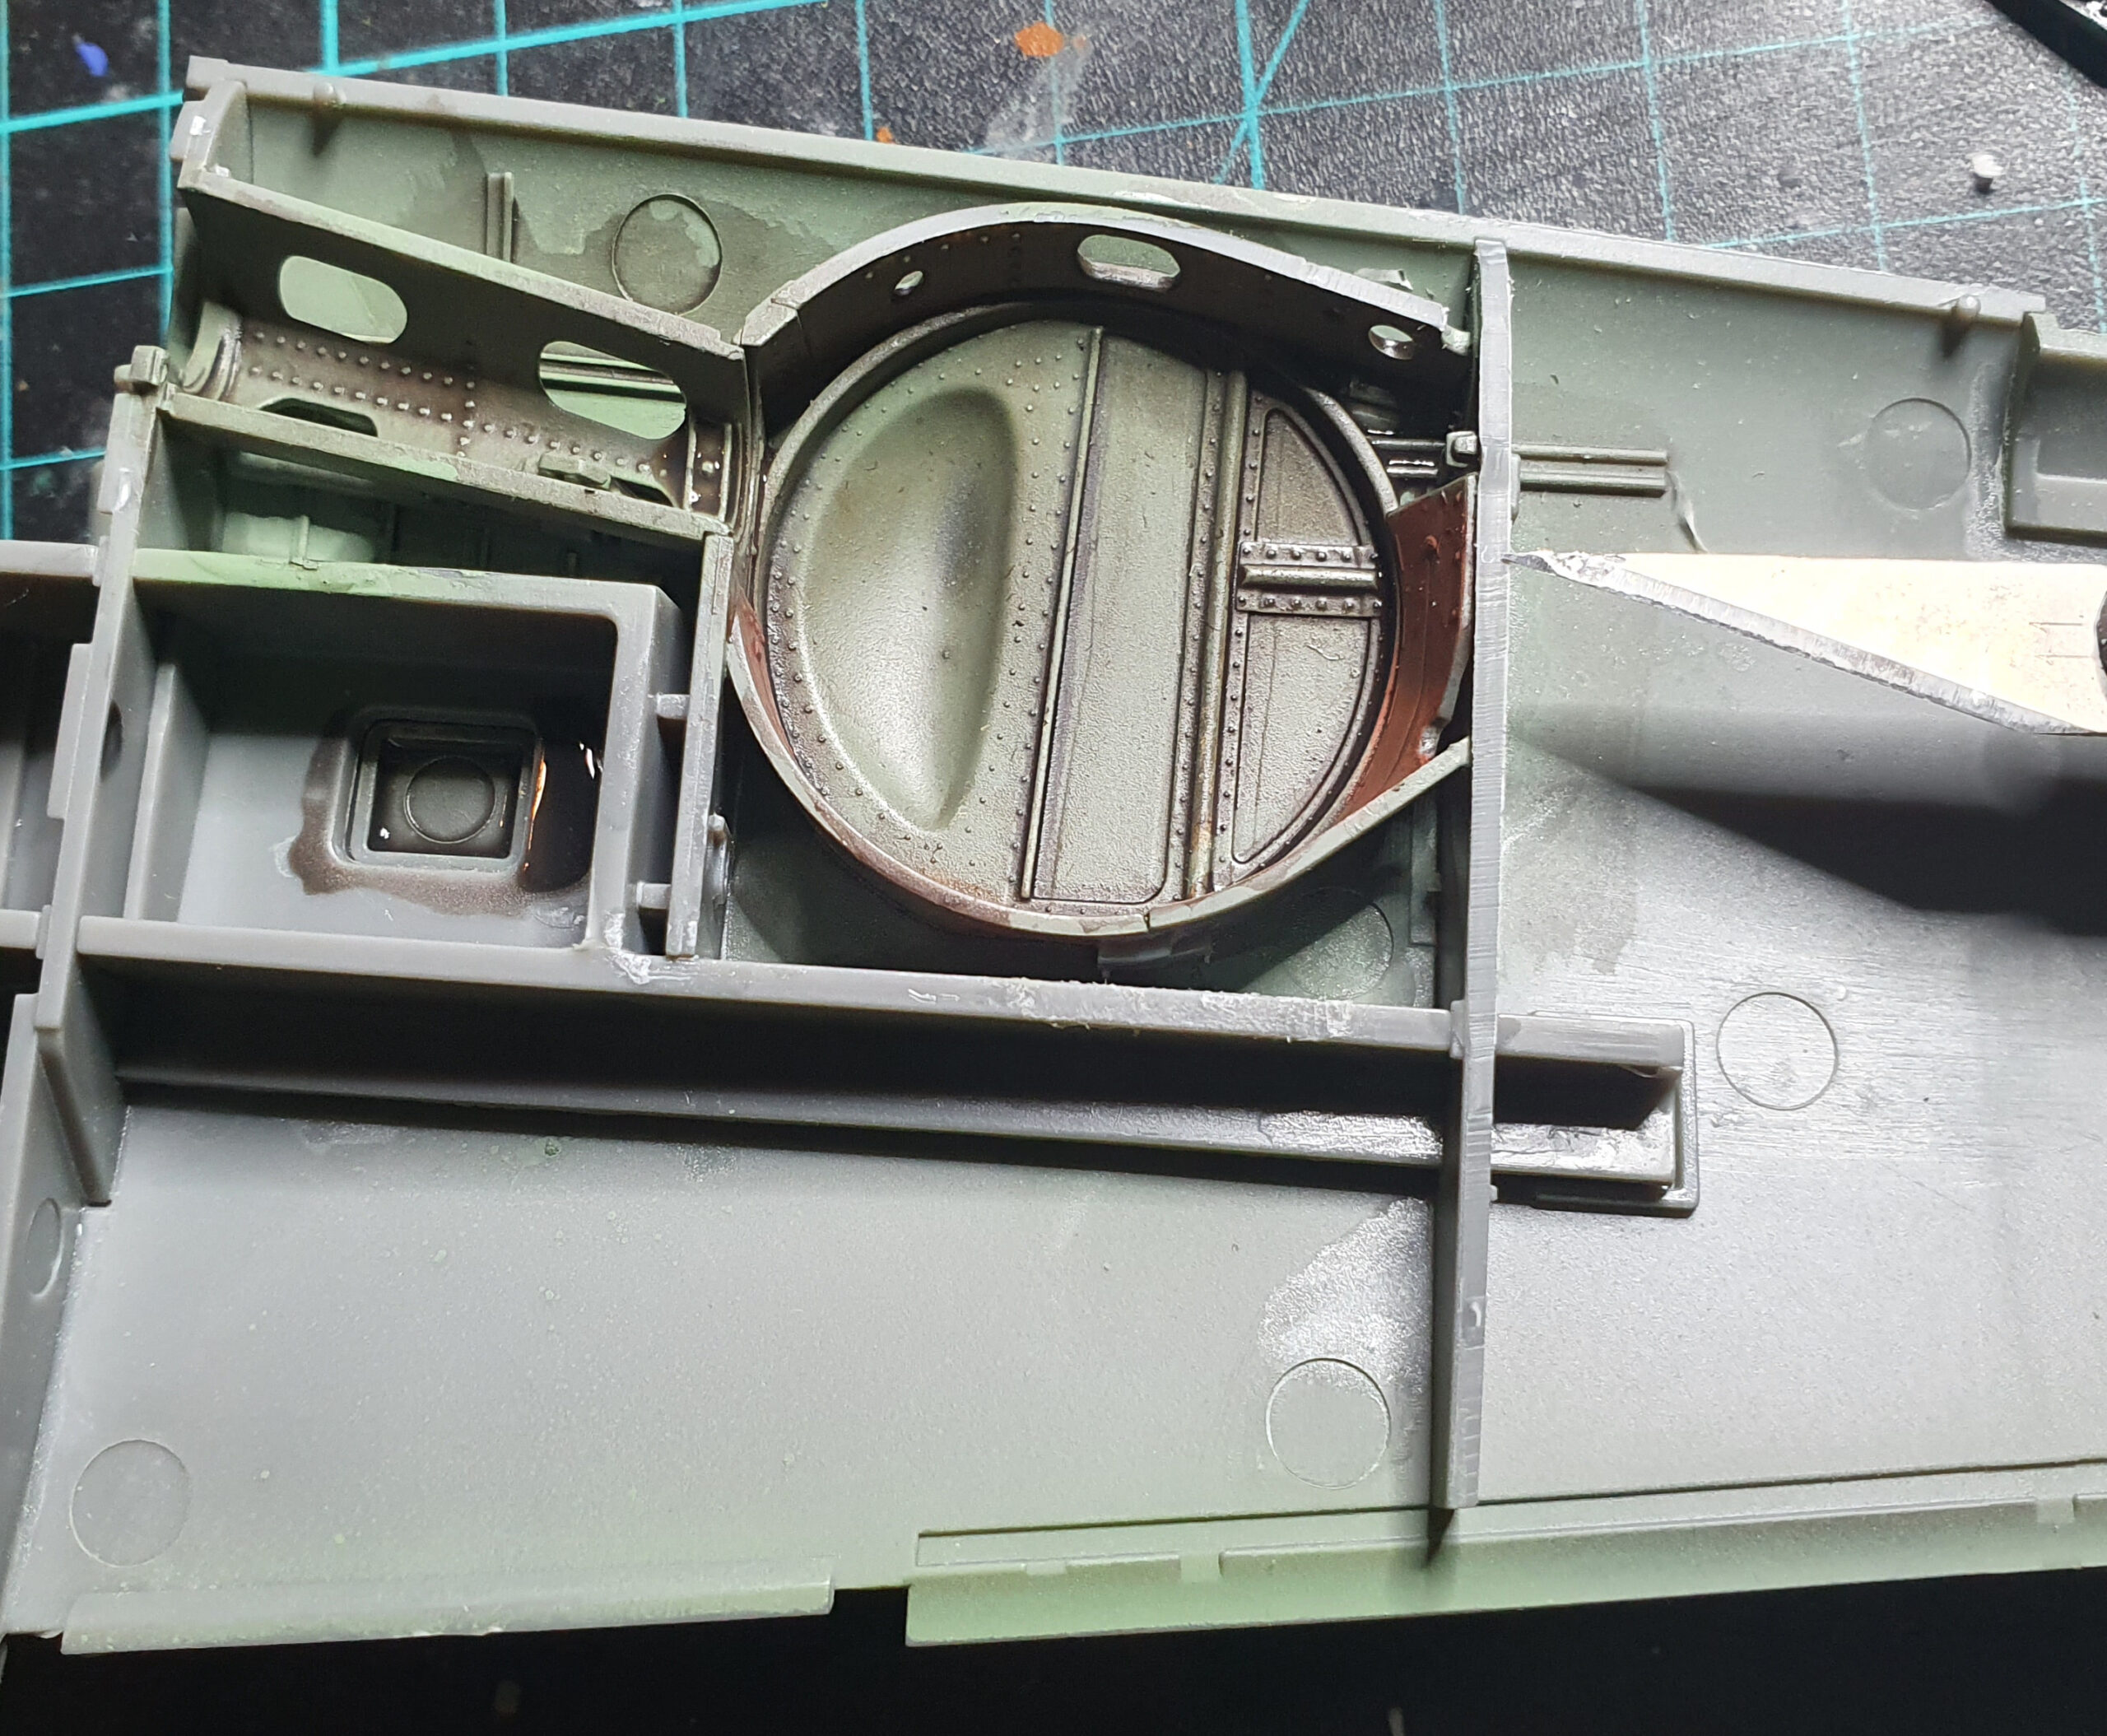
Next up is to get the engine on and here’s one spot where I strayed a little from the instructions.
That silver thing laying on the starboard wing leading edge is the discharge chute ( parts Q22 & Q27) and this is the only part I had trouble with getting to slot into its designated location. I ended up trimming off the tab on the bottom and found that it just sat in position without needing to “click” in.

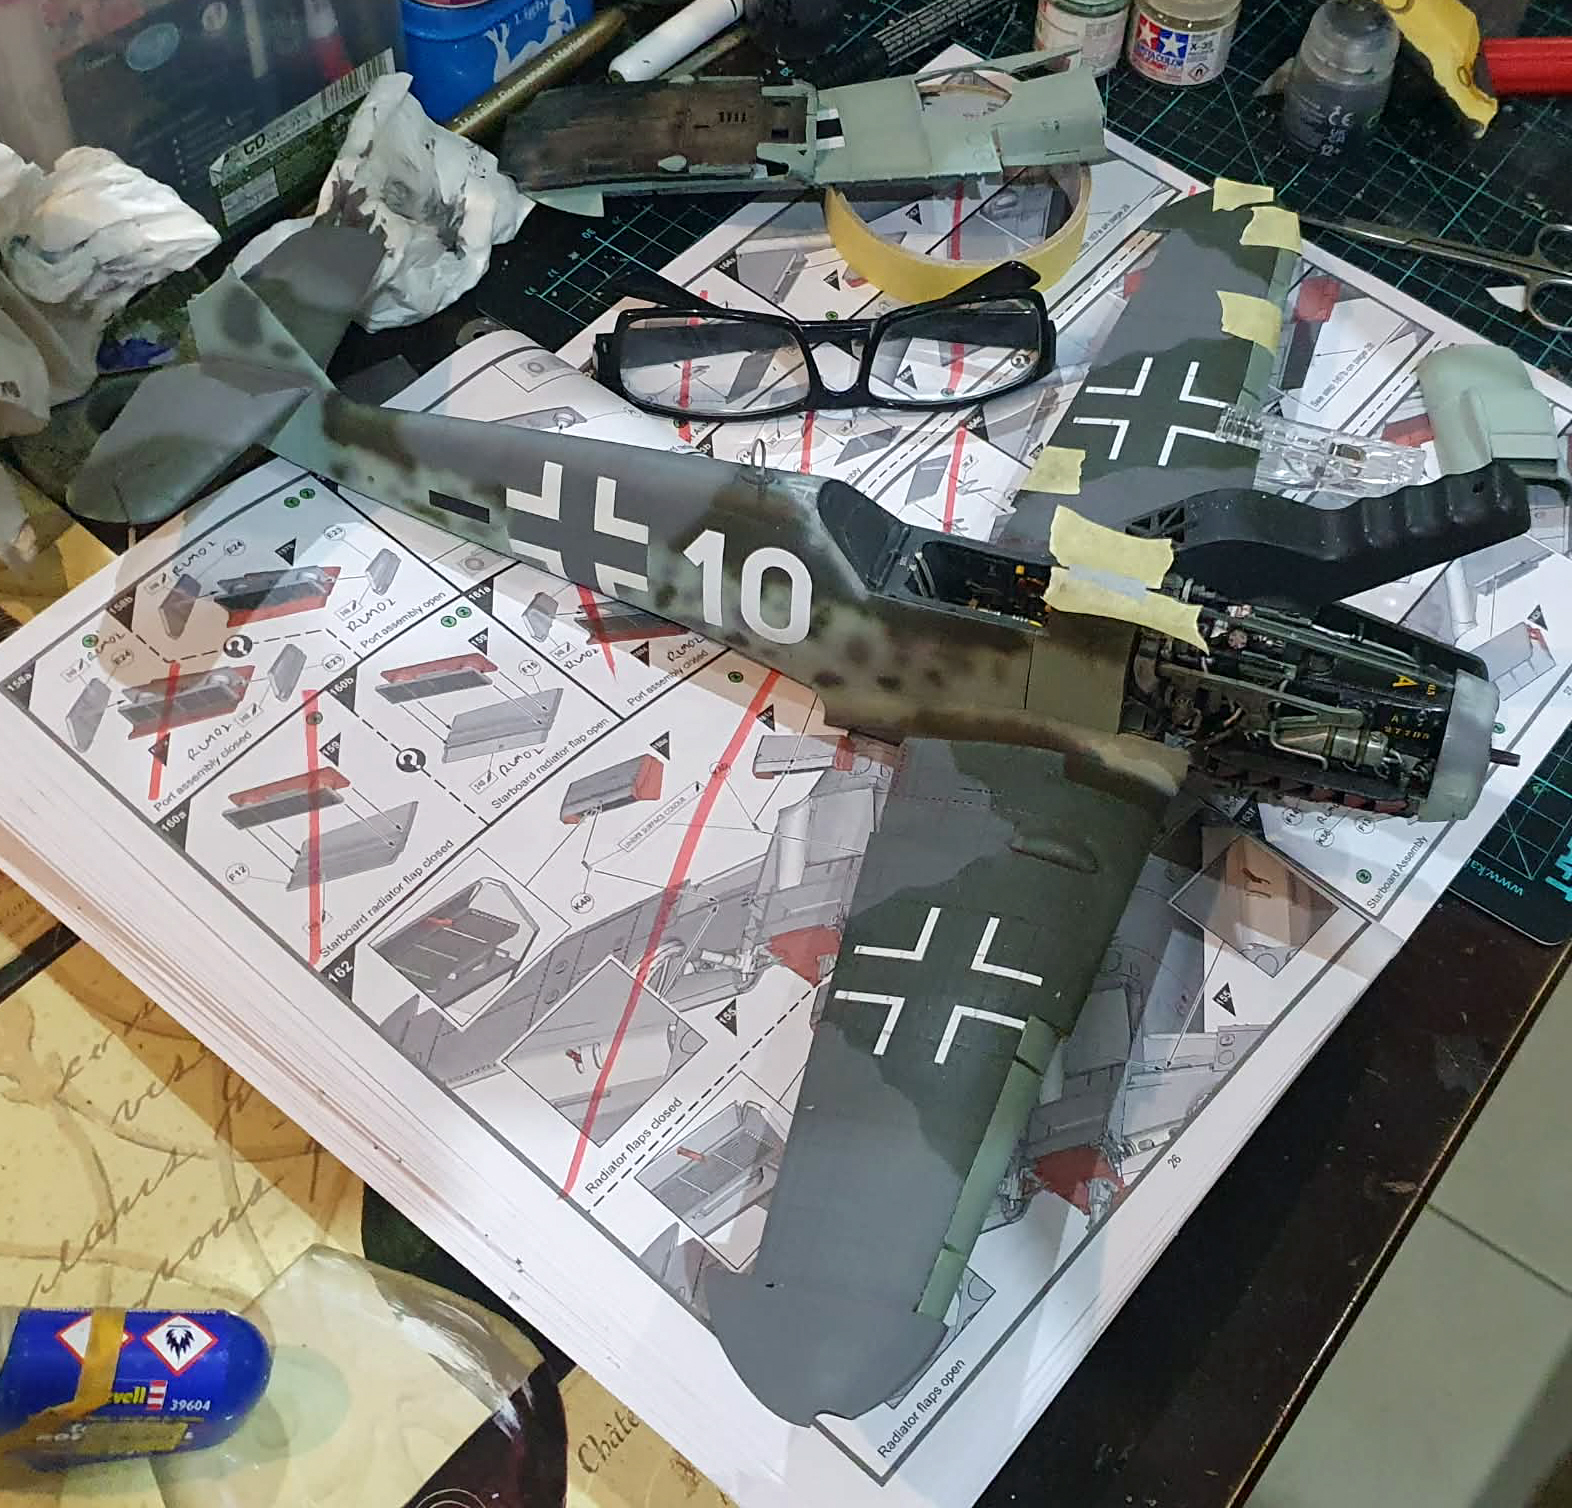
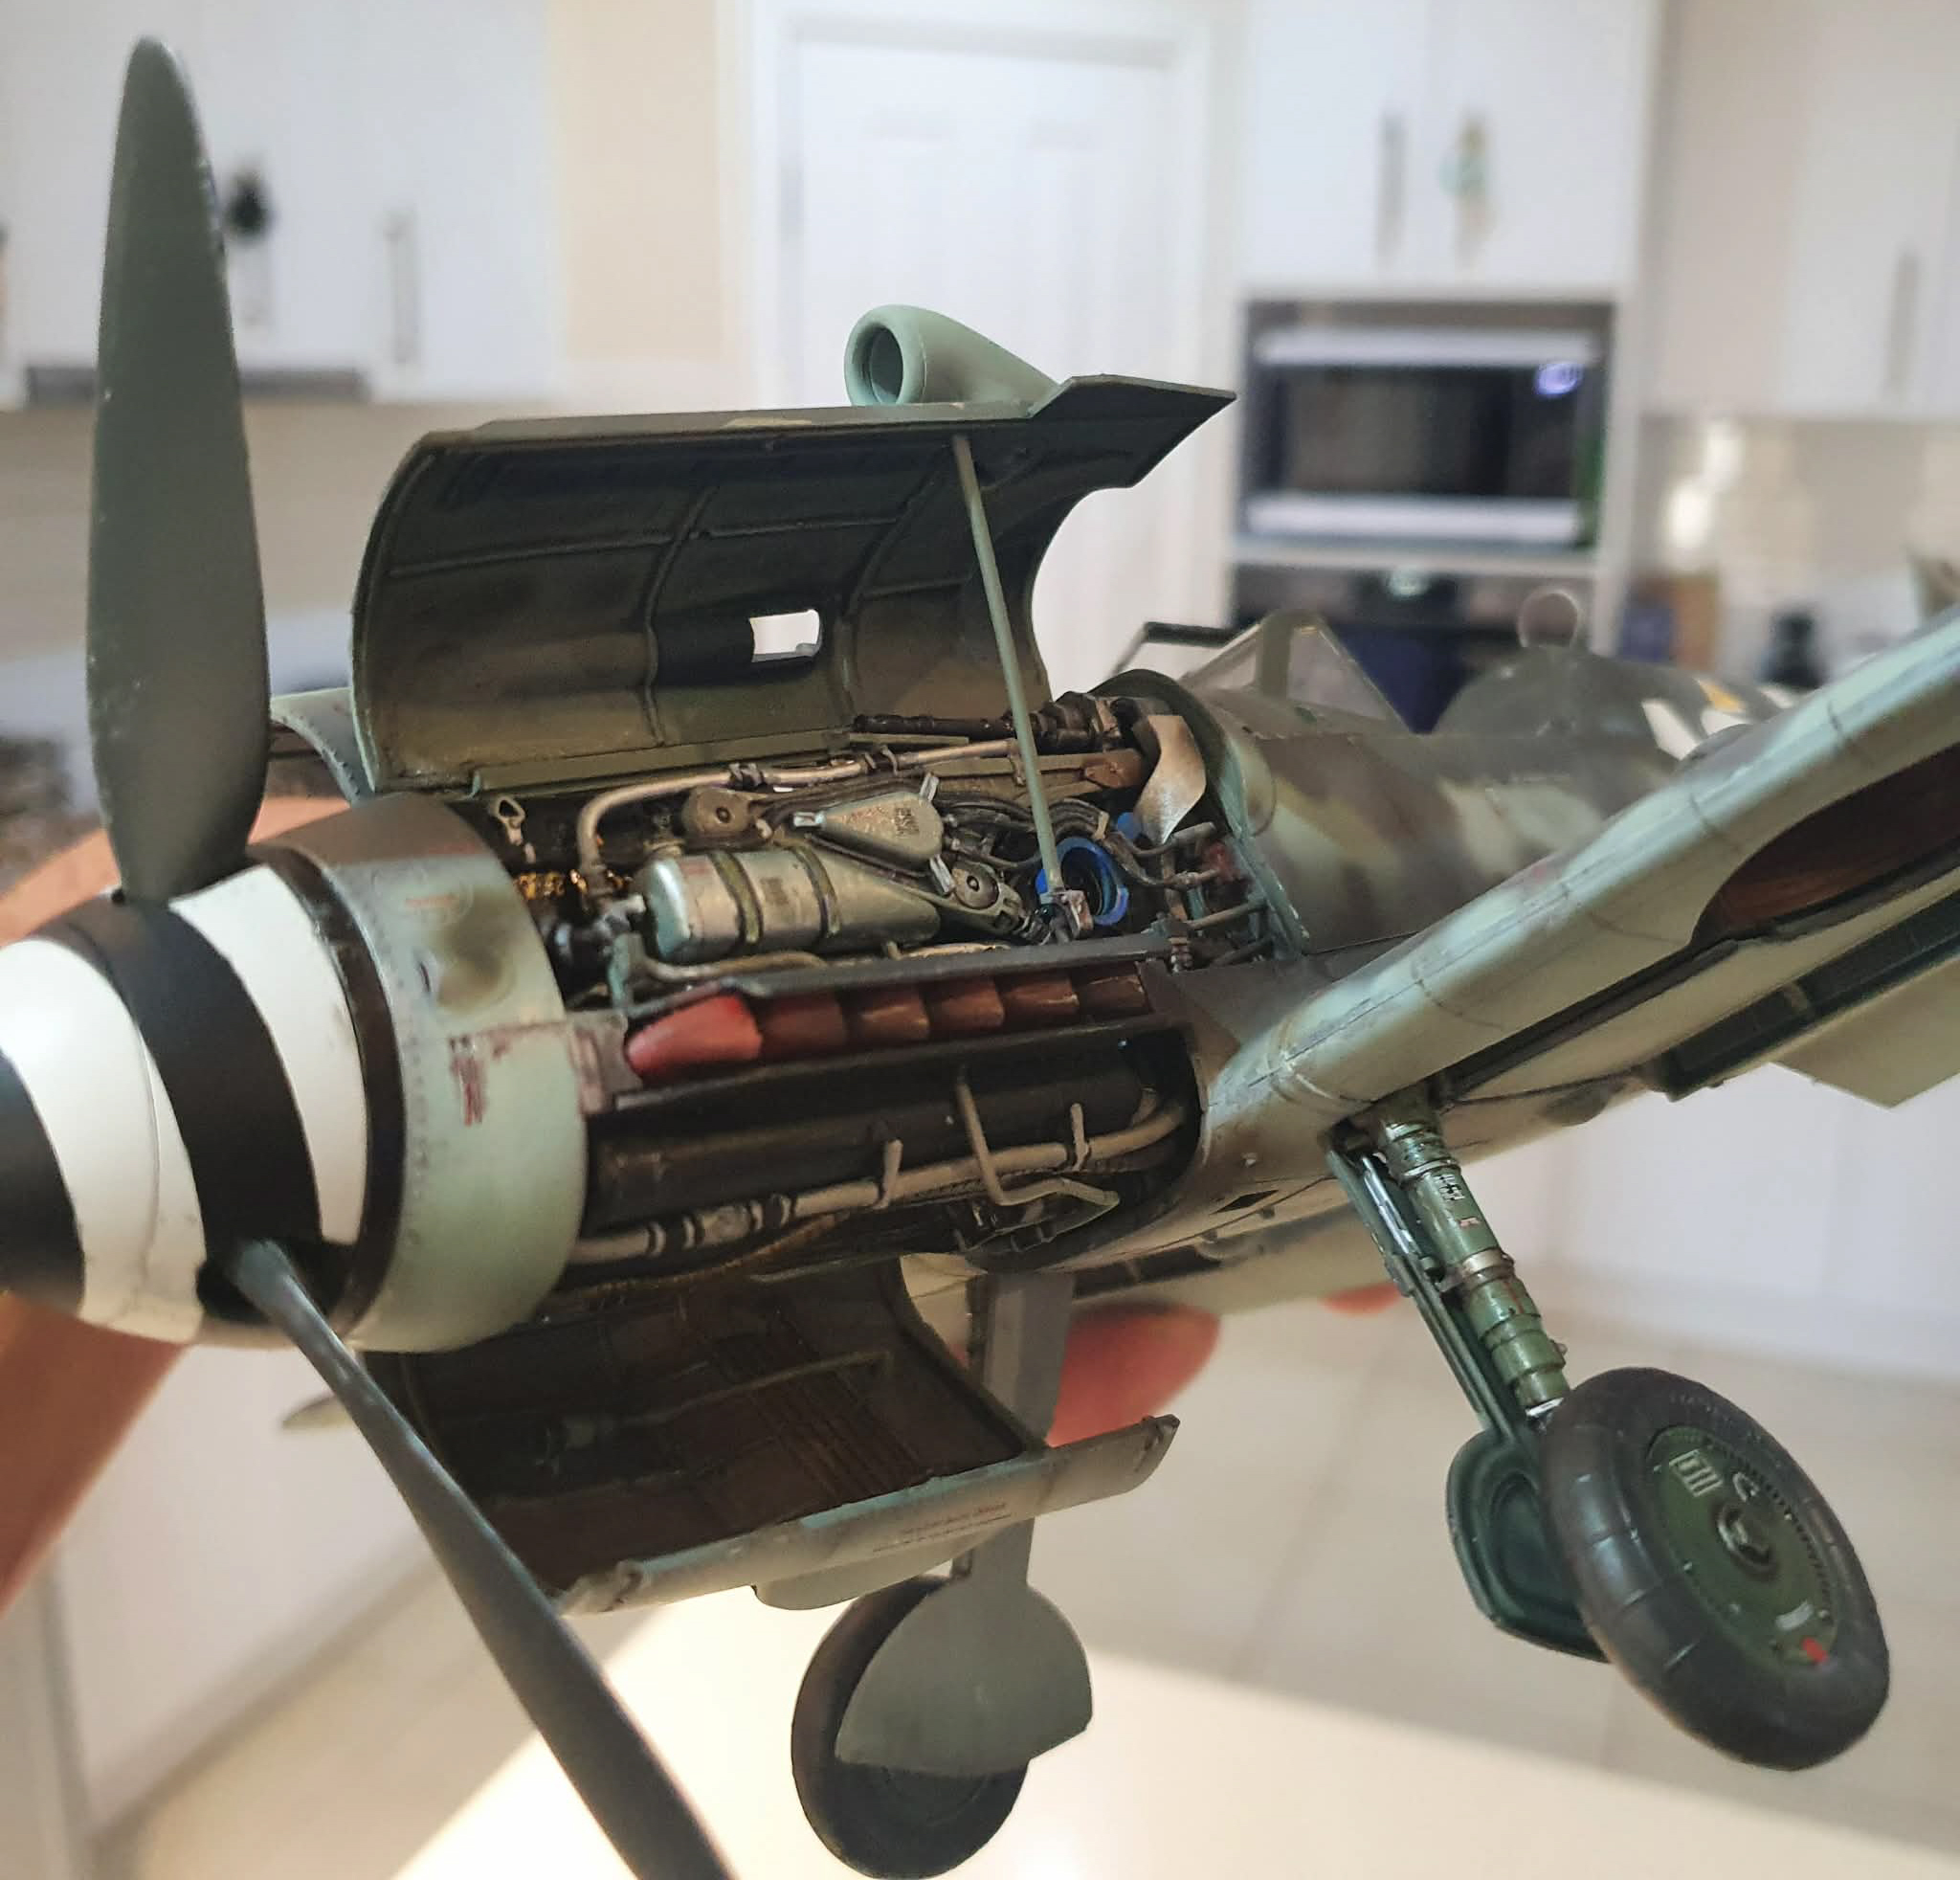
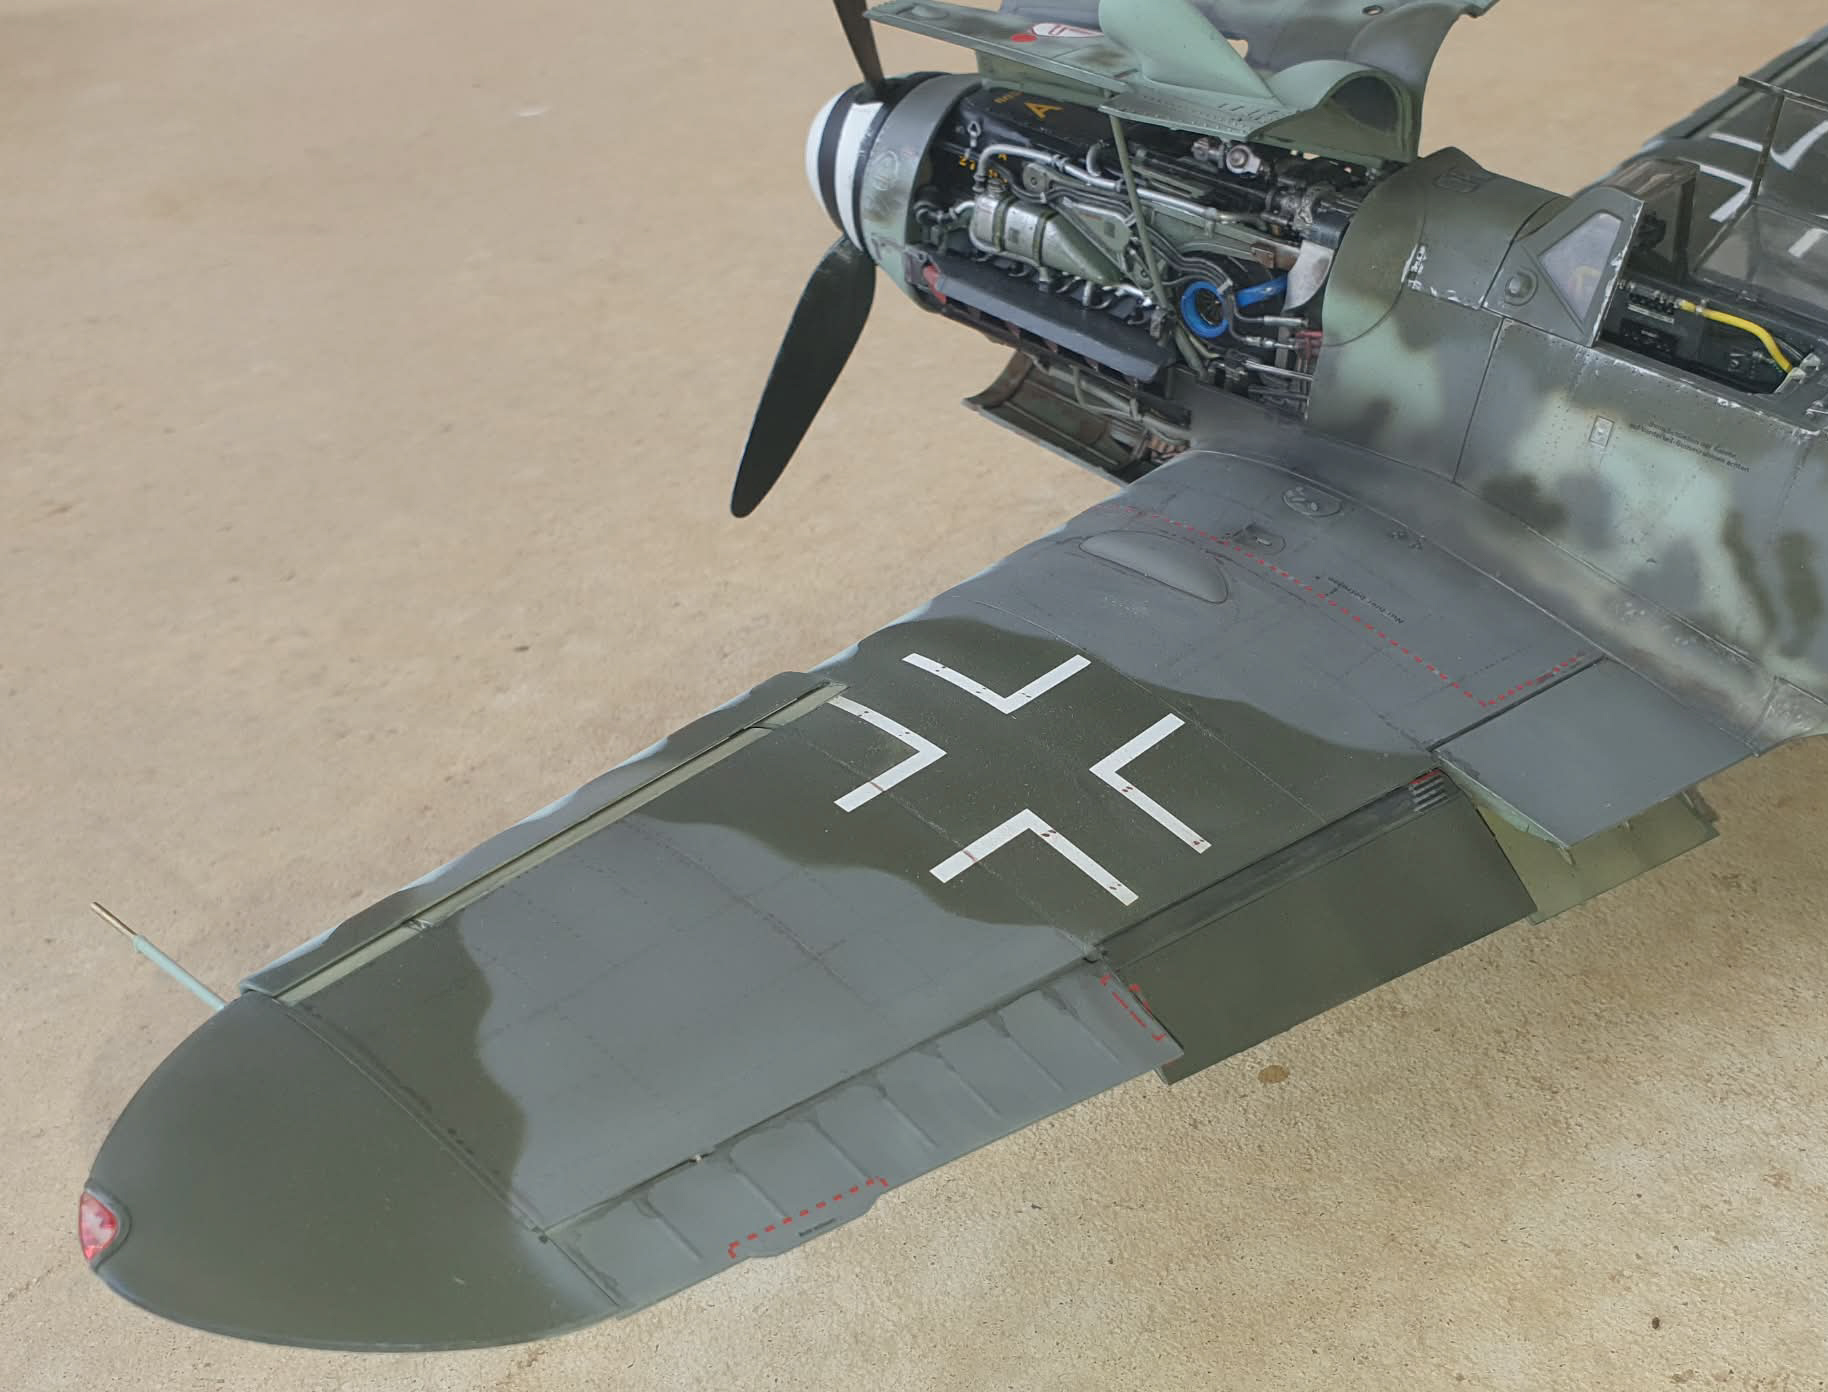
The undercarriage was very straightforward in construction and sits at an angle that may not look right – but it is ! Airfix weighted the tyres accordingly to account for the angle.
and then before you know it we’re applying 200 odd decals !
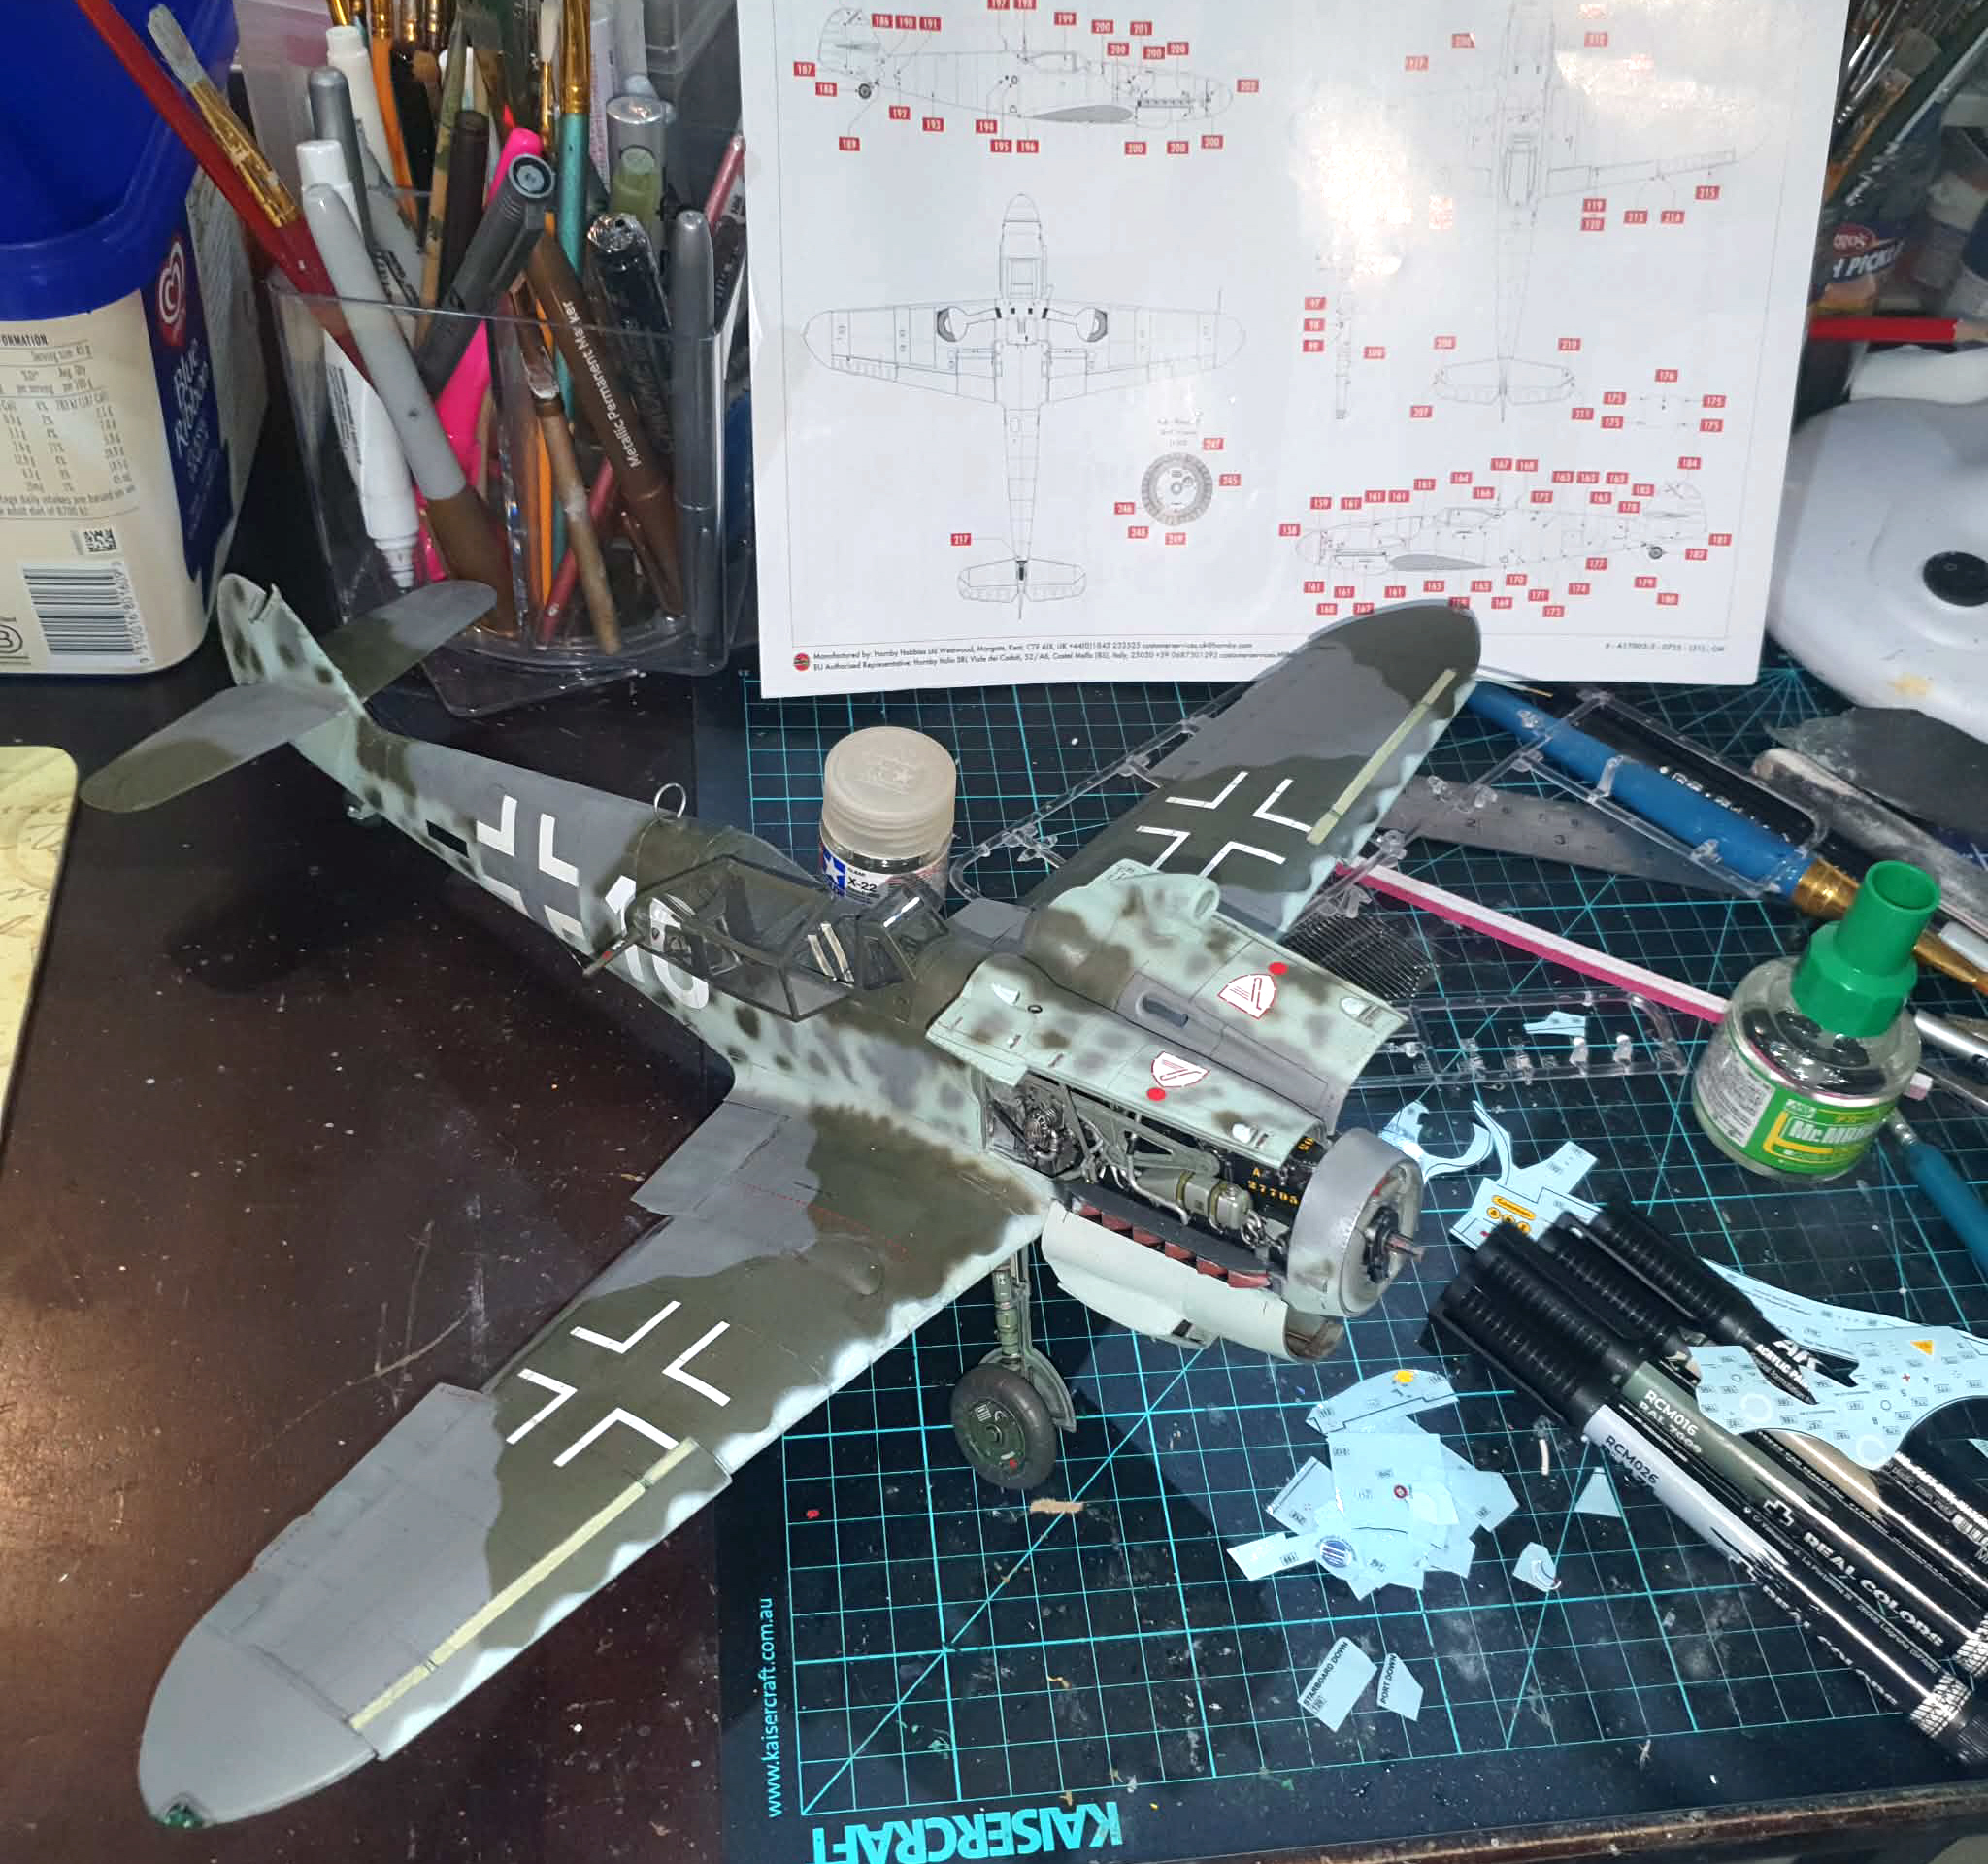
I added an aerial using elastic thread which was the only non-kit part so I lied – it’s not 100% OOB !
I painted the wing tip nav light cavities silver and then gave the inside edge of the clear parts clear Tamiya red and green respectively to get that clear perspex but coloured on the inside look.
The decals were all covered with Tamiya clear to begin with and then airbrushed over with Testors Dullcote. Minor weathering achieved using light airbrushing with thinned black and silver.
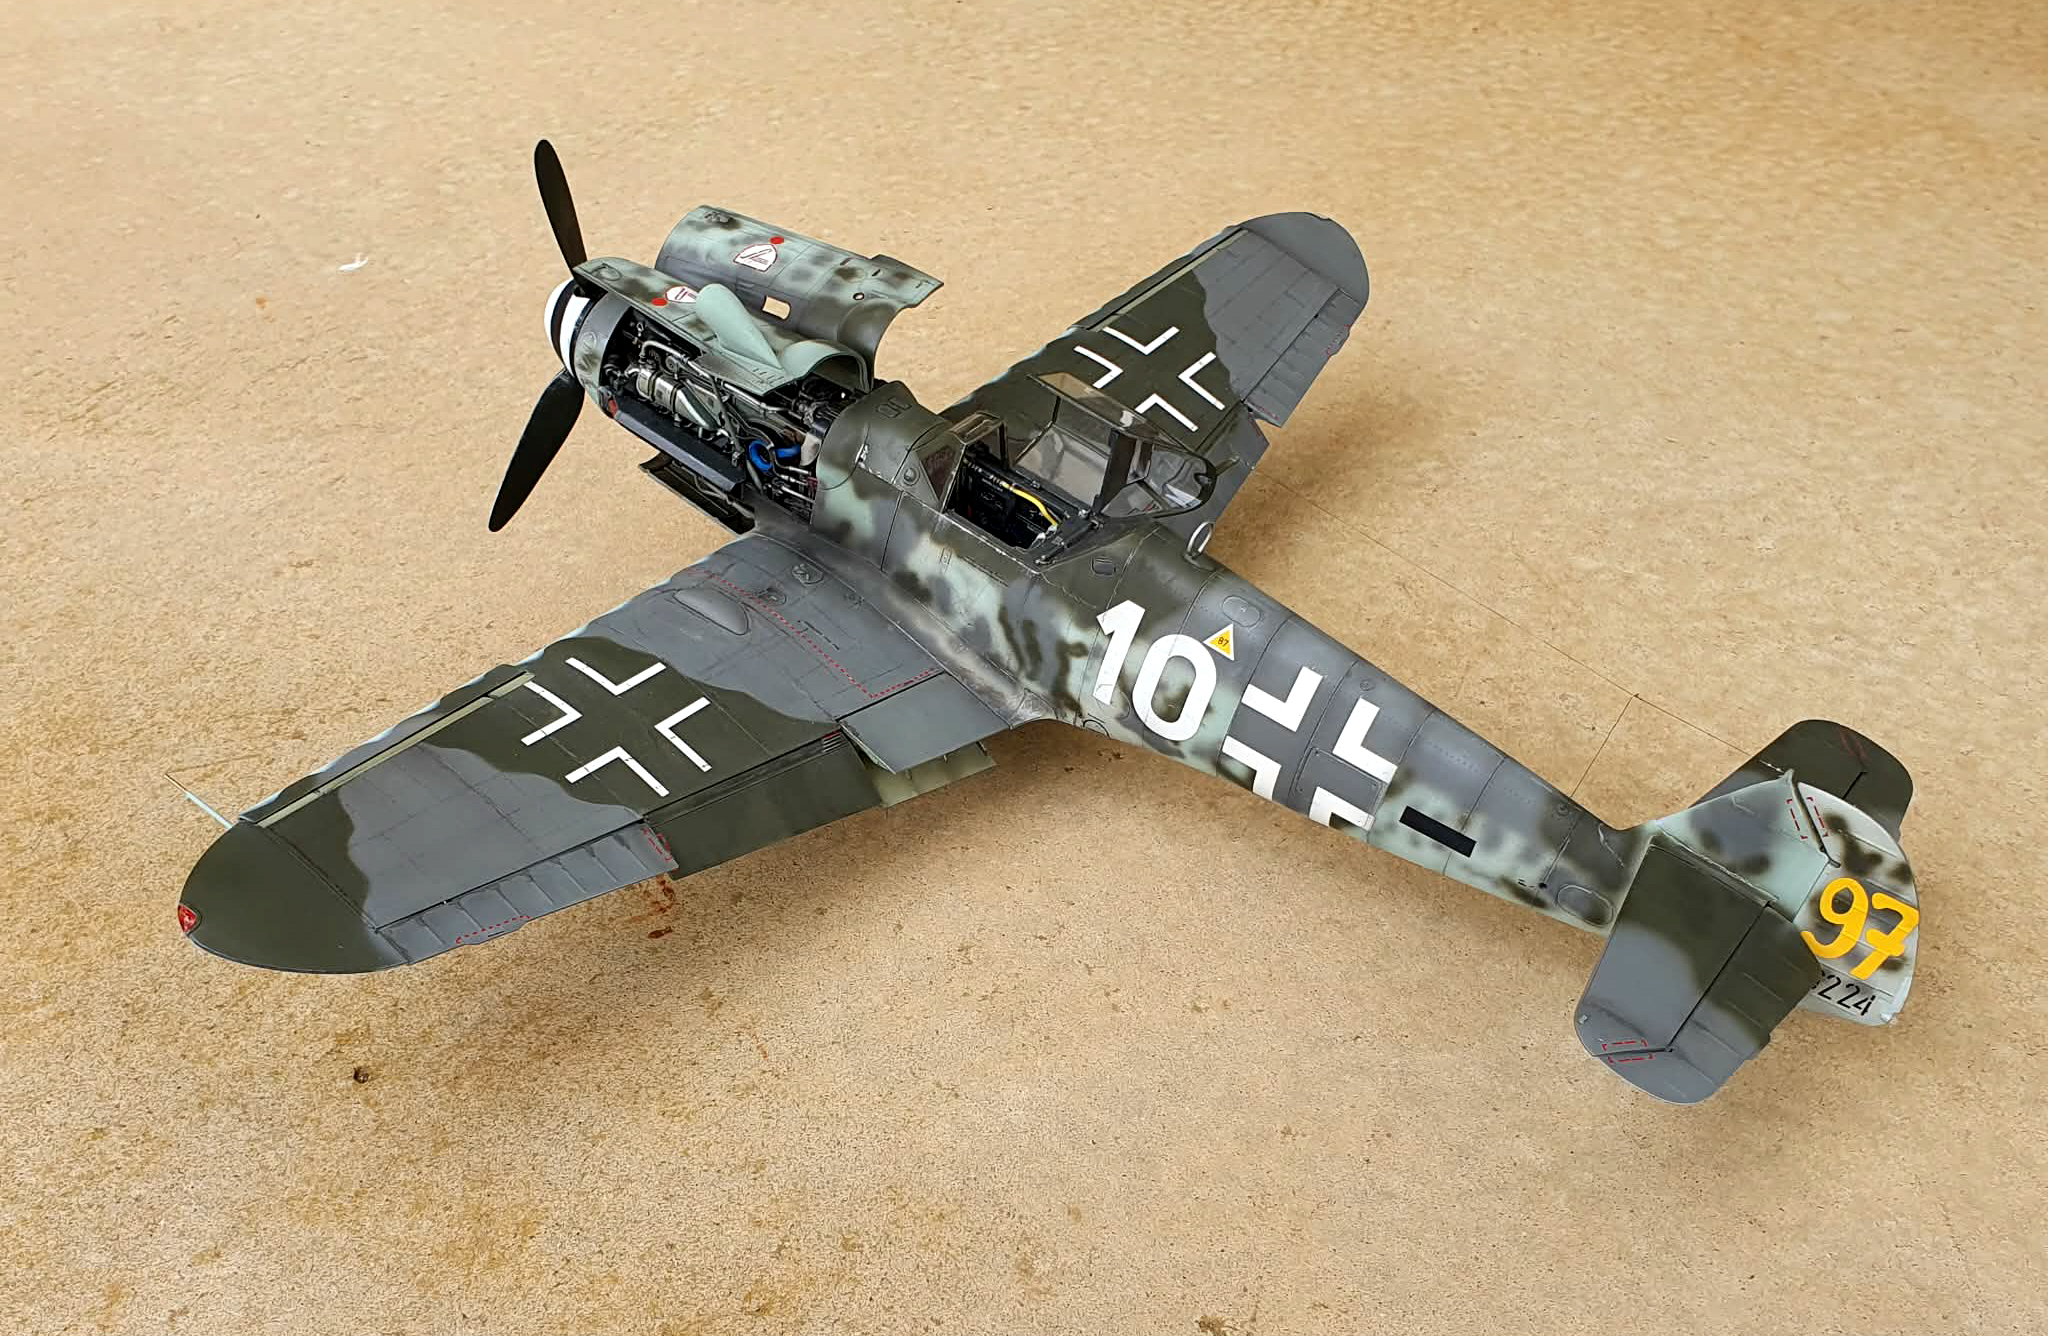
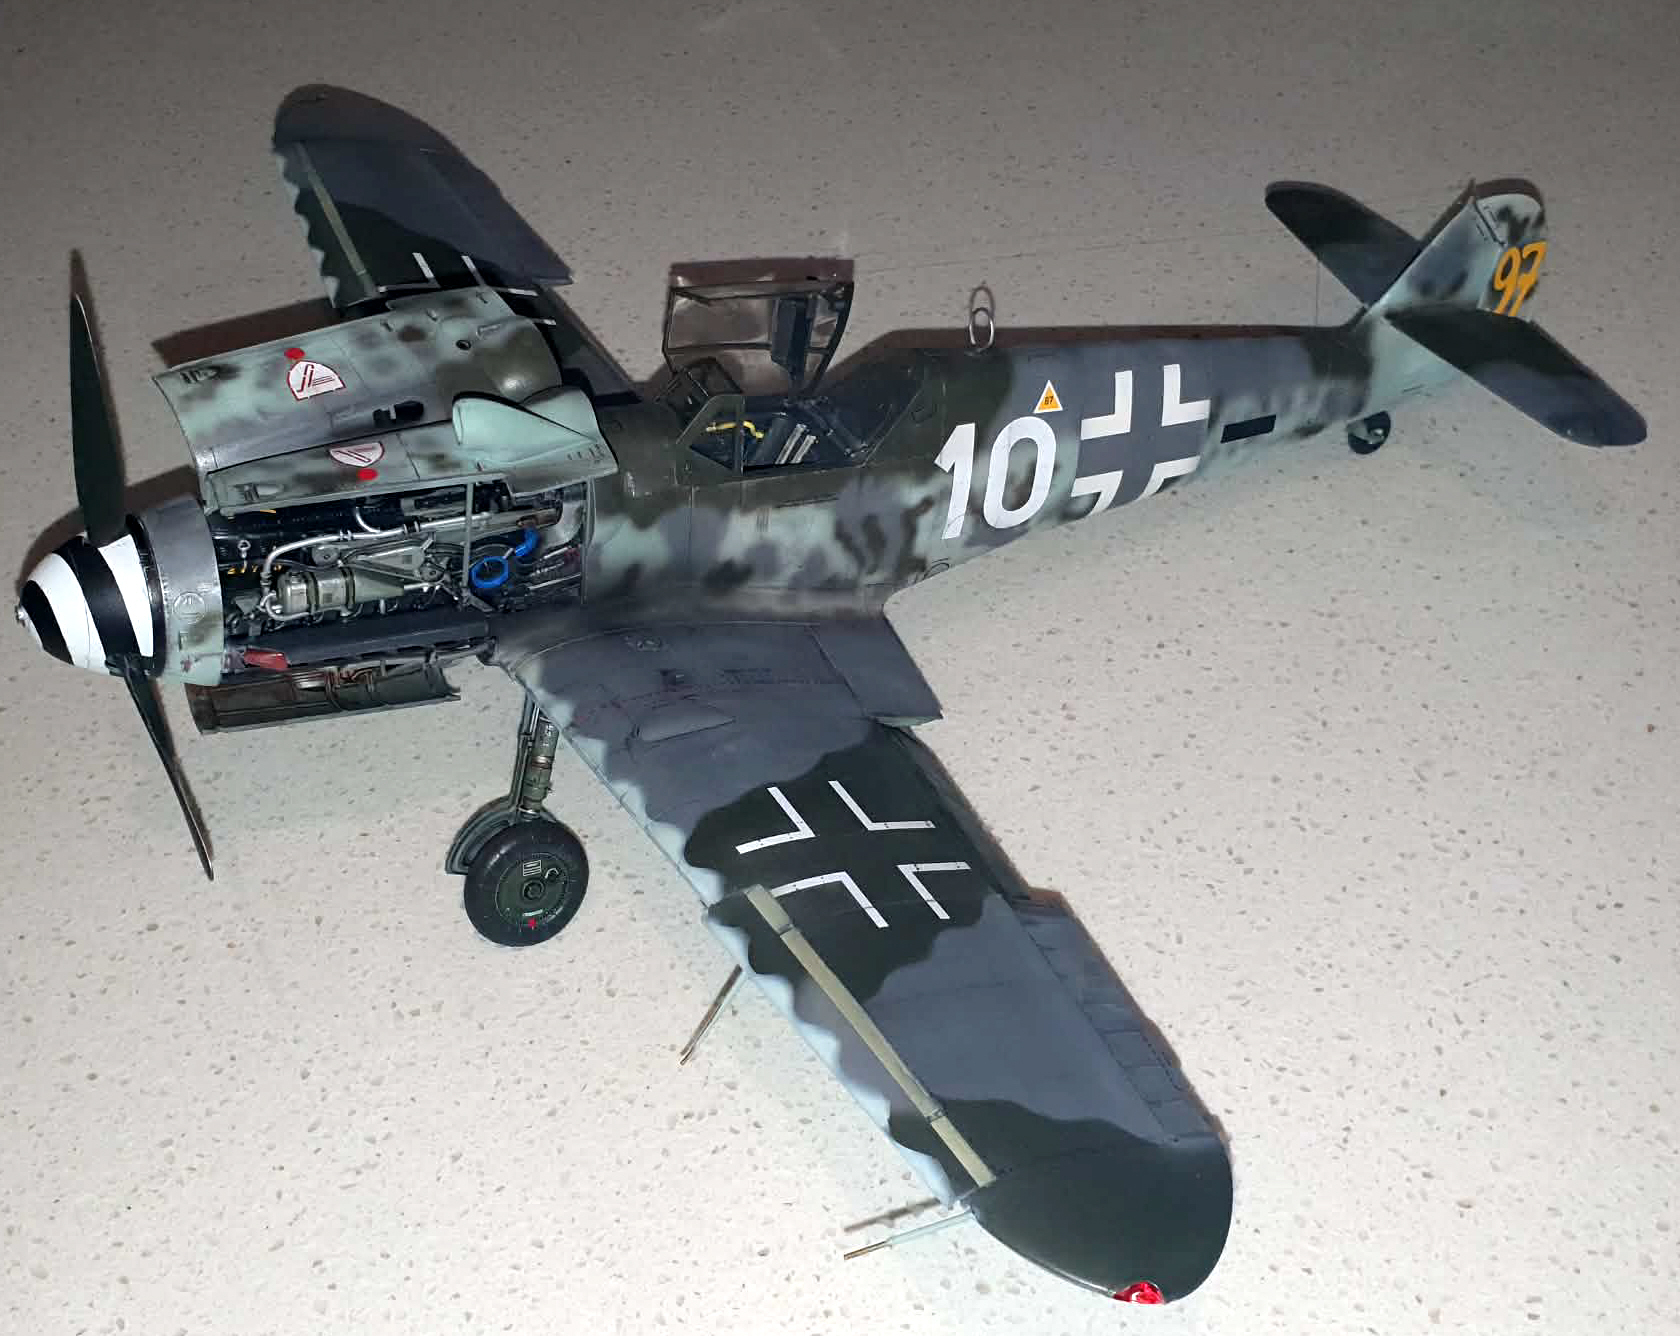
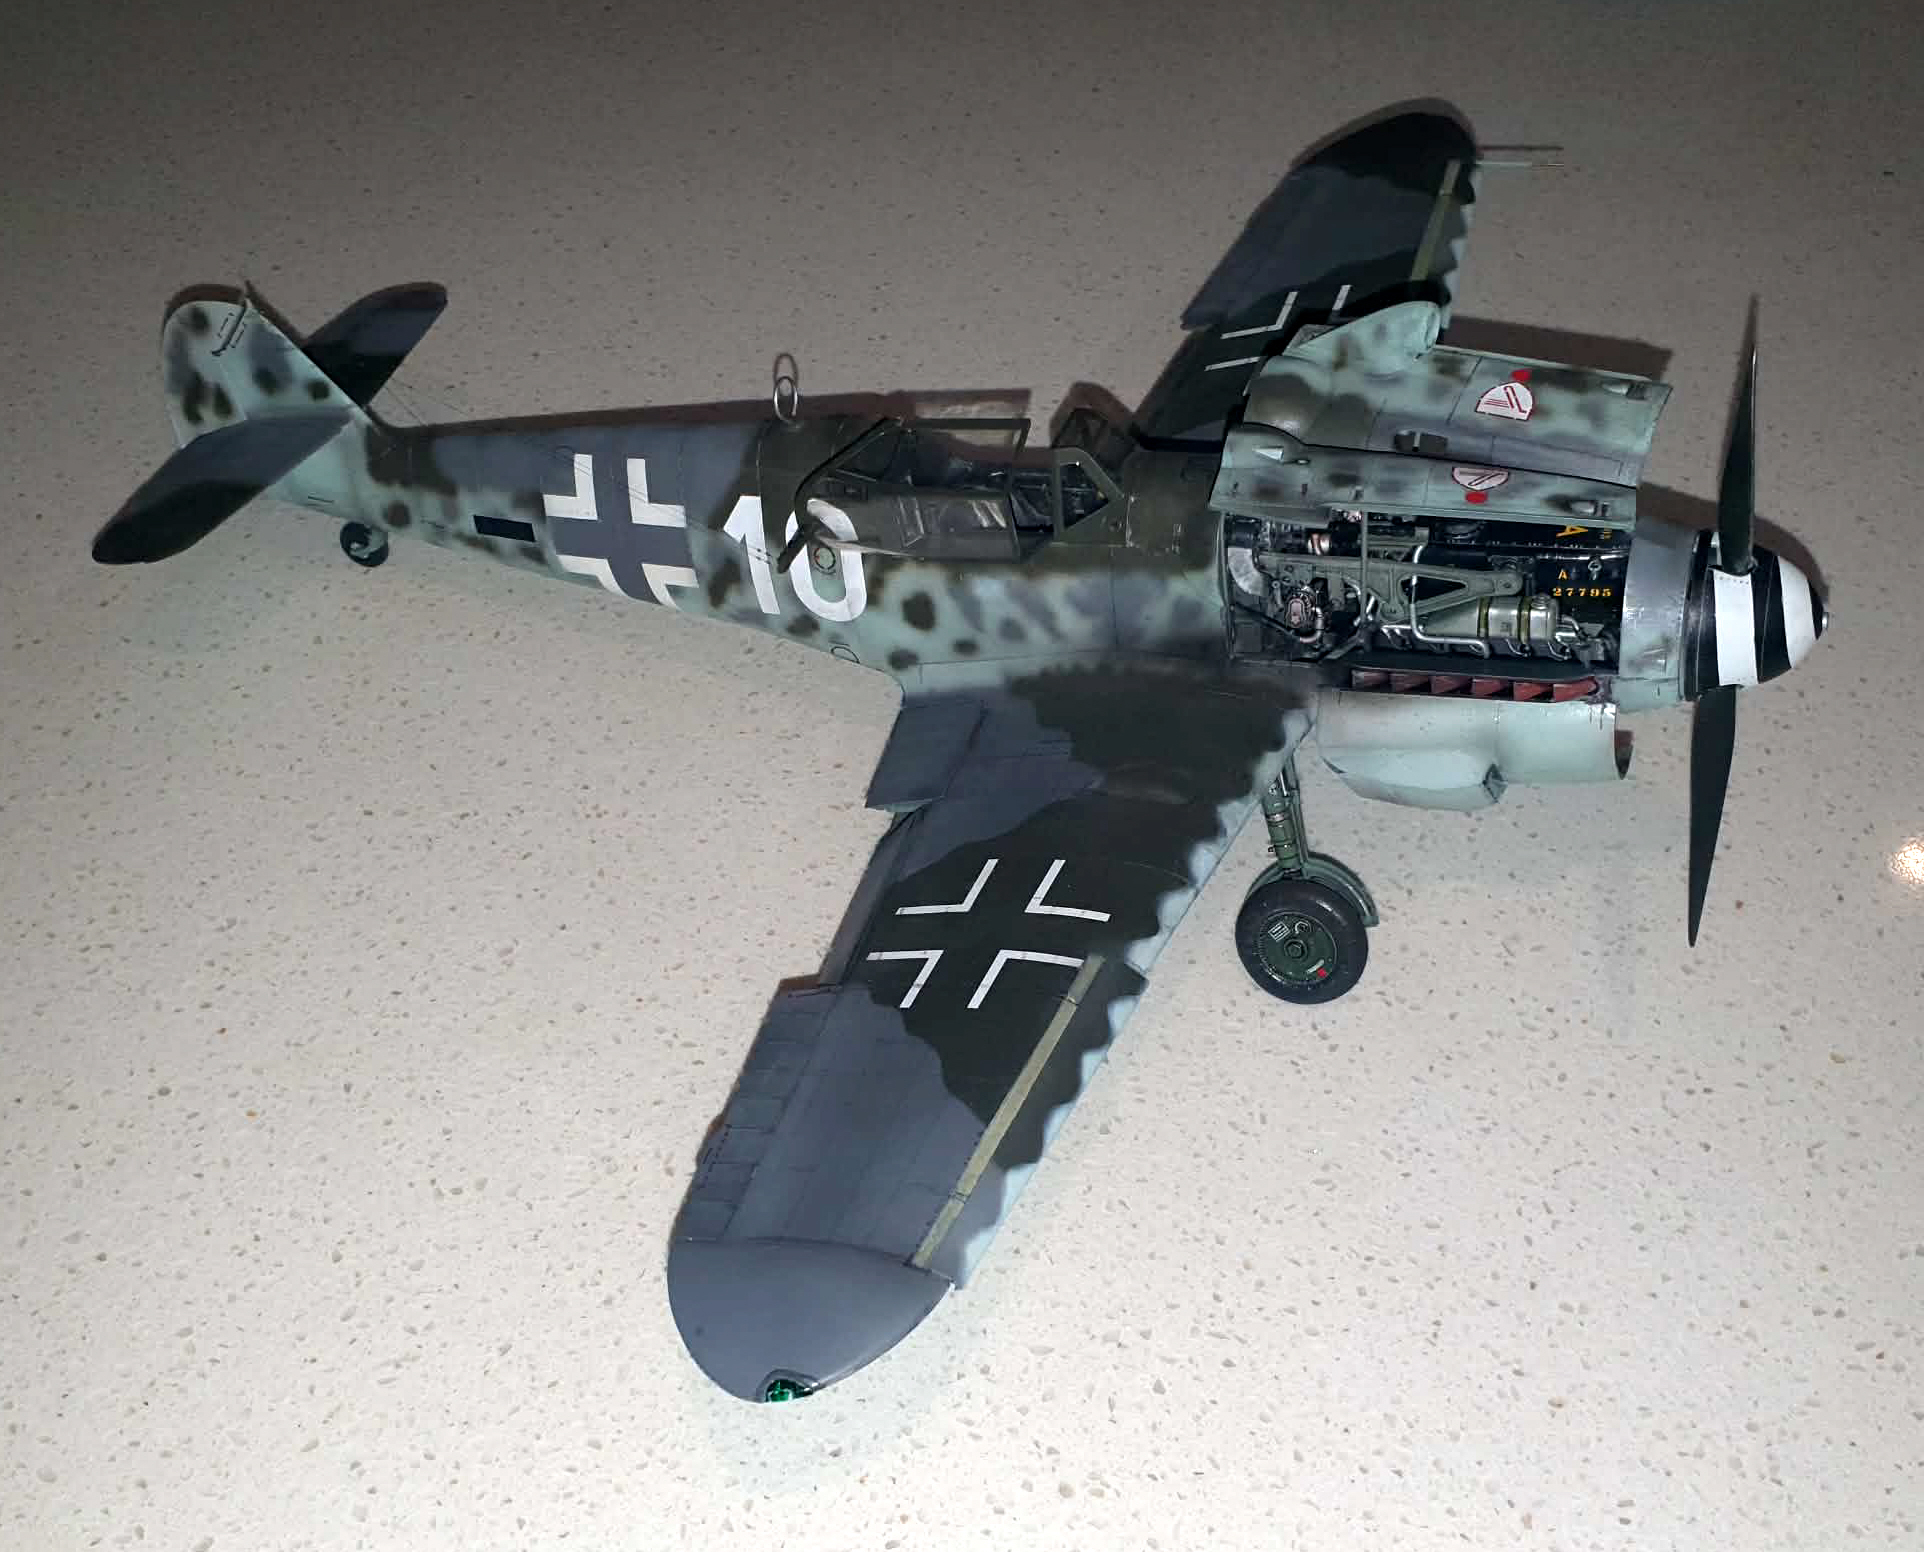
and there it is – the Airfix 1/24 Messerschmitt Bf109G-6. This kit was almost an entry level kit and is not in my opinion a complex one. Assembly was straightforward on the whole, the plastic was easy to work with, the decals are excellent and the inclusion of masks was welcome. This kit has a lot going for it and offers enough scope for someone who may want to take it further and open up a few more panels or make a diorama. The optional parts allow for different configurations and different sub-variants and seriously, count the canopies.
Thanks to Metro Hobbies for giving me the opportunity to build this kit and I reckon I’ll build another as it was quite enjoyable – only this time I’ll do a different scheme and add spicy tail crosses – revisionist history be damned !